
Related Manuals for Gator GRV92CPM


Summary of Contents for Gator GRV92CPM
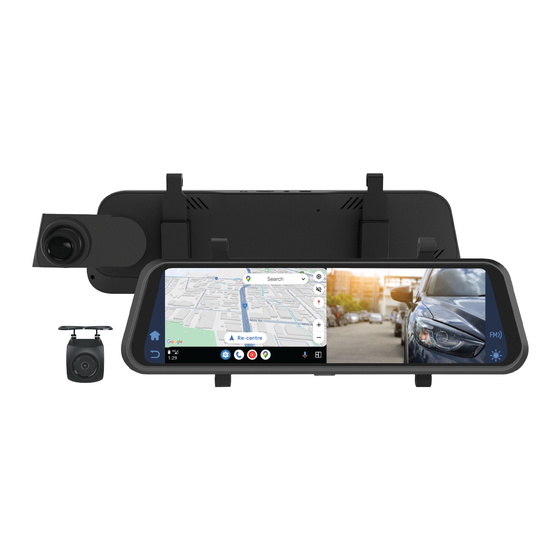
- Page 1 GRV92CPM USER MANUAL For more information on the Gator range go to our website gatordriverassist.com INCLUSIONS: Mirror Monitor, Rear Camera, Camera Lead With Trigger Wire, 12/24V Car Charger & Mounting Hardware 05-06-2024...
-
Page 2: Introduction
Introduction Thank you for purchasing the Gator GRV92CPM Smart wireless mirror monitor. This product is a convenient and durable traveling video and data recorder. Please ensure that you have read the product manual and instructions in full, prior to installation and use. -
Page 3: Table Of Contents
Table of contents Introduction..............2 Product features..............2 Table of contents..............3 Package components............4 Optional accessories (Sold Separately).......5 Product structure..............6 Installation of mirror monitor..........7 Home screen touch screen functions........9 Other mirror functions............9 Settings screen..............10 CarPlay screen..............12 Android Auto screen............12 DVR screen...............13 Playback screen...............14 Audio output settings............15 Video playback mode............17 Connecting to a computer..........17... -
Page 4: Package Components
Package components GRV92CPM Mirror Monitor Rear Camera Micro SD Card 12/24V charging adapter Camera Lead with Trigger Wire Mounting screws & 3M adhesive Mirror protector pads & for butterfly camera rubber mounting clips... -
Page 5: Optional Accessories (Sold Separately)
This allows for recording in Parkmode. Includes fuse taps for simple installation. Parkmode function is not available without this accessory. GRV90EXT – 3M Rear Cam Extension Cable 3M extension cable allows installation of the GRV92CPM on longer vehicles. The cable connects at the camera end of the installation. -
Page 6: Product Structure
Product structure 1) LCD touch screen 5) Power input (Type C 5V/3A) 2) Power button 6) Forward recording camera 3) Micro SD card slot 7) Mounting clip-on system 4) Rear camera input 8) Reset button... -
Page 7: Installation Of Mirror Monitor
Installation of the mirror monitor Before After Flexible bands go behind the existing vehicles mirror and attach to the plastic hooks on Gator Mirror Monitor. 40MM 40MM The forward facing cameras mounting arm can be extended outwards as well as the camera lens angled up and down. - Page 8 Installation of the mirror monitor 1. Insert Micro SD card into the Mirror Monitor 2. Clip on mirror design securely mounts on the existing rear view mirror in the vehicle by stretching the bands at the back. There are two positions based on thickness of existing mirror. 3.
-
Page 9: Home Screen Touch Screen Functions
Home screen touch screen functions 1) Display Icon: Press to hide display 2) Home Screen Press to access the default home screen 3) CarPlay: Press to access CarPlay settings 4) Android Auto: Press to access Android Auto settings 5) DVR: Press to access DVR camera recording settings 6) Playback: Press to access recorded video files 7) Settings: Press to access the settings menu 8) Brightness: Press then drag slider to change brightness... -
Page 10: Settings Screen
Settings screen (12V Socket connection) Settings Press the Settings icon on the home screen to display more mirror features. Press the individual feature icons to access their settings. CP/AA Split Screen: Choose to display in full screen, left or right, with the default display on the right side of the screen. - Page 11 Settings screen Settings Press the Settings icon on the home screen to display more mirror features. Press the individual feature icons to access their settings. Language: Change the operating language. Default is English Startup Sound: Press to turn ON or OFF Date/Time: Displays the Date and Time.
-
Page 12: Carplay Screen
CarPlay screen CarPlay Press the CarPlay icon on the home screen to display pairing information. Follow the instructions on screen. Once paired the CarPlay screen will display and be automatically remembered for future use. Live view allows you to change between the front and rear camera by swiping left to right on the live image. -
Page 13: Dvr Screen
DVR screen Press the DVR icon on the home screen to display recording functions. Press the individual feature icons to access their settings. Microphone: Press to turn ON or OFF sound recording. Lock Icon: Press to lock recorded files Recording Icon: Press to START or STOP the recording function. -
Page 14: Playback Screen
Playback screen Playback Press the Playback icon on the home screen to display recorded file options. Press the individual feature icons to access their files. In this screen recorded files can be played, locked, unlocked, and delete footage. -
Page 15: Audio Output Settings
Audio output settings (Apple CarPlay & Android Auto) Use the FM transmitter mode if you want to listen to audio on your cars sound system without connecting any wires. Tap the Audio output icon on the home screen. Select the FM icon on the top middle of the screen to use the FM transmitter function. - Page 16 Audio output settings (Cont..) The CarPlay/Auto feature allows you to use the CarPlay features on the display whilst streaming audio to your factory audio system over Bluetooth if supported. Make sure that the CarPlay/Auto feature is selected. Then connect your device via CarPlay/Android Auto to the 9 inch monitor using the instructions in this manual.
-
Page 17: Video Playback Mode
Video playback mode When not recording press the playback icon to select recorded and locked recorded video footage. Press on the file to view on screen. You can press icons on screen to lock/ unlock/ back/ forward/ pause and delete recorded video files. Press return arrow to exit to menu files. -
Page 18: Reversing Guide Lines
Reversing guide lines When triggered, the reversing guide lines only assist a driver with backing into a parking space or aligning with an object behind the vehicle. They do not measure distance. You should always get out of the vehicle and visually check the distance to aid the driver when using guide lines. -
Page 19: Product Specifications
Product specifications Display 9.66" High-resolution LCD touch screen Colour Black Video FHD 2560 x 1440@25fps Resolution Front FHD 1920 x 1080@25fps Resolution Rear Frequency 50HZ/60HZ MSTAR SSC8826Q Front Camera 120 Degree wide angle lens Rear Camera Surface mount butterfly camera 110 Degree wide angle lens Functions G-Sensor, Loop recording... -
Page 20: Troubleshooting Guide
Troubleshooting guide If there are problems with the device, please refer to the following methods to resolve. Cannot record video? Please check whether there is enough space on the micro SD card or internal storage. Stopping automatically while recording? Due to the high amount of HD video data being recorded, please use a high-speed Micro SD card. -
Page 21: Safety Information & Warnings
Please pay attention to cleaning the lens surface, use a moist soft cloth to clean the lens before use, to avoid poor video footage. Gator is NOT responsible for the loss of any recorded video during operation. Although designed to withstand high impact of car collision, Gator does NOT guarantee recording of accidents where the impact may cause the device to be damaged. -
Page 22: Technical Assistance
Product specifications Technical assistance If you need assistance setting up or using your Gator product now or in the future, call Gator Support. Australia TEL: 03 – 8587 8898 FAX: 03 – 8587 8866 Mon-Fri 9am – 5pm AEST or EMAIL: service@tdj.com.au Please retain this user guide for future reference.
Need help?
Do you have a question about the GRV92CPM and is the answer not in the manual?
Questions and answers