Subscribe to Our Youtube Channel
Summary of Contents for Gator GHDVR210
- Page 1 HDVR210 Full HD 1080P DaSH cam PRODUCT USER MANUAL Full 2.4” 1080P Resolution Screen Size File G Sensor Wide Angle Suction Locking Mount ...
-
Page 2: Introduction
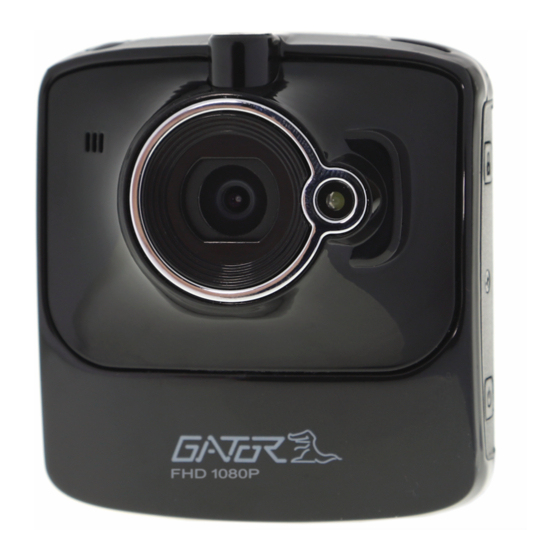
Introduction Thank you for purchasing the Gator GHDVR210 FHD 1080P Dash Cam. Please ensure that you have read the product manual and instructions in full, prior to installation and use. Failure to do so may result in product failure/damage or incorrect operation and therefore impact the product performance. -
Page 3: Table Of Contents
Table of Contents Introduction…………………….…………………………………………..2 Product overview………………………..…………………………………2 Product features …………………………………………………………..2 Table of contents ………………………………..…………….………….3 Package components ………………………………..…………….…….4 Product structure……………………………….……………….…...…..5 Installation of Dash Cam…..………………..……….…...……….…..6 Button instructions ..……………..…………..……………..………..6 Extra functions ..……………..……...………………………………….…8 Video mode ..……………..………. ………………..………………….…9 Photo mode/ Playback ..…….……………….…………………….……10 Menu settings ………….………..……………………………………….11 Product specification ..………………………………...…….…….…..13 Trouble shooting guide ………..…………….…………..…..………….14 Safety information &... -
Page 4: Package Components
Optional accessory: GHWCUSB The GATOR GHWCUSB DASH CAM HARD WIRE KIT enables a professional installation of a GATOR DASH CAM into your vehicle. Instead of sourcing power from the accessory socket of the vehicle, the GHWCUSB allows the dash cam to be wired directly to the vehicles fuse box. The DASH CAM will still function the same way as the accessory plug power lead but allows all cables to be hidden for a professional installation. -
Page 5: Product Structure
Product structure 1) SOS Button 2) Power Button/LED Button 3) Ok Button 4) Down Button 5) Up Button 6) Menu/Mode Button 7) Reset 8) HDMI Out (Cable not included) 9) Micro SD Slot 10) Indication Light 11) LCD Screen 12) USB Port 13) Bracket Connection 14) Camera Button 15) Lens... -
Page 6: Installation Of Dash Cam
Installation of Dash Cam 1. Insert suction mount into the mounting bracket fixing point on the DASH CAM. 2. Fix device onto a clean windscreen where the vision is not blocked (Place close to rear-view mirror is recommended). Don’t install device on airbag or within its working range. - Page 7 shooting mode. Pressing the Up button while recording will activate the file protection (A key will be present on the top of the screen if activated). Down Button: The down button is used while in the menu to move the highlighted area for selecting.
-
Page 8: Extra Functions
Battery Charging Indication Light: After connecting the Dash Cam through USB, the indication lamp will glow red meaning it is charging. The light will automatically turn off after fully charged. MIC: Audio receiver for video recording. Extra functions G-sensor Function: The G-sensor function activates in the case of a car accident by determining the gravitational acceleration (1g = 9.8 meters/second^2). -
Page 9: Video Mode
Video Mode Hold the Menu/Mode button for 2 seconds and then let go to switch to video mode if not already. To start recording in video mode press the OK button to start the recording. You know it is recording by the red circle indicator on the top left corner of the LCD. -
Page 10: Photo Mode/ Playback
Photo Mode Hold the Menu/Mode button for 2 seconds and then let go to switch to photo mode. There is a camera icon at the top left corner of the LCD to signify you are on photo mode. To take a photo, press the OK button. The screen will flash and make a camera sound when a picture is taken. -
Page 11: Menu Settings
Menu Settings Press the Menu button to get into the menu settings. You can navigate the settings menu by using the Up/Down buttons. To change or edit a selected setting, press the OK button. Press the menu button again to get out of the menu settings. USB Mode When connecting a USB cable with a PC, the DASH CAM will present two options. - Page 12 Loop Recording: This feature allows you to set the size of the files your DASH CAM will record before saving and creating a new file. We recommend the DASH CAM to be set to ‘3’ minute files. Exposure: This feature will change the white input. We recommend it always be set at ‘+0.0’.
-
Page 13: Product Specification
Format: This feature allows you to format/delete all the files off your micro SD card and also reinstalls your DCIM directory and DASH CAM software on your SD card so the micro SD card can operate with your DASH CAM free of errors. Default Setting: This feature will reset all your settings and return your DASH CAM to the factory standard settings. -
Page 14: Trouble Shooting Guide
Auto turn on/off while car Supports turn on while car starts and turn off while car turns off. power on/off Year/Month/Day/Hour/ Supported Minute Still images Photo resolution: 12MP Photo Format JPEG Memory Card Micro SD (up to 32GB Max) Supported Built-in Speaker Supported TV Output... -
Page 15: Safety Information & Warnings
Fuzzy/dirty image Please check if the lens is filled with dirt or fingerprints and clean carefully. Please clean lens with cloth before shooting. The DASH CAM is jammed or not responding Please reset the device by pushing in the reset button on the underside of the DASH CAM. -
Page 16: Technical Assistance
Mon-Fri 9am – 5pm AEST Please retain this user guide for future reference. If you would like to download a digital copy of this manual, or other Gator manuals/software, please visit the http://gatordriverassist.com website and click on ‘Firmware & Manuals” for information on where to find the manuals/software.


Need help?
Do you have a question about the GHDVR210 and is the answer not in the manual?
Questions and answers