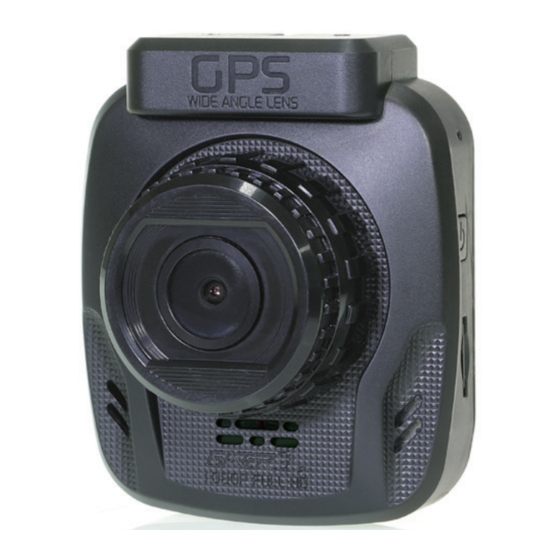
Summary of Contents for Gator GHDVR380
- Page 1 HDVR380 FULL HD 1080P DaSH cam GPS TRaCKING Manual Full 2.3” 1080P Resolution Screen Size Super G Sensor Wide Angle Suction Mount Capacitor...
-
Page 2: Introduction
Introduction Thank you for purchasing the Gator GHDVR380 FULL HD 1080P Dash Cam. Please ensure that you have read the product manual and instructions in full, prior to installation and use. Failure to do so may result in product failure/damage or incorrect operation and therefore impact the product performance. -
Page 3: Table Of Contents
Table of Contents Introduction Product overview Product features Table of contents Package components Product structure Installation of Dash Cam Fixing the Dash Cam Indicator lights Powering your Dash Cam Video and photo operation Video/Photo playback Dash Cam menu Video Menu Settings Tools Menu Settings Photo Menu Settings Resetting Dash Cam... -
Page 4: Package Components
Package components Mounting GHDVR380 Bracket USB to Mini USB Car Charger INCLUDED Micro SD GHDVR380 Card User Manual... -
Page 5: Product Structure
Product structure 9) GPS Antenna 1) Mounting Slot 10) Mic 2) Power Indicators 11) Speaker 3) LCD Screen 12) Reset 4) Menu/Return 13) Mini USB port 5) Up 14) HDMI port 6) Down 15) Power/Lock Button 7) OK Button 16) Micro SD Card Slot 8) Lens... -
Page 6: Installation Of Dash Cam
Installation of Dash Cam 1. Ensure windscreen is clean and free of debris. Attach suction cup to the windscreen and lock into position with the lever. 2. Fix where the vision is not blocked (Place close to rear-view mirror is recommended). Don't install device on airbag or within its working range. -
Page 7: Fixing The Dash Cam
Fixing the Dash Cam Suggested Indicator lights 1. The blue power indicator LED lights up and the charge symbol on screen flashes when the Dash Cam is receiving power. 2. One of the blue indicators flashes when the Dash Cam is recording. Powering your Dash Cam Press the power button to turn the Dash Cam on. -
Page 8: Video And Photo Operation
Video and photo operation Video Mode There is a camera icon at the top left corner of the LCD to signify you are on video mode. When the Dash Cam is recording, a red circle indicator appears and flashes on the top left corner of the screen. To stop the recording, simply press the OK button. -
Page 9: Video/Photo Playback
Video/Photo playback Press the power button until you see the playback icon on the top left of the screen. Using the arrow buttons, you can choose between all your recorded videos or photos. The protected files have a lock icon meaning they cannot be deleted until unlocked. -
Page 10: Dash Cam Menu
DASH CAM Menu Menu Settings In video mode press the Menu (Return) button to get into the menu settings when not recording. Press once for Video settings, twice for Tool settings. You can navigate the settings menu by using the Up/Down buttons. -
Page 11: Tools Menu Settings
Video Menu Settings Cont..Date Stamp: This feature will stamp the date and time on all your footage produced by your Dash Cam. G Sensor: This feature allows you to set the sensitivity of the Gravity sensor in the Dash Cam. Settings are OFF, Low, Medium & High. We recommend this be set to ‘LOW’... -
Page 12: Photo Menu Settings
Photo Menu Settings Menu Settings In photo mode press the Menu (Return) button to get into the photo menu settings. Press once for Photo settings, twice for Tool settings (Page 11). You can navigate the settings menu by using the Up/Down buttons. -
Page 13: Resetting Dash Cam
Resetting DASH CAM To hard reset the device in the case of a system jam or crash. Insert a fine point paper clip into reset hole on the side of the Dash Cam above the USB input. Formatting the SD Card It is advisable to format the card weekly. -
Page 14: Gps Player
GPS PLAYER (Windows Only) The GPS data is automatically saved to the video files. In order to see the GPS data in the video files, you will need to install “YW GPS PLAYER” from the provided software on the disc. Once installed, open the program and click on the folder shown in the picture below (Pic1). -
Page 15: Product Specifications
Product specifications NTK96658 Display 2.31-inch LCD screen Color Black Video MOV/MP4 1296P 1728x1296 1080 FULL HD 1920x1080 at 30fps 1080 FULL HD 1920x1080 at 30fps 720P HD 1280 x 720 at 30fps 720P HD 1280 x 720 at 30fps Picture Picture 12M, 10M, 8M, 5M, 3M, 2M, 1.3M &... -
Page 16: Safety Information & Warnings
Safety information & warnings Do not use the Dash Cam in damp working conditions; the Dash Cam is not waterproof Do not try opening the shell or trying to repair the Dash Cam by yourself. If the accessories for the Dash Cam have any problems, please take it to an authorised repair agent for repair. -
Page 17: Troubleshooting Guide
Troubleshooting guide Under normal operating conditions, if there are problems with the device, please refer to the following methods to resolve. Cannot take pictures or record video? Please check whether there is enough space on the Micro SD card or internal storage. Stopping automatically while recording? Due to the high amount of HD video data being recorded, please use a high-speed Micro SD card. -
Page 18: Technical Assistance
Technical assistance If you need assistance setting up or using your Gator product now or in the future, call Gator Support. Australia TEL: 03 – 8587 8898 FAX: 03 – 8587 8866 Mon-Fri 9am – 5pm AEST Please retain this user guide for future reference.


Need help?
Do you have a question about the GHDVR380 and is the answer not in the manual?
Questions and answers