Table of Contents
Advertisement
Quick Links
Advertisement
Table of Contents

Subscribe to Our Youtube Channel
Related Manuals for inVENTer Taris


Summary of Contents for inVENTer Taris
- Page 1 Installation and operating instructions Taris extractor fan Read carefully and refer to the illustrations before handling the product. Keep these instructions for future reference. Original Installation and operating instructions https://www.inventer.eu...
- Page 3 Trademarks, copyrights, and industrial property rights inVENTer®, Xenion®, inVENTron®, Inventin, and Clust-Air® are protected trademarks of inVENTer GmbH. The copyright to this document remains with the manufacturer. Rights to all content and images: © inVENTer GmbH 2024. All trademarks used in this documentation are the property of their respective manufacturers and are hereby acknowledged.
-
Page 4: Table Of Contents
4.1.6 Air quality sensor ....................17 Structure and scope of delivery ..................18 Optional accessories ......................21 4.3.1 Taris wall installation set ..................21 4.3.2 Panel frame ......................22 4.3.3 Second-room inner panel ..................22 4.3.4 Mounting bracket ....................22 Product variants ....................... - Page 5 7.4.4 Housing installation position .................. 42 7.4.5 Non-return damper installation position ..............43 Mounting the Taris extractor fan with surface-mounted housing ........44 Installing the Taris extractor fan with flush-mounted housing .......... 47 7.6.1 Installation in the outer wall ................... 47 7.6.2 Installation in the shaft wall ..................
- Page 6 Filter change ........................79 10 Warranty and guarantee......................80 10.1 Warranty ........................... 80 10.2 Manufacturer’s guarantee ....................80 Service ............................81 11.1 Complaints ........................81 11.2 Accessories and spare parts .................... 81 12 Disposal ............................ 81 Taris extractor fan | 5011-0014...
-
Page 7: About This Document
These Installation and operating instructions are intended for anyone installing the product. They contain all the basic information about product installation, commissioning, inspection, mainte- nance, cleaning, and disposal. Note the requirements for the operating personnel; see Section 2.3 “Operating personnel requirements” on page 12. Taris extractor fan | 5011-0014... -
Page 8: Warnings And Other Notices
• Consequence Describes the effects that may occur if the notice is not complied with. • Avoidance Describes how to prevent the hazard from occurring, or provides instructions for safety meas- ures if the hazard occurs. Taris extractor fan | 5011-0014... -
Page 9: Example Of A Warning
► This is the result of the second step. Operating and display elements Operating and display elements, such as buttons, switches, and control knobs, are written in bold. Example: The on/off switch is located on the controller. Taris extractor fan | 5011-0014... -
Page 10: Other Symbols
Any additional tools and aids required for the activities are listed before the instruc- tions. Red bar over a graphic: Illustration shows the inner wall. Blue bar over a graphic: Illustration shows the outer wall. Action focus: To be taken into account in the relevant assembly step. Taris extractor fan | 5011-0014... -
Page 11: Safety
Intended use The Taris extractor fan serves to ventilate moist, windowless rooms. It fulfils the requirements of DIN 18017-3. The extract air system works without heat recovery and uses alternating current. Any other product use constitutes improper use. -
Page 12: Operating Personnel Requirements
Safety / Personal protective equipment Operating personnel requirements The Taris extractor fan is a building product with electrical components. Only qualified specialists can assemble, install, and configure it. Only those who meet the following requirements may handle the product: • They have completely read and understood these Installation and operating instructions. -
Page 13: Hazard Sources
Damage to components Dirty components (from residual plaster, for example) lead to damage. → As necessary, clean the Taris extractor fan housing before inserting the fan assembly. Damage from foreign bodies If objects, small animals, dead leaves, etc. find their way into the outer wall duct, function may be impaired and the device and other components may be damaged. -
Page 14: Conditions For Use
• No extreme dust exposure, • No environment that allows direct water ingress, • No environment that allows smoke or combustion gas backflow, • Only masonry that conforms to the dimensions indicated, • Ambient temperatures: -20 – +40 °C. Taris extractor fan | 5011-0014... -
Page 15: System Overview
The following sections describe the product’s function, structure, and scope of delivery. Functions The Taris extractor fan serves to ventilate residential and sanitary rooms (utility rooms, baths/ restrooms) and eat-in kitchens. It uses alternating current and can be controlled automatically or switched on and off manually. -
Page 16: Switch-On Delay
4.1.3 Switch-on delay The Taris extractor fan has a switch-on delay function. This means that when the switch is actu- ated (the room lighting is switched on, for instance), the ventilation function switches on after a predefined period of one to five minutes. The device then runs at maximum airflow until the switch is actuated again or until the end of a predefined run-on time (see Section 4.1.4 “Run-on function”... -
Page 17: Air Quality Sensor
You can specify a switching threshold of Air Quality Level 3, 4, or 5 (3 is preset). For setting the air quality sensor, see Section 8.8 “Setting the air quality sensor” on page 72. Taris extractor fan | 5011-0014... -
Page 18: Structure And Scope Of Delivery
Fig. 1: Structure and scope of delivery: Surface-mounted variant 1 Non-return damper 5 Filter 2 Fan assembly 6 Inner panel cover 3 Humidity sensor* 7 Exhaust opening room connector 4 Inner panel ventilation grille 8 Surface-mounted housing Taris extractor fan | 5011-0014... - Page 19 1 Fan inserts with item numbers from 1002-0071 to 1002-0074 are for housings with two-room extraction (item number 1002-0061) only. 2 The housing with item number 1002-0061 requires a second room connector (not shown in the figure) to achieve two-room extraction; otherwise its construction is identical to that of item number 1002-0060. Taris extractor fan | 5011-0014...
- Page 20 1 Fan inserts with item numbers from 1002-0071 to 1002-0074 are for housings with two-room extraction (item number 1002-0061) only. 2 The housing with item number 1002-0061 requires a second room connector (not shown in the figure) to achieve two-room extraction; otherwise its construction is identical to that of item number 1002-0060. Taris extractor fan | 5011-0014...
-
Page 21: Optional Accessories
For installation of optional accessories, consult the installation instructions of the accessory in question. 4.3.1 Taris wall installation set The Taris wall installation set is an optional accessory for axial Taris extractor fan variants and facilitates creation of the wall duct and external finish. 1001-0245 4 ×... -
Page 22: Panel Frame
System overview / Optional accessories 4.3.2 Panel frame The panel frame is an optional accessory for flush-mounted Taris extractor fan variants and cov- ers wall openings that are larger than the outer dimensions of the inner panel. 1002-0076 Fig. 5: Flush-mounted panel frame 4.3.3... -
Page 23: Product Variants
• Humidity sensor: Basic variant (without humidity sensor), standard variant (with humidity sensor). The Taris extractor fan can be used in ventilation systems according to DIN 18017-3 with fan inserts 1002-0063 to 1002-0070. They have been tested at full load for air volume flows of up to 60 m³/h and approved by the Deutsches Institut für Bautechnik... -
Page 24: Product Characteristics
4.5.1 One-room and two-room design A Taris extractor fan can discharge the extract air from one or two rooms. The two-room design is available in the flush-mounted variant only. Here, a second pipe for a second room is connected to the optional second-room housing connection (see Fig. -
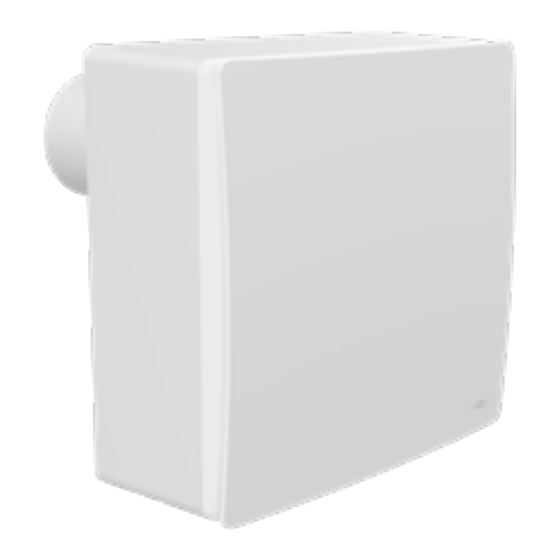
Page 25: Surface-Mounted Housing
The device is installed on an opening in the wall structure. The following figure shows the Taris extractor fan with a surface-mounted housing. Optional accessories are marked with “ * ”. Fig. 8: Surface-mounted variant – masonry installation... -
Page 26: Flush-Mounted Housing
This design allows extract air discharge from one or two rooms. The following figure shows the Taris extractor fan with a flush-mounted housing in drywall installation with a mounting bracket. Optional accessories are marked with “ * ”. -
Page 27: Technical Specifications
19.5 W (rated power)/0.8 W (standby) Air volume flow: 30/60/100 m³/h Noise emission: Varies; see planning manual Operating temperature: -20 – 40 °C Protection range outside Protection Area 0 according to VDE 0100: Weight: 1520 g Taris extractor fan | 5011-0014... -
Page 28: Dimensions
Technical specifications / Dimensions Dimensions The following figures show the dimensions of the Taris extractor fan’s individual housing variants and inner panel and the cable passage. 5.1.1 Surface-mounted housing □ □ Fig. 10: Dimensioned drawing – surface-mounted Taris extractor fan housing... -
Page 29: Surface-Mounted Wall Openings
Technical specifications / Dimensions 5.1.2 Surface-mounted wall openings Observe the following dimensions for creating the wall openings for the cable passage and ex- haust shaft: □ Fig. 11: Dimensioned drawing – surface-mounted Taris extractor fan cable passage Taris extractor fan | 5011-0014... -
Page 30: Flush-Mounted Housing, Axial
Technical specifications / Dimensions 5.1.3 Flush-mounted housing, axial □ Fig. 12: Dimensioned drawing – axial flush-mounted Taris extractor fan housing Taris extractor fan | 5011-0014... -
Page 31: Flush-Mounted Housing, Radial
Technical specifications / Dimensions 5.1.4 Flush-mounted housing, radial Ø 78 □ Fig. 13: Dimensioned drawing – radial flush-mounted Taris extractor fan housing Taris extractor fan | 5011-0014... -
Page 32: Inner Panel
Technical specifications / Dimensions 5.1.5 Inner panel □ 28,5 Fig. 14: Dimensioned drawing – Taris extractor fan inner panel Taris extractor fan | 5011-0014... -
Page 33: Optional Accessories
Technical specifications / Dimensions 5.1.6 Optional accessories Taris wall installation set Ø 100 – 735 1 – 2° Ø103 Fig. 15: Dimensioned drawing – Taris wall installation set Taris extractor fan | 5011-0014... - Page 34 Technical specifications / Dimensions Second-room inner panel Fig. 16: Dimensioned drawing – second-room inner panel Panel frame □ Fig. 17: Dimensioned drawing – panel frame Taris extractor fan | 5011-0014...
-
Page 35: Storage And Transport
Section 5.1.2 “Surface-mounted wall openings” on page 29. • Exhaust duct(s) have been laid and are ready to be connected: If the planned structure involves the Taris wall installation set, equip the wall mounting ■ sleeve and weather protection hood as described in the relevant installation instructions. -
Page 36: Requirements For The Supply Shaft System
• No other rooms in a dwelling may be connected to a ventilation device which vents the bath- room and restroom. • When connecting to the ducting, the bending radius (R) must not be less than the pipe diam- eter (DN). Taris extractor fan | 5011-0014... - Page 37 One exhaust air unit per floor Nominal riser pipe diameter Nominal riser pipe diameter Air volume flow 100 m Two exhaust air units per floor One exhaust air unit per floor Nominal riser pipe diameter Nominal riser pipe diameter Taris extractor fan | 5011-0014...
-
Page 38: Checking The Scope Of Delivery
Installation and operating instructions can be found in Section 4.2 “Structure and scope of deliv- ery” on page 18. Installation location and installation positions For safe, flawless Taris extractor fan function, observe the following installation location conditions and possible device installation positions. 7.4.1... -
Page 39: Air Volume Flows
150 cm² in order to ensure an adequate supply of air. • We recommend placing an external air supply such as the inVENTer aV100 ALD positioned in the upper wall area, ideally above a radiator, in the room to be ventilated (this pre-warms the outdoor air flowing in). -
Page 40: Installation Positions
Install the surface-mounted variant in this orientation only: Fig. 19: Surface-mounted Taris extractor fan installation position Flush-mounted housing installation position Install the flush-mounted variant in one of the following orientations: Fig. 20: Flush-mounted Taris extractor fan installation positions, radial Taris extractor fan | 5011-0014... -
Page 41: Housing Installation Position
Installation and assembly / Installation location and installation positions Fig. 21: Flush-mounted Taris extractor fan installation positions, axial 7.4.4 Housing installation position Observe the following minimum distances for the wall opening: Fig. 22: Installation position dimensioned drawing – flush-mounted/surface-mounted axial housing with wall duct and... -
Page 42: Non-Return Damper Installation Position
The non-return damper is located in front of the exhaust opening: Be sure to install the non-return damper in such a way that it can be closed by gravity. The follow- ing figures show the correct installation direction. Correct: Incorrect: Taris extractor fan | 5011-0014... -
Page 43: Mounting The Taris Extractor Fan With Surface-Mounted Housing
→ Observe the information in Section 7.1 “Prerequisites for installation” on page 35. Preparing connection pipes and electrical connections Prepare the connection pipe(s) and/or the Taris wall installation set so that the hous- ing’s exhaust opening and, as necessary, intake opening can be easily adapted. Lay the cables so that they can be routed into the housing from behind. - Page 44 Installation and assembly / Mounting the Taris extractor fan with surface-mounted housing 3. Position the housing with the exhaust opening exactly over the pre-installed Taris wall installa- tion set or the pre-mounted flexible aluminium pipe on the riser pipe. Guide the mains cable (230 V, 50 Hz) into the housing.
- Page 45 Installation and assembly / Mounting the Taris extractor fan with surface-mounted housing 12. Use the three screws provided (3.5 x 14 mm) to fix the fan assembly to the housing sockets. 13. Position the ventilation grille and the inner panel cover on the housing and use the two screws provided (3.5 x 14 mm) to screw it firmly to the...
-
Page 46: Installing The Taris Extractor Fan With Flush-Mounted Housing
→ Observe the information in Section 7.1 “Prerequisites for installation” on page 35. Preparing connection pipes and electrical connections Prepare the connection pipe(s) and/or the Taris wall installation set so that the hous- ing’s exhaust opening and, as necessary, intake opening can be easily adapted. Lay the cables so that they can be routed into the housing from behind. - Page 47 Installation and assembly / Installing the Taris extractor fan with flush-mounted housing 2. Prepare the housing and adapt the room con- nector. See Section 7.7 “Removing blind covers and adapting the room connector” on page 54. Observe the correct installation position.
- Page 48 Installation and assembly / Installing the Taris extractor fan with flush-mounted housing 9. Replace the plastering cover in the housing to protect the housing from dirt caused during subsequent work. 10. Plaster in the housing. 11. Remove the plastering cover from the housing.
- Page 49 Installation and assembly / Installing the Taris extractor fan with flush-mounted housing 15. Use the three screws provided (3.5 x 14 mm) to fix the fan assembly to the housing sockets. If your structural situation so requires, at- tach the optional panel frame to the inner panel.
-
Page 50: Installation In The Shaft Wall
Installation and assembly / Installing the Taris extractor fan with flush-mounted housing 7.6.2 Installation in the shaft wall Cordless screwdriver, folding ruler, screwdriver, pencil, spirit level, four drywall screws DANGER Electrical hazards Failure to properly install electrical components results in mortal danger. - Page 51 Installation and assembly / Installing the Taris extractor fan with flush-mounted housing 2. Prepare the housing and adapt the room con- nector. See Section 7.7 “Removing blind covers and adapting the room connector” on page 54. 3. Prepare the housing and adapt the room connec- tor.
- Page 52 Installation and assembly / Installing the Taris extractor fan with flush-mounted housing 8. Position the housing in the drywall cutout. 9. At the tabs, screw the housing to the drywall. 10. Replace the plastering cover in the housing to protect the housing from dirt caused during subsequent work.
- Page 53 Installation and assembly / Installing the Taris extractor fan with flush-mounted housing 14. Insert the non-return damper into the housing’s exhaust opening. Observe the correct non-return damper installation position. See Section 7.4.5 “Non-return damper installation position” on page 42. 15. Push the fan assembly into the housing until all three housing sockets engage.
-
Page 54: Removing Blind Covers And Adapting The Room Connector
Installation and assembly / Removing blind covers and adapting the room connector 18. Insert the filter element and close the inner panel cover. ► The Taris extractor fan with flush-mounted housing has now been mounted on the shaft wall. Removing blind covers and adapting the room connector The standard housing has two possible outlets for extract air and three possible inlets (for two- room connection only), each of which can be used to adapt a room connector. - Page 55 4. Position the room connectors on the housing openings. 5. Fix the room connectors in place with a clockwise rotation on the housing. ► The flush-mounted housing with two-room exhaust discharge and radial exhaust opening has been prepared. Taris extractor fan | 5011-0014...
-
Page 56: Installing Optional Accessories
Installation and assembly / Installing optional accessories Installing optional accessories The following sections describe installation of optional accessories. 7.8.1 Installing the Taris wall installation set Creating a wall opening Drill with Ø 115 mm core drilling or milling drill attachment. NOTICE... - Page 57 6. Use mounting wedges to fix the wall mounting sleeve on the inside and outside with a slope of 1-2° to the outer wall. 7. Use a spirit level to check the angle of the wall mounting sleeve. Taris extractor fan | 5011-0014...
- Page 58 10. Cut the excess hardened assembly foam and the protruding mounting wedges flush with the inner and outer walls. 11. Remove the plastering cover from the wall mounting sleeve on the inner wall side. 12. Tape sealing tape in the wall mounting sleeve. Taris extractor fan | 5011-0014...
- Page 59 • flush with the opening for the wall mounting sleeve • along the guide on the outer edge Do not seal the mounting holes. The sealing tape must protrude over the inner edge of the opening for the wall mount- ing sleeve. Taris extractor fan | 5011-0014...
- Page 60 10. Place the cover on the base plate from above. 11. Pull the cover down as far as it will go. The guides on the cover hook behind the base plate. ► You have installed the Taris wall installation set. Taris extractor fan | 5011-0014...
-
Page 61: Installing The Panel Frame
Installing the panel frame Panel frame installation is optional and an intermediate step during installation of the Taris extractor fan with flush-mounted housing. Proceed as follows: 1. As shown, insert the inner panel, rotated slightly with cover open, into the panel frame. -
Page 62: Installing The Second-Room Inner Panel
2. Prepare the second-room inner panel. Remove the housing cover and take out the filter. 3. Press the second-room inner panel housing exactly over the pre-installed flexible pipe until it is flush with the wall. Taris extractor fan | 5011-0014... - Page 63 See Section 8.10 “Setting the second- room inner panel” on page 73. 10. Insert the filter. 11. Clip the cover back onto the housing. ► The second-room inner panel has been installed. Taris extractor fan | 5011-0014...
-
Page 64: Electrical Installation
The following sections explain electrical connection variants and contain instructions for connect- ing the power cable. 7.9.1 Connection variants The following figures show typical examples of Taris extractor fan connection variants. L N LS L N LS 230V AC 230V AC Fig. -
Page 65: Installing The Power Cable
2. Strip the cable to 70 mm. 3. Strip the cores to 6 mm. Observe the cable length inside the housing. Shorten the cables so that they do not kink and are not in the way. Taris extractor fan | 5011-0014... - Page 66 See Section 7.9.1 “Con- nection variants” on page 64. 4. Connect the mains cable leads to the terminal as shown in the figure. ► The mains cable is connected. L N LS NC Taris extractor fan | 5011-0014...
-
Page 67: Setting Functions
Setting functions / Operating and display elements Setting functions This section explains the steps for adjusting the Taris extractor fan functions. Some functions are optional and may not be present on your product. For descriptions of individual functions, see Section 4.1 “Functions” on page 15. -
Page 68: Menu Navigation And Button Use
• A-2: Automatic extract air cycles on: 2 h base load/15 min full load, • A-4: Automatic extract air cycles on: 4 h base load/30 min full load. 3. Press the MODE button (6) to confirm the selection and move to the next setting point. Taris extractor fan | 5011-0014... -
Page 69: Switching The Comfort Mode On And Off
2. Use the + button (4) and the - button (5) to select a switch-on delay between 1 and 5 min. The preset value is 3 min. 3. Press the MODE button (6) to confirm the selection and move to the next setting point. Taris extractor fan | 5011-0014... -
Page 70: Setting The Run-On Function
• S15: Run-on duration for sensor activation: 15 min (preset), • S30: Run-on duration for sensor activation: 30 min. 3. Press the MODE button (6) to confirm the selection and move to the next setting point. Taris extractor fan | 5011-0014... -
Page 71: Setting The Humidity Sensor
2. Use the + button (4) and the - button (5) to select a humidity limit value between 60% and 90%. The preset value is 70%. 3. Press the MODE button (6) to confirm the selection and move to the next setting point. Taris extractor fan | 5011-0014... -
Page 72: Setting The Air Quality Sensor
• P-n: Air volume flow at full load: 60 m /h (preset), • P-y: Air volume flow at full load: 100 m 3. Press the MODE button (6) to confirm the selection and move to the next setting point. Taris extractor fan | 5011-0014... -
Page 73: 8.10 Setting The Second-Room Inner Panel
Proceed as follows: 1. Remove the housing cover and take out the filter. 2. Shift the panel opening controller (2) to the left to make the panel opening wider and to the right to make it narrower. Taris extractor fan | 5011-0014... - Page 74 Setting functions / Setting the second-room inner panel 3. Insert the filter. 4. Clip the cover back onto the housing. ► The second-room inner panel has been installed. Taris extractor fan | 5011-0014...
-
Page 75: Troubleshooting And Filter Change
Troubleshooting and filter change / Troubleshooting Troubleshooting and filter change Except for regular filter change, the Taris extractor fan is entirely maintenance-free. The following sections describe the error codes that can occur on the device and the procedure to be followed for filter change. -
Page 76: Filter Change
4. Actuate the “Confirm filter change” button. Use an aid (pencil, etc.) if necessary. 5. Put the filter back in the ventilation grille and close the cover. ► The “Filter change” LED goes out. The filter change is complete. Taris extractor fan | 5011-0014... -
Page 77: Warranty And Guarantee
Use the device as intended in order to maintain the warranty claim. 10.2 Manufacturer’s guarantee inVENTer GmbH grants a five-year guarantee on all electronic components. This covers prema- ture product wear. The warranty claim is an additional offer by the manufacturer and does not affect applicable law in any way. -
Page 78: Service
Also dispose of product packaging correctly. You will find disposal recommendations in the following table. Table 7: Disposal recommendations Component Material Disposal Housing components PS plastic Recyclable waste Fan assembly Various electrotechnical materials Electronic waste Taris extractor fan | 5011-0014... - Page 80 GmbH Ortsstraße 4a D-07751 Löberschütz, Germany https://www.inventer.eu Subject to modifications. No liability for printing errors. Item no.: 5011-0014 Version: 1.0 – 04/2024...
Need help?
Do you have a question about the Taris and is the answer not in the manual?
Questions and answers