
Related Manuals for inVENTer PAX Standard set


Summary of Contents for inVENTer PAX Standard set
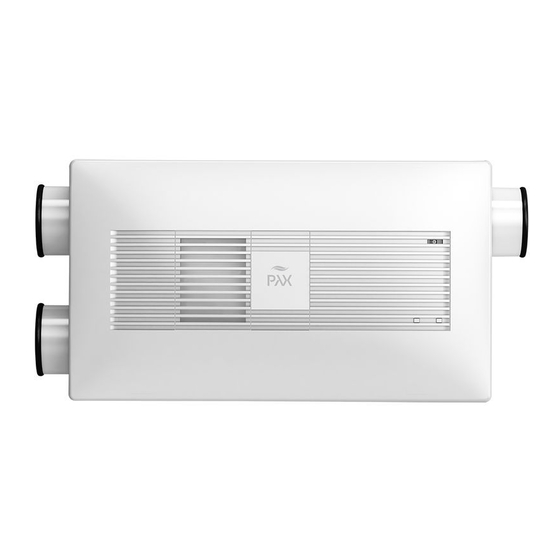
- Page 1 Ventilation system inVENTer PAX – Standard set Installation and operating instructions...
- Page 2 GmbH. ® The copyright of this document remains with the manufacturer. Rights to all contents and images: © inVENTer GmbH 2016-17. All trademarks used in this document are the property of their respective manufacturers and are hereby acknowledged.
- Page 3 PAX standard set • Installation and operating instructions...
-
Page 4: Table Of Contents
Control elements ......................12 Preparing for installation ......................13 Installation advices ......................13 Dimensions ........................14 Installation situation inVENTer PAX standard set ............14 Dimension drawing ......................15 Installation conditions for connection over the roof ............16 Assembly and installation ...................... 17 Check the scope of supply .................... -
Page 5: User And Safety Instructions
U S E R A N D S A F E T Y I N S T R U C T I O N S User and safety instructions Thank you for purchasing this high quality product from inVENTer! This section provides an overview of the basic safety precautions for safe and proper operation of your ventilation unit. -
Page 6: Safety Instructions
• The volume of supply air should match the volume of extract air. We recommend an external air supply for inVENTer PAX. This may be realised by appropriate overflow measures: an air gap of about 10 mm below the door, unscrew the hinges by 5 mm, use a ventilation grille or similar. - Page 7 Qualified personnel The inVENTer PAX complies with the applicable technical safety requirements and standards for household and similar electrical appliances. It may only be installed, set up and operated in conjunction with this documentation. Installation, electrical connection and set up of the equip- ment may only be performed by qualified personnel.
-
Page 8: System Overview
Real values may be evaluated based on the airflow-pressure curve. Under certain conditions the inVENTer PAX can be installed over the roof. This must be realised on site. -
Page 9: Construction
8 User interface grille cover 9 Front panel 10 Outdoor air dust filter Figure 2: Exploded view of the inVENTer PAX main module Figure 3: Exterior closure: PAX weather protection hood with wall duct 1 Wall duct (2x, 60 cm length) -
Page 10: Function
SYS T E M OV E R V I E W Function The inVENTer PAX ventilation system is equipped with an integral cross-flow heat exchanger. It stores the thermal energy from the indoor air (extract air) inside the main module and uses it to warm up the incoming outdoor air. - Page 11 (percentage indoor air humidity) should be increased. Operating modes The ventilation unit inVENTer PAX provides four operating modes. Functional scope within the operating modes depends on the outside temperature.The following list provides an overview of the possible operating modes and the ventilation unit’s functionality at different temperatures.
-
Page 12: Control Elements
Figure 5: Front view: Infrared remote control for inVENTer PAX The remote control is a handheld electronic unit for controlling the core functions of the inVENTer PAX ventilation unit. It is based on infrared technology and depends on optical connection with the main module. -
Page 13: Preparing For Installation
3 Interior wall side 4 Exterior wall side • The inVENTer PAX ventilation system can be installed over several rooms.If the main module is connected to an duct system, the air flow is reduced. Real values may be evaluated based on the airflow-pressure curve (page 39). -
Page 14: Dimensions
PAX weather protection hood – incl. render, insulation, masonry and inner structure. optional in vertical alignment Installation situation inVENTer PAX standard set Figure 7: InVENTer Pax standard set installed (horizontal alignment) 1 Ceiling (interior) 5 Main module 2 Suspended ceiling 6 Wall duct... -
Page 15: Dimension Drawing
Dimension drawing Wall opening (Installation on room edge) Ø Ø Ø Exterior wall (outdoor air, exhaust air) Figure 8: Dimensional drawing inVENTer PAX wall openings 1 Interior wall 3 Drilling template 2 Wall opening 4 Ceiling inVENTer PAX main module Figure 9: Dimensional drawing Main module inVENTer PAX... -
Page 16: Installation Conditions For Connection Over The Roof
PAX weather protection hood The PAX-h weather protection hood in horizontal alignment is the standard exterior closure for the inVENTer PAX ventilation system. On request the PAX weather protection hood is available in vertical alignment. Figure 10: Dimensional drawing PAX weather protection hood... -
Page 17: Assembly And Installation
Check the delivery for completeness and transport damage upon receipt using the delivery note. Report missing items immediately, and at the latest within 14 days to your supplier, distributor or factory representative. Figure 11: inVENTer PAX standard set 1 Drilling template 5 Plug-in connector... -
Page 18: Create Wall Opening/Drill Holes
► Drill the 8 holes with Ø 8 mm, min. 50 mm deep to the ceiling and interior wall. ► Create 2 wall openings for the wall duct. The wall openings and bore holes are created. Ö inVENTer PAX standard set • Installation and operating instructions... -
Page 19: Install The Mounting Plate
► Attach the wall ducts with a slope of 1 – 2° to the exterior wall. ► Replace the wall construction as far as the wall ducts. ► Observe the necessary barrier levels. inVENTer PAX standard set • Installation and operating instructions... - Page 20 ► Fill the gap between the insulating sleeve and the masonry on the exterior and interior wall with non-pressing fitting foam. The wall duct is inserted. Ö inVENTer PAX standard set • Installation and operating instructions...
-
Page 21: Mount The Main Module
► Align the supply air adaptor to the position of the supply air ducts. ► Screw the supply air adaptor to the main module with 6 screws. ► Cover the screws with 6 end caps. inVENTer PAX standard set • Installation and operating instructions... - Page 22 ► Leed the power cable through the main mod- ule to the terminal box on the main module’s opposite side (2,3). Ensure that the power cable is long enough for connection. inVENTer PAX standard set • Installation and operating instructions...
- Page 23 ► Screw the main module to the mounting plate with 4 screws using the supplied 200 mm bit PH2. The main module is installed. Ö inVENTer PAX standard set • Installation and operating instructions...
-
Page 24: Connect The Main Module
3 Main ON/OFF switch 2 Lustre terminal 4 Power cable, 2-pole The inVENTer PAX is connected directly to the 230 V AC mains. Electrical connection takes place inside the mian module’s terminal box. Requirements: The main module is installed. The power supply is disconnected. - Page 25 ► Slide the lever (red arrow) on the casing sideways (1). The front panel is locked. Ö ► Fold the grille cover upwards until it snaps in (2). The main module is connected. Ö inVENTer PAX standard set • Installation and operating instructions...
-
Page 26: Mount The Weather Protection Hood
Mount the weather protection hood The PAX weather protection hood in horizontal alignment is the standard exterior closure for the inVENTer PAX ventilation system. For mounting the weather protection hood in vertical alignment see the instructions attached to the weather proection hood. - Page 27 ► Seal the joint between the cover of the weather protection hood and the exterior wall at the sides and top with a permanently elastic outdoor sealing compound. The Pax weather protection hood is mounted. Ö inVENTer PAX standard set • Installation and operating instructions...
-
Page 28: Operation
Ö ► Press the button once again. The operating mode indicator light extinguishes. Ö The ventilation unit is in standby. Ö The ventilation unit is started/in standby. Ö inVENTer PAX standard set • Installation and operating instructions... - Page 29 The flow rate is set. Ö Autocalibrating the airflow When changes to the inVENTer PAX ventilation system are made or new installation is made the airflow is not adapted. After changes/installation, carry out an autocalibration to adjust the ventilation systems to the changed parameters. Requirements: The ventilation unit is switched on.
- Page 30 O P E R AT I O N Setting the dehumidification The inVENTer PAX ventilation unit is supplied with a factory default dehumidification level of 58 % indoor air humidity. Dehumidification can be adjusted to 9 levels between 40 and 88 % indoor air humidity.
-
Page 31: Operating The Ventilation Unit With Infrared Remote Control
O P E R AT I O N Operating the ventilation unit with infrared remote control The remote control for inVENTer PAX works on the principle of infrared. Make sure that you are within reach of the main module and no objects are in the way. -
Page 32: Cleaning And Maintenance
• soft brush Recommended maintenance The maintenance tasks and intervals listed here are recommended by inVENTer GmbH to maintain the functionality and performance of the inVENTer PAX ventilation unit. Depending on requirements and/or air quality, your personal maintenance plan may deviate from these recommendations. -
Page 33: Switching On/Off The Ventilation Unit Via Main On/Off Switch
► Press the main ON/OFF switch into position 0. The ventilation unit is switched off via the Ö main ON/OFF switch. ► Snap the front panel into place in the roller catches on both sides of the casing. inVENTer PAX standard set • Installation and operating instructions... -
Page 34: Setting The Filter Change Interval
The ventilation unit is in standby. Ö ► Press the buttons simultaneously for 3 seconds. The buzzer sounds twice. Ö The user interface is activated for setting Ö the change interval. inVENTer PAX standard set • Installation and operating instructions... - Page 35 Status lights while setting the filter change interval: Interval / Days Indicator light Flow rate LED Filter change LED Operating mode LED ► Press the buttons simultaneously for 3 seconds. The filter change interval is set. Ö inVENTer PAX standard set • Installation and operating instructions...
-
Page 36: Replace The Dust Filters
C L E A N I N G A N D M A I N T E N A N C E Replace the dust filters NOTICE Strong contamination of the outdoor and extract air filter. Output and flow rate of inVENter PAX are reduced! ► Observe filter change interval. ► When changing air filters, both the outdoor air and the extract air filter must be replaced. Requirements: The ventilation unit is switched off via the main ON/OFF switch (see section 6.1). - Page 37 ► Slide the lever (red arrow) on the casing sideways (1). The front panel is locked. Ö ► Fold the grille cover upwards until it snaps in (2). You have replaced the filters. Ö inVENTer PAX standard set • Installation and operating instructions...
-
Page 38: Specifications
Wall opening [mm] 2 x Ø 160 Dimensions [W x H x D in mm] 720 x 340 x 191 Weight [g] 9500 Wall duct (Insulating sleeve with folded spiral-seam duct) Feature Value Length/Diameter (single) [mm] 600/140 Weight [g] 2500 inVENTer PAX standard set • Installation and operating instructions... - Page 39 On request the PAX weather protection hood is available in vertical alignment and/or custom colour. Airflow curve inVENTer PAX Airflow [m³/h] Luftvolumenstrom (m³/h) Figure 13: Airflow-pressure curve inVENTer PAX (free blowing) 1 Fan level 1 3 Fan level 3 2 Fan level 2 inVENTer PAX standard set •...
-
Page 40: Scope Of Supply
Scope of supply Standard set • inVENTer PAX main module w. remote control, mounting plate, drilling template, accessory kit • Silencer, Plug-in connector, Wall duct (Insulating sleeve/folded spiral-seam duct) • PAX-h weather protection hood (white, grey, Nord) w. accessory kit... -
Page 41: Troubleshooting And Disposal
Troubleshooting If your ventilation unit is not functioning properly, consult the following troubleshooting table. If the fault persists, contact your supplier, distributor or the technical service department at inVENTer GmbH. For information see section 12: Service. Fault Possible cause Remedy Ventilation unit Dehumidifcation set too low. -
Page 42: Guarantee And Warranty
Failure to observe the intended use will invalidate all warranty claims. Manufacturer guarantee inVENTer GmbH provides a five-year guarantee for the inVENTer PAX main module. This covers premature product wear. Further information about the warranty is available at www.inventer.eu/guarantee. -
Page 43: Company Details
VAT ID NUMBER: DE 815494982 JENA DISTRICT COURT HRB 510380 PICTURE CREDITS/ALL RIGHTS RESERVED: © INVENTER GMBH 2016-17 SUBJECT TO MODIFICATIONS. ALL INFORMATION IS SUPPLIED WITHOUT GUARANTEE. NO LIABILITY IS ACCEPTED FOR PRINTING ERRORS. inVENTer PAX standard set • Installation and operating instructions... - Page 44 GmbH Ortsstraße 4a D-07751 Löberschütz Telephone: +49 (0) 36427 211-0 Fax: +49 (0) 36427 211-113 Email: info@inventer.de Version dated 08/2017 Subject to modifications. Order number: 5015-0005 www.inventer.eu © inVENTer GmbH 2016-17...
Need help?
Do you have a question about the PAX Standard set and is the answer not in the manual?
Questions and answers