
Subscribe to Our Youtube Channel
Related Manuals for Holman 40476TE


Summary of Contents for Holman 40476TE
- Page 1 Instruction Guide 40476TE - 40476TL - 40476TR Holman Rancho Cordova, CA 95742 800-343-7486 InstallationSupport@holman.com 20231023R1 DATE: ________________...
-
Page 2: Table Of Contents
• Any previously installed flooring must be removed prior to installing Holman flooring. • Floor must be assembled in vehicle. • 40477T threshold kit must be installed when installing Holman flooring. (40477T sold separately) For Technical Support Call: 800-343-7486, Monday-Friday, 7AM - 4 PM (PST) -
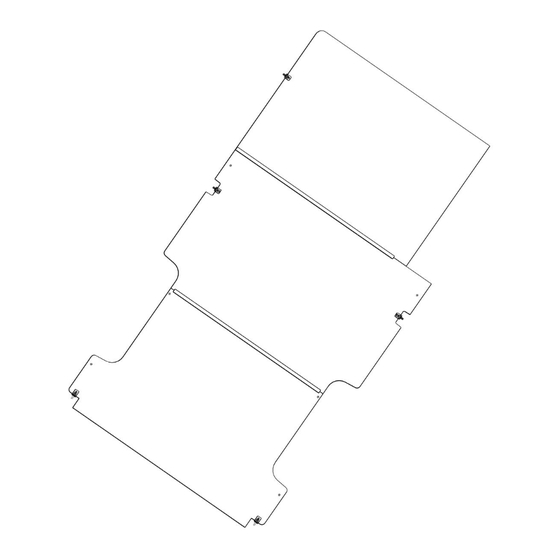
Page 3: 40476Tl, 40476Tr, And 40476Te Parts List
Instructions – 40476TE, 40476TL, 40476TR 40476TL, 40476TR, and 40476TE Parts List For Technical Support Call: 800-343-7486, Monday-Friday, 7AM - 4 PM (PST) Page 2... -
Page 4: 18-40476Tl Floor Hardware (All Floor Kits)
Instructions – 40476TE, 40476TL, 40476TR 18-40476TL Floor Hardware (ALL FLOOR KITS) For Technical Support Call: 800-343-7486, Monday-Friday, 7AM - 4 PM (PST) Page 3... -
Page 5: 18-40476Te Floor Extension Hardware (40476Te Only)
Instructions – 40476TE, 40476TL, 40476TR 18-40476TE Floor Extension Hardware (40476TE ONLY) For Technical Support Call: 800-343-7486, Monday-Friday, 7AM - 4 PM (PST) Page 4... -
Page 6: Step 1 - Trim Factory Threshold
Instructions – 40476TE, 40476TL, 40476TR Step 1 – Trim Factory Threshold Some vehicles may be equipped with a plastic threshold by the sliding door this needs to be either removed or trimmed before installing the floor. • Remove the four screws circled. -
Page 7: Step 3 - Insert T-Nut Inserts
Instructions – 40476TE, 40476TL, 40476TR Step 3 – Insert T-nut Inserts • Insert 1/4” tee nut insert into bottom of floor panel into holes highlighted below. • Tap in inserts with hammer. 1/4” Tee Nut Insert • For Transit 130” and 148” wheelbase insert five 1/4”... -
Page 8: Step 4 - Install Floor Spacers
Instructions – 40476TE, 40476TL, 40476TR Step 4 – Install Floor Phillips round Spacers head screw • Using six Phillips round head screws fasten plastic spacers to 1/4” x 1/2" the bottom of the floor in the Plastic Spacer locations highlighted. - Page 9 Instructions – 40476TE, 40476TL, 40476TR • Using 7/16” x 1-1/4” hex head screws, 7/16” lock washers and 1/2” flat washers bolt floor brackets into D-ring embosses in rear pillar, side pillar, and B-pillar. Be sure to use the Front Mount on the side and B-pillar and Rear Mount for the rear pillars.
- Page 10 1-1/8” drill bit. • In the center of each hole, install a plus nut using the instructions below. • Use 1” x 3/8” plastic spacer (Holman p/n 40501) in each hole as needed to attach accessories to steel van floor.
Need help?
Do you have a question about the 40476TE and is the answer not in the manual?
Questions and answers