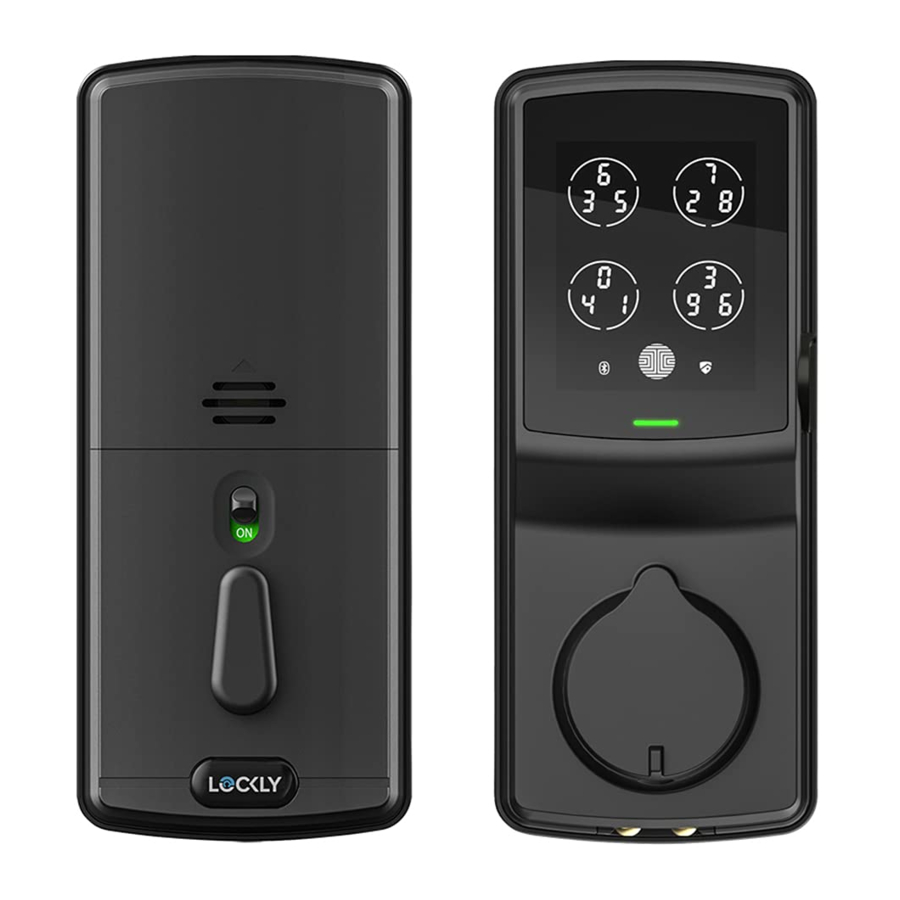
Lockly SECURE PRO, PGD728W - Fingerprint Deadbolt Manual
- Installation manual (30 pages) ,
- User manual (41 pages) ,
- Start here manual (26 pages)
Advertisement
- 1 Welcome!
- 2 Preparation
- 3 ADJUST DEADBOLT AND INSTALL
- 4 INSTALLING EXTERIOR ASSEMBLY (B)
- 5 INSTALLING INTERIOR ASSEMBLY (F)
- 6 PREPARING DOOR SENSORS FOR INSTALLATION
- 7 INSTALLING THE INTERIOR ASSEMBLY (F)
- 8 INSTALLING BATTERIES
- 9 INSTALLING THE DOORS SENSOR
- 10 INSTALLING STRIKE PLATE
- 11 DOWNLOAD LOCKLY APP
- 12 SETTING UP THE SECURE LINK WI-FI HUB
- 13 SECURE LINK WI-FI HUB SETUP
- 14 CONNECTING YOUR LOCKLY SECURE PRO
- 15 Smart Home Ready. VOICE CONTROL
- 16 INSTALLATION OVERVIEW & PARTS LIST
- 17 Documents / Resources
Welcome!
This guide will walk you through step-by-step how to install and get your Lockly Secure Pro up and running. Installation generally takes less than 30 minutes. If you have any questions please reference our online support at: Lockly.com/support or call (669) 500-8835 for help.
Reference installation parts overview foldout on back page
Preparation
To complete the installation you will need:

Prepare door: remove existing deadbolt or use provided template to bore new holes.

ADJUST DEADBOLT AND INSTALL
Deadbolt slot must align to the center of the door hole. Adjust as shown if needed.

The deadbolt comes set to 2-3/4" (70mm). Adjust length to 2-3/8" (60mm) if necessary. (wear gloves to protect from possible pinching).

Push the crank  to extend the deadbolt

Hold the metal plate  and twist the deadbolt body
  clockwise till it snaps to 2-3/8"

Deadbolt comes set at 2-3/4" (70mm). To return to default, while deadbolt is extended, hold the metal plate and twist the deadbolt body counterclockwise till it snaps to 2-3/4"


Extend the deadbolt by inserting a flat-head screwdriver into the slot and turning clockwise.

Insert the deadbolt into door edge hole. make sure that the right side is up and the slot is in the vertical position. Secure with 2  screws.
INSTALLING EXTERIOR ASSEMBLY (B)
 - Step 1")
Check the exterior assembly (B) alignment to door hole and deadbolt before peeling off film on adhesive strips.
 - Step 2")
Peel film from adhesive strips and make sure torque blade is in the vertical position with the deadbolt extended. Place assembly and torque blade through the deadbolt slot and guide connection cables through the cross-bore hole under the deadbolt as shown. Complete mounting by aligning and securing until flush to exterior door surface.
INSTALLING INTERIOR ASSEMBLY (F)
- Check interior mounting plate (D) alignment to your door hole before securing with adhesive strips.
![]()
- Align and secure mounting plate with adhesive strips. Guide connection cables through the hole and secure to the lower left notched hole.
![]()
- Insert and tighten by hand 2
![]() screws located on the left and right of the blade. Check alignment and tighten with screwdriver until mounting plate is securely placed on door.
screws located on the left and right of the blade. Check alignment and tighten with screwdriver until mounting plate is securely placed on door.
![]()
- Use the key to ensure deadbolt locks and unlocks smoothly(no binding or rubbing).
![]()
when finished, leave the dead bolt extended and remove the key before proceeding to the next step.
")


")
TIP: when installing screws by hand, turn screws clockwise several turns then counterclockwise one turn to ensure smooth threading and no cross threading.
PREPARING DOOR SENSORS FOR INSTALLATION
Do not mount (install) door sensors yet. You will install in step 7.
About door sensors
Door sensors provide real-time door condition status, such as the ability to verify if the door is securely closed. It also sends push notifications to your phone whenever your door opens and enables voice control with Amazon Alexa or Google assistant.
Lockly Secure Pro comes with a pre-wired door sensors consisting of two parts:


When installed on door, the distance between the wired sensor and sensor magnet must be less than 3/4" in order for the sensor to work. If door frame is higher than door, add included foam pads to level parts (P) and (Q) with each other as much as possible.
TIP: Lockly door sensors comes in Grey (PGA715) and Matte Black (PGA716) that can be ordered through our customer hotline: (669) 500-8835 or by email: help@Lockly.com.
Removal of Sensor (optional)
There may be circumstances where the sensor cannot be installed because of molding/ door limitations or is not aesthetically desirable. The sensor wired to the lock is removable by carefully pulling its connector from the circuit board. If removed, some features and functionality will not be available, such as real-time condition status.
When installing the door sensors, make sure the arrow on the wired sensor (P) aligns to the arrow of the sensor magnet (Q) as close as possible.

The sensors need to be as close to level as possible. If needed, use the adhesive foam pad(s) to adjust the height of the wired sensor.

Sensors can be positioned on either left or right side.

The interior assembly comes with the pre-installed wired door sensor setup for a right swing doors with 2 ¾" (70mm) backset*. Trim excess part (P) for doors with 2 ⅜" (60mm) backset as shown below.
For left swing doors, re-route the door sensor wire through the side channel. Pull the foam pad then re-insert to secure the wire. Discard the excess part (e) for doors with 2 ⅜" (60mm) backset as shown below:
 *Backset = distance of the door edge to the center of the cross-bore door hole.
DO NOT INSTALL THE SENSORS YET
INSTALLING THE INTERIOR ASSEMBLY (F)
")
Plug the cable coming through mounting plate (D) into the interior assembly (F) as shown. Tuck cable under eyelet hooks and route to the right on interior assembly (F).

Plug  into
into  , match red side of plug with red on socket - insert tightly.
NOTE: If you need to disconnect the cable, make sure to press the snap tab to release the plug before carefully pulling it out. Do not force, as this may result in damaging the lock.

Before placing the interior assembly onto the mounting plate, ensure the thumb turn is vertical.


Place the interior assembly against the mounting plate and make sure the torque blade is inserted to the thumb turn shaft.

Secure the interior assembly to mount platedoor with 2  screws.
INSTALLING BATTERIES
- With door open and deadbolt fully extended, place ribbon inside compartment and insert 4 batteries (note correct -/+ polarity).

- After all batteries are installed, PRESS and HOLD the program button for 10S. The lock will auto matically start self-check (release program button once check starts). The self-check process determines right or left swinging door and is very important to ensure correct installation.
![]()
if lock is not properly installed it will open and close repeatedly.

- Once self-check completes ensure the lock operates smoothly by manually locking and unlocking the door using the thumb turn on the interior assembly. The deadbolt should operate smoothly without any interference or binding. If necessary, repeat step 2 and ensure that (a) the deadbolt was extended and (b) the torque blade was inserted vertically while the deadbolt was extended.
- Swipe your hand across the touch screen keypad, the lock should close (lock). If deadbolt bounces back or unlocks automatically it means something is not installed correctly. Go back and repeat step 2, same as above.
- Once self-check is complete, install battery cover (H), secure with screw on top (do not over tighten).


INSTALLING THE DOORS SENSOR
Make sure you have prepared the door sensors for installation, see step 4
LOCK SENSOR (P)
Install on the interior side only. If necessary, trim tab from sensor (P) for doors with 2-3/8" (60mm) backset. Clean surface of door and doorframe, remove film from adhesive, attach and secure close to door edge as shown.

DOOR FRAME SENSOR (Q)
Manually retract deadbolt and close door. Dry fit sensor (Q) to door frame and check for alignment. If needed, raise the height of the sensor to be more level with sensor (P) by adding 1 or 2 of the included adhesive foam pads. Once satisfied both sensors are as level as possible, remove film from adhesive and install with arrows aligned to each other with less than a 3/4" gap between each sensor.

NOTE: When properly installed, the Lockly logo blinks red when door opens and closes.
INSTALLING STRIKE PLATE

Use the supplied door strike or use your existing as long as deadbolt operates smoothly without binding or catching.

because doors and frames vary in design it may be necessary to make slight adjustments to your strike plate and/or dust box in order to ensure smooth deadbolt operation. This is very important. If the deadbolt is binding or catching in any way the lock will sound an alarm (rapid beeping) indicating it cannot close due to misalignment and/or excessive rubbing or binding.
DOWNLOAD LOCKLY APP
You have completed the Lockly physical lock installation. To enable live monitoring and voice control with Google Assistant or Amazon Alexa, you will need to setup the included Secure Link Wi-Fi hub and pair it with the Lockly Secure Pro deadbolt smart lock door sensors.
Before connecting Secure Link Wi-Fi hub download the Lockly app on your smartphone. It's required to finish setup and to set (pair) the connection between hub and lock.
Scan or visit Lockly.com/app


SETTING UP THE SECURE LINK WI-FI HUB
To set up your Lockly Secure Pro, choose an appropriate location for the Secure Link Wi-fi Hub for optimum performance (see below). For optimum connectivity, it is recommended that the hub be no further away from the lock than 30 feet (9 meters).
During the setup process position yourself between the lock and the Secure Link Wi-Fi Hub—ideally no more than 30 feet (9 meters) apart. Ensure your iOS or Android device has both Bluetooth and Wi-Fi enabled.

TIP: The Secure Link requires a strong wireless signal for optimal performance. Make sure the Secure Link will be installed in a location with a strong 2.4 Ghz wireless signal. Sometimes distances between Wi-Fi hub and lock can vary due to circumstances. If you are having difficulty setting up optimal range of 30/ft or less, we're here to help. Call our customer care team: (669) 500 8835, or visit Lockly.com/help for suggestions and troubleshooting tips.
SECURE LINK WI-FI HUB SETUP
Plug the Secure Link Wi-Fi Hub into the 5V 1A USB AC adapter and plug the AC adapter to your wall socket.

Once you have confirmed that your Secure Link Wi-Fi Hub is ready to connect to your lock, open the Lockly App from your smartphone. Make sure you are standing between the Wi-Fi hub and Lockly smart lock, then Add New Device and follow the on screen instructions.
CONNECTING YOUR LOCKLY SECURE PRO
The App will take you through the following steps, make sure the smart lock has been properly installed. You will need your activation card that is included in the box to proceed.


Set the Admin Code
Confirm lock password

Password setting OK

Plug in your Secure Link and Click "YES"

Set Wi-Fi

Click "Yes" when the green light is on

Successfully Added

Congratulations! Your Lockly Secure Pro is now set up. You may proceed to Add the Door Sensors.
Smart Home Ready. VOICE CONTROL
Hands-free voice control
Control and check your status using only your voice with Amazon Alexa or Google Assistant-enabled devices.

To setup your lock to work with either voice assistant, download the Amazon Alexa or Google Home App and add a new Amazon Alexa Skill or Lockly Action on Google.

TIP: In Google Home or Amazon Alexa app, add Lockly skill for Alexa or Lockly Action on Google, then follow on screen instructions. See full list of commands, help videos, or troubleshooting your Lockly at https://Lockly.com/help
INSTALLATION OVERVIEW & PARTS LIST

Connect with us
@meetlockly | #Lockly

We're here to help!
Email: help@Lockly.com

Lockly.com/help
Documents / Resources
References
![lockly.com]() Product Registration - Lockly Support Desk
Product Registration - Lockly Support Desk![lockly.com]() Product Registration - Lockly Support Desk
Product Registration - Lockly Support Desk![lockly.com]() Download Lockly App for iOS and Android | Lockly®
Download Lockly App for iOS and Android | Lockly®![www.apple.com]() App Store - Apple
App Store - Apple![play.google.com]() Google Play
Google Play![lockly.com]() Product Registration - Lockly Support Desk
Product Registration - Lockly Support Desk

Download manual
Here you can download full pdf version of manual, it may contain additional safety instructions, warranty information, FCC rules, etc.
Download Lockly SECURE PRO, PGD728W - Fingerprint Deadbolt Manual
Advertisement


Need help?
Do you have a question about the SECURE PRO and is the answer not in the manual?
Questions and answers