Table of Contents

Subscribe to Our Youtube Channel
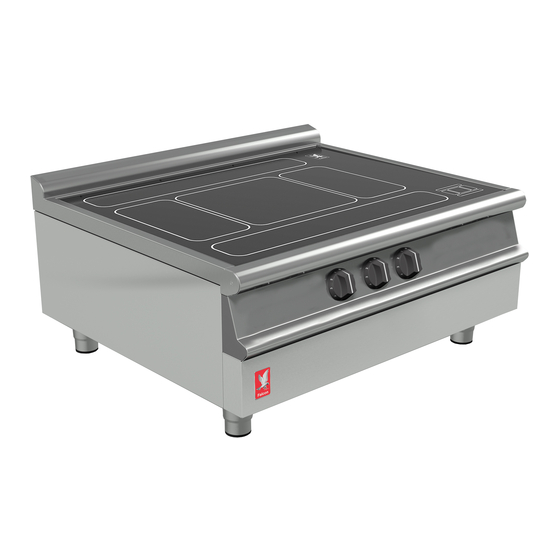
Related Manuals for Falcon DOMINATOR PLUS E3907I


Summary of Contents for Falcon DOMINATOR PLUS E3907I
- Page 1 User, installation, and servicing instructions INDUCTION SOLIDTOP COUNTERTOP E3907I Read these instructions before use DATE PURCHASED: MODEL NUMBER: SERIAL NUMBER: DEALER: SERVICE PROVIDER: T101075 Rev No 3 Published: 30/10/2023...
- Page 2 Dear Customer Thank you for choosing Falcon Foodservice Equipment. This manual can be downloaded from www.falconfoodservice.com or scan here: IMPORTANT: Please keep this manual for future reference. Falcon Foodservice Equipment HEAD OFFICE Wallace View, Hillfoots Road, Stirling. FK9 5PY. Scotland.
-
Page 3: Table Of Contents
CONTENTS SYMBOLS ......................... 1 SAFETY GUIDANCE ....................2 GENERAL SAFETY ....................2 INSTALLATION SAFETY ..................4 ELECTRICAL SAFETY ................... 4 FIRE SAFETY ......................5 MAINTENANCE SAFETY ..................6 APPLIANCE INFORMATION ..................8 OPERATION ......................9 COMPONENT PARTS ..................10 CONTROLS ......................11 USING THE APPLIANCE .................. - Page 4 SITING / CLEARANCES ..................26 ELECTRIC SUPPLY & CONNECTION ..............27 COMMISSIONING ....................29 INSTRUCTION TO USER ..................29 SERVICING ......................30 CONTROL PANEL REMOVAL ................30 REAR FAN COVER REMOVAL ................30 FUSE REMOVAL ....................31 CONTROL SWITCHES REMOVAL ..............32 HOB COOLING THERMOSTAT REMOVAL ............
-
Page 5: Symbols
1.0 SYMBOLS NON-IONISING WARNING RISK OF SHOCK RISK OF FIRE ELECTROMAGNETIC RADIATION SCREWDRIVER SPANNER SOCKET... -
Page 6: Safety Guidance
2.0 SAFETY GUIDANCE 2.1 GENERAL SAFETY 2.1.1 These instructions are only valid if the country code appears on the appliance. If the code does not appear on the appliance, refer to the technical instructions for adapting the appliance to the conditions for use in that country. - Page 7 2.1.10 Risk Assessment: As part of managing the health and safety of your business you must control any risks identified in your commercial kitchen. To do this you need to think about what might cause harm to people and decide whether you are taking reasonable steps to prevent that harm. This is known as risk assessment.
-
Page 8: Installation Safety
2.2 INSTALLATION SAFETY 2.2.1 Installation must meet national or local regulations. Attention must be paid to safety (installation & use) regulations, health and safety at work act, local and national building regulations, fire precautions act. 2.2.2 The installer must instruct the responsible person(s) of the correct operation and maintenance of the appliance. -
Page 9: Fire Safety
2.4 FIRE SAFETY OPERATOR COMPETENCY AND TRAINING 2.4.1 Ensure you are trained in the safe and proper use of the Induction Range and know how to turn it off and switch the power off at the mains. 2.4.2 Ensure you are familiar with the kitchen fire safety procedures and the location and proper use of correct fire safety equipment. -
Page 10: Maintenance Safety
2.5.8 If the thermostats or capillaries are damaged, then do not turn the appliance on and contact Falcon or you approved service provider to undertake the necessary repairs. 2.5.9 To obtain maximum performance from this unit regular servicing of the appliance should be undertaken to ensure correct operation, it is functioning as intended, and safe to use. - Page 11 IMPORTANT INFORMATION ELECTRICAL SAFETY AND ADVICE REGARDING SUPPLEMENTARY ELECTRICAL PROTECTION Commercial kitchens and foodservice areas are environments where electrical appliances may be located close to liquids or operate in and around damp conditions or where restricted movement for installation and service is evident. The installation and periodic inspection of the appliance should only be undertaken by a qualified, skilled, and competent electrician;...
-
Page 12: Appliance Information
3.0 APPLIANCE INFORMATION These appliances have been UKCA/CE-marked based on compliance with the Gas Appliance Regulations/Product Safety and Metrology Regulations for the Countries, Gas Types and Pressures as stated on the data plate A - Serial No B - Model No C- Gas Category D –... -
Page 13: Operation
4.0 OPERATION IF GLASS-CERAMIC TOP IS CRACKED OR BROKEN IMMEDIATELY DISCONNECT APPLIANCE FROM POWER SUPPLY AND CONTACT YOUR SERVICE AGENT. THE AIR INTAKE FILTERS MUST BE IN POSITION DURING OPERATION IT SHOULD BE CLEANED REGULARLY AND DO NOT OBSTRUCT AIR FILTER ENTRY BELOW. USERS MUST BE MADE AWARE THAT INDIVIDUALS FITTED WITH A PACEMAKER SHOULD CONSULT THEIR DOCTOR IF IN A CLOSE PROXIMITY TO THIS UNIT. -
Page 14: Component Parts
4.1 COMPONENT PARTS Glass Hob Filter Hob Zone Control Switch... -
Page 15: Controls
4.2 CONTROLS Power neon (red) Induction zone indicator Induction control switch Induction zone digital display... -
Page 16: Using The Appliance
4.3 USING THE APPLIANCE 4.3.1 Ensure you use the correct size of pot for each zone. Recommended pot sizes are in the images below. Front and rear zone Ø120 – Ø250 <Ø120 Centre zone Ø120 – Ø300 <Ø120 Left hand and right-hand zone. Ø120 –... -
Page 17: Do Not Place Pot Or Pan Over Digital Display
4.3.3 Ensure you use a clean flat bottom pan. 4.4 DO NOT PLACE POT OR PAN OVER DIGITAL DISPLAY 4.4.1 This can result on digital display overheating. 4.5 WARNING WHEN USING MULTIPLE PANS ON THE SAME HOB 4.5.1 Do not allow pans to touch each whilst in use. Pans contacting each can result stray electrical flows: 4.6 BUZZING NOISE OR TONE WHEN IN OPERATION When using large empty pans that straddle multiple zones, you may experience a buzzing... -
Page 18: Hob Cooking Zone Energy Layout
4.7 HOB COOKING ZONE ENERGY LAYOUT Each zone has a different maximum power availability. See below diagram of layout: For example: When boiling we recommend using the centre zone and once boiled move pot to rear or side zone to maintain a simmer. -
Page 19: Hob Settings 1-9
4.8 HOB SETTINGS 1-9 4.8.1 Each cooking zone is controlled by a marked, variable control from 1 (lowest) to 9 (highest). 4.9 PAN DETECTION 4.9.1 This prevents the zones being turned on without a pan being present. It also switches the zone off as soon as a pan is removed. -
Page 20: How To Operate
4.12 HOW TO OPERATE 4.12.1 To adjust settings, turn the control switch clockwise and select your preference incrementally. Note: As per solid top the centre zone or “bullseye” has the strongest output. Moving towards the sides, rear and front the output decreases. These zones do not deliver the same power output as the centre. -
Page 21: The Do Not's And The Do's With The Appliance
4.15 THE DO NOT’S AND THE DO’S WITH THE APPLIANCE: • Never leave any commercial equipment unattended, whilst operational. • Take care not to excessively overheat pans and pots beyond 1 smoking point. • Especially take care with dry pans and pots. •... -
Page 22: Cleaning And Maintenance
5.0 CLEANING AND MAINTENANCE When removing heavy items to aid cleaning or maintenance particular care should be taken. A manual handling risk assessment is the best way to determine the level of risk to anyone using or maintaining this equipment. To help with such an evaluation we have included the weights of individual components that may present significant risk. -
Page 23: Cleaning
5.1 CLEANING 5.1.1 Switch off appliance and allow appliance to cool down. CLEAN THE AIR INTAKE FILTERS REGULARLY. FAILURE TO CLEAN THE FILTER REGULARLY MAY CAUSE PROBLEMS THAT WILL NOT BE COVERED BY WARRANTY. FOR GUIDANCE WOULD RECOMMEND WEEKLY CLEANING INCLUDING DAILY INSPECTION TO DETERMINAL THE STATE OF THE FILTERS. -
Page 24: Maintenance
5.2 MAINTENANCE MAINTENANCE CHECK REGULAR SERVICING OF THE APPLIANCE SHOULD BE UNDERTAKEN TO ENSURE CORRECT OPERATION, IT IS FUNCTIONING AS INTENDED, AND SAFE TO USE. WE RECOMMEND SERVICING AFTER 2,500 HOURS OF USE, OR ANNUALLY, WHICHEVER COMES FIRST. ANY MAINTENANCE SCHEDULE SHOULD BE CARRIED OUT IN ACCORDANCE WITH SFG20 MAINTENANCE SCHEDULE. -
Page 25: Maintenance - Cooling Fans
5.3 MAINTENANCE - COOLING FANS 5.3.1 The recommended maintenance schedule for the hob cooling fans is: Part to check Type of inspection Frequency Protection against accidental contact with fan Visual Min ½ yearly Check fan for damage Visual Min ½ yearly Fan fixed in place correctly Visual Min ½... -
Page 26: Specification
6.0 SPECIFICATION 6.1 APPLIANCE WEIGHT TABLE: APPLIANCE UNIT WEIGHT (kg) PACKED WEIGHT (kg) E3907I 6.2 ELECTRICAL DATA TABLE: The figures in the table below ate based on the maximum theoretical power draw if all zones were covered by pots capable of drawing maximum power. Power 21.5kW Supply voltage... -
Page 27: Dimensions / Connection Locations
7.0 DIMENSIONS / CONNECTION LOCATIONS... -
Page 28: Transport & Installation
8.0 TRANSPORT & INSTALLATION ELECTRICAL SAFETY AND ADVICE REGARDING SUPPLEMENTARY ELECTRICAL PROTECTION Commercial kitchens and foodservice areas are environments where electrical appliances may be located close to liquids or operate in and around damp conditions or where restricted movement for installation and service is evident. The installation and periodic inspection of the appliance should only be undertaken by a qualified, skilled, and competent electrician;... -
Page 29: Transport & Positioning
8.1 TRANSPORT & POSITIONING GENERAL WARNINGS FOR TRANSPORT: 8.1.1 Observe the Maximum load and stacking limits. 8.1.2 Follow the indications shown on the packaging, any instructions on the equipment, including those on the points where forklift trucks cannot be used. 8.1.3 Danger of crushing during transportation due to the weight of the appliance. -
Page 30: Siting / Clearances
Please ensure that any plastic coatings are removed prior to use. Before operation, the appliance should be thoroughly cleaned and dried. Discolouration of heated parts is caused by factory testing to ensure a satisfactory unit. It does not affect quality or performance. 8.2 SITING / CLEARANCES THIS APPLIANCE CAN BE SITED AGAINST A COMBUSTABLE WALL. -
Page 31: Electric Supply & Connection
8.3 ELECTRIC SUPPLY & CONNECTION The location of the electrical connection is as seen in section 5. this unit is suitable for AC supplies only. To install the mains cable, remove terminal cover and feed the cable through the cable gland and connect the mains supply to the terminal block. - Page 32 A suitable supply cord is supplied that conforms to BSEN 50525-2-51, cable type JZ-500 HMH-C. This appliance is designed to, and must, be connected to suitably rated isolator. A suitable rated isolating switch with contact separation of at least 3mm in all poles must be installed and wiring executed in accordance with relevant regulations.
-
Page 33: Commissioning
8.4 COMMISSIONING Refer to section 4.0 for operation. Carry out the following operation: 8.4.1 Turn on mains power supply on. 8.4.2 Ensure red neon(s) illuminates, 8.4.3 Ensure LED on Hob Illuminates and begins to flash. 8.4.4 Switch controls to “0” 8.4.5 Place a pan suitable for induction cooker tops, filled with water, upon a cooking zone. -
Page 34: Servicing
9.0 SERVICING 9.1 CONTROL PANEL REMOVAL BEFORE ATTEMPTING ANY MAINTENANCE, ISOLATE THE APPLIANCE AT THE MAINS SWITCH AND TAKE STEPS TO ENSURE THAT IT IS NOT INADVERTENTLY SWITCHED ON. 9.1.1 9.1.1 Remove fixings at top control panel and lower control panel. 9.1.2 When replacing panel, take care not to trap any connecting wires. -
Page 35: Fuse Removal
9.3 FUSE REMOVAL 9.3.1 Remove control panel as detailed in section 9.1. 9.3.2 9.3.2 Remove fuse... -
Page 36: Control Switches Removal
9.4 CONTROL SWITCHES REMOVAL 9.4.1 Remove control panel as detailed in Section 9.1. 9.4.2 9.4.2 Remove switch connections and note wire arrangement. Pull off control knob. Undo fixings to release switch. 9.4.3 Fit replacement switch, ensuring that shake proof washers are fitted below the fixings. 9.5 HOB COOLING THERMOSTAT REMOVAL 9.5.1 The hob chamber temperature is controlled with a thermostat, the thermostat is self- resetting. -
Page 37: Front Cooling Fan Removal
9.6 FRONT COOLING FAN REMOVAL 9.6.1 Remove control panel as detailed in section in 9.1. 9.6.2 Disconnect generator power cables as detailed in section 9.8. 9.6.3 9.6.3 Rotate catch on generator tray to enable tray to slide out. 9.6.4 Gently slide out generator tray ensuring not to snag any cabling within the unit. 9.6.7 9.6.5 9.6.6... - Page 38 9.6.9 When re-fitting ensures all electrical connections are restored as detailed in wiring diagram. Note: Two fans at front of appliance induce cold air from outside of the appliance.
-
Page 39: Release & Open Hob
9.7 RELEASE & OPEN HOB BEFORE ATTEMPTING ANY MAINTENANCE, ISOLATE THE APPLIANCE AT THE MAINS SWITCH AND TAKE STEPS TO ENSURE THAT IT IS NOT INADVERTENTLY SWITCHED ON. 9.7.1 9.7.1 Remove fixings at top control panel. 9.7.2 9.7.2 Tilt hob up and lift hob stay into position. Insert cranked end into slot on underside of hob.as shown above. -
Page 40: Led Digital Display Pcb Replacement
9.8 LED DIGITAL DISPLAY PCB REPLACEMENT 9.8.1 Open Hob as detailed in section 9.7 9.8.2 Un-do two screws on LED circuit board guard. 9.8.3 9.8.2 LED PCB BOARD IS SUPPLIED IN A ESD BAG. WHEN REPLACING ENGINEER SHOULD TOUCH THE HOB SURFACE TO DISCHARGE HINSELF BEFORE REMOVING REPLACEMENT BOARD FROM BAG. -
Page 41: Disconnect Generator Power Cables
9.9 DISCONNECT GENERATOR POWER CABLES BEFORE ATTEMPTING ANY MAINTENANCE, ISOLATE THE APPLIANCE AT THE MAINS SWITCH AND TAKE STEPS TO ENSURE THAT IT IS NOT INADVERTENTLY SWITCHED ON. 9.9.1 Remove rear fan cover as detailed in section 9.2. 9.9.2 Disconnect generator power leads from both generators. 9.9.2 9.9.2 9.10 DISCONNECT COIL POWER CABLES... - Page 42 9.10.6 Disconnect coil power cable and screen from each generator. 9.10.6 (Generator A shown) 9.10.6 (Generator B shown) 9.10.7 When re-fitting ensures all electrical connections are restored as detailed in the wiring diagram.
-
Page 43: Memory Stick Removal
9.11 MEMORY STICK REMOVAL Generators have been fitted with external Memory sticks; this contains specific operating parameters for the appliance. 9.11.1 Remove control panels as detailed in section 9.1. 9.11.2 Disconnect generator power cables as detailed in section 9.9. 9.11.3 Rotate catch on generator tray. 9.11.4 Gently slide out generator tray ensuring not to snag any cabling within the unit. -
Page 44: Generator Removal
9.12 GENERATOR REMOVAL BEFORE ATTEMPTING ANY MAINTENANCE, ISOLATE THE APPLIANCE AT THE MAINS SWITCH AND TAKE STEPS TO ENSURE THAT IT IS NOT INADVERTENTLY SWITCHED ON. 9.12.1 Remove control panel as detailed in section 9.1. 9.12.2 Release and open hob as detailed in section 9.7. 9.12.3 Disconnect relevant generator power cables as detailed section 9.9. - Page 45 9.12.5 Disconnect relevant earth cable from relevant generator to coil carrier supports. 9.12.6 Disconnect relevant coil power cables as detailed in section 9.10. 9.12.7 Un-plug relevant data & sensor cables from relevant generator 9.12.5 (Generator B shown) 9.12.5 (Generator A shown) 9.12.8 Un-do two screws on fixing strap.
-
Page 46: Induction Heater Coils Removal
9.13 INDUCTION HEATER COILS REMOVAL BEFORE ATTEMPTING ANY MAINTENANCE, ISOLATE THE APPLIANCE AT THE MAINS SWITCH AND TAKE STEPS TO ENSURE THAT IT IS NOT INADVERTENTLY SWITCHED ON. 9.13.1 Release and open hob as detailed section 9.7. 9.13.2 Carefully relocate control panel below the unit without disconnecting wiring. 9.13.2 9.13.2 9.13.3 Disconnect relevant coil power wires as detailed in section 9.10. -
Page 47: Rear Cooling Fan Removal
9.14 REAR COOLING FAN REMOVAL 9.14.1 Remove fan rear cover as per section 9.2. 9.14.2 Disconnect relevant fan leads from terminal block and undo four screws on fan to release. 9.14.2 Note: Two fans extract the hot air from inside the appliance. 9.14.3 When re-fitting ensures all electrical connections are restored as detailed in the wiring diagram. -
Page 48: Capictor Removal
9.15 CAPICTOR REMOVAL BEFORE ATTEMPTING ANY MAINTENANCE, ISOLATE THE APPLIANCE AT THE MAINS SWITCH AND TAKE STEPS TO ENSURE THAT IT IS NOT INADVERTENTLY SWITCHED ON. WARNING: UNIT IS FITTED WITH A CAPACITOR BEFORE REMOVING ANY LINKS FROM THE MAINS TERMINAL OR DISCONNECTING THE MAINS LEADS, ENSURE THE CAPACITOR IS DISCHARGED OF ANY STORED VOLTAGE. -
Page 49: Circuit Diagrams
9.16 CIRCUIT DIAGRAMS 9.16.1 E3907I Circuit diagram... -
Page 50: Wiring Diagrams
9.17 WIRING DIAGRAMS 9.17.1 E3907i Fan & neon wiring diagram... - Page 51 9.17.2 E3907i Generator A diagram...
- Page 52 9.17.3 E3907i Generator B diagram...
- Page 53 9.17.4 E3907i Control and data wiring diagram...
-
Page 54: Accessories
10.0 ACCESSORIES 10.1 ENERGY OPTIMIZATION KIT (DIN 18875) Note(s) a) 8-off 2 Core SIHF-J 0.34²mm cables assemblies would be also required. These are not supplied due variable length requirements. b) See energy optimisation connection manual “T101083” for further wiring. information. -
Page 55: Fault Finding
11.0 FAULT FINDING 11.1 ERROR CODES 11.1.1 Most faults can be rectified by simply switching unit off for 10 seconds. After this time, turn power back on at mains supply. If fault continues to occur after such action, then please refer to the table. This will provide a solution to rectify the condition. POSSIBLE CAUSE OF ERROR CODE DESCRIPTION... - Page 56 POSSIBLE CAUSE OF • ERROR CODE DESCRIPTION REMEDY ERROR Error/interruption of data • Communication error Call the engineer • Reduce the cooking level. • Switch of appliance and let the appliance cool down. Hob excessive temperature • ControlInduc® pans should not be used in continuous operation.
- Page 57 POSSIBLE CAUSE OF ERROR CODE DESCRIPTION REMEDY ERROR Check mains voltage. Check the mains connection. • Overload Call the engineer. Magnetic coupling to others Induction systems reduce. Check the connection of application-specific Application sensor connection temperature sensor of coil A •...
- Page 58 POSSIBLE CAUSE OF • ERROR CODE DESCRIPTION REMEDY ERROR Turn off customer specific coil and let cool-down. • Coil excess temperature Call the engineer. Change the configuration of the device. Check wiring of temperature sensor of customer-specific Connection-error coil coil. •...
- Page 59 POSSIBLE CAUSE OF • ERROR CODE DESCRIPTION REMEDY ERROR • Turn the knob briefly off Protection of restart after Change the configuration of and select cooking level disruption of current the device. again. • Call engineer • Switch off the cooking Insufficient air flow to zone and allow to cool High heat sink temperature...
-
Page 60: Spare Parts
12.0 SPARE PARTS PART DESCRIPTION Power neon red LED digital display pcb Control panel Control knob Knob coding switch Front hob cooling fan Fuse Capacitor Rear hob cooling fan Hob cooling thermostat Generator A Generator B Memory Stick ID1 Memory Stick ID2 Memory Stick ID3 Memory Stick ID4 Induction Heater on Carrier (Front or Rear Zone) -
Page 61: Service Information
1. Model number – found on data plate. 2. Serial number – found on data plate. 3. Brief description of the issue To contact Falcon for a warranty issue dial (UK only) 01786 455 200 and select Warranty Issues from the menu.
Need help?
Do you have a question about the DOMINATOR PLUS E3907I and is the answer not in the manual?
Questions and answers