Falcon G2962 Installation And Servicing Instructions
Manual-tilt & auto-tilt bratt pans
Hide thumbs
Also See for G2962:
- User instructions (6 pages) ,
- User instructions (5 pages) ,
- Installation and servicing instruction (11 pages)
Table of Contents
Advertisement
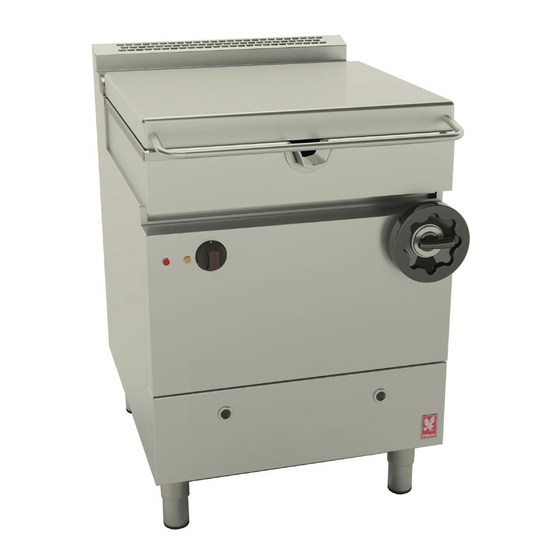
G2962, G2994
Manual-tilt Bratt Pans
G2965 and G2995
Auto-tilt Bratt Pans
INSTALLATION and SERVICING
INSTRUCTIONS
These appliances must be installed and serviced by a qualified person as stipulated by the Gas Safety (Installation &
Use) Regulations.
IMPORTANT
The installer must ensure that the installation of the appliance is in conformity with these instructions and National Regula tions
in force at the time of installation. Particular attention MUST be paid to -
I.E.E Regulations for Electrical Installations
Electricity At Work Regulations
Gas Safety (Installation & Use) Regulations
Health And Safety At Work etc. Act
Local and National Building Regulations
These appliances have been CE-marked on the basis of compliance with the Gas Appliance Directive, EMC and Low Voltage
Directive for the Countries, Gas Types and Pressures as stated on the data plate.
WARNING - TO PREVENT SHOCKS, ALL APPLIANCES WHETHER GAS OR ELECTRIC MUST BE EARTHED.
On completion of the installation, these instructions should be left with the Engineer -in-Charge for reference during servicing.
Further to this, The Users Instructions should be handed over to the User, having had a demonstration of the operation and
cleaning of the appliance.
IT IS MOST IMPORTANT THAT THESE INSTRUCTIONS BE CONSULTED BEFORE INSTALLING AND COM MISSIONING
THIS APPLIANCE. FAILURE TO COMPLY WITH THE SPECIFIED PROCEDURES MAY RESULT IN DAMAGE OR THE
NEED FOR A SERVICE CALL.
PREVENTATIVE MAINTENANCE CONTRACT
In order to obtain maximum performance from this appliance we would recommend that a maintenance contract be arranged
with SERVICELINE. Visits may then be made at agreed intervals to carry out adjustments and repairs. A quotation for this
service will be given upon request to the contact numbers below.
WEEE Directive Registration No. WEE/DC0059TT/PRO
At end of appliance life, dispose of appliance and any replacement parts
in a safe manner, via a licens ed waste handler.
Appliances are designed to be dismantled easily and recycling of all
material is encouraged whenever practicable.
Falcon Foodservice Equipment
HEAD OFFICE AND WORKS
Wallace View, Hillfoots Road, Stirling. FK9 5PY. Scotland.
SERVICELINE CONTACT
Phone: 01438 363 000
Fax: 01438 369 900
Fire Precautions Act
Detailed recommendations are contained in Institute of
Gas Engineers published documents:
IGE/ UP/ 1, IGE/ UP/ 2
BS6173 and BS5440
T100723 Ref. 3
Advertisement
Table of Contents

Related Manuals for Falcon G2962


Summary of Contents for Falcon G2962
- Page 1 G2962, G2994 Manual-tilt Bratt Pans G2965 and G2995 Auto-tilt Bratt Pans INSTALLATION and SERVICING INSTRUCTIONS These appliances must be installed and serviced by a qualified person as stipulated by the Gas Safety (Installation & Use) Regulations. IMPORTANT The installer must ensure that the installation of the appliance is in conformity with these instructions and National Regula tions in force at the time of installation.
- Page 2 Warranty Policy Shortlist Warranty does not cover :- Correcting faults caused by incorrect installation of a product. Where an engineer cannot gain access to a site or a product. Repeat commission visits. Replacement of any parts where damage has been caused by misuse. Engineer waiting time will be chargeable.
-
Page 3: Section 1 - Installation
HEIGHT WEIGHT WEIGHT MODEL required to be able to remove any such products that may occur, safely and efficiently. G2962 G2965 Recommendations for V entilation of Catering G2994 Appliances are provided in BS5440: 2. For multiple G2995 installations, requirements for individual appliances should be added together. - Page 4 Model NA TURAL PROPANE GREEN and YELLOW. 35.5 mbar The wire coloured BLUE must be connected to G2962/2965 14.2 in. w.g. 15 mbar terminal marked with letter N or coloured BLA CK. 6 in. w.g. 35 mbar The wire coloured BROWN must be connected to G2994/2995 14 in.
-
Page 5: Section 2 - Assembly And Commissioning
2.5 PRE-COMMISSIONING CHECK SECTION 2 - ASSEMBLY and Important COMMISSIONING After installation, the engineer should check that all 2.1 ASS EMBLY gas connections are tight and do not leak. Also check that all electrical connections are secure. Position appliance and level by adjusting leg levelling feet or castors as appropriat e. -
Page 6: Section 3 - Servicing And Conversion
3.4.2 Removal Of Cross Lighting Burner Remove main control panel. (S ee Section 3.2) 3.1 CONV ERSION Tilt pan to fully raised position. On G2962/G2994 When changing from one gas family to another models, temporarily re-fit handle (with key) upon always ensure the following - shaft. - Page 7 The unit is located on LH side of gas control unit mounting bracket secured by two fixings. On G2962/G2994 models, temporarily replace tilting handle (with key) and fully raise pan. A faulty unit cannot be serviced and must be On G2965 and G2995, drop down door must be replaced.
- Page 8 To Replace 3.8.2 To Check /Adjust appliance operating gas pressure. (Natural Gas Appliances Only) a) Carry out operations (a) and (b) (as Section 3.7.2). a) Refer to Figure 1. Remove screw from outlet test b) Remove phial clamp from pan underside. point and connect manometer.
- Page 9 3.8.3 To Check appliance operating gas pre ssure 3.10.3 Checkout Multifunctional Control for (Propane Appliances Only) complete function. Note: On Propane applianc es, governor override Put lighting sequenc e into operation and observe, screw should be fitted, and no gas pressure through a complete cycle that main burners function adjustment is possible.
-
Page 10: Gas Solenoid Valv E
Replace in reverse order with main rod and adjusting screws fully home to prevent damage to switch when 3.13 TILT SWITCH MECHANISM (G2962/2994 lowering pan prior to setting. Models) This switch is located at base of screw jack. Access... -
Page 11: Change Over Switch
3.14.3 To Set 3.18 LINEAR POW ER P ACK (G2965/G2995 There are two ways to set switch: models only) To Remove a) For coarse setting, use main rod. b) For fine and final setting, use screw that presses a) Remove both panels. on microswitch lever. -
Page 12: Section 4 - Spare Parts
SECTION 4 - SPARE PARTS When ordering spare parts, always quote the appliance type and serial number. This information will be found on the data badge attached to the cont rols cover behind the controls compartment door. Short Spares Li st ...
Need help?
Do you have a question about the G2962 and is the answer not in the manual?
Questions and answers