Wine Guardian D088 Installation, Operation And Maintenance Manual
Ducted self-contained wine cellar cooling systems
Hide thumbs
Also See for D088:
- Installation, operation and maintenance manual (96 pages) ,
- Operating manual (58 pages) ,
- Quick start installation manual (24 pages)
Table of Contents
Advertisement
Quick Links
Ducted Self-Contained
Wine Cellar Cooling Systems
Installation, Operation and Maintenance Manual
60Hz Models: D025, D050, D088, D200
50Hz Models: WG40, WG75, WG100, WG175
Manufactured by
Syracuse, NY
wineguardian.com
airinnovations.com
Wine Guardian reserves the right, without notice, to make changes to this document at its sole discretion.
Please visit our web site for the most current version of the Wine Guardian manual and other literature.
Wine Guardian is a registered trademark (2,972,262) of Air Innovations, Inc.
Edition 10/2023 (Original Instructions)
© Air Innovations 2021
15H0325-00
Part No.
REV: A
1
Advertisement
Table of Contents

Related Manuals for Wine Guardian D088


Summary of Contents for Wine Guardian D088
- Page 1 Wine Guardian reserves the right, without notice, to make changes to this document at its sole discretion. Please visit our web site for the most current version of the Wine Guardian manual and other literature. Wine Guardian is a registered trademark (2,972,262) of Air Innovations, Inc.
-
Page 2: Table Of Contents
Controller Specification........................ 30 Mounting the Remote Interface Controller (Wired) ............... 31 Mounting the Remote Interface Controller (Wireless) ............32 Installation of the Wine Guardian Remote Sensor ..............33 Mounting the Remote Sensor (Wired) ..................33 Mounting the Remote Sensor (Wireless) ................. 35 Remote Sensor Pairing –... - Page 3 Cleaning the Humidifier (Optional) ....................48 Maintenance Schedule ........................48 Monthly ............................. 48 Yearly..............................48 Troubleshooting ............................. 49 Resetting the High-Pressure Switch ..................... 49 Contact and Warranty ........................... 51 Contact Information ........................... 52 Warranty ............................... 52...
- Page 4 Note: This equipment has been tested and found to comply with the limits for a Class B digital device, pursuant to part 15 of the FCC Rules. These limits are designed to provide reasonable protection against harmful interference in a residential installation. This equipment generates, uses and can radiate radio frequency energy and, if not installed and used in accordance with the instructions, may cause harmful interference to radio communications.
-
Page 5: Safety
When performing maintenance, always use the Lockout/Tagout procedure, which is described in this chapter. Observe the maintenance safety guidelines in the Wine Guardian Manual. Electrical Hazards - Working on the equipment may involve exposure to dangerously high voltage. Make sure you are aware of the level of electrical hazard when working on the system. -
Page 6: Lockout/Tagout Procedure
When receiving the unit, ensure the unit is undamaged and includes all ordered accessories. Note: Wine Guardian units are factory assembled and tested prior to shipment. Wine Guardian units are shipped in individual corrugated boxes. ✓ Lift at the designated handhold locations only or fully support from underneath. A shipment may include one or more boxes containing accessories. -
Page 7: Directory Of Terms
Review the Packing Slip to verify the following: ✓ Model # ✓ Factory Installed Options ✓ Unit Accessories If any items listed on the packing slip do not match your order information, contact the place of purchase immediately. Check the unit for these items: ✓... -
Page 8: General Overview
All wiring complies with NEC. Each unit is furnished with a sealed, UL- approved power cord and plug. All Wine Guardian 50Hz units carry the CE mark. Each unit is furnished with a sealed, CE- approved power cord and plug. - Page 9 F) you risk tripping the high-pressure switch. The water-cooled Wine Guardian system requires cooling water to be piped to the unit for proper operation. The cooling water absorbs the refrigerant heat through the unit’s water-cooled condenser coil. Warm water is then directed out of the unit back to the cooling water system.
- Page 10 Electric power is supplied by a single, factory-furnished cord and plug. All external controls are digital and proprietary to Wine Guardian products. Only the approved communication cable and Wine Guardian controllers are suitable for proper system operation.
-
Page 11: Accessories/Options
Instructions. Duct Collar Kits Ducting for the Wine Guardian is sold in kits by size for each unit. Each kit contains two adapter collars, one 25’ (7.3 meters) length of round flexible duct and two straps. The number of duct kits needed depends on the layout. The size of the kit depends on the model Wine Guardian selected. -
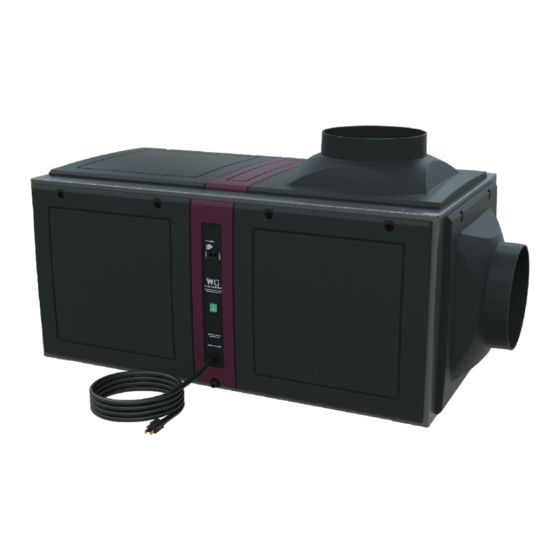
Page 12: Component Overview
Extended Compressor Warranty The Wine Guardian uses only the best commercially available compressors on the market. However, since the compressor is the single most expensive component in the unit, it is recommended that you purchase the extended warranty option. Component Overview Cabinet –... - Page 13 AIR-COOLED Fig. 1 Fig. 2...
- Page 14 WATER-COOLED Fig. 3 Fig. 4...
-
Page 15: Wiring Diagrams
Wiring Diagrams Fig. 5 (D025, D050, WG40, WG75, WG100) - Page 16 Fig. 7 (Pump control for water cooled units)
- Page 17 Fig. 8 (D088)
- Page 18 Fig. 9 (D200, WG175)
-
Page 19: Dimensions/Specifications
Dimensions/Specifications... - Page 20 Dimensional Data for 60Hz Models Chassis Type Chassis A Chassis B Model Number D025 D050 / D088 / D200 Dimensions - Nominal - add 0.375 inches for each grille A – Depth Inches 16.6 22.4 B – Height Inches 15.56 18.85...
- Page 21 Specifications Wine Guardian Specification Sheet – 60Hz models...
- Page 22 Wine Guardian Specification Sheet – 50Hz models...
-
Page 23: Installation
Prior to installation determine how best to mount the unit. Please ensure a 3’ minimum clearance for service work. Floor Mounting - Mount the Wine Guardian fan coil on the floor but elevate it 4” (10cm) as a minimum on a frame with a plywood surface to keep it away from water. Allow adequate space for the external drain. -
Page 24: Reducing Noise Generation
Ceiling Mounting - Construct a structurally sound, level platform to place the unit on when hanging it from the ceiling joists. The Wine Guardian system is NOT designed to be suspended from the top of the unit; it must be supported from the bottom. Place the unit on a platform to ensure that the unit is supported on all for corners. - Page 25 Use ductwork on the condenser section to redirect or absorb sound, to bring in outside air to the unit inlet, and/or to exhaust the hot air out of the ambient space. Ductwork Diameters (inches) – Wine Guardian 60 Hz units Evaporator (cold air side)
-
Page 26: Duct Collar And Panel Adjustment
Note: Uninsulated ducts and surfaces cause exposed metal to sweat which can cause a degradation of insulation, a loss of cooling capacity, and in some cases lead to water damage. Note: If the cooling unit is placed in a hot and humid location it could form condensation on the chassis. -
Page 27: Drain Line
DO NOT install an external trap on the drain line, every ducted wine guardian unit is built with an internal trap. Allow enough height for the drain line to function properly. If draining into a nearby sink, the unit must be elevated higher than the rim of the sink in order for the water to drain by gravity. - Page 28 Plug the unit into the wall outlet, gently pull on the plug to make sure it is tight. Fig. 1: Plug configurations Required For: Models D025/D050 -115VAC, 60Hz -NEMA 5-15P -NEMA 5-15R Required For: Models D088 -230VAC, 60Hz -NEMA 6-15P -NEMA 5-15R Required For: Models D200 -230VAC, 60Hz -NEMA 6-20P...
-
Page 29: Installing The Remote Interface And Communication Cable
IMPORTANT Regardless of wired or wireless, each Wine Guardian System can have a maximum of two (2) Remote Interface Controllers and three (3) Remote Sensors. -
Page 30: Additional Remote Interface
~WARNING~ Air movement though an unsealed opening in the wall will cause condensation damage to the controller. Use durable tape to seal the opening in the wall after applying insulation around the wire in the opening. Additional Remote Interface Prior to adding an additional remote interface to the system, you will have to change setting 30 on the first controller to give it a different address. -
Page 31: Mounting The Remote Interface Controller (Wired)
Mounting the Remote Interface Controller (Wired) 1. Remove the comm cable from the zip lock bag and attach it to the side of the Wine Guardian unit (Fig. 1). a. Route the communication cable within the wall and/or ceiling structure of the wine cellar to the desired controller mounting location. -
Page 32: Mounting The Remote Interface Controller (Wireless)
Mounting the Remote Interface Controller (Wireless) 1. Plan on mounting the remote interface controller on a solid surface away from doors, corners, air outlets, drafts or heat generating equipment. Do not mount the remote interface controller directly on an outside wall, a wall adjacent to a boiler room, or other hot area. -
Page 33: Installation Of The Wine Guardian Remote Sensor
Mounting the Remote Sensor (Wired) 1. Remove the comm cable from the zip lock bag and attach it to the side of the Wine Guardian unit. Route the communication cable within the wall and/or ceiling structure of the wine cellar to the desired controller mounting location. - Page 34 Plug in the communication cable to the remote sensor and mount the Remote Sensor to the wall. (Fig. 3) Reattach the sensor’s faceplate (Fig. 4) If multiple sensors are being used either connect each Sensor to each other in series using RJ9 cable or purchase a RJ9 Splitter (Fig.
-
Page 35: Mounting The Remote Sensor (Wireless)
Mounting the Remote Sensor (Wireless) 1. Plan on mounting the remote sensor on a solid surface away from doors, corners, air outlets, drafts or heat generating equipment. Do not mount the remote sensor directly on an outside wall, wall adjacent to a boiler room, or other hot area as this runs the risk of influencing its temperature readings. -
Page 36: Remote Sensor Pairing - Multiple Sensors (Wireless)
Remote Sensor Pairing – Multiple Sensors (Wireless) If using multiple remote temperature/humidity sensors in your application, refer to the figures and the procedure below to change each remote sensor’s device number (Three Remote Sensors maximum). Each Remote Sensor must have its own device number and must also be on the same RF channel (Setting 31) as the system they are being paired with. -
Page 37: Remote Interface Functions
“Humidity” setpoint. • Press the “Up” or “Down” arrows to adjust the humidity to the desired set point. Note: A Wine Guardian humidifier must be installed and Setting 6 set to “1” or “2” before the controller will let you change percent humidity. - Page 38 Setting 6. • Press the “Up” or “Down” arrow buttons to adjust to the desired setpoint. Factory default is zero (0). Zero (0) = No humidifier One (1) = Integral Wine Guardian mounted humidifier Two (2) = Stand-alone remote mounted humidifier...
- Page 39 5 minutes. Compressor anti-short cycling time is the amount of allowable time between compressor stop and restart. Rapid start/stop of compressors can cause premature failure. WINE GUARDIAN DOES NOT RECOMMEND SETTINGS LOWER THAN FACTORY DEFAULT. Defrost Setting 9 sensor •...
- Page 40 Defrost cut- Setting 11 • Press "Settings" button to advance to temperature Setting 11. • Press the “Up” or “Down” arrow buttons to adjust to the desired setpoint. This setting is adjustable from 35°F to 50°F. Factory default is 40°F. Note: This setpoint must be 1°F/°C higher than setting 10.
- Page 41 RH offset Setting 14 • Press “Settings” button to advance to Setting 14 • Press the “Up” or “Down” buttons to adjust to the desired setpoint. This setting allows the adjustment of %RH reading by +/-10%. Factory default is 0%RH. Differential Setting 15 temperature...
- Page 42 System type Setting 20 defaults System setting. DO NOT CHANGE. Reserved Settings 21-29 Reserved for additional fields. Define remote Setting 30 • Press “Settings” button to advance to user interface Setting 30 • Press the “Up” or “Down” buttons to adjust to the desired setpoint.
- Page 43 Setting 41 Thermistor 2 • Press “Settings” button to advance to No Longer Setting 41. Not Available Applicable Reserved for Thermistor Setting 42 Thermistor 3 • Press “Settings” button to advance to No Longer Setting 42. Not Available Applicable Reserved for Thermistor Setting 43 Thermistor 4 •...
-
Page 44: Alarm Codes
Setting 71 Default %RH • Press “Settings” button to advance to Setting 71. No setting adjustment. Initial relative humidity set point. Will revert to this setting upon loss of power. Setting 72 Default mode • Press “Settings” button to advance to Setting 72. - Page 45 Low humidity alarm Flashing humidity number along with (!) symbol will remain on screen until Flashing humidity humidity rises above the Low Humidity number Alarm set point (Setting 4). !1 = High Pressure THIS ALARM FORCES THE SYSTEM Switch Fault TO SHUT DOWN (!1) will remain on screen until the High Pressure reset switch has been reset.
-
Page 46: Start-Up
Start-Up • Check over the installation and ensure all wiring connections are correct • Examine all duct connections, grilles, and panels in case any are not connected • Start the unit • Check ducts and duct connections for any possible air leaks •... -
Page 47: Maintenance
Risk of Serious Injury Sharp Edges are present on the fan wheels, housing, fins, and coils Maintenance on Wine Guardian units requires working with high voltage and sheet metal with possible sharp edges. Only qualified personnel should perform maintenance. Some tasks require knowledge of mechanical and electrical methods. Make sure you are familiar with all hazards, general safety related procedures, and safety labels on the unit. -
Page 48: Flushing The Water Regulating Valve - Water-Cooled Only
Flushing the Water Regulating Valve – Water-Cooled Only To clear any sediment that may accumulate, valves may be manually flushed by inserting screwdrivers under both sides of the main spring and lifting upwards to flush the valve. Manual flushing does not affect valve adjustments. -
Page 49: Troubleshooting
Resetting the High-Pressure Switch High-Pressure Switch Has Shut Down the Unit Every Wine Guardian unit has a manual reset high pressure switch in the refrigeration system. This switch shuts the compressor and condenser down if the head pressure in the system is too high. It is intended to protect the compressor. Restricted airflow through the condenser is the most common reason for the pressure to become too high. - Page 50 Fig. 1 Please see the link below for a video on how to reset the High-Pressure Switch https://www.youtube.com/watch?v=TFGFTWZVeAs...
-
Page 51: Contact And Warranty
Contact and Warranty GENERAL Wine Guardian warrants, to the original buyer, its goods, and all parts thereof to be free from defects in material and workmanship for a period of two (2) years from the date of invoicing assuming NORMAL USE AND SERVICE. -
Page 52: Contact Information
Warranty The Wine Guardian unit serial number is noted on all packing lists and bills of lading and, along with shipping date, is kept on file at Wine Guardian for warranty purposes. All correspondence regarding warranty must include the model number and serial number of the unit involved.
Need help?
Do you have a question about the D088 and is the answer not in the manual?
Questions and answers