Advertisement
Quick Links
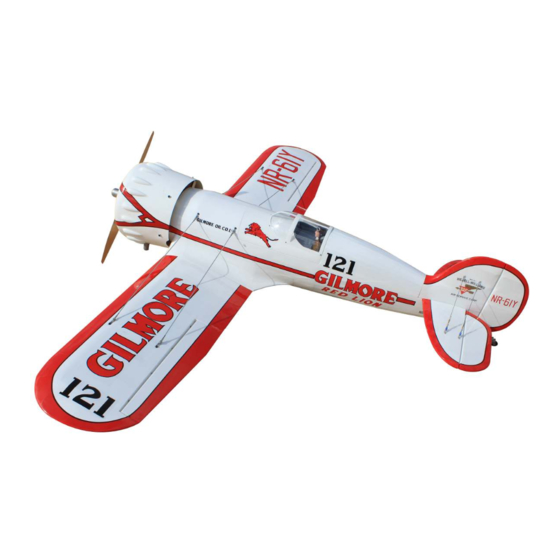
Code : SEA390
ASSEMBLY MANUAL
Speciications:
Wingspan----------------- 81 in---------------------- 205 cm.
Wing area----------------- 1222.2 sq.in------------- 72.4 sq.dm.
Weight--------------------- 20.9 lbs------------------- 9.5 kg.
Length--------------------- 62.5 in-------------------- 158.8 cm.
Engine size---------------- 40 - 60cc gasoline engine.
Motor 360/ 6000watt/ ESC 160A-200A/ Lipi 12s.
Electric propeller 24x10 - 25x12.
Radio----------------------- 6 channels with 6 digital servos.
1
Advertisement

Related Manuals for Seagull Models GILMORE RED LION RACER 40-60cc


Summary of Contents for Seagull Models GILMORE RED LION RACER 40-60cc
- Page 1 Code : SEA390 ASSEMBLY MANUAL Speciications: Wingspan----------------- 81 in---------------------- 205 cm. Wing area----------------- 1222.2 sq.in------------- 72.4 sq.dm. Weight--------------------- 20.9 lbs------------------- 9.5 kg. Length--------------------- 62.5 in-------------------- 158.8 cm. Engine size---------------- 40 - 60cc gasoline engine. Motor 360/ 6000watt/ ESC 160A-200A/ Lipi 12s. Electric propeller 24x10 - 25x12.
- Page 2 GILMORE RED LION RACER 40-60cc Instruction Manual. INTRODUCTION GILMORE RED LION RACER 40-60cc hank you for choosing the ARTF by SG MOD- GILMORE RED LION RACER 40-60cc ELS . he was designed with the intermediate/ad- vanced sport lyer in mind. It is a semi scale airplane which is easy to ly and quick to as- semble.
- Page 3 KIT CONTENTS INSTALL THE AILERONS SEA390 GILMORE RED LION RACER Please see pictures below. 40-60cc 1. Fuselage 2. Wing set (2) 3. Tail set (2) 4. Canopy 5. Cowling 6. Wing tube 7. Pilot 8. Wheel pants 9. landing gear 10.
- Page 4 GILMORE RED LION RACER 40-60cc Instruction Manual. Be sure to test the aileron hinges once you insert them. Ensure that the hinge pockets line up, and that the hinges move freely before the epoxy dries. Insert all four hinges in the ailerons at this time.
- Page 5 Maximum Servo spec. Torque : 126.6 oz-in (9.11 kg-cm) @ 6.0V; 178 oz-in (12.82 kg-cm) @ 7.4V; 248 oz- in (17.86 kg-cm) @ 8.4V Because the size of servos difer, you may need to adjust the size of the precut opening in the mount.
- Page 6 GILMORE RED LION RACER 40-60cc Instruction Manual. Apply 2-3 drops of thin C/A to each C/A glue of the mounting holes. Allow the C/A to cure without using accelerator. Remove the string from the wing at the servo location and use the tape to attach it C/A glue to the servo extension lead.
- Page 7 120mm M3 lock nut. M3 clevis. 80mm Set the aileron hatch in place and use a Phillips screw driver to install it with four wood screws. 3x10mm INSTALLING THE FUSELAGE SERVOS Because the size of servos difer, you may need to adjust the size of the precut opening in the mount.
- Page 8 GILMORE RED LION RACER 40-60cc Instruction Manual. hrottle servo Elevator servo Rudder servo Switch. Elevator servo INSTALLING THE ENGINE SWITCH hrottle servo arm Elevator servo arm Rudder servo arm Elevator servo arm Trim and cut INSTALLING THE RECEIVER SWITCH Install the switch into the precut hole in the side, in the fuselage.
- Page 9 M4x15mm...
- Page 10 GILMORE RED LION RACER 40-60cc Instruction Manual. M3x4mm...
- Page 12 GILMORE RED LION RACER 40-60cc Instruction Manual. M4x12mm Loctite INSTALLING THE STOPPER ASSEMBLY Using a modeling knife, carefully cut of the rear portion of one of the 3 nylon tubes leaving 1/2” protruding from the rear of the stopper. his will be the fuel...
- Page 13 Using a modeling knife, cut one length With the stopper assembly in place, the weighted pick-up should rest away from the of silicon fuel line. Connect one end of rear of the tank and move freely inside the the line to the weighted fuel pick up and tank.
- Page 14 GILMORE RED LION RACER 40-60cc Instruction Manual. Connect the lines from the tank to the en- gine and muler. he vent line will connect to the muler and the line from the clunk to Vent tube the carburetor. Fuel pick up tube...
- Page 15 Locate the engine mounting in position on the irewall. Use a 6.1mm drill bit to drill the holes necessary to mount your particular motor choice.
- Page 16 GILMORE RED LION RACER 40-60cc Instruction Manual. 6.1mm 172mm Position the engine with the drive washer (172mm) forward of the irewall.
- Page 17 Ignition Module Attach the muler to the engine using the hardware included with the muler.
- Page 18 GILMORE RED LION RACER 40-60cc Instruction Manual. Reinstall the servo horn by sliding the connector over the pushrod wire. Cent- er the throttle stick and trim and install the servo horn perpendiular to the servo center line. Epoxy Move the throttle stick to the closed po- sition and move the carburetor to closed.
- Page 19 Epoxy...
- Page 20 GILMORE RED LION RACER 40-60cc Instruction Manual. COWLING...
- Page 21 Tape the cowl to the fuselage using low- Install the muler and muler extension tack tape. onto the engine and make the cutout in the cowl for muler clearance. Connect the fuel and pressure lines to the carbu- retor, muler and fuel iler valve. Secure the cowl to fuselage using the M4x25mm socket head screws.Putting a small length of silicon fuel tube under the head of the...
- Page 22 GILMORE RED LION RACER 40-60cc Instruction Manual. Use a drill bit to drill the holes necessary to mount your particular motor choice. Recommend the items necessary to in- stall the electric power conversion parts included with your model. - Motor: 360 - 6000 Watts...
- Page 23 5.5mm hen, use 5.5mm drill bit to enlarge the holes on the electric motor box. 5.5mm M5x30mm Attach the motor to the front of the electric motor box using four 4mm blind nut, four M5x30mm hex head bolts to se- cure the motor.
- Page 24 GILMORE RED LION RACER 40-60cc Instruction Manual. Speed control M5x25mm Epoxy 172mm Battery Balsa stick Epoxy Attach the speed control to the side of the motor box using two-sided tape and tie wraps. Connect the appropriate leads from the speed control to the mo- tor.
- Page 25 INSTALLING THE PROPELLER he propeller should not touch any part of the spinner cone. If it does, use a sharp modeling knife and carefully trim away the spinner cone where the propel- ler comes in contact with it. Open the air exit hole. INSTALL NAIL HINGE ELEVATOR Test it the hinges into the elevator, and then the hinges into the tail.
- Page 26 GILMORE RED LION RACER 40-60cc Instruction Manual. INSTALL ELEVATOR CONTROL HORN Install the elevator control horn using the same method as same as the elevator control horns. Epoxy...
- Page 27 HINGING THE RUDDER Glue the top three rudder hinges in place using the same techniques used to hinge the elevator. he lower hinge will be glued when the in/rudder assembly is attached to the fu- selage. Epoxy...
- Page 28 GILMORE RED LION RACER 40-60cc Instruction Manual. Fiberglass control horn Epoxy INSTALL RUDDER CONTROL HORN Repeat steps to install the rudder control horn as same as steps done for elevator.
- Page 29 Using a modeling knife, carefully remove the covering at mounting slot of horizon- tal stabilizer (both side of fuselage). Slide the stabilizer into place in the precut slot in the rear of the fuselage. he stabilizer should be pushed irmly against Epoxy the front of the slot.
- Page 30 GILMORE RED LION RACER 40-60cc Instruction Manual. With the stabilizer held irmly in place, use a pen and draw lines onto the stabilizer where it and the fuselage sides meet. Do this on both the right and let sides and top and bottom of the stabilizer.
- Page 31 INSTALLING VERTICAL STABILIZER While holding the vertical stabilizer im- ly in place, use a pen and draw a line on eachside of the vertical stabilizer where it meets the top of the fuselage. Using a modeling knife, remove the cov- ering from over the precut hinge slot cut Epoxy into the lower rear portion of the fuselage.
- Page 32 GILMORE RED LION RACER 40-60cc Instruction Manual. hread one clevis and M3 lock nut on When you are sure that everything is to each elevator control rod. hread the aligned correctly, mix up a generous horns on until they are lush with the amount of Flash 30 Minute Epoxy.
- Page 33 Maximum Servo spec. Torque : 126.6 oz-in (9.11 kg-cm) @ 6.0V; 178 oz-in (12.82 kg-cm) @ 7.4V; 248 oz- in (17.86 kg-cm) @ 8.4V RUDDER CABLE INSTALLATION Study images below to install pull-pull cable set.
- Page 34 GILMORE RED LION RACER 40-60cc Instruction Manual.
- Page 35 MOUNTING THE TAIL WHEEL M3x15mm Locate items necessary to install tail wheel. C/A glue...
- Page 36 GILMORE RED LION RACER 40-60cc Instruction Manual. M3x15mm Loctite...
- Page 37 INSTALL BRACING WIRE AND METAL BRACKET AT THE TAIL TOP VIEW M3x30mm...
- Page 38 GILMORE RED LION RACER 40-60cc Instruction Manual. Nylon locknut BOTTOM VIEW...
- Page 39 M4x12mm ATTACHMENT WING- FUSELAGE Attach the aluminium tube into fuselage. Insert two lower wing panels as pictures below..
- Page 40 GILMORE RED LION RACER 40-60cc Instruction Manual. INSTALLATION WING STRUTS TOP VIEW...
- Page 41 520mm...
- Page 42 GILMORE RED LION RACER 40-60cc Instruction Manual. BOTTOM VIEW 440mm 460mm M3x10mm M3x10mm...
- Page 43 INSTALLATION GEAR STRUTS...
- Page 44 GILMORE RED LION RACER 40-60cc Instruction Manual. INSTALLATION PILOT AND CANOPY Locate items necessary to install pilot and canopy.
- Page 45 APPLY THE DECALS If all the decals are precut and ready to stick. Please be certain the model is clean and free from oily ingerprints and dust. Position decal on the model where de- sired, using the photos on the box and aid in their location.
- Page 46 GILMORE RED LION RACER 40-60cc Instruction Manual. *If possible, irst attempt to balance the CONTROL THROWS model by changing the position of the receiver battery and receiver. If you are unable to obtain good balance by doing Ailerons: Rudder: so, then it will be necessary to add weight...
- Page 47 If it does not, lip the sive vibration which could lead to engine servo reversing switch on your transmit- and/or airframe failure. ter to change the direction. We wish you many safe and enjoyable lights with your GILMORE RED LION RACER 40-60cc...
- Page 48 GILMORE RED LION RACER 40-60cc Instruction Manual. If you have any queries, or are interested in our products, please feel free to contact us Factory : 12/101A - Hamlet 4 - Le Van Khuong Street - Dong hanh Ward - Hoc Mon District - Ho Chi Minh City - Viet Nam.
Need help?
Do you have a question about the GILMORE RED LION RACER 40-60cc and is the answer not in the manual?
Questions and answers