Advertisement
Quick Links
Advertisement

Subscribe to Our Youtube Channel
Related Manuals for NCR 7364-K118


Summary of Contents for NCR 7364-K118
- Page 1 Kit Instructions Bagwell Side Panel with Checkpoint Mount 7364-K118 Issue A...
- Page 2 NCR, therefore, reserves the right to change specifications without prior notice. All features, functions, and operations described herein may not be marketed by NCR in all parts of the world. In some instances, photographs are of equipment prototypes. Therefore, before using this document, consult with your NCR representative or NCR office for information that is applicable and current.
-
Page 3: Revision Record
Revision Record Issue Date Remarks Mar 2022 First Issue... -
Page 4: Kit Contents
Bagwell Side Panel with Checkpoint Mount Bagwell Side Panel with Checkpoint Mount This publication provides procedures for installing a Bagwell Side Panel with Checkpoint Mount on an NCR FastLane SelfServ™ Checkout (7364) unit. Kit Contents Part Number Description 497-0532052 7364-K118 Kit - Bagwell Side Panel with Checkpoint... -
Page 5: Installation Procedure
Bagwell Side Panel with Checkpoint Mount Installation Procedure To install the Bagwell Side Panel with Checkpoint Mount, follow these steps: 1. Do the following components, if necessary: • Remove the existing Top Tray from the Scale Tray Fence. • Remove the existing Scale Tray Fence. For more information, refer to Removing Scale Tray Fence on page 4. - Page 6 Bagwell Side Panel with Checkpoint Mount b. Attach the Checkpoint Glass to the Checkpoint Bracket of the Bagwell. Note: The Checkpoint Glass, that comes with a built-in antenna cable, is supplied by the customer. It may come with other hardware parts used to attach the Checkpoint Glass to the Bagwell.
- Page 7 Bagwell Side Panel with Checkpoint Mount Removing Scale Tray Fence To remove the Scale Tray Fence from the Bagwell, follow these steps: 1. Remove eight (8) screws securing the fence on the Scale Tray. Note: Set aside these screws for re-installation. 2.
- Page 8 Bagwell Side Panel with Checkpoint Mount Removing Scale Tray from 7364 SelfServ Checkout Unit Depending on the type of Scale Tray, do either of the following: • Lift and remove the existing Plastic Scale Tray together with the Scale Tray Frame from the Bagwell.
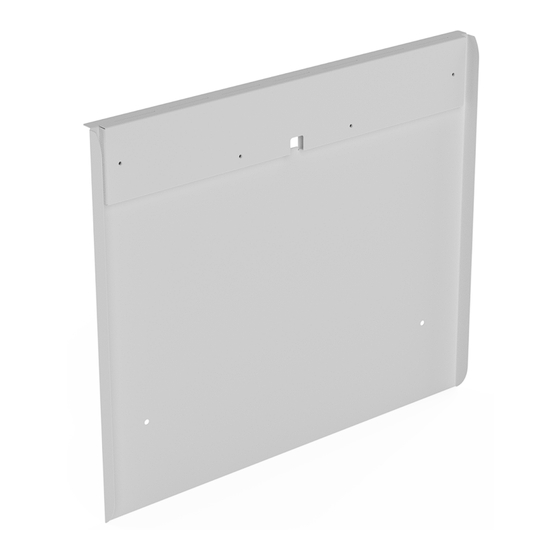
- Page 9 Bagwell Side Panel with Checkpoint Mount Removing the Bagwell Side Panel To remove the Bagwell Side Panel, follow these steps: 1. Remove four (4) nuts securing the Bagwell Side Panel to the Bagwell, as shown in the image below. 2. Detach the Bagwell Side Panel from the Bagwell.
- Page 10 Bagwell Side Panel with Checkpoint Mount Installing the Bagwell Side Panel To install the Bagwell Side Panel, follow these steps: 1. Align and mount the four (4) studs of the Bagwell Side Panel to corresponding slots of the Bagwell. 2. Secure the Bagwell Side Panel using four (4) nuts, as shown in the image below.
- Page 11 Bagwell Side Panel with Checkpoint Mount Connecting the Checkpoint Antenna Cable To connect the antenna cable to the antenna port of the Checkpoint Controller, follow these steps: 1. Move the latch on the front of the Checkpoint Controller to the left and slide the top cover off the device.
- Page 12 Bagwell Side Panel with Checkpoint Mount Routing the Checkpoint Interface Cable To route the interface cable, follow these steps: 1. Connect the interface cable to the TAB/CAB Checkpoint port of the KIO Board. 2. Route the interface cable to the Checkpoint Controller. 3.
- Page 13 Tuning the Checkpoint Antenna To tune the Checkpoint Antenna, follow these steps: 1. Verify that the NCR FastLane SelfServ™ Checkout (7364) system and the Checkpoint Controller are turned on. 2. From the Checkpoint Controller, remove the Rubber Cover to access the Reset button.
- Page 14 Bagwell Side Panel with Checkpoint Mount Installing Scale Tray (Stainless Steel) on 7364 SelfServ Checkout Unit Place the Scale Tray (Stainless Steel) on top of the four (4) load cells of the Bagwell, as shown in the images below.
Need help?
Do you have a question about the 7364-K118 and is the answer not in the manual?
Questions and answers