Advertisement
Quick Links
Advertisement

Subscribe to Our Youtube Channel
Related Manuals for NCR 7360-K600


Summary of Contents for NCR 7360-K600
- Page 1 Kit Instructions 7360 Lower Bumper Kits 7360-K600/K601/K602/K603 Issue A...
- Page 2 NCR, therefore, reserves the right to change specifications without prior notice. All features, functions, and operations described herein may not be marketed by NCR in all parts of the world. In some instances, photographs are of equipment prototypes. Software screen images are representative, and in some cases, may not match a customer’s installed software exactly.
- Page 3 Revision Record Issue Date Remarks Feb 2019 First Issue...
-
Page 4: Table Of Contents
Lower Bumper Kits Bumpers are metal plates designed to protect the unit from impact of outside force. This publication provides procedures for installing Lower Bumpers on the Cosmetic Door, Core Cabinet, and Bagwell module on the NCR FastLane SelfServ™ Checkout (7360). Kit Contents... -
Page 5: 7360-K600 Lower Bumper Kit No-Bag Unit
7360-K600/K601/K602/K603 Lower Bumper Kits 7360-K600 Lower Bumper Kit No-Bag Unit Part Number Description 497-0520277 7360-K600 Lower Bumper Kit No-Bag Unit 497-0519705 Lower-Front Bumper (1 pc) 497-0519703 Lower-Side Bumper (2 pcs) 497-0519704 Lower-Rear Bumper (1pc) 497-0506680 Bumper Back Plate (2 pcs) 497-0506263 Black Nylon Spacer 12.7mm x 6.6mm x 22.23mm (ODxIDxL) (3... -
Page 6: 7360-K601 Lower Bumper Kit 1-Bag Unit
7360-K600/K601/K602/K603 Lower Bumper Kits 7360-K601 Lower Bumper Kit 1-Bag Unit Part Number Description 497-0520278 7360-K601 Bumper Kit 1-Bag Unit 497-0519705 Lower-Front Bumper (1 pc) 497-0519703 Lower-Side Bumper (1 pc) 497-0519706 Lower-1-Bag Bagwell Bumpers (2 pcs) 497-0519704 Lower-Rear Bumper (1pc) 497-0519707... -
Page 7: 7360-K602 Lower Bumper Kit 2-Bag Unit
7360-K600/K601/K602/K603 Lower Bumper Kits 7360-K602 Lower Bumper Kit 2-Bag Unit Part Number Description 497-0520279 7360-K602 2-Bag Bumper Set 497-0519705 Lower-Front Bumper (1 pc) 497-0519703 Lower-Side Bumper (1 pc) 497-0519708 Lower-2-Bag Bagwell Bumpers (2 pcs) 497-0519704 Lower-Rear Bumper (1pc) 497-0519707 Lower-End Bumper (1pc) -
Page 8: 7360-K603 Lower Bumper Kit 3-Bag Unit
7360-K600/K601/K602/K603 Lower Bumper Kits 7360-K603 Lower Bumper Kit 3-Bag Unit Part Number Description 497-0520280 7360-K603 Bumper Kit 3-Bag Unit 497-0519705 Lower-Front Bumper (1 pc) 497-0519703 Lower-Side Bumper (1 pc) 497-0519709 Lower-3-Bag Bagwell Bumpers (2 pcs) 497-0519704 Lower-Rear Bumper (1pc) 497-0519707... - Page 9 7360-K600/K601/K602/K603 Lower Bumper Kits Installation Procedures The procedures for installing the Lower Bumpers on the NCR FastLane SelfServ™ Checkout (7360) unit depends on the bagging configuration of the unit. For more information, refer to the following procedures: • Installing Lower Bumper on Cosmetic Door on the facing page.
- Page 10 7360-K600/K601/K602/K603 Lower Bumper Kits Installing Lower Bumper on Cosmetic Door To install the Lower Bumper on the Cosmetic Door, follow these steps: 1. From the back of the Cosmetic Door, remove three nuts securing the door panel to the Cosmetic Door.
- Page 11 7360-K600/K601/K602/K603 Lower Bumper Kits 2. From the front of the Cosmetic Door, do the following: • Peel Hole Cover labels. • Pull out and then slide down the Door Panel to completely remove it.
- Page 12 7360-K600/K601/K602/K603 Lower Bumper Kits 3. Mount and then secure two (2) Back Plates on the Cosmetic Door using four (4) screws on each Back Plate. 4. Reinstall the Door Panel to the Cosmetic Door by engaging the Door Panel hooks...
- Page 13 7360-K600/K601/K602/K603 Lower Bumper Kits 5. Secure the Door Panel on the back of the Cosmetic Door using three (3) nuts. Example: The image below shows a unit with a Single Latch assembly. Note: If unit has the Dual Latch assembly as shown below, the Door Brace may need...
- Page 14 7360-K600/K601/K602/K603 Lower Bumper Kits 6. Insert three spacers into the Door Bumper studs. 7. Insert the Door Bumper studs through the corresponding Door Panel holes.
- Page 15 7360-K600/K601/K602/K603 Lower Bumper Kits 8. Open the Coupon Bin door and then, secure the Door Bumper on the Door Panel using two nuts.
- Page 16 7360-K600/K601/K602/K603 Lower Bumper Kits Installing Lower Bumpers on Core Cabinet To install the Lower Bumpers on the Core Cabinet, follow these steps: 1. Remove the Side and Back Panels from the Core Frame. For more information, refer Removing Side and Back Panels from Core Frame on page 15.
- Page 17 7360-K600/K601/K602/K603 Lower Bumper Kits Note: To install the Back and Side Panels to the Core Frame, refer to Installing Side and Back Panels on Core Frame on page 18.
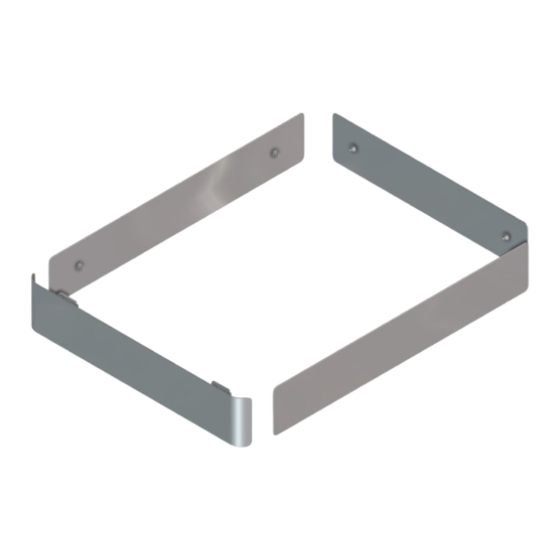
- Page 18 7360-K600/K601/K602/K603 Lower Bumper Kits Removing Side and Back Panels from Core Frame To remove the Side and Back Panels from the Core Frame, follow these steps: Note: For the purpose of illustration, this procedure shows images of a Convertible unit as an example only.
- Page 19 7360-K600/K601/K602/K603 Lower Bumper Kits b. Slowly pull the Back Panel forward to disengage each flange attaching the Back Panel to the Core Frame as shown in the image below.
- Page 20 7360-K600/K601/K602/K603 Lower Bumper Kits 2. Remove the Side Panels by sliding each Panel to the back as shown in the image below. Note: If the unit is configured with a Basket Shelf, remove the Basket Shelf. Note: If the unit is configured with a Bagwell module, only one Side Panel is...
- Page 21 7360-K600/K601/K602/K603 Lower Bumper Kits Installing Side and Back Panels on Core Frame To install the Side and Back Panels on the Core Frame, follow these steps: 1. Slowly align and attach the Back Panel to the flanges on the Core Frame as shown in the image below.
- Page 22 7360-K600/K601/K602/K603 Lower Bumper Kits 2. Attach the Side Panels to the corresponding sides on the Core Frame by sliding each Panel to the front as shown in the image below. Note: If the unit is configured with a Bagwell module, only one Side Panel is...
- Page 23 7360-K600/K601/K602/K603 Lower Bumper Kits Installing Lower Bumpers on Bagwell To install Lower Bumpers on the Bagwell, follow these steps: Note: This procedure provides instructions for installing the kit on a 3-Bag Bagwell configuration only as an example. 1. Remove the Back and Front Panels from the Bagwell Frame. For more information,...
- Page 24 7360-K600/K601/K602/K603 Lower Bumper Kits 4. Install the Lower Bumper on the Side Panel by aligning the Bumper studs with the corresponding Panel holes and then secure at the back using lock nuts as shown in the images below.
- Page 25 7360-K600/K601/K602/K603 Lower Bumper Kits Removing Back and Front Panels from Bagwell Frame To remove the Back and Front Panels from the Bagwell Frame, follow these steps: Note: This procedure provides instructions for installing the kit on a 3-Bag Bagwell configuration only as an example.
- Page 26 7360-K600/K601/K602/K603 Lower Bumper Kits 3. Remove one (1) nut securing each Backsplash Holders from to the Bagwell Frame to remove each Holder.
- Page 27 7360-K600/K601/K602/K603 Lower Bumper Kits 4. Lift the Back Panel from the Bagwell Frame. 5. Loosen two (2) nuts securing the Front Panel to the Bagwell Frame to disengage the Panel from the open slot.
-
Page 28: On The Next Page
7360-K600/K601/K602/K603 Lower Bumper Kits 6. Lift the Front Panel from the Bagwell Frame. Note: To install the Back and Side Panels to the Bagwell Frame, refer to Installing Back and Front Panels on Bagwell Frame on the next page. - Page 29 7360-K600/K601/K602/K603 Lower Bumper Kits Installing Back and Front Panels on Bagwell Frame To install the Back and Front Panels on the Bagwell Frame, follow these steps: Note: This procedure provides instructions for installing the kit on a 3-Bag Bagwell configuration only as an example.
- Page 30 7360-K600/K601/K602/K603 Lower Bumper Kits 3. Insert and secure each Backsplash Holder using one (1) nut to the Bagwell Frame, as shown in the image below. 4. Install the Backsplash by doing the following: a. Insert the Backsplash into the Backsplash Holder slot, as shown in the image...
- Page 31 7360-K600/K601/K602/K603 Lower Bumper Kits b. Secure the Backsplash to the Core Frame using two (2) flathead screws. 5. Insert the Front Panel into the Core Frame.
- Page 32 7360-K600/K601/K602/K603 Lower Bumper Kits 6. Tighten two nuts to secure the Front Panel to the Bagwell frame.
Need help?
Do you have a question about the 7360-K600 and is the answer not in the manual?
Questions and answers