Advertisement
Advertisement
Table of Contents

Subscribe to Our Youtube Channel
Related Manuals for NCR 7360-K451


Summary of Contents for NCR 7360-K451
- Page 1 Kit Instructions 12-inch Bag Rack 7360-K451 Issue A...
- Page 2 NCR, therefore, reserves the right to change specifications without prior notice. All features, functions, and operations described herein may not be marketed by NCR in all parts of the world. In some instances, photographs are of equipment prototypes. Therefore, before using this document, consult with your NCR representative or NCR office for information that is applicable and current.
- Page 3 Revision Record Issue Date Remarks Aug 2019 First Issue...
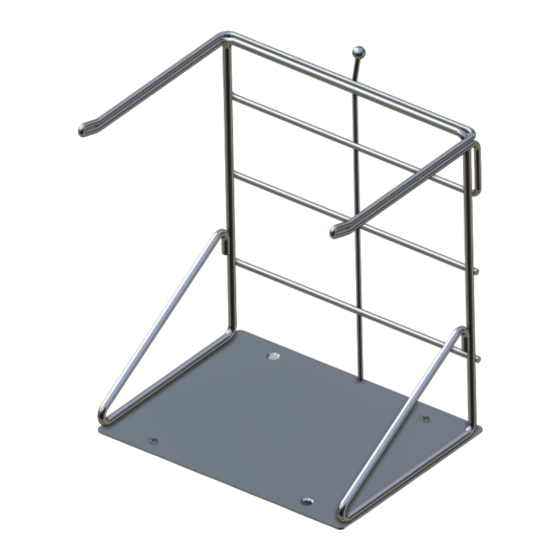
- Page 4 Kit Contents Part Number Description 497-0525987 7360-K451 Kit - 12-inch Bag Rack 497-0444541 Bag Rack, 12 in 007-7022141 Screw MA FLAT POZ M6 (2 pcs) * 497-0470565 3 x 5 x 0.004 Pink Anti-Stat Poly Ziplock * 497-0423108 Instructions Kit (Reference Sheet)
- Page 5 12-inch Bag Rack Installation Procedures Installing the 12-inch Bag Rack involves the following procedures: • Removing Bag Rack on the facing page. • Installing Bag Rack on page 4.
- Page 6 12-inch Bag Rack Removing Bag Rack To remove the bag rack from the Scale Tray, loosen two screws that are securing the bag rack in place. Note: Bag racks can be installed facing forward or to the side. For the purpose of illustration only, this procedure shows images using a 1-Bag SelfServ Checkout in a Left- hand (LH) orientation with the bag rack facing forward.
- Page 7 12-inch Bag Rack Installing Bag Rack To install the 12-inch bag rack on the scale tray, follow these steps: Note: Bag racks can be installed facing forward or to the side. For the purpose of illustration only, this procedure shows images using a 1-Bag SelfServ Checkout in a Left- hand (LH) orientation with the bag rack facing forward.
- Page 8 12-inch Bag Rack 3. Secure the bag racks to the Scale Tray using two (2) screws. Note: Attach the screws on opposite corners.
Need help?
Do you have a question about the 7360-K451 and is the answer not in the manual?
Questions and answers