
Related Manuals for Huawei SmartLi 3.0


Summary of Contents for Huawei SmartLi 3.0
- Page 1 SmartLi 3.0 User Manual (Long-Term Backup Power) Issue Date 2024-01-31 HUAWEI DIGITAL POWER TECHNOLOGIES CO., LTD.
- Page 2 Notice The purchased products, services and features are stipulated by the contract made between Huawei Digital Power Technologies Co., Ltd. and the customer. All or part of the products, services and features described in this document may not be within the purchase scope or the usage scope. Unless otherwise specified in the contract, all statements, information, and recommendations in this document are provided "AS IS"...
-
Page 3: About This Document
User Manual (Long-Term Backup Power) About This Document About This Document Purpose This document describes the SmartLi 3.0 (long-term backup power) intelligent lithium battery cabinet (lithium battery cabinet for short) in terms of its overview, transportation, storage, installation, cable connection, power-on commissioning, and maintenance. - Page 4 ● Optimized the description about battery room fire safety and site selection requirements in 1 Safety Information. ● Updated the indicator status description 2.4.3 BCU. ● Added precautions in 5.7 Installing Battery Modules. Issue 09 (2024-01-31) Copyright © Huawei Digital Power Technologies Co., Ltd.
- Page 5 5, 6, and 7 battery modules. 2022-07-31 ● Added descriptions about battery room fire safety. ● Added descriptions about iManager-M service access. 2022-04-15 This issue is the first official release. Issue 09 (2024-01-31) Copyright © Huawei Digital Power Technologies Co., Ltd.
-
Page 6: Table Of Contents
4.4 Battery Module Storage Duration and Recharge Requirements................46 4.5 Battery Module Recharge..............................47 5 Installation and Cable Connection..................51 5.1 Installation Clearances................................ 51 5.2 Installation Preparations..............................52 5.2.1 Tools....................................... 52 Issue 09 (2024-01-31) Copyright © Huawei Digital Power Technologies Co., Ltd. - Page 7 8.8 How Do I Power Off the SmartLi in Emergency?....................118 8.9 How Do I Restore the SmartLi After Powering It in Emergency?..............118 8.10 How Do I Export SmartLi Data?..........................118 Issue 09 (2024-01-31) Copyright © Huawei Digital Power Technologies Co., Ltd.
- Page 8 User Manual (Long-Term Backup Power) Contents 8.11 What Is the Heat Consumption of a Single SmartLi Cabinet?................. 119 A Wiring Diagram........................120 B Lifting Trolley........................122 C Acronyms and Abbreviations................... 124 Issue 09 (2024-01-31) Copyright © Huawei Digital Power Technologies Co., Ltd.
-
Page 9: Safety Information
Equipment damage due to force majeure such as earthquakes, floods, volcanic eruptions, debris flows, lightning strikes, fires, wars, armed conflicts, typhoons, hurricanes, tornadoes, and extreme weather conditions ● Operation beyond the conditions specified in this document Issue 09 (2024-01-31) Copyright © Huawei Digital Power Technologies Co., Ltd. -
Page 10: Personal Safety
D ANGER During operations, use dedicated insulated tools to prevent electric shocks or short circuits. The insulation and voltage resistance must comply with local laws, regulations, standards, and specifications. Issue 09 (2024-01-31) Copyright © Huawei Digital Power Technologies Co., Ltd. - Page 11 – Trained personnel: personnel who are trained in technology and safety, have required experience, are aware of possible hazards on themselves in Issue 09 (2024-01-31) Copyright © Huawei Digital Power Technologies Co., Ltd.
-
Page 12: Battery Safety
D ANGER Protect batteries from mechanical vibration, falling, collision, punctures, and strong impact. Otherwise, the batteries may be damaged or catch fire. Issue 09 (2024-01-31) Copyright © Huawei Digital Power Technologies Co., Ltd. - Page 13 Ensure that no liquid enters the equipment to prevent faults or short circuits. Issue 09 (2024-01-31) Copyright © Huawei Digital Power Technologies Co., Ltd.
- Page 14 ● Force majeure such as earthquakes, floods, volcanic eruptions, debris flows, lightning strikes, fires, wars, armed conflicts, typhoons, hurricanes, tornadoes, and other extreme weather conditions Issue 09 (2024-01-31) Copyright © Huawei Digital Power Technologies Co., Ltd.
- Page 15 If any damage is found, notify the carrier and manufacturer immediately. ● Do not unpack batteries in an environment where the temperature and humidity are uncontrollable. Before unpacking batteries, keep them still for 24 Issue 09 (2024-01-31) Copyright © Huawei Digital Power Technologies Co., Ltd.
- Page 16 When installing and maintaining batteries, wrap the exposed cable terminals on the batteries with insulation tape. ● Avoid foreign objects (such as conductive objects, screws, and liquids) from entering a battery, as this may cause short circuits. Issue 09 (2024-01-31) Copyright © Huawei Digital Power Technologies Co., Ltd.
- Page 17 ● The battery room shall be equipped with fire extinguishers filled with halon, heptafluoropropane, perfluorohexanone, carbon dioxide, or dry powder. Each Issue 09 (2024-01-31) Copyright © Huawei Digital Power Technologies Co., Ltd.
- Page 18 ● Other requirements specified in applicable standards (such as NFPA 855, NEN-1010, and GB 50016) shall also be met. Issue 09 (2024-01-31) Copyright © Huawei Digital Power Technologies Co., Ltd.
- Page 19 Do not place waste batteries in environments with high humidity or corrosive substances. ● Do not use faulty batteries. Contact a battery recycling company to scrap them as soon as possible to avoid environmental pollution. Issue 09 (2024-01-31) Copyright © Huawei Digital Power Technologies Co., Ltd.
-
Page 20: Electrical Safety
Stay away from the equipment when preparing cables to prevent cable scraps from entering the equipment. Cable scraps may cause sparks and result in personal injury and equipment damage. Issue 09 (2024-01-31) Copyright © Huawei Digital Power Technologies Co., Ltd. - Page 21 Do not scrawl, damage, or block any labels or nameplates on the equipment. Promptly replace labels that have worn out. ● Do not use solvents such as water, alcohol, or oil to clean electrical components inside or outside of the equipment. Issue 09 (2024-01-31) Copyright © Huawei Digital Power Technologies Co., Ltd.
- Page 22 ● When the temperature is low, violent impact or vibration may damage the plastic cable sheathing. To ensure safety, comply with the following requirements: Issue 09 (2024-01-31) Copyright © Huawei Digital Power Technologies Co., Ltd.
- Page 23 When holding a board or a module with exposed circuit boards, hold its edge without touching any components. Do not touch the components with bare hands. ● Package boards or modules with ESD packaging materials before storing or transporting them. Issue 09 (2024-01-31) Copyright © Huawei Digital Power Technologies Co., Ltd.
-
Page 24: Environment Requirements
Issue 09 (2024-01-31) Copyright © Huawei Digital Power Technologies Co., Ltd. - Page 25 Areas with adverse geological conditions such as rubbery soil and soft soil layer, or prone to waterlogging and land subsidence ● Areas under a reservoir, water landscape, and water room Issue 09 (2024-01-31) Copyright © Huawei Digital Power Technologies Co., Ltd.
-
Page 26: Mechanical Safety
Otherwise, tipping or falling cabinets may cause bodily injury and equipment damage. WARNING When pulling equipment out of a cabinet, be aware of unstable or heavy objects in the cabinet to prevent injury. Issue 09 (2024-01-31) Copyright © Huawei Digital Power Technologies Co., Ltd. - Page 27 Dismantle the scaffolding from top down after finishing the job. Do not dismantle the upper and lower layers at the same time. When removing a part, ensure that other parts will not collapse. Issue 09 (2024-01-31) Copyright © Huawei Digital Power Technologies Co., Ltd.
- Page 28 ● If a single ladder is used, do not climb higher than the fourth rung of the ladder from the top. Issue 09 (2024-01-31) Copyright © Huawei Digital Power Technologies Co., Ltd.
- Page 29 Do not drag steel ropes and hoisting tools or bump hoisted objects against hard objects during hoisting. ● Ensure that the angle between two hoisting ropes is no more than 90 degrees, as shown in the following figure. Issue 09 (2024-01-31) Copyright © Huawei Digital Power Technologies Co., Ltd.
- Page 30 To avoid short circuits or other risks, do not drill holes into buried pipes or cables. ● When drilling holes, protect the equipment from shavings. After drilling, clean up any shavings. Issue 09 (2024-01-31) Copyright © Huawei Digital Power Technologies Co., Ltd.
-
Page 31: Product Overview
● SmartLi-384V-100Ah-F-01-A-5 Slave SmartLi ● SmartLi-614V-100Ah-S-01-A-8 cabinet ● SmartLi-537V-100Ah-S-01-A-7 ● SmartLi-460V-100Ah-S-01-A-6 ● SmartLi-384V-100Ah-S-01-A-5 Figure 2-1 Model number Table 2-2 Model number description Item Description Product SmartLi: intelligent lithium battery category Issue 09 (2024-01-31) Copyright © Huawei Digital Power Technologies Co., Ltd. -
Page 32: Smartli Cabinet Description
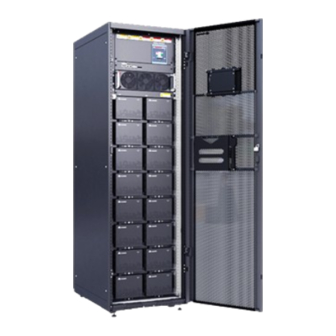
● 6: six battery modules ● 5: five battery modules 2.2 SmartLi Cabinet Description Figure 2-2 SmartLi Cabinet Description (1) Air vent (2) Incoming cable glands (3) Battery circuit breaker Issue 09 (2024-01-31) Copyright © Huawei Digital Power Technologies Co., Ltd. -
Page 33: Product Configurations
4G module Optional The module exchanges data with related equipment through wireless communication. The model can be iIOT- WAC0411 or iIOT-WAC0412. Issue 09 (2024-01-31) Copyright © Huawei Digital Power Technologies Co., Ltd. -
Page 34: Component Description
(SOH), and temperature reported by the BCU, and save data and alarm information locally. NO TE The ports of the MDU are located on the side and rear of the display panel. Issue 09 (2024-01-31) Copyright © Huawei Digital Power Technologies Co., Ltd. - Page 35 Insert a USB flash drive to import or export the configuration file, export fault information, and upgrade the BSP and software; insert a 4G module for iManager-M service access. Issue 09 (2024-01-31) Copyright © Huawei Digital Power Technologies Co., Ltd.
-
Page 36: Monitoring Interface Unit
Modbus-TCP or BIN, or a third-party NMS over Modbus- TCP. ● Supported protocols: Modbus- TCP, HTTPS, and BIN Northbound ● Connects to a UPS. communication ● Supported protocol: Modbus- s port Issue 09 (2024-01-31) Copyright © Huawei Digital Power Technologies Co., Ltd. - Page 37 Table 2-6 Port and pin definitions Appearance COM Port RS485 Port FE Port RS485_T+ RS485_T+ RJ_TX+ RS485_T– RS485_T– RJ_TX– RJ_RX+ RS485_R+ RS485_R+ RS485_R– RS485_R– Issue 09 (2024-01-31) Copyright © Huawei Digital Power Technologies Co., Ltd.
-
Page 38: Bcu
Only the BCU with the BOM number 02313PYT-001 supports online leakage current detection. Figure 2-6 BCU (1) Positioning lock (2) Power switch (3) Running indicator (4) Alarm indicator (5) Fault indicator (6) Ready switch (7) Output ports (8) Input ports Issue 09 (2024-01-31) Copyright © Huawei Digital Power Technologies Co., Ltd. -
Page 39: Battery Module
2.4.4 Battery Module The battery module consists of 24 electrochemical cells (connected in series). The cells are made of lithium iron phosphate. A built-in fire suppression module is Issue 09 (2024-01-31) Copyright © Huawei Digital Power Technologies Co., Ltd. -
Page 40: Carbon Monoxide Gas Sensor
The sensor detects the concentration of carbon monoxide in the cabinet to determine whether carbon monoxide is released from battery modules because the vents are opened due to thermal runaway. Issue 09 (2024-01-31) Copyright © Huawei Digital Power Technologies Co., Ltd. - Page 41 (1) DIP switch (2) RS485 communications ports Figure 2-9 RS485 port pins Table 2-9 RS485 port definition Signal Description RS485+ RS485– V+: power supply, positive RS485+ RS485– V–: power supply, negative Issue 09 (2024-01-31) Copyright © Huawei Digital Power Technologies Co., Ltd.
-
Page 42: Module
Blinking at intervals of 2s The backhaul module (on for 1.8s and off for 0.2s) has successfully registered with the network or is in the standby state. Issue 09 (2024-01-31) Copyright © Huawei Digital Power Technologies Co., Ltd. - Page 43 ● The 4G module requires high communication signal strength. Before using the 4G module, survey the signal strength. ● The mobile data transmission function of the 4G module cannot be used in a shielding equipment room. Issue 09 (2024-01-31) Copyright © Huawei Digital Power Technologies Co., Ltd.
-
Page 44: Technical Specifications
Dimensions (H x W x D) 2000 mm x 600 mm x 850 mm Weight < 800 kg Circuit breaker 750 V DC, 250 A, 4P specifications Fuse specifications 800 V DC, 250 A Issue 09 (2024-01-31) Copyright © Huawei Digital Power Technologies Co., Ltd. - Page 45 ESD immunity IEC 61000-4-2 Conducted susceptibility EN IEC 62040-2 (CS) EN/IEC 61000-4-6 Radiated susceptibility (RS) EN IEC 62040-2 EN/IEC 61000-4-3 Electrical fast transient EN IEC 62040-2 (EFT) IEC 61000-4-4 Issue 09 (2024-01-31) Copyright © Huawei Digital Power Technologies Co., Ltd.
- Page 46 0– 40°C) Backup time 40 min 40 min 40 min 40 min Rated charge current 50 A/0.5C Discharge cut-off voltage 2.65 V per cell Rated discharge current 200 A Issue 09 (2024-01-31) Copyright © Huawei Digital Power Technologies Co., Ltd.
- Page 47 ≥ 511.2 V; level-3 protection: ≥ 522 V ● Battery string (5 packs): level-1 protection: ≥ 423 V; level-2 protection: ≥ 426 V; level-3 protection: ≥ 435 V Issue 09 (2024-01-31) Copyright © Huawei Digital Power Technologies Co., Ltd.
-
Page 48: Component Technical Specifications
Dimensions (H x W x D) 160 mm x 442 mm x 560 mm Weight < 70 kg Rated voltage 76.8 V DC Rated backup power 100 Ah capacity Rated charge current 50 A/0.5C Issue 09 (2024-01-31) Copyright © Huawei Digital Power Technologies Co., Ltd. - Page 49 Dimensions (H x W x D) 40 mm x 25 mm x 97 mm Operating temperature –10°C to +55°C Storage temperature –40ºC to +70ºC Humidity 5%–95% RH (non-condensing) Operating atmospheric 70–106 kPa pressure range Issue 09 (2024-01-31) Copyright © Huawei Digital Power Technologies Co., Ltd.
-
Page 50: Transportation And Storage Requirements
Issue 09 (2024-01-31) Copyright © Huawei Digital Power Technologies Co., Ltd. -
Page 51: Battery Module Transportation Requirements
If the cabinet needs to be transported or moved, remove the batteries first. WARNING Do not move a battery by holding its terminals, bolts, or cables. Otherwise, the battery may be damaged. Issue 09 (2024-01-31) Copyright © Huawei Digital Power Technologies Co., Ltd. - Page 52 ● When transporting faulty batteries, avoid approaching flammable material storage areas, residential areas, or other densely populated places, such as mass transit facilities or elevators. Issue 09 (2024-01-31) Copyright © Huawei Digital Power Technologies Co., Ltd.
-
Page 53: Battery Module Storage Requirements
20°C to 30°C), the storage period can be two months or longer. Storage for an extended period of time is not recommended. Use batteries in a timely manner or charge batteries based on the lithium battery charge interval. Issue 09 (2024-01-31) Copyright © Huawei Digital Power Technologies Co., Ltd. -
Page 54: Battery Module Storage Duration And Recharge Requirements
12 months. 18–24 Recharge it for the second time. 27–36 Recharge it for the third time. 12 months after It is advisable to the third recharge scrap the battery module. Issue 09 (2024-01-31) Copyright © Huawei Digital Power Technologies Co., Ltd. -
Page 55: Battery Module Recharge
Recharge in a SmartLi Cabinet WARNING Do not use the customer's loads to recharge battery modules because completely discharging the battery modules will cause the loads to power off. Issue 09 (2024-01-31) Copyright © Huawei Digital Power Technologies Co., Ltd. - Page 56 The battery module should be used as soon as possible. Step 11 Reinstall the BCU. Issue 09 (2024-01-31) Copyright © Huawei Digital Power Technologies Co., Ltd.
- Page 57 (4) Power cable (negative) (5) Power cable (positive) Step 4 On the portable battery charger/discharger, select the activation mode, set the battery type to ESM-76100CS1, and start charging. Issue 09 (2024-01-31) Copyright © Huawei Digital Power Technologies Co., Ltd.
- Page 58 The battery module should be used as soon as possible. ----End Issue 09 (2024-01-31) Copyright © Huawei Digital Power Technologies Co., Ltd.
-
Page 59: Installation And Cable Connection
Reserve at least 500 mm from the top of the cabinet. ● The device can be installed against a wall and no space needs to be reserved at the rear. Figure 5-1 Reserved clearances (unit: mm) Issue 09 (2024-01-31) Copyright © Huawei Digital Power Technologies Co., Ltd. -
Page 60: Installation Preparations
(2) Two cabinets connected in (3) Three cabinets connected trough parallel in parallel 5.2 Installation Preparations 5.2.1 Tools The onsite operation personnel can select tools based on the site requirements. Issue 09 (2024-01-31) Copyright © Huawei Digital Power Technologies Co., Ltd. - Page 61 Personal Protective Equipment Safety helmet Goggles Protective shoes Reflective vest ESD gloves Insulated gloves Protective gloves Safety harness Dust mask Insulated shoes Transportation tools Lifting trolley Electric forklift Manual pallet truck Issue 09 (2024-01-31) Copyright © Huawei Digital Power Technologies Co., Ltd.
- Page 62 (M8/M10/M12/ M16) Adjustable torque Hammer drill Hammer drill bit Claw hammer wrench (Φ16 mm) Electric Step ladder Pliers Rubber mallet screwdriver Utility knife Marker Rivet gun Insulated ladder Issue 09 (2024-01-31) Copyright © Huawei Digital Power Technologies Co., Ltd.
- Page 63 Cord end terminal Heat gun Scissors pliers crimping tool Measurement Instruments Height gauge Laser locator Electroprobe Thermometer Clamp meter Soft measuring Steel measuring Square tape tape Level Laptop Level gauge Multimeter Issue 09 (2024-01-31) Copyright © Huawei Digital Power Technologies Co., Ltd.
- Page 64 5 Installation and Cable Connection Network tester Phase sequence Dielectric strength Megohmmeter meter tester Machinery Small cutter Cable reel Engineering Auxiliary Materials Label Cable tie Cotton cloth Sandpaper Heat-shrink Insulation tape tubing Issue 09 (2024-01-31) Copyright © Huawei Digital Power Technologies Co., Ltd.
-
Page 65: Communications Cables
04071114-001 (about 5 m). If the cable is not long enough, use an extension cable (optional). You need to crimp RJ45 connectors and adapters onto the network cable onsite. Issue 09 (2024-01-31) Copyright © Huawei Digital Power Technologies Co., Ltd. -
Page 66: Power Cables
– Connection mode: cable crimped with a DT terminal Bolt specifications for +/N/–: M12 x 35 mm (47 N·m); bolt specifications for PE: M10 x 25 mm (26 N·m) Issue 09 (2024-01-31) Copyright © Huawei Digital Power Technologies Co., Ltd. -
Page 67: Transportation, Unpacking, And Checking
Check that all fittings comply with the packing list. If there is any discrepancy, keep a record and contact the supplier immediately. Table 5-3 List of accessories Appearance Name Quantity (PCS) Cable Cable Commissioning and Acceptance Report Issue 09 (2024-01-31) Copyright © Huawei Digital Power Technologies Co., Ltd. - Page 68 Quality Assessment Form Certificate of Quality Assurance Panel screw M12x35 screw assembly M12 nut assembly M10x25 screw assembly Grommet strip Copper bar M8x20 screw assembly Battery module handle Pagoda connector Issue 09 (2024-01-31) Copyright © Huawei Digital Power Technologies Co., Ltd.
- Page 69 Step 4 After confirming that the cabinet is intact, remove the L-shaped bracket that secures the cabinet and pallet, and secure the sliding plate to the pallet using the M12 screws that you have removed. Figure 5-3 Removing L-shaped brackets Issue 09 (2024-01-31) Copyright © Huawei Digital Power Technologies Co., Ltd.
- Page 70 Figure 5-5 Raising the anchor bolts to the highest position Step 6 Slowly move the cabinet over its castors to the installation position. Step 7 Take out the desiccant. ----End Issue 09 (2024-01-31) Copyright © Huawei Digital Power Technologies Co., Ltd.
-
Page 71: Installation Process
5.4 Installation Process Figure 5-6 Installation process 5.5 Installing Cabinets Secured Installation Step 1 Determine the cabinet installation position. Draw mounting holes in the installation position according to the drawing. Issue 09 (2024-01-31) Copyright © Huawei Digital Power Technologies Co., Ltd. - Page 72 Knock the expansion bolt into the hole until the expansion tube completely fits into the hole. The expansion sleeve must be completely buried under the ground to facilitate subsequent installation. Issue 09 (2024-01-31) Copyright © Huawei Digital Power Technologies Co., Ltd.
- Page 73 Step 1 Adjust the four anchor bolts at the bottom of the cabinet until all the four castors at the bottom hang in the air and the anchor bolts bear all of the cabinet weight. Issue 09 (2024-01-31) Copyright © Huawei Digital Power Technologies Co., Ltd.
- Page 74 Step 1 Install each cabinet in sequence according to the installation method of a single cabinet. Step 2 Combine cabinets. Figure 5-11 Installing connecting kits ----End Issue 09 (2024-01-31) Copyright © Huawei Digital Power Technologies Co., Ltd.
-
Page 75: Installing Cables
Step 3 Pull the marked cable out of the cabinet, cut the cable from the marked position, strip the cable, and crimp a terminal. Figure 5-12 Preparing a cable terminal outside the cabinet Issue 09 (2024-01-31) Copyright © Huawei Digital Power Technologies Co., Ltd. -
Page 76: Installing A Ground Cable
Remove certain gland sealing plugs based on the actual cable specifications. Route the cable through the gland nut and sealing plugs. Cut the cable and crimp the cable terminal. Connect the cable to the copper bar. Issue 09 (2024-01-31) Copyright © Huawei Digital Power Technologies Co., Ltd. -
Page 77: Installing Power Cables
Step 3 Reinstall the sealing plugs. (The rubber plugs must be completely inserted into the gland to facilitate the reinstallation of the gland nut.) Step 4 Reinstall the gland nut with a torque of 8 N·m. ----End 5.6.3 Installing Power Cables Issue 09 (2024-01-31) Copyright © Huawei Digital Power Technologies Co., Ltd. - Page 78 Figure 5-16 Top cable glands (1) Positive cable outlet (2) Neutral cable outlet (gland: (3) Negative cable outlet (gland: M40) M40) (gland: M40) Step 2 Cut cables and crimp terminals. Issue 09 (2024-01-31) Copyright © Huawei Digital Power Technologies Co., Ltd.
- Page 79 The rubber rings to be removed depend on the actual cable diameter (including the insulation layer). Remove sealing plugs only when necessary. Otherwise, the sealing performance will be affected. Issue 09 (2024-01-31) Copyright © Huawei Digital Power Technologies Co., Ltd.
-
Page 80: Installing Communications Cables
● UPS5000-E: Connect the COM port on the monitoring interface unit in the master SmartLi cabinet to the COM2 port on the monitoring interface card in the UPS. Issue 09 (2024-01-31) Copyright © Huawei Digital Power Technologies Co., Ltd. - Page 81 ● When reinstalling the communications cable box, prevent the cable box from pressing the cables. ● RS485 cables and FE cables must be shielded cables. ● Do not bind communications cables and power cables together. Figure 5-21 Communications cable route Issue 09 (2024-01-31) Copyright © Huawei Digital Power Technologies Co., Ltd.
- Page 82 (8-pin COM port). ● If more than eight SmartLi cabinets are connected in parallel, a maximum of four 15 m parallel communications cables are supported. Issue 09 (2024-01-31) Copyright © Huawei Digital Power Technologies Co., Ltd.
-
Page 83: Connecting A Remote Epo Switch
UPS. Connect the EPO button to the EPO port on the SmartLi. Figure 5-24 Cable connection for an EPO NO port Issue 09 (2024-01-31) Copyright © Huawei Digital Power Technologies Co., Ltd. -
Page 84: Installing Battery Modules
Tighten the screws on the copper bars or cables to the torque specified in this document. Loose connections will result in excessive voltage drops or cause battery modules to burn out when the current is high. Issue 09 (2024-01-31) Copyright © Huawei Digital Power Technologies Co., Ltd. - Page 85 When installing batteries, do not place installation tools, metal parts, or sundries on the batteries. After the installation is complete, clean up the objects on the batteries and the surrounding area. Issue 09 (2024-01-31) Copyright © Huawei Digital Power Technologies Co., Ltd.
- Page 86 Otherwise, the equipment may be damaged due to condensation. Step 1 Turn off the ready switch on the BCU, remove the bolts that secure the BCU, and pull it out for about 10 cm. Issue 09 (2024-01-31) Copyright © Huawei Digital Power Technologies Co., Ltd.
- Page 87 If the readings are less than 6 V DC, the insulation is good. Otherwise, contact technical support engineers. Issue 09 (2024-01-31) Copyright © Huawei Digital Power Technologies Co., Ltd.
- Page 88 Take out the negative cables of battery modules from the buckles and install the cables. Issue 09 (2024-01-31) Copyright © Huawei Digital Power Technologies Co., Ltd.
- Page 89 NO TE Excessive bolts will be used as spare parts. Figure 5-29 Installing copper bars and cables (using eight battery modules as an example) Issue 09 (2024-01-31) Copyright © Huawei Digital Power Technologies Co., Ltd.
-
Page 90: Installing Optional Components
Step 8 Select the corresponding model on the nameplate of the cabinet based on the quantity of installed battery modules. (The figure uses eight battery modules as an example.) Figure 5-31 Selecting a model ----End 5.8 Installing Optional Components Issue 09 (2024-01-31) Copyright © Huawei Digital Power Technologies Co., Ltd. -
Page 91: Installing A Carbon Monoxide Gas Sensor
Set the DIP switch address to 1 (set toggle switch 1 to ON and others to OFF). The DIP switch setting shown in the figure is for reference only. The actual setting may vary. Issue 09 (2024-01-31) Copyright © Huawei Digital Power Technologies Co., Ltd. - Page 92 Step 3 Install the cable for the carbon monoxide gas sensor. (One cable end is preinstalled at the monitoring interface board before delivery.) NO TE Connect the cable of the carbon monoxide gas sensor to any port. Figure 5-34 Installing the cable ----End Issue 09 (2024-01-31) Copyright © Huawei Digital Power Technologies Co., Ltd.
-
Page 93: Installing A 4G Module Or Network Cable
Do not install the 4G module in an enclosed environment or a position subject to severe signal interference. Otherwise, the 4G module may be disconnected from the network for a short period of time. Issue 09 (2024-01-31) Copyright © Huawei Digital Power Technologies Co., Ltd. - Page 94 FE Access Scenario Step 1 Connect the network port on a LAN switch or router to the FE port on the monitoring interface unit. Figure 5-37 Connecting a cable ----End Issue 09 (2024-01-31) Copyright © Huawei Digital Power Technologies Co., Ltd.
-
Page 95: Verifying The Installation
Grounding The resistance between the cabinet ground bar and the equipment room ground bar is less than 0.1 ohm. Issue 09 (2024-01-31) Copyright © Huawei Digital Power Technologies Co., Ltd. - Page 96 3. There is no foreign matter around circuit breaker terminals. 4. There is no foreign matter on the bottom plate of the cabinet. 5. There is no foreign matter on the rear module subrack. Issue 09 (2024-01-31) Copyright © Huawei Digital Power Technologies Co., Ltd.
- Page 97 Do not remove the dust cover during construction or before the device is powered on. Remove the cover only when the device is ready for operation. Otherwise, device faults may occur. Issue 09 (2024-01-31) Copyright © Huawei Digital Power Technologies Co., Ltd.
- Page 98 User Manual (Long-Term Backup Power) 5 Installation and Cable Connection Figure 5-38 Installing the dust covers (1) Top dust cover (if any) (2) Rear dust cover (3) Front dust cover Issue 09 (2024-01-31) Copyright © Huawei Digital Power Technologies Co., Ltd.
-
Page 99: Power-On And Commissioning
Step 2 Check that the ready switch on the BCU is in ready state. Figure 6-1 Ready state ----End 6.2 Connecting the Battery Supply D ANGER Wear personal protective equipment and use dedicated insulated tools to avoid electric shocks or short circuits. Issue 09 (2024-01-31) Copyright © Huawei Digital Power Technologies Co., Ltd. -
Page 100: Initial Startup Of A Single Cabinet
UPS cannot be cold started. indicator is steady on. 6.2.1 Initial Startup of a Single Cabinet Step 1 Check that the UPS supports communication with SmartLi 3.0 and that a communications cable is correctly connected between the UPS and the SmartLi. Issue 09 (2024-01-31) - Page 101 Data Center Facility Deployment Guide . app. For details, see the Step 4 Set the language, time, date, iManager-M service, network parameters, and system parameters on the Settings Wizard screen. Issue 09 (2024-01-31) Copyright © Huawei Digital Power Technologies Co., Ltd.
- Page 102 SmartLi 3.0 User Manual (Long-Term Backup Power) 6 Power-On and Commissioning Figure 6-3 Settings Wizard - Language Figure 6-4 Settings Wizard - Time Figure 6-5 Quick Settings - iManager-M Service Issue 09 (2024-01-31) Copyright © Huawei Digital Power Technologies Co., Ltd.
- Page 103 FE and the primary DNS server cannot resolve the domain name, set the secondary DNS server to resolve the domain name. Figure 6-6 Settings Wizard - Network Param. Issue 09 (2024-01-31) Copyright © Huawei Digital Power Technologies Co., Ltd.
- Page 104 Step 5 On the UPS LCD screen, choose System Info > Settings > Battery Settings and check that Battery Type is set to Lithium battery. Issue 09 (2024-01-31) Copyright © Huawei Digital Power Technologies Co., Ltd.
-
Page 105: Initial Startup Of Multiple Cabinets
----End 6.2.2 Initial Startup of Multiple Cabinets Step 1 Check that the UPS supports communication with SmartLi 3.0 and that a communications cable is correctly connected between the UPS and the SmartLi. Step 2 Press and hold the POWER ON/OFF button on the BCU in the master cabinet for more than 2s to power on the master cabinet. - Page 106 Data Center Facility Deployment Guide . app. For details, see the Step 5 Set the language, time, date, iManager-M service, network parameters, and system parameters on the Settings Wizard screen. Issue 09 (2024-01-31) Copyright © Huawei Digital Power Technologies Co., Ltd.
- Page 107 SmartLi 3.0 User Manual (Long-Term Backup Power) 6 Power-On and Commissioning Figure 6-11 Settings Wizard - Language Figure 6-12 Settings Wizard - Time Figure 6-13 Quick Settings - iManager-M Service Issue 09 (2024-01-31) Copyright © Huawei Digital Power Technologies Co., Ltd.
- Page 108 FE and the primary DNS server cannot resolve the domain name, set the secondary DNS server to resolve the domain name. Figure 6-14 Settings Wizard - Network Param. Issue 09 (2024-01-31) Copyright © Huawei Digital Power Technologies Co., Ltd.
- Page 109 Step 6 On the UPS LCD screen, choose System Info > Settings > Battery Settings and check that Battery Type is set to Lithium battery. Issue 09 (2024-01-31) Copyright © Huawei Digital Power Technologies Co., Ltd.
-
Page 110: Optional) Imanager-M Service Access
If Access authentication code on the iManager-M Service screen is empty, obtain the authentication code from the position shown in the following figure and enter it in Access authentication code. Figure 6-16 Documentation QR code on the cabinet Issue 09 (2024-01-31) Copyright © Huawei Digital Power Technologies Co., Ltd. - Page 111 Address type: Domain name – Server domain name and Port number: Retain the default values. – Connection test link setup port: 4G Click Test Connect. After the test is successful, click Submit. Issue 09 (2024-01-31) Copyright © Huawei Digital Power Technologies Co., Ltd.
- Page 112 Server domain name and Port number: Retain the default values. – Connection test link setup port: FE Click Test Connect. After the test is successful, click Submit. Step 4 Connect the device on the NetEco app. ----End Issue 09 (2024-01-31) Copyright © Huawei Digital Power Technologies Co., Ltd.
-
Page 113: Disconnecting The Battery Supply
CA UTION After batteries are powered off subsequent to installation and commissioning or batteries have discharged, recharge the batteries in time. Otherwise, batteries may be damaged due to overdischarge. Issue 09 (2024-01-31) Copyright © Huawei Digital Power Technologies Co., Ltd. - Page 114 SOC ≥ 13% 30 days 10% ≤ SOC < 13% 25 days 7% ≤ SOC < 10% 20 days 4% ≤ SOC < 7% 10 days SOC < 4% 2 hours Issue 09 (2024-01-31) Copyright © Huawei Digital Power Technologies Co., Ltd.
-
Page 115: Maintenance
WARNING After batteries are discharged, charge them in time to avoid damage due to overdischarge. Issue 09 (2024-01-31) Copyright © Huawei Digital Power Technologies Co., Ltd. -
Page 116: Routine Maintenance
● Troubleshooting: Rectify system battery equipment room. the fault based on the For details about the acceptance criteria. requirements, see Battery Room Fire Safety. Issue 09 (2024-01-31) Copyright © Huawei Digital Power Technologies Co., Ltd. - Page 117 ● Batteries are intact and free of damage, deformation, bulges, and cracks. ● Batteries have no electrolyte leakage. (If electrolyte leakage occurs, there will be a pungent smell.) Issue 09 (2024-01-31) Copyright © Huawei Digital Power Technologies Co., Ltd.
- Page 118 ● Troubleshooting: are free from black marks Replace the cables and and noticeable sparks. tighten the loose screws. Issue 09 (2024-01-31) Copyright © Huawei Digital Power Technologies Co., Ltd.
- Page 119 (ALARM) inspection the BCU and red (FAULT) indicators ● Troubleshooting: View are off. the alarm information on the SmartLi LCD and handle the alarm. Issue 09 (2024-01-31) Copyright © Huawei Digital Power Technologies Co., Ltd.
-
Page 120: Battery Test
SmartLi LCDs. ● Troubleshooting: View the alarm information on the UPS and SmartLi LCDs and handle the alarm. 7.2 Battery Test Perform the following steps on the UPS LCD. Issue 09 (2024-01-31) Copyright © Huawei Digital Power Technologies Co., Ltd. -
Page 121: Shallow Discharge Test
On the home screen of the UPS LCD, choose System Info > Maintenance > Battery Maint. Tap Start next to Shallow Dis. Test to start a shallow discharge test. Issue 09 (2024-01-31) Copyright © Huawei Digital Power Technologies Co., Ltd. -
Page 122: Capacity Test
Step 1 On the home screen of the UPS LCD, choose System Info > Maintenance > Battery Maint. Step 2 Tap Start next to Capacity Test to start a capacity test. Issue 09 (2024-01-31) Copyright © Huawei Digital Power Technologies Co., Ltd. -
Page 123: Downloading Test Data
Log drop-down list box, and click Query. Figure 7-3 Battery Test Records Step 2 Choose logs that have been queried from the Log drop-down list box, and click Export. ----End Issue 09 (2024-01-31) Copyright © Huawei Digital Power Technologies Co., Ltd. -
Page 124: Faq
The circuit breaker needs to be switched from OFF to ON. That is, if the circuit breaker has tripped, it needs to be switched to OFF and then to ON. Issue 09 (2024-01-31) Copyright © Huawei Digital Power Technologies Co., Ltd. -
Page 125: How Do I Conduct Shallow Discharge And Capacity Tests
In the integrated UPS scenario, connect the COM port on the master SmartLi cabinet to the COM1 port on the UPS. In other scenarios, connect the COM port on the master SmartLi cabinet to the COM2 port on the UPS. Issue 09 (2024-01-31) Copyright © Huawei Digital Power Technologies Co., Ltd. -
Page 126: How Do I Power Off The Smartli In Emergency
WebUI ● Exporting fault information Choose Maintenance > Fault Information, set Encryption password for export, click Export Fault Information, and specify a path to save the exported data. Issue 09 (2024-01-31) Copyright © Huawei Digital Power Technologies Co., Ltd. -
Page 127: What Is The Heat Consumption Of A Single Smartli Cabinet
SmartLi cabinet is 0.91 kW. You can select an appropriate air conditioner for the battery room based on the data. Issue 09 (2024-01-31) Copyright © Huawei Digital Power Technologies Co., Ltd. -
Page 128: A Wiring Diagram
SmartLi 3.0 User Manual (Long-Term Backup Power) A Wiring Diagram Wiring Diagram Figure A-1 Wiring diagram (connecting to the integrated UPS) Issue 09 (2024-01-31) Copyright © Huawei Digital Power Technologies Co., Ltd. - Page 129 SmartLi 3.0 User Manual (Long-Term Backup Power) A Wiring Diagram Figure A-2 Wiring diagram (connecting to the UPS5000-E) Issue 09 (2024-01-31) Copyright © Huawei Digital Power Technologies Co., Ltd.
-
Page 130: B Lifting Trolley
You can decide whether to choose it based on site requirements. Appearance Figure B-1 Lifting trolley (1) Tabletop (2) Handle (3) Lowering switch (4) Elevating pedal (5) Foot brake Issue 09 (2024-01-31) Copyright © Huawei Digital Power Technologies Co., Ltd. - Page 131 Step 3 Repeatedly step on the elevating pedal to raise the tabletop to a proper height. Step 4 Lift the lowering switch to slowly lower the tabletop to the required height. ----End Issue 09 (2024-01-31) Copyright © Huawei Digital Power Technologies Co., Ltd.
-
Page 132: C Acronyms And Abbreviations
C Acronyms and Abbreviations Acronyms and Abbreviations battery management system battery management unit battery control unit Conformite Europeenne depth of discharge emergency power off end of discharge end of life Issue 09 (2024-01-31) Copyright © Huawei Digital Power Technologies Co., Ltd. - Page 133 C Acronyms and Abbreviations International Electrotechnical Commission liquid crystal display monitoring display unit network management system protective earthing RS485 Recommended Standard state of charge state of health SBCU system battery management unit Issue 09 (2024-01-31) Copyright © Huawei Digital Power Technologies Co., Ltd.
- Page 134 SmartLi 3.0 User Manual (Long-Term Backup Power) C Acronyms and Abbreviations uninterruptible power system Issue 09 (2024-01-31) Copyright © Huawei Digital Power Technologies Co., Ltd.
Need help?
Do you have a question about the SmartLi 3.0 and is the answer not in the manual?
Questions and answers