Enterasys S Series Hardware Installation Manual
Stand alone switch
Hide thumbs
Also See for S Series:
- Hardware installation manual (76 pages) ,
- Upgrade installation manual (48 pages) ,
- Hardware installation manual (68 pages)

Subscribe to Our Youtube Channel
Related Manuals for Enterasys S Series


Summary of Contents for Enterasys S Series
- Page 1 Enterasys S-Series ® Stand Alone (SSA) Switch Hardware Installation Guide SSA-T8028-0652 SSA-G8018-0652 P/N 9034703...
- Page 3 Enterasys Networks reserves the right to make changes in specifications and other information contained in this document and its web site without prior notice. The reader should in all cases consult Enterasys Networks to determine whether any such changes have been made.
- Page 4 Regulatory Compliance Information Federal Communications Commission (FCC) Notice This device complies with Part 15 of the FCC rules. Operation is subject to the following two conditions: (1) this device may not cause harmful interference, and (2) this device must accept any interference received, including interference that may cause undesired operation.
- Page 5 It is the users’ responsibility to utilize the available collection system to ensure WEEE is properly treated. Enterasys For information about the available collection system, please contact Customer Support at +353 61 705500 (Ireland).
- Page 6 SJ/T 11363-2006 standard. This table shows where these substances may be found in the supply chain of Enterasys’ electronic information products, as of the date of sale of the enclosed product. Note that some of the component types listed above may or may not be a part of the enclosed product.
- Page 7 Safety Information Class 1 Laser Transceivers The single mode interface modules use Class 1 laser transceivers. Read the following safety information before installing or operating these modules. The Class 1 laser transceivers use an optical feedback loop to maintain Class 1 operation limits. This control loop eliminates the need for maintenance checks or adjustments.
- Page 8 2006/95/EC Manufacturer’s Name: Enterasys Networks, Inc. Manufacturer’s Address: 9 Northeastern Boulevard Salem, NH 03079 European Representative Name: Enterasys Networks Limited European Representative Address: Nexus House, Newbury Business Park London Road, Newbury Berkshire RG14 2PZ, England Conformance to Directive(s)/Product Standards: EC Directive 2004/108/EC...
- Page 9 CAREFULLY READ THIS LICENSE AGREEMENT. This document is an agreement (“Agreement”) between the end user (“You”) and Enterasys Networks, Inc., on behalf of itself and its Affiliates (as hereinafter defined) (“Enterasys”) that sets forth Your rights and obligations with respect to the Enterasys software program/firmware (including any accompanying documentation, hardware or media) (“Program”) in the package...
- Page 10 Agreement. 12. WAIVER. A waiver by Enterasys of a breach of any of the terms and conditions of this Agreement must be in writing and will not be construed as a waiver of any subsequent breach of such term or condition. Enterasys’ failure to enforce a term upon Your breach of such term shall not be construed as a waiver of Your breach or prevent enforcement on any other occasion.
- Page 11 14. TERMINATION. Enterasys may terminate this Agreement immediately upon Your breach of any of the terms and conditions of this Agreement. Upon any such termination, You shall immediately cease all use of the Program and shall return...
-
Page 13: Table Of Contents
Contents About This Guide Who Should Use This Guide ..........................xv How to Use This Guide .............................xv Related Documents ............................xvi Typographical Conventions ..........................xvii Getting Help ..............................xviii Chapter 1: Introduction SSA-T8028-0652 ............................1-1 SSA-G8018-0652 ............................1-2 AC Power Supplies ............................1-2 Fans ................................ - Page 14 Chapter 3: Troubleshooting LEDs ................................3-1 Port LEDs ..............................3-1 System LEDs ............................3-3 Power Supply LED ........................... 3-5 Troubleshooting Checklist ..........................3-5 Replacing the SSA Fan Module ........................3-6 Removing a Power Supply ..........................3-8 Using the OFFLINE/RESET Button ........................ 3-9 Recommended Shutdown Procedure Using OFFLINE/RESET Button ...........
- Page 15 Concrete Inserts ..........................D-4 Mounting the SSA Chassis on a Wall ......................D-4 Appendix E: Environmental Guidelines Temperature and Humidity Guidelines ......................E-1 Operating Temperatures ..........................E-1 Inlet Air Temperature Measurement ......................E-1 Cooling Air ..............................E-1 Power Conditioning ..........................E-1 Airflow Concerns for Closed Racks ......................E-2 Airflow Concerns for Open Racks ......................E-3 Dust Mitigation and Prevention ........................E-5 Airborne Chemicals and Prevention .......................E-6...
- Page 16 Power Supply LED Status Definitions ....................3-5 Troubleshooting Checklist ........................3-5 SSA Switch Ports ..........................A-1 Specifications .............................A-1 COM Port Pin Assignments ........................A-2 Compliance Standards ........................A-3 Contents of SSA-FB-MOUNTKIT .......................C-2 Contents of SSA-WALL-MOUNT Kit ....................D-1 Airborne Dust Specification for Enterasys Equipment — Airborne Dust Maximum Values....E-6...
-
Page 17: About This Guide
A brief summary of each chapter • Definitions of the conventions used in this document • Instructions regarding how to obtain technical support from Enterasys Networks. To locate information about various subjects in this guide, refer to the following table. For... Refer to... -
Page 18: Related Documents
The Enterasys S-Series Configuration Guide and Enterasys S-Series CLI Reference Guide provide information on how to use the CLI to set up and manage the SSA switch. The Enterasys S-Series Stand Alone (SSA) Switch Quick Reference provides an overview of key considerations when installing the SSA switch. -
Page 19: Typographical Conventions
Personen oder Todesfällen – hervorgerufen durch elektrische Spannung – führen können! Risques d'électrocution: Met en garde contre un geste qui pourrait entraîner des blessures ou la mort à la suite d'une électrocution. Enterasys S-Series Stand Alone (SSA) Hardware Installation Guide xvii... -
Page 20: Getting Help
Getting Help Getting Help For additional support related to the SSA switch or this document, contact Enterasys Networks using one of the following methods: World Wide Web www.enterasys.com/support Phone 1-800-872-8440 (toll-free in U.S. and Canada) or 1-603-952-5000 For the Enterasys Networks Support toll-free number in your country: www.enterasys.com/support... -
Page 21: Chapter 1: Introduction
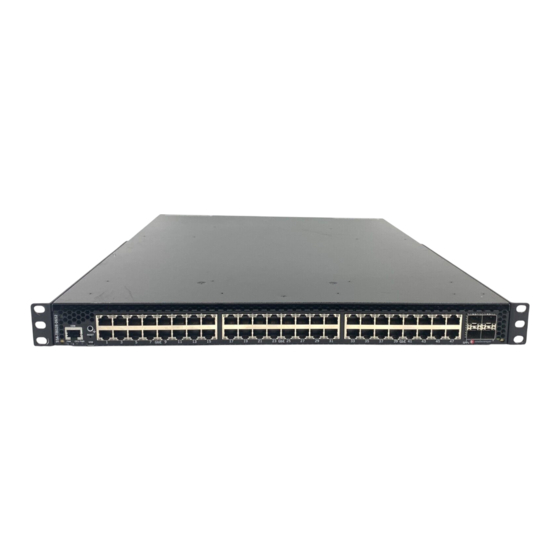
Introduction This chapter provides an overview of the capabilities of the Enterasys S-Series SSA models: • SSA-T8028-0652 • SSA-G8018-0652 For information about firmware features of the SSA switch and how to configure them, refer to the Enterasys S-Series Configuration Guide. -
Page 22: Ssa-G8018-0652
The SFP and SFP+ ports support a number of pluggable transceivers. For more information about the transceivers, see the following: http://www.enterasys.com/products/transceivers-ds.pdf AC Power Supplies Two 460 watt AC power supply models, which you must order separately, are available for the SSA switch: •... -
Page 23: Micro-Usb Port
(a virtual switch bonded chassis) managed by one IP address. Connect the chassis to each other by using at least two 10G ports on each SSA chassis. Note: For virtual switch bonding configuration details, see the Enterasys S-Series Configuration Guide. - Page 24 Virtual Switch Bonding 1-4 Introduction...
-
Page 25: Required Tools
Ränder der E/A-Anschlüsse nicht mit den Fingern. Avertissements: Afin d'éviter toute blessure possible lors de l'installation de votre commutateur Enterasys, évitez que vos doigts touchent les rebords des ports d'entrée et de sortie. Follow the order of the sections listed below for correct installation: For information about... -
Page 26: Installation Site Requirements
Power cord retention clips SSA Quick Reference Inspect the SSA switch for any signs of physical damage. If there are any signs of damage, DO NOT install the SSA switch; instead, contact Enterasys Networks. Refer to “Getting Help” on page xviii for details. -
Page 27: Ssa Switch Rack Configurations
Mid-mounted with the switch I/O ports facing front front (cool air side) Mid-mounting with the power supply facing front Flush mounted with the power supply facing Air flow direction front (cool air side) Enterasys S-Series Stand Alone (SSA) Hardware Installation Guide 2-3... -
Page 28: Power Supply Air Flow And Switch Fan Module Air Flow
Mounting the SSA Switch Power Supply Air Flow and Switch Fan Module Air Flow The power supply module has its own fan for cooling the power supply, and the two switch fan modules have two fans (each) for cooling the switch circuitry. The air flow direction of all three modules must agree in order to properly cool the installed SSA system. -
Page 29: Reversing The Fan Module Air Flow
Figure 2-3). Flip the fan unit 180 degrees until the air flow indicator is again completely visible and pointing away the fan module screen, as shown in callout 4, Figure 2-3. Enterasys S-Series Stand Alone (SSA) Hardware Installation Guide 2-5... -
Page 30: Reinstall The Fan Module
Mounting the SSA Switch Figure 2-3 Reversing the Fan Module Air Flow 1 Air flow indicator arrow 3 Air flow indicator arrow 2 Fan unit in mid-reversal 4 Fan screen 1.Callout 1 shows air flow from the I/O port side to the power supply side of the module. 2.Callout 3 shows air flow from the power supply side to the I/O port side of the module. -
Page 31: Flush-Mount Power Supply Facing Front Configuration
Repeat steps 1–3 on the other side of the chassis. Figure 2-4 Flush Mount Power Supply Front Configuration Ear mount screw removal Ear mount screw insertion Rack mount ear pivot screw Pivot screw retightened Reposition of rack mount ear Enterasys S-Series Stand Alone (SSA) Hardware Installation Guide 2-7... -
Page 32: Mid-Mount I/O Ports Facing Front Configuration
Mounting the SSA Switch Mid-Mount I/O Ports Facing Front Configuration The mid-mount, I/O ports facing front configuration is depicted in callout 3 of Figure 2-1 page 2-3. This rack mount configuration requires repositioning the rack mount ears on both sides of the device. -
Page 33: Securing The Ssa Switch To The Rack
To secure the SSA switch to the rack: Ensure that the rack mount ears are properly installed based upon the discussion in section “Rack Mount Ear Positioning” on page 2-6. Enterasys S-Series Stand Alone (SSA) Hardware Installation Guide 2-9... -
Page 34: Securing The Ssa Switch To The Rack In A Flush Mount Configuration
Mounting the SSA Switch Align the rack mount ear holes with the front rack post holes in either a flush (Figure 2-7) or mid-mount (Figure 2-8 on page 2-11) configuration. Secure the SSA switch to each rack post with at least two screws or fasteners appropriate to the rack as shown in callout 1 of the appropriate figure (Figure 2-7 Figure... -
Page 35: Flat Surface Installation
2-4. Remove the power supply from its protective plastic bag. Examine the power supply carefully, checking for damage. If there are any signs of damage, DO NOT install the power supply; instead, contact Enterasys Networks. Refer to “Getting Help” on page xviii for details. -
Page 36: Installing The Power Supplies
Installing the Power Supplies Table 2-4 Contents of SSA Power Supply Carton Item Quantity Power supply (SSA-FB-AC-PS-A or SSA-FB-AC-PS-B) For USA shipments: NEMA Power Cord 5-15, C13, R/A, SHLD Type of power cord is dependent on country of installation. Installing the Power Supplies If you are installing only one power supply, you must put the power supply in the left power supply bay (labeled PS1). -
Page 37: Powering Up The Ssa Switch
When the initialization process is successful, the CPU LED turns green. If the CPU LED does not turn green, refer to Chapter 3, Troubleshooting, for troubleshooting information. Enterasys S-Series Stand Alone (SSA) Hardware Installation Guide 2-13... -
Page 38: Installing The Power Cord Retention Clip Assembly
Link Aggregation to operate properly. Before connecting the cables, refer to the Enterasys S-Series Configuration Guide for configuration information. For details on how to obtain manuals, refer to “Related... -
Page 39: Connecting Category 6 Utp Ethernet Cables To The Base-T Ports
1. N'utilisez aucun instrument d'optique pour observer la sortie du laser. L'utilisation d'instruments d'optique augmente les risques de blessure aux yeux. L'alimentation de l'adaptateur de réseau doit être coupée lorsque vous inspectez le port optique de sortie. Enterasys S-Series Stand Alone (SSA) Hardware Installation Guide 2-15... -
Page 40: Preparation
Connecting to the Network Caution: Carefully follow the instructions in this manual to avoid damaging the pluggable transceivers and SSA chassis. The pluggable transceivers and SSA chassis are sensitive to static discharges. Use an antistatic wrist strap and observe all static precautions during this procedure. Failure to do so could result in damage to the SFP, SFP+, and SSA. -
Page 41: Connecting Two Ssa Chassis For Virtual Switch Bonding
Using the UTP cable with RJ45 connectors and an optional RJ45-to-DB25 female adapter, you can connect from the SSA RJ45 COM port to a VT series terminal or VT type terminals running emulation programs for the VT series. Enterasys S-Series Stand Alone (SSA) Hardware Installation Guide 2-17... -
Page 42: Connecting To A Pc Or Laptop
Connecting to the COM Port for Local Management Connecting to a PC or Laptop To connect a PC or laptop running the VT terminal emulation to the SSA COM port: Connect the RJ45 connector at one end of the cable to the COM port on the SSA switch. Plug the RJ45 connector at the other end of the cable into an RJ45-to-DB9 adapter. -
Page 43: Adapter Wiring And Signal Assignments
VT Series Port Adapter Wiring and Signal Diagram RJ45 DB25 Conductor Signal Transmit (TX) Blue Receive (RX) Yellow Clear to Send (CTS) Green Ground (GRD) Orange Data Terminal Ready Pins Pins DB25 Connector (Female) RJ45 Connector (Female) Enterasys S-Series Stand Alone (SSA) Hardware Installation Guide 2-19... -
Page 44: Completing The Installation
Read-Write access; and admin for super-user access to all modifiable parameters. The default password is set to blank (null). For information on changing these default passwords, refer to the Enterasys S-Series Configuration Guide. Start the Command Line Interface (CLI) from the device’s local console port as follows: Connect a terminal to the local console port as described in “Connecting to the COM Port for... - Page 45 Completing the Installation The SSA switch is now ready to be configured. For information about setting the IP address and configuring Telnet settings for remote access to SSA switch management, refer to the Enterasys S-Series Configuration Guide. The CLI commands enable you to initially set up and perform more involved management configurations.
- Page 46 Completing the Installation Pin Out Descriptions 2-22 Installation...
-
Page 47: Chapter 3: Troubleshooting
On the SSA, you can view the receive and transmit activity on the RX and TX LEDs for the RJ45, SFP, and SFP+ ports. See Figure 3-1 Figure 3-2. Figure 3-1 RJ45 Port LEDs RX LED TX LED Enterasys S-Series Stand Alone (SSA) Hardware Installation Guide 3-1... -
Page 48: Sfp And Sfp+ Port Leds
None Port enabled, but no activity. If you know the port should (Transmit) be active and is not, contact Enterasys Technical Support. Green (blinking) Indicates data transmission activity. None. Flashing frequency indicates the data rate. -
Page 49: System Leds
Alternating (67% on, 33% off). Indicates a shutdown While in this state, you have 60 seconds and off is complete. The indication will hold for 60 seconds before the SSA switch will reboot. then automatically restart. Enterasys S-Series Stand Alone (SSA) Hardware Installation Guide 3-3... -
Page 50: Cpu Led In Virtual Switch Bonding (Vsb) Configuration
The SSA switch is not receiving power from the Ensure the power cords are plugged in power supplies. and power is available at the source. Contact Enterasys Networks for technical support. Green Functional. Indicates one of the following conditions: None. -
Page 51: Power Supply Led
SSA switch assign an IP address. through in-band Port is disabled. Enable port. See the Enterasys S-Series Configuration Guide for management. instructions to enable/disable ports. Host Port policy and/or management Verify that a management VLAN exists and that it is associated VLAN is incorrectly configured, or with the Host Port. -
Page 52: Replacing The Ssa Fan Module
Problem Possible Cause Recommended Action Port(s) goes into Loop condition detected. Verify that Spanning Tree is enabled. Refer to the Enterasys S- standby for no Series Configuration Guide for the instructions to set the type of apparent reason. STP. Review the network design and delete loops. -
Page 53: Removing The Fan Module
Align the new fan module with the fan module opening. Insert the module into the fan module opening, applying enough pressure that the fan module is flush with the device. Secure the two fan module captive screws. Enterasys S-Series Stand Alone (SSA) Hardware Installation Guide 3-7... -
Page 54: Removing A Power Supply
Removing a Power Supply Removing a Power Supply To remove a power supply from the SSA switch: Use appropriate antistatic protection when handling power supplies. If a power cord retention clip is securing the power cord, push down on the retention clip clamp tab to open the clamp and disengage the power cord from the clamp. -
Page 55: Using The Offline/Reset Button
último recurso, puesto que interrumpe todos los procesos del módulo en funcionamiento, lo que podría resultar pérdidas de frames. To reset an SSA switch without it performing an orderly shutdown routine, press and hold the OFFLINE/RESET button for approximately 6 seconds. Enterasys S-Series Stand Alone (SSA) Hardware Installation Guide 3-9... - Page 56 Using the OFFLINE/RESET Button 3-10 Troubleshooting...
-
Page 57: Appendix A: Specifications
SSA Switch Specifications Pluggable Transceiver Specifications COM Port Pinout Assignments Regulatory Compliance Enterasys Networks reserves the right to change specifications at any time without notice. SSA Switch Specifications Table A-1 describes I/O ports for the SSA switch. Table A-1 SSA Switch Ports... -
Page 58: Pluggable Transceiver Specifications
5% to 95% (non-condensing) Pluggable Transceiver Specifications For SFP and SFP+ transceiver specifications, refer to the datasheet at the following URL: http://www.enterasys.com/products/transceivers-ds.pdf COM Port Pinout Assignments The COM port is an RJ45 communications port for local access to local management. Refer to the table below for the COM port pin assignments. -
Page 59: Regulatory Compliance
(Class A), EN 55024, EN 61000-3-2, EN 61000-3-3, AS/NZS CISPR-22 (Class A). VCCI V-3. CNS 13438 (BSMI), 2004/108/EC (EMC Directive) Environmental 2011/65/EU (RoHS Directive), 2002/96/EC (WEEE Directive), Ministry of Information Order #39 (China RoHS) Enterasys S-Series Stand Alone (SSA) Hardware Installation Guide A-3... - Page 60 Regulatory Compliance A-4 Specifications...
-
Page 61: Appendix B: Clearing The Persistent Storage Or System Password
Press a key and the system image loader prompt displays: ###You have 3 seconds to access the bootloader menu### Press any key to enter System Image Loader menu PressAnyKey [System Image Loader]: Enterasys S-Series Stand Alone (SSA) Hardware Installation Guide B-1... -
Page 62: Clearing System Storage Or Password Using The Dip Switch Method
Enter admin at the username prompt. Enter a carriage-return at the password prompt. See the Image Configuration and File Management chapter of the Enterasys S-Series Configuration Guide for instructions on restoring a config if you cleared the NVRAM. Clearing System Storage or Password Using the Dip Switch Method Electrical Hazard: Only qualified personnel should perform installation procedures. -
Page 63: Required Tools
Once the SSA switch resets, you can either use the factory default setting or reenter your own password. Note: Do not change the position of Switch 8 unless it is necessary to reset the admin password to its factory default setting. Enterasys S-Series Stand Alone (SSA) Hardware Installation Guide B-3... -
Page 64: Setting The Mode Switches
Clearing System Storage or Password Using the Dip Switch Method Figure B-1 Mode Switch Location Fan Module Bay 2 Mode Switches Setting the Mode Switches Before setting the mode switches, you must power down the SSA switch. Put on the ESD wrist strap and attach it to the ground receptacle on the switch I/O ports side of the SSA switch. -
Page 65: Required Tools
Removing the Rack Mount Ears from the SSA Switch Installing the Adapter Plates 4-Post Rack Mount Installation 2-Post Rack Mount Installation Required Tools • ESD wrist strap (included with the S-Series chassis) • Phillips screwdriver Enterasys S-Series Stand Alone (SSA) Hardware Installation Guide C-1... -
Page 66: Contents Of Mounting Kit
Contents of Mounting Kit Contents of Mounting Kit Table C-1 lists the contents of the SSA-FB-MOUNTKIT mounting kit. Table C-1 Contents of SSA-FB-MOUNTKIT Item Number Left and right rails and extensions assemblies Adapter plates Mid-Brackets 6-32 flat head screws 10-32 pan head screws (black) 10-32 cage nuts Note: The SSA-FB-MOUNTKIT mounting kit does not include rack screws. -
Page 67: Required Order Of Installation
The rail and mid-bracket assemblies used in the 2-post rack configuration (see “Pre- Installation Tasks” on page C-9) The adapter plates can be installed in either a flush or a recessed configuration of up to 1.5 inch. Enterasys S-Series Stand Alone (SSA) Hardware Installation Guide C-3... -
Page 68: Installing The Adapter Plates
Installing the Adapter Plates The SSA switch can be configured for air intake on either the chassis switch I /O port side or the power supply side. Adapter plate installation must align the adapter plate ears with the air intake side of the chassis. -
Page 69: 4-Post Rack Mount Installation
“right front” or “left front”. The front of the rack is always the cool air intake side. The rear of the rack is always the hot air exhaust side. Enterasys S-Series Stand Alone (SSA) Hardware Installation Guide C-5... -
Page 70: Rack Mount Rail With Attached Extension Assembly Installation
4-Post Rack Mount Installation Rack Mount Rail with Attached Extension Assembly Installation Refer to Figure C-4 as you perform the following procedure. You must supply eight rack screws to install the rack mount rails in the equipment rack. To install the rack mount rail with extension assembly: Adjust the length of the two assemblies (callout 1) to agree with the distance between the outer face of the vertical rack posts. -
Page 71: Chassis To Rail Assembly Installation
Rack front (cool air inlet) Rail assembly middle screw hole Rack specific screw (2) Rail assembly flange Chassis air intake side Rear rack post Adapter plate ear Rail assembly to rack screws Enterasys S-Series Stand Alone (SSA) Hardware Installation Guide C-7... -
Page 72: 2-Post Rack Mount Installation
2-Post Rack Mount Installation 2-Post Rack Mount Installation The rack mount option kit supports two configurations for a 2-post rack installation: • A 3 inch or 7.25 inch post flush mount configuration • A mid-mount configuration The option of recessing the chassis up to 1.5 inches is also supported for each configuration (see “Installing the Adapter Plates”... -
Page 73: Pre-Installation Tasks
The mid-bracket is used to secure the rack mount rail to the rear flange of the rack post in a flush mount configuration or to the front flange of the rack post in a mid-mount configuration. Enterasys S-Series Stand Alone (SSA) Hardware Installation Guide C-9... -
Page 74: Securing Mid-Bracket To Rail 3 Inch Flush Mount
2-Post Rack Mount Installation You can position the mid-bracket on to the rail in the following configurations: • 3 inches in from the rack mount rail ear for securing to the rear rack post flange in a 3 inch rack post flush mount configuration. -
Page 75: Securing Mid-Bracket To Rail 7.25 Inch Flush Mount
C-10) that comes with the kit in the rail ear square opening (callout 3, Figure C-10). Repeat steps 1–4 for the other rail. Figure C-9 Securing Mid-Bracket to Rail 7.25 Inch Flush Mount Four screws from extension rack assembly Mid-bracket Enterasys S-Series Stand Alone (SSA) Hardware Installation Guide C-11... -
Page 76: Securing Mid-Bracket To Rail 7.25 Inch Mid Mount
2-Post Rack Mount Installation Figure C-10 Securing Mid-Bracket to Rail 7.25 Inch Mid Mount Four screws from extension rack assembly Rail ear square opening Mid-bracket Cage nut C-12 Optional Rack Mount Rail Kit Installation... -
Page 77: Securing The Rail Assembly For A 2-Post Flush Mount Configuration
Secure each rail assembly with two screws or fasteners appropriate to the rack at both the rail ear and mid-bracket ear. Figure C-11 Securing a Flush Mount Rail Assembly Rack appropriate screws of fasteners (8) Enterasys S-Series Stand Alone (SSA) Hardware Installation Guide C-13... -
Page 78: Securing The Rail Assembly For A 2-Post Mid-Mount Configuration
2-Post Rack Mount Installation Securing the Rail Assembly for a 2-Post Mid-Mount Configuration When securing the rail and mid-bracket assembly in a mid-mount configuration: Ensure that a cage nut is installed in the rail ear square opening as described in “Mid-Bracket to Rail 7.25 Inch Flush Mount or Mid-Mount Assembly”... -
Page 79: Securing The Ssa Switch To The Rack
7.25 Inch Flush Mount or Mid-Mount Assembly” on page C-11. Figure C-13 Securing the SSA Switch to the Rack Flush mount configuration Rack appropriate screws or fasteners (2) Mid-mount configuration Black 10-32 screws (2) Enterasys S-Series Stand Alone (SSA) Hardware Installation Guide C-15... - Page 80 2-Post Rack Mount Installation C-16 Optional Rack Mount Rail Kit Installation...
-
Page 81: Required Tools
Phillips screwdriver Contents of SSA-WALL-MOUNT Kit Table D-1 lists the contents of the SSA-WALL-MOUNT kit. Table D-1 Contents of SSA-WALL-MOUNT Kit Item Number Mounting bracket 10-32 x .5 inch pan head screws Enterasys S-Series Stand Alone (SSA) Hardware Installation Guide D-1... -
Page 82: Installation Site Requirements
Installation Site Requirements Note: The SSA-WALL-MOUNT kit does not include hardware for installing the mounting bracket on a wall. You must provide screws and wall anchors that are appropriate for the wall on which you are installing the mounting bracket. The screws and wall anchors that you provide must be capable of supporting at least four times the combined weight of the SSA chassis and two power supplies. -
Page 83: Toggle Bolts
The screws must be long enough to fully engage all threads on the nuts. Concrete or Masonry Wall Construction For concrete or masonry walls, use appropriate wall fasteners in all four mounting points. • Concrete Screws • Concrete Inserts Enterasys S-Series Stand Alone (SSA) Hardware Installation Guide D-3... -
Page 84: Concrete Screws
Mounting the SSA Chassis on a Wall Concrete Screws Concrete screws must be at least 3/16”. Each of the four screws must be rated for 32.2 lb (14.6 kg) minimum. Typical drill size is 5/32” for the 3/16” concrete screw. Follow the manufacturer’s instructions, including the recommendation for drill depth. -
Page 85: Securing The Wall Mounting Bracket To A Wall
Mounting the SSA Chassis on a Wall Figure D-1 Securing the Wall Mounting Bracket to a Wall Customer-supplied screws Enterasys S-Series Stand Alone (SSA) Hardware Installation Guide D-5... -
Page 86: Opening The Gate
Mounting the SSA Chassis on a Wall Open the gate on the top side of the mounting bracket. See Figure D-2. Pull the right and left plungers simultaneously to unlock the gate. To lock the plungers in the open position, rotate the opened plungers counter-clockwise. b. -
Page 87: Mounting Bracket Gate In The Open Position
Note: You must install the SSA chassis in the orientation shown in Figure D-4 (I/O connectors facing left, top of SSA facing out). No other orientation of the SSA chassis is supported. Enterasys S-Series Stand Alone (SSA) Hardware Installation Guide D-7... -
Page 88: Installing The Ssa In The Mounting Bracket
Mounting the SSA Chassis on a Wall Figure D-4 Installing the SSA in the Mounting Bracket Insert the top side of the SSA chassis in the mounting bracket. D-8 Installing the SSA-WALL-MOUNT... -
Page 89: Closing The Gate
Figure D-5 Closing the Gate Gate Using the 10-32 screws included with the mounting bracket, secure the front of the SSA chassis to the left of the mounting bracket. See Figure D-6. Enterasys S-Series Stand Alone (SSA) Hardware Installation Guide D-9... -
Page 90: Securing The Ssa Chassis To The Mounting Bracket
Mounting the SSA Chassis on a Wall Figure D-6 Securing the SSA Chassis to the Mounting Bracket You can now cable the I/O ports and power up the SSA chassis as described in Chapter Installation. D-10 Installing the SSA-WALL-MOUNT... -
Page 91: Appendix E: Environmental Guidelines
Power Conditioning Enterasys products are rated to be used with internationally accepted AC input parameters. It is important that these parameters are monitored and verified to operate as expected for the ratings that apply to the equipment installed. Surges and excessive noise outside of these prescribed ranges in the power circuits feeding this equipment may cause permanent damage to the equipment installed and must be monitored and prevented. -
Page 92: Airflow Concerns For Closed Racks
Note: The SSA switch directs air flow from front to back, not side to side. When placing Enterasys switches into enclosed racks, rack exhaust fans must be considered if the rack does not contain adequate inlet and exit venting. These fans may be needed to help exhaust hot air from the rack. -
Page 93: Airflow Concerns For Open Racks
E-4 below shows a non-ideal configuration for an open rack, where sub- systems with mixed flow directions (white arrows) are combined in one rack. Circular red arrows show potential for hot air recirculation. Enterasys S-Series Stand Alone (SSA) Hardware Installation Guide E-3... -
Page 94: Non-Ideal Open Rack Configuration
Temperature and Humidity Guidelines Figure E-3 Non-ideal Open Rack Configuration Non-ideal flows should be avoided or mitigated and confirmed through thermal testing. Figure E-4 below shows a non-ideal open rack configuration containing sub-systems with mixed flow directions (white arrows). This configuration shows mitigation of potential hot air recirculation by leaving a gap in the rack population. -
Page 95: Dust Mitigation And Prevention
Dust accumulation on inlet and exit venting is not uncommon after prolonged use. In dustier environments this accumulation can be much quicker. Enterasys strongly recommends routine maintenance to check for clean inlet and exit vents on this equipment. Over time, dust accumulation can create vent blockages, thereby decreasing airflow and increasing component temperatures, resulting in reduced reliability. -
Page 96: Airborne Chemicals And Prevention
Airborne Chemicals and Prevention Table E-1 Airborne Dust Specification for Enterasys Equipment — Airborne Dust Maximum Values Dust Guidelines All/Total Airborne Particles (TSP-Dichot 15): 20 µg/m PM10/Coarse Particles (2.5 to 15 microns): Preferred : <10 µg/m Maximum : 20 µg/m PM2.5/Fine particles (< 2.5 microns): 10 µg/m...
Need help?
Do you have a question about the S Series and is the answer not in the manual?
Questions and answers