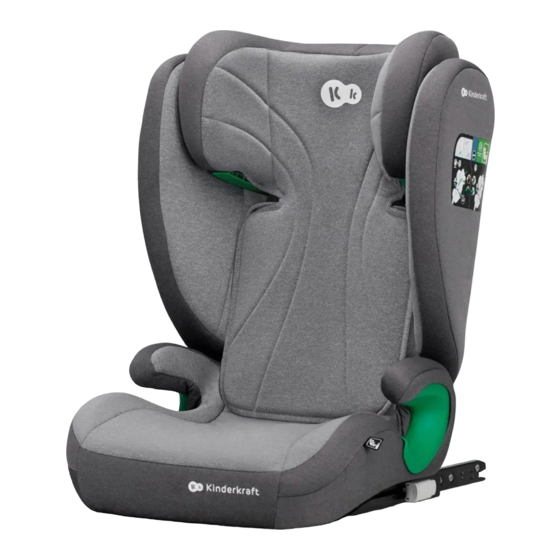
Kinderkraft JUNIOR FIX 2 i-Size User Manual
Hide thumbs
Also See for JUNIOR FIX 2 i-Size:
- User manual (96 pages) ,
- User manual (13 pages) ,
- User manual (21 pages)
Summary of Contents for Kinderkraft JUNIOR FIX 2 i-Size
- Page 1 JUNIOR FIX 2 i-Size USER GUIDE MODEL: JUNIOR FIX 2 i-Size ECE R129.03 v.2.0 MODEL: I-GUARD ECE.R129.03 ver. 1.2...
- Page 2 1.0 Usage NOTE! Product graphics serve an illustrative function! The car seat has been designed, tested and approved for use in accordance with the requirements of UN/ECE Regulation No. 129 concerning the approval of child restraint systems (UN/ECE R129/03). Do not set the car seat in a forward facing position until your child is 15 months old and 76 cm tall.
- Page 3 Hight of the child Car seat setting Car seat mounting ISOFIX + three-point car seat belt 100-150cm Three-point car seat belt...
-
Page 4: Safety Instructions
2.0 Safety instructions Please take a few minutes to read this instruction manual in order to ensure the proper safety of your child. • The car seat MUST NOT be installed on the vehicle seats mounted backwards or sideways. • The car seat MUST NOT be placed on the vehicle seats with an active front air-bag. - Page 5 Information on the suitability of the car seat for use with a child seat can be • Never leave a child unattended in a child seat. found in the vehicle's operating instructions. • Make sure that luggage and other objects are adequately secured, •...
- Page 6 • Do not use the seat if parts are damaged or loose. • On some car seats made of sensitive materials, the use of the car seat • In an emergency, it is important to release the harness quickly. This means can leave marks and/or cause discolouration.
- Page 7 3.0 Installing the car seat backrest 1. Place the backrest flat behind the seat and hook the bottom of the backrest onto the seat 2. Adjust the backrest until it locks in the vertical position. You will hear a characteristic "click" sound 3.
- Page 8 4.0 Adjusting the backrest and securing the child The backrest of the car seat is movable, thanks to which it is possible to adjust it accurately to the plane of the vehicle seat. Tilt the backrest backwards until it is adjacent to the vehicle seat.
- Page 9 4.1 Height of the headrest 1. Grasp the headrest adjustment lever located on the back of the headrest and pull it gently upwards 2. Adjust the headrest by selecting one of ten options and when the height is adjusted, release the adjustment strap IMPORTANT! Make sure the vehicle seat headrest is locked in place The headrest should fit snugly around your child's head, with...
-
Page 10: Isofix Installation
4.2 ISOFIX installation 1. Place the car seat on the vehicle seat. Press both sides of the ISOFIX release button and extend the ISOFIX connector arms to their maximum length. 2. Grasp the car seat with both hands and insert both latches into the places of installation on the vehicle seat. - Page 11 5.0 Children between 100 and 150 cm - using ISOFIX connectors and three-point car seat belt. 1. Install the car seat on the vehicle seat using ISOFIX connectors. 2. Push the car seat all the way into the seat and check its correct installation –...
- Page 12 5.1 Children between 100 and 150 cm - using three-point car seat belt. 1. Install the car seat on the vehicle seat. 2. Push the car seat all the way to the vehicle seat. 3. Place your child in the car seat 4.
- Page 13 6.0 Uninstalling the car seat (ISOFIX installing system) 1. Press the release button on both ISOFIX latches. (The latches will be released, and the colour of the ISOFIX indicators will change from green to red) 2. Insert the ISOFIX arms into the base of the car seat using the sliding lever.
- Page 14 6.1 Removing the car seat backrest 1. Uncover the inside of the car seat by unfastening the fasteners located on the backrest. 2. Push the backrest away from you so that the car seat's backrest lies flat on the surface. 3.
-
Page 15: Removing The Cover
7.0 Removing the cover 1. Unfasten the fasteners located on the edges of the car seat backrest material, then uncover the car seat cover by moving the material from the backrest to the headrest 2. Unfasten the fasteners located on the edges of the cover (on both sides) 3. -
Page 16: Installing The Cover
7. Pull the material towards you to slide it off the seat. 8. Starting from the sides of the headrest, slide it off the shell of the car seat. 7.1 Installing the cover To put the cover back on - just reverse the above sequence of actions. Align the cover with the attachment points on the car seat. - Page 17 • Do not use aggressive cleaning agents (such as solvents). • The safety harness can be cleaned in lukewarm soapy water. Warning! You must not remove the metal clips from the safety harness. The full text of the Warranty Terms and Conditions is available on the website WWW.KINDERKRAFT.COM...


Need help?
Do you have a question about the JUNIOR FIX 2 i-Size and is the answer not in the manual?
Questions and answers