Advertisement
Quick Links
Advertisement

Related Manuals for Kinderkraft I-FIX i-Size


Summary of Contents for Kinderkraft I-FIX i-Size
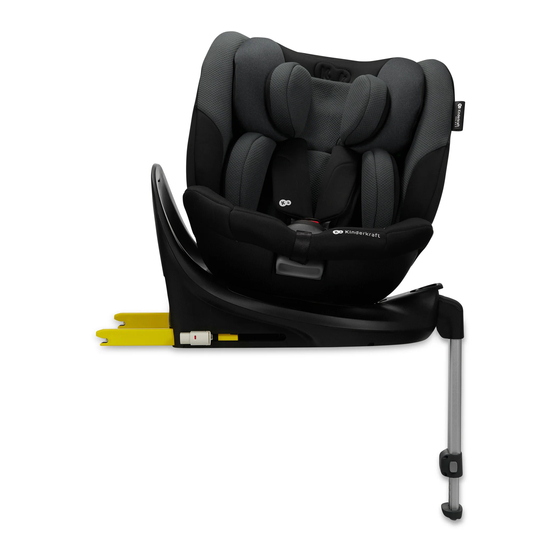
- Page 1 I-FIX i-Size USER GUIDE MODEL: I-FIX i-Size ECE R129.03 v.1.0 MODEL: I-GUARD ECE.R129.03 ver. 1.2...
- Page 2 1.0 Usage NOTE! Product graphics serve an illustrative function! The car seat has been designed, tested and approved for use in accordance with the requirements of UN/ECE Regulation No. 129 concerning the approval of child restraint systems (UN/ECE R129/03). Do not set the car seat in a forward facing position until your child is 15 months old and 76 cm tall.
- Page 3 Hight of the child Car seat setting Car seat mounting ISOFIX + support leg + internal safety 40cm–105cm harness ISOFIX + support leg + internal safety 76cm-105cm harness 100cm-150cm ISOFIX + three-point car seat belt...
-
Page 4: Safety Instructions
2.0 Safety instructions Please take a few minutes to read this instruction manual in order to ensure the proper safety of your child. • The car seat MUST NOT be installed on the vehicle seats mounted backwards or sideways. • The car seat can only be installed on seats equipped with three-point car seat belt. - Page 5 Please refer to your vehicle operating manual for information on the • Never leave your child unattended in the car seat. suitability of the vehicle seat for use with a car seat. • Make sure that the luggage and other objects are adequately secured, •...
- Page 6 • Do not use the car seat if its parts are damaged or loose. • On some vehicle seats made of delicate materials, the use of car seats • In the event of an emergency, it is important to quickly unfasten the car may leave marks and/or discolouration.
- Page 7 3.0 Securing the child 3.1 Installation of insert The extra insert should be used until the child reaches 76 cm. 1. Connect the headrest part of the insert with the rest of it using snap fasteners. 2. Unfasten the safety harness. 3.
- Page 8 3.1.2 Insert functions Positioning the insert in the case Positioning the insert when using of the lowest headrest setting headrest positions other than the lowest...
- Page 9 3.2 Securing the child with the internal safety harness 1. Press the safety harness adjustment button while pulling the harness straps. Remember! Do not pull on the shoulder pads. 2. Unfasten the safety harness. 3. Move the safety harness to the sides of the car seat. For convenience, you can attach them to the elastic bands on the edges 4.
- Page 10 3.3 Tightening the safety harness 1. Pull the internal safety harness to eliminate slack in the waist section; the harness should lie flat. 2. Press the safety harness with the adjustment strap until the harness lies flat on your child's body. IMPORTANT! Make sure that the safety harness is not twisted.
- Page 11 Adjust the appropriate height of the shoulder part of the safety harness so that the harness enters the car seat backrest flat, horizontally, right above the child's shoulders.
- Page 12 3.4 Height of the headrest The headrest should fit snugly around your child's head, with the lower part of the headrest at the same height as your child's shoulders. 1. Loosen the safety harness straps fully by pressing the button and pulling the safety harness straps Remember! Do not pull on the shoulder pads.
- Page 13 The headrest should fit snugly around your child's head, with the lower part of the headrest at the same height as your child's shoulders.
- Page 14 3.5 Seat inclination adjustment mechanism 1. Pull the seat inclination adjustment lever 2. Adjust the seat inclination angle and release the lever in the required position (one of four possible options) 3. Move the seat slightly until you hear a distinct "click" sound. A: Seat inclination adjustment lever...
- Page 15 Important! The car seat can be used in four seat inclination positions, both in forward facing and rear rearward facing positions. Important! When using the car seat for the 100-150 cm range, the car seat must be placed in a vertical position.
- Page 16 3.6 Easy spin mechanism The easy spin mechanism is a function that helps to conveniently position the child or take the child out of the car seat. 1. Pull the car seat easy spin lever 2. Rotate the car seat to the direction of your choice, then release the lever.
- Page 17 4.0 Installation in the vehicle 4.1 ISOFIX installation Before placing the car seat in the vehicle, unfold the support leg. 1. The car seat together with the unfolded support leg should be placed on the vehicle seat. Press both sides of the ISOFIX release button and extend the ISOFIX connector arms to their maximum length.
- Page 18 4.2 Installing the support leg 1. Pull the car seat support leg out of the base and unfold it fully. 2. Press the leg height adjustment buttons on both sides of the leg (this will release the extension lock of the leg, which will automatically extend) 3.
- Page 19 NOTE! Never install the support leg on the storage box in the floor of the car - the storage box can break during an accident; if in doubt, refer to the vehicle manual. NOTE! The support leg must never be unsupported, and no objects can be placed under it.
- Page 20 5.0 Stowing away the five-point safety harness 1. Loosen the safety harness as much as possible by pressing the button and pulling on the safety harness. Remember! Do not pull on the shoulder pads. 2. Remove the shoulder pads by undoing the hook-and-loop fastener and removing the safety harness from the metal hook 3.
- Page 21 7. Open the compartment cover and then put the fastened safety harness into the compartment. 8. Arrange the safety harness flat along the backrest and close the compartment cover. 9. Place the cover back on the car seat by attaching the rubber bands to the car seat shell.
- Page 22 6.0 Installation of the car seat Note! The car seat should be placed directly on the vehicle seat. 6.1 Children with a height ranging from 40 to 105 cm using the ISOFIX installing system with a support leg. 1. Unfold the support leg 2.
- Page 23 5. Adjust the headrest to the child's height. 6. Place your child in the car seat 7. Secure the child with the internal safety harness IMPORTANT If the child has already reached 76 cm, remove the insert before placing the child in the car seat.
- Page 24 6.2 Children with a height ranging from 76 to 105 cm using the ISOFIX installing system with a support leg. 1. Unfold the support leg 2. Install the car seat on the vehicle seat forward facing using ISOFIX connectors. (if the car seat is already installed rearward facing, rotate it using an easy spin mechanism to a forward facing position) 3.
- Page 25 5. Adjust the headrest to the child's height. 6. Place your child in the car seat 7. Secure the child with the internal safety harness...
- Page 26 6.3 Children between 100 and 150 cm - using the ISOFIX connectors and a three-point car seat belt. Important! When using the car seat for the 100-150 cm range, the car seat must be placed in a vertical position. 1. Install the car seat on the vehicle seat forward facing using ISOFIX connectors 2.
- Page 27 7. Guide the car seat belt through the green guide of the shoulder belt. 8. Guide the car seat belt through both waist belt guides. Fasten the car seat belt. You will hear a characteristic "click". Shoulder belt guide Waist belt guide...
- Page 28 6.4 Children between 100 and 150 cm tall - using a three-point car seat belt. Important! When using the car seat for the 100-150 cm range, the car seat must be placed in a vertical position. 1. Install the car seat forward facing on the vehicle seat. 2.
- Page 29 7. Guide the car seat belt through the green guide of the shoulder belt. 8. Guide the car seat belt through both waist belt guides. Fasten the car seat belt. You will hear a characteristic "click". Shoulder belt guide Waist belt guide...
- Page 30 7.0 Removing the car seat (ISOFIX installing system+support leg) 1. Fold the support leg extension by pressing both buttons on the sides of the leg extension and slide it up, tucking it into the rest of the leg. 2. Press the release button on both ISOFIX latches. (The latches will be released, and the colour of the ISOFIX indicators will change from green to red) 3.
-
Page 31: Removing The Cover
7.1 Removing the cover 1. Remove the insert 2. Loosen the car seat belt as much as possible by pressing the button and pulling on the car seat belt. Remember! Do not pull on the shoulder pads. 3. Move the headrest to the highest position 4. - Page 32 7. Guide the buckle through the opening in the cover 8. Uncover the upper part of the car seat shell by moving the fabric from the backrest to the headrest, then unfasten the elastic bands attached to the shell and uncover its lower part and the seat 9.
-
Page 33: Installing The Cover
13. Slide the fabric around the safety harness release button and gently pull it tight. 14. Remove the fabric from the car seat sides by pulling it gently towards yourself. 15. Remove the two elastic bands attached to the back of the car seat (between the back of the headrest and the car seat). - Page 34 NOTE! The car seat must not be used without the cover. The full text of the Warranty Terms and Conditions is available on the website WWW.KINDERKRAFT.COM • The cover is removable and washable with a mild powder and using a program for delicate fabrics (30°C).
Need help?
Do you have a question about the I-FIX i-Size and is the answer not in the manual?
Questions and answers