
Related Manuals for Kinderkraft I-GROW


Summary of Contents for Kinderkraft I-GROW
- Page 1 I-GROW USER GUIDE MODEL: I-GROW ECE R129.03 v.1.1 MODEL: I-GUARD ECE.R129.03 ver. 1.2...
-
Page 2: General Information
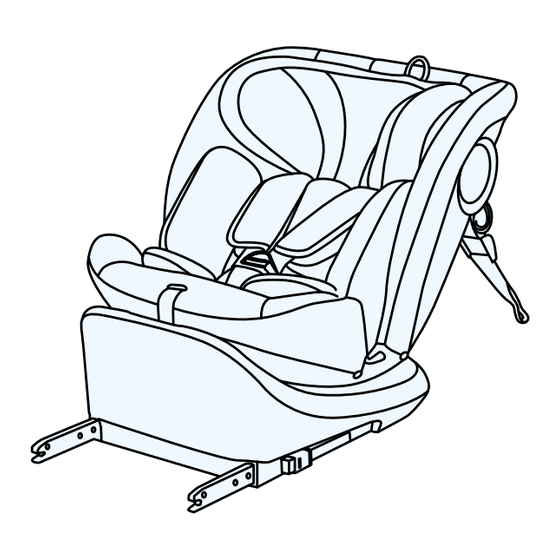
NOTE: The product graphics are for illustrative purposes! Please read the instruction manual carefully before using the car seat for the first time. It is your responsibility to ensure the safety of your child, and failure to read this manual may affect it. 1.0 General information The car seat has been designed, tested and approved for use in accordance with the requirements of UN/ECE Regulation No. - Page 3 Child's height Car seat orientation Car seat installation ISOFIX + Top Tether + internal safety harness 40-105 cm ISOFIX + Top Tether + internal safety harness 76-105 cm ISOFIX + three-point car seat belt 100 – 150 cm three -point car seat belt...
-
Page 4: Safety Instructions
2.0 Safety Instructions Please take a few minutes to read this instruction manual to ensure proper safety for your child. • DO NOT install the car seat on rearward facing or side- facing seats in the vehicle. • DO NOT place the car seat on seats equipped with an active front airbag. - Page 5 3.0 Securing the child 3.1 Installing the insert Use the additional insert until the child reaches 76 cm. 1. Connect the headrest part of the insert to the rest of the insert with the fasteners 2. Detach the safety harness 3.
-
Page 6: Adjusting The Safety Harness
3.2 Adjusting the safety harness 1. Press the safety harness adjustment button while simultaneously pulling the safety harness to the limit. 2. Unbuckle the safety harness 3. Move the safety harness to the sides of the car seat 4. Place the child in the car seat 5. -
Page 7: Headrest Height
3.3 Headrest height The headrest should be adjusted to the child's head well, the lower part of the headrest should be positioned at the child's shoulder height. 1. Grasp the headrest height adjustment strap, which is located on the top of the headrest, and pull it up gently 2. - Page 8 3.4 Backrest angle of incline adjustment mechanism 1. Pull the backrest angle of incline adjustment lever 2. Adjust the seat angle of incline 3. Release the lever in the required position (one of five available options) 4. Move the seat slightly until you hear a distinct "click" sound NOTE: In the later stages of installation, remember to loosen the TT strap before adjusting the backrest angle of incline.
- Page 9 3.5 Easy spin mechanism Easy spin mechanism is a function that helps you comfortably place or remove your child from the car seat. 1. Pull the car seat easy spin lever 2. Rotate the car seat to the side of your choice. 3.
- Page 10 3.6 Securing the child with the internal safety harness 1. Loosen the safety harness fully by pressing the button and pulling the harness straps 2. Unfasten the buckle 3. Place the safety harness on the sides of the car seat 4.
- Page 11 3.7 Tightening the safety harness 1. Pull the internal safety harness to eliminate the clearance in the waist section, the safety harness should lie flat. 2. Tighten the safety harness with the adjuster strap until the safety harness lies flat on the child's body. IMPORTANT! Make sure the safety harness is not twisted.
- Page 12 4.0 Installation in the vehicle Installation using the ISOFIX system 1. Attach the ISOFIX pads to the seat connectors in the vehicle. 2. Place the Top Tether strap on the headrest and do not block access to it at a later stage of the car seat installation. 3.
- Page 13 4.2 Installing the "Top Tether" 1. Pull out the Top Tether strap 2. Press the buckle release button to loosen it (the length of the strap must allow the hook to be placed to the installation point located at the rear of the vehicle seat or in the trunk).
- Page 14 4.3 Rearward facing car seat installation 4.3.1 Children between 40 and 105 cm in height using the ISOFIX system and the Top Tether. 1. Install the car seat on the seat using the ISOFIX connectors rearward- facing (if the car seat is already installed using the ISOFIX connectors, change its position using the easy spin mechanism).
- Page 15 4.3.2 Forward facing installation of the car seat for children between 76 and 105 cm in height using the ISOFIX system and the Top Tether. 1. Install the car seat forward-facing using the ISOFIX connectors. If the car seat is already installed using the ISOFIX connectors, change its position to forward-facing using the easy spin mechanism.
- Page 16 4.3.3 Forward facing installation of the car seat for children between 100 and 150 cm in height using the three-point car seat belts. 1. Install the car seat forward-facing on the seat of the vehicle using the ISOFIX connectors. 2. Push the car seat as far as possible to the seat of the vehicle and check its installation - the correct installation indicators should turn green.
- Page 17 5.0 Stowing away the five-point safety harness 1. Loosen the safety harness fully by pressing the button and pulling the safety harness. Remember: do not pull the shoulder pads. 2. Remove the shoulder pads and buckle pad by unfastening the fasteners located on the sides.
- Page 18 6.0 Removing the car seat (ISOFIX system) 1 Press the ISOFIX release buttons on both arms of the ISOFIX connector at the same time (the colour of the indicators should turn red) 2. Slide the car seat out of the ISOFIX guides. 3.
-
Page 19: Removing The Cover
6.1 Removing the cover 1. Remove the insert 2. Move the headrest to the highest position 3. Remove the shoulder pads and buckle pad 4. Unfasten the four fasteners securing the cover to the front part of the car seat backrest and the fasteners on the sides of the car seat 5. - Page 20 • Do not use aggressive cleaning agents (such as solvents). • The safety harness can be cleaned in lukewarm soapy water. Warning! Metal snaps should never be removed from the safety harness. Full Warranty Terms and Conditions are available at WWW.KINDERKRAFT.COM...
Need help?
Do you have a question about the I-GROW and is the answer not in the manual?
Questions and answers