
Subscribe to Our Youtube Channel
Related Manuals for Kinderkraft I-CARE i-Size


Summary of Contents for Kinderkraft I-CARE i-Size
- Page 1 I-CARE i-Size USER GUIDE MODEL: I-CARE ECE R129.03 v.1.0 MODEL: I-LITE ECE.R129.03 ver. 1.0...
-
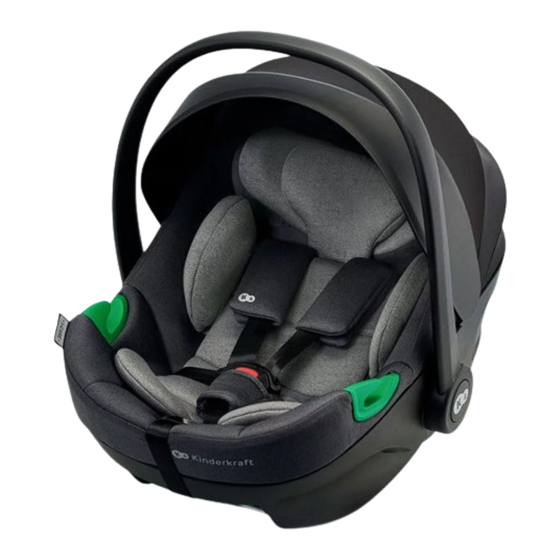
Page 2: Car Seat Components
Please read the operating manual carefully before using the child car seat for the first time. Ensuring the safety of the child is your responsibility, and not reading this instruction may have an impact on it. 1.0 Car seat components 1. - Page 3 15. Base mount ISOFIX connector 16. ISOFIX connectors release button 17. Lever for releasing the car seat lock 18. Adjustable leg 19. Leg adjustment button 20. Leg assembly correctness indicator...
- Page 4 2.0 Usage The seat handle can be locked in four positions (fig. A.2): The car seat has been designed, tested and approved for use in accordance with the requirements Position for placing the child in Position for the bouncer- of UN/ECE Regulation No. 129 concerning the approval of child improved restraint systems the car seat rocker (UN/ECE R129/03).
-
Page 5: Safety Instructions
3.0 Safety instructions WARNINGS Please take a few minutes to read this instruction manual in order to ensure the proper security of your child. Many injuries that are easy to avoid are caused by reckless and improper usage of the car seat. •... - Page 6 • The car seat cannot be used without the cover. IMPORTANT! READ CAREFULLY AND KEEP FOR FUTURE REFERENCE. • Do not use replacement covers, other than those recommended by the manufacturer, as the Using the seat as a baby bouncer (EN 12790-1:2023 standard) cover is an integral part of the safety system of the car seat.
- Page 7 4.0 Use of insert The insert (3) serves to support and protect the head and back of a small child. The insert prevents the child from collapsing inside or sliding down and ensures a proper physiological position of the child in MAX.
-
Page 8: Installation In The Vehicle
5.0 Installation in the vehicle In the event of sudden braking or an accident, people not wearing seat belts may injure other passengers. Always check whether: • The seat backrests in the vehicle are locked (i.e. the folding backrest of the rear seat is latched). •... - Page 9 5.1 Installing the rearward facing car seat using the ISOFIX CARE FX base 5.1.1 Installing the ISOFIX CARE FX base • Unfold the base support leg (18) (fig. C.1). • While holding down the ISOFIX connector release button (16) (fig. C.2), pull the connector out of the base (16) as far as possible (fig.
- Page 10 CAUTION! With a properly installed base there is no gap between the backrest of the seat and the shell of the base (fig. C.5). • Press the base leg adjustment button (19). The extension will extend automatically until it touches the floor of the car (fig.
- Page 11 5.1.2 Installing the car seat on the ISOFIX CARE FX base Install the car seat on the base as shown in figure C.7. Direct the car seat perpendicularly to the base - you will hear a click. CAUTION! The car seat can be installed on the base in the rearward facing position only.
- Page 12 5.1.3 Removing the car seat from the ISOFIX base and removing the base In order to remove the car seat from the base, press the car seat lock release lever (17) and then lift the car seat up (fig. C.8). To remove the ISOFIX base, first fold the leg extension while pressing the leg adjustment button (19) (fig.
- Page 13 5.2 Installing the rearward facing car seat using seat belts CAUTION! The car seat must be installed in the rearward facing position. CAUTION! Never install the car seat on a seat with an active front air-bag. CAUTION! Before starting the installation, make sure that the seat is equipped with three-point seat belts.
- Page 14 • Set the handle of the car seat (1) to the position for installation with the use of car seat belts. • CAUTION! Make sure that the car seat belt is correctly guided, tightened, not twisted and has not slipped off the guides (fig. D.2). CAUTION! Make sure the position of the car seat is well fixed and stable.
-
Page 15: Using The Sun Shade
6.0 Using the sun shade The sun shade (13) is used to prevent direct sunlight on the child's face. 6.1 Unfolding and folding the sun shade Pull the plastic cover to unfold the sun shade (12). When the sun shade is not in use, tilt it back to expose the inside of the seat (fig. - Page 16 7.0 Using the car seat 7.1 Adjusting the position of the safety harness and the headrest The adjustment of the car seat safety harness is integrated with the adjustment of the headrest (4 levels of adjustment). The headrest should be adjusted according to the child's height. The height of the safety harness will change with the height of the headrest.
- Page 17 7.2 Adjusting the length of the internal safety harness and fastening the child in the car seat • Adjust the position of the internal safety harness to the correct height (see point 7.1) • Place the car seat on a level surface and set the handle (1) to the position for placing the child in the cat seat.
- Page 18 E.10 • Fasten the internal safety harness (fig. E.9) - fold both buckle latches together to engage them, then insert them into the buckle hole (7). A “click” sound will be heard to indicate that the buckle is locked (fig. E.9). Make sure that the child is correctly placed in the car seat, with their back completely adjacent to the car seat.
-
Page 19: Removing The Cover
8.0 Maintenance instructions 8.1 Removing the cover • Press the safety harness release button (7) and loosen the safety harness • Remove the insert (3) if used (see point 4.1). • Remove the shoulder pads: – undo the pad snap fasteners, unfasten the strip connecting the pads, pull the strip through the holes in the headrest and the cover. - Page 20 8.2 Cleaning Only the original cover (4) should be used, as it is an essential element of the car seat safety. • The cover can be removed. Machine wash in warm water (up to 30°C) using a mild detergent. Leave to dry. Do not spin, do not tumble dry, do not use bleach. •...
- Page 21 • Simultaneously press the release buttons (2) on the sides of the car seat while lifting the seat. CAUTION! Please refer to the stroller manual for information on car seat compatibility. The full text of the Warranty Terms and Conditions is available at WWW.KINDERKRAFT.COM...
Need help?
Do you have a question about the I-CARE i-Size and is the answer not in the manual?
Questions and answers