
Related Manuals for HMS KLT23


Summary of Contents for HMS KLT23
- Page 1 KLT23 KLATKA TRENINGOWA KLT23 POWER RACK KLT23 POWER RACK KLT23 RACK FÜR HEIMTRAINING INSTRUKCJA UŻYTKOWANIA MANUAL INSTRUCTION NÁVOD K OBSLUZE BEDIENUNGSANLEITUN...
-
Page 2: Informacje Dotyczące Bezpieczeństwa
Informacje dotyczące bezpieczeństwa 1. Po zainstalowaniu urządzenia należy zachować pudełko i instrukcję obsługi. 2. Należy regularnie sprawdzać stabilność śrub. 3. Urządzenie należy zainstalować w wygodnym miejscu. 4. Urządzenie należy ustawić na równym podłożu i zabezpieczyć podłogę matą. 5. Urządzenie jest przeznaczone dla osób zdrowych; nie używaj go, jeśli czujesz się niekomfortowo. -
Page 3: Lista Części
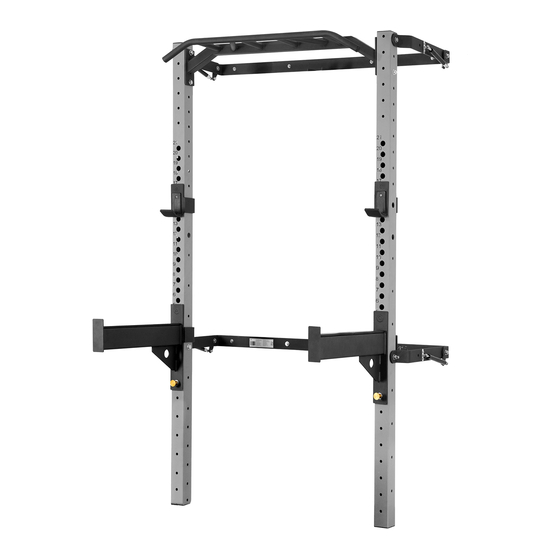
Lista części Ilość Opis Ilość Opis Główna kolumna Śruba sześciokątna M12*100 Lewa górna rama nośna Śruba sześciokątna M12*110 Prawa górna rama nośna Podkładka φ8 Główna rama nośna Podkładka φ12 Górna belka Duża podkładka φ12 Nylonowa nakrętka Lewa dolna rama nośna zabezpieczająca M5 Nylonowa nakrętka Prawa dolna rama nośna... - Page 4 Montaż Krok 1 Pozycja wykrawania śruby rozporowej...
- Page 6 Montaż Krok 2...
- Page 7 Montaż Krok 3...
- Page 8 Montaż Krok 4 Dokręcić kluczem wszystkie śruby i nakrętki.
-
Page 9: Safety Information
Safety information 1. Please keep the box and the manual after installing the machine. 2. Checking the stability of the screws regularly. 3. Please install the machine in a commodious place. 4. Putting the machine on the level ground, and use a mat to protect the floor. 5. -
Page 10: Part List
Part List Description Qty. Description Qty. Main Upright Hex Bolt M12*100 Left Top Support Frame Hex Bolt M12*110 Washer φ 8 Right Top Support Frame Washer φ 12 Main Support Frame Big Washer φ 12 Top Beam Left Bottom Support Frame Nylon Lock Nut M5 Right Bottom Support Frame Nylon Lock Nut M8... - Page 11 Assembly Step 1 Punching position of expansion Screw...
- Page 13 Assembly Step 2...
- Page 14 Assembly Step 3...
- Page 15 Assembly Step 4 Wrench tighten all bolts and nuts.
-
Page 16: Bezpečnostní Informace
Bezpečnostní informace 1. Po instalaci stroje si uschovejte krabici a návod k obsluze. 2. Pravidelně kontrolujte dotažení šroubů. 3. Instalujte prosím stroj na vhodné a dostatečně prostorné místo. 4. Umístěte stroj na rovnou plochu a k ochraně podlahy použijte podložku. 5. - Page 17 Seznam částí Č.dílu Název Č.dílu Název Šroub M12*100 Hlavní stojna Šroub M12*110 Držák osy Podložka φ8 Držák osy Podložka φ12 Konzole Velká podložka φ12 Hrazda Nylonová matice M5 Bezpečnostní zarážka Nylonová matice M8 Bezpečnostní zarážka Nylonová matice M12 Výložník Hmoždinka Vzduchový...
- Page 18 Montáž Krok 1 Montážní výška konzol...
- Page 20 Montáž Krok 2...
- Page 21 Montáž Krok 3...
- Page 22 Montáž Krok 4 Všechny šrouby a matice utáhněte klíčem.
-
Page 23: Informationen Zur Sicherheit
Informationen zur Sicherheit 1. Bitte bewahren Sie den Karton und die Bedienungsanleitung nach der Installation des Geräts auf. 2. Überprüfen Sie regelmäßig die Stabilität der Schrauben. 3. Bitte stellen Sie das Gerät an einem geeigneten Ort auf. 4. Stellen Sie die Maschine auf einen ebenen Boden und verwenden Sie eine Matte zum Schutz des Bodens. - Page 24 Teileliste Beschreibung Stk. Nr.. Beschreibung Stk. Hauptständer Sechskantschraube M12*100 Linker oberer Stützrahmen Sechskantschraube M12*110 Rechter oberer Stützrahmen Unterlegscheibe φ8 Unterlegscheibe φ12 Haupttragrahmen Oberer Träger Große Unterlegscheibe φ12 Linker unterer Stützrahmen Nylon-Sicherungsmutter M5 Rechter unterer Stützrahmen Nylon-Sicherungsmutter M8 Hauptverbindungsrahmen Nylon-Sicherungsmutter M12 Zylinder Expansionsrohr Querschraube M5*16...
-
Page 25: Montage
Montage Schritt 1 Stanzposition der Dehnschraube... - Page 27 Montage Schritt 2...
- Page 28 Montage Schritt 3...
- Page 29 Montage Schritt 4 Ziehen Sie alle Schrauben und Muttern mit einem Schraubenschlüssel an.
-
Page 30: Karta Gwarancyjna
KARTA GWARANCYJNA Nazwa artykułu:…………………………………………………… Kod EAN:…………………………………………………………. Data sprzedaży:……………………………………………………. WARUNKI GWARANCJI: 1. Sprzedawca w imieniu Gwaranta udziela gwarancji na terytorium RP na okres 24 miesięcy od daty sprzedaży. 2. Gwarancja będzie respektowana przez sklep lub serwis po przedstawieniu przez klienta: - czytelnie i poprawnie wypełnionej karty gwarancyjnej z pieczątką sprzedaży oraz podpisem sprzedawcy, - ważnego dowodu zakupu sprzętu z datą... -
Page 31: Guarantee Card
GUARANTEE CARD Article name:………………………………………………………. EAN code:…………………………………………………………. Date of sale: ……………………………………………………….. GUARANTEE TERMS: 1. The Seller provides guarantee on behalf of the Guarantor within the territory of the Republic of Poland for the period of 24 months from the date of sale: electric power assisted booster 24 months, charger 6 months. -
Page 32: Záruční List
ZÁRUČNÍ LIST Název produktu:…………………………………………………… EAN kód:………………………………………………………….. Datum prodeje:…………………………………………………….. ZÁRUČNÍ PODMÍNKY: 1. Prodávající jménem Ručitele poskytuje záruku na území Polska po dobu 24 měsíců od data prodeje: skútr 24 měsíců, baterie po dobu 6 měsíců. 2. Záruka bude respektována obchodem nebo servisem po předložení zákazníkem: - čitelně... - Page 33 GARANTIEKARTE Artikelname:…………………………………………………………... EAN-Code:……………………………………………………………. Verkaufsdatum:………………………………………………………... GARANTIEBEDINGUNGEN: Der Verkäufer gewährt im Namen des Garanten eine Garantie für 24 Monate nach dem Verkaufsdatum auf dem Hoheitsgebiet der Republik Polen: Roller 24 Monate, Akku 6 Monate. Die Garantie wird von dem Laden oder dem Service nach Vorlage: - der leserlich und korrekt ausgefüllten Garantiekarte mit Verkaufsstempel und Unterschrift des Verkäufers, - eines gültigen Kaufnachweises für das Gerät mit dem Verkaufsdatum / Rechnung, der beanstandeten Ware durch den Kunden respektiert.
- Page 34 NOTATKI ………………………………………………………………………………………………………………… ……….……………………………………………………………………………………………………… ………………….…………………………………………………………………………………………… …………………………….………………………………………………………………………………… ……………………………………….……………………………………………………………………… ………………………………………………….…………………………………………………………… …………………………………………………………….………………………………………………… ……………………………………………………………………….……………………………………… ………………………………………………………………………………….…………………………… …………………………………………………………………………………………….………………… ……………………………………………………………………………………………………….……… ………………………………………………………………………………………………………………… .……………………………………………………………………………………………………………… ………….…………………………………………………………………………………………………… …………………….………………………………………………………………………………………… ……………………………….……………………………………………………………………………… ………………………………………….…………………………………………………………………… …………………………………………………….………………………………………………………… ……………………………………………………………….……………………………………………… ………………………………………………………………………….…………………………………… …………………………………………………………………………………….………………………… ……………………………………………………………………………………………….……………… ………………………………………………………………………………………………………….…… ………………………………………………………………………………………………………………… ….…………………………………………………………………………………………………………… …………….………………………………………………………………………………………………… ……………………….……………………………………………………………………………………… ………………………………….…………………………………………………………………………… …………………………………………….………………………………………………………………… ……………………………………………………….……………………………………………………… ………………………………………………………………….…………………………………………… …………………………………………………………………………….………………………………… ……………………………………………………………………………………….……………………… ………………………………………………………………………………………………….…………… …………………………………………………………………………………………………………….… ………………………………………………………………………………………………………………… …….………………………………………………………………………………………………………… ……………….……………………………………………………………………………………………… ………………………….…………………………………………………………………………………… …………………………………….…………………………………………………………………………...
- Page 35 ………………………………………………………………………………….…………………………… …………………………………………………………………………………………….………………… ………………………………………………………………………………………………………………… ………………………………………………………….…………………………………………………… ………….…………………………………………………………………………………………………… …………………….………………………………………………………………………………………… …………………………………………………………………………………………………….………… …………………………………………………….………………………………………………………… ……………………………………………………………………………………………………………….. ………………………………………………………………………………………………………………… ……….……………………………………………………………………………………………………… ………………….…………………………………………………………………………………………… …………………………….………………………………………………………………………………… ……………………………………….……………………………………………………………………… ………………………………………………….…………………………………………………………… …………………………………………………………….………………………………………………… ……………………………………………………………………….……………………………………… ………………………………………………………………………………….…………………………… …………………………………………………………………………………………….………………… ……………………………………………………………………………………………………….……… ………………………………………………………………………………………………………………… .……………………………………………………………………………………………………………… ………….…………………………………………………………………………………………………… …………………….………………………………………………………………………………………… ……………………………….……………………………………………………………………………… ………………………………………….…………………………………………………………………… …………………………………………………….………………………………………………………… ……………………………………………………………….……………………………………………… ………………………………………………………………………….…………………………………… …………………………………………………………………………………….………………………… ……………………………………………………………………………………………….……………… ………………………………………………………………………………………………………….…… ………………………………………………………………………………………………………………… ….…………………………………………………………………………………………………………… …………….………………………………………………………………………………………………… ……………………….……………………………………………………………………………………… ………………………………….…………………………………………………………………………… …………………………………………….………………………………………………………………… ……………………………………………………….……………………………………………………… ………………………………………………………………….…………………………………………… …………………………………………………………………………….…………………………………...
- Page 36 IMPORTER: ABISAL SP. Z O.O., ul. Pyskowicka 17, 41-807 Zabrze, Polska DISTRIBUTOR: ABISTORE SPORT S.R.O, U Cihelny 230/3, 74801 Hlučín, Česká Republika abisal@abisal.pl www.abisal.pl...
Need help?
Do you have a question about the KLT23 and is the answer not in the manual?
Questions and answers