Table of Contents
Advertisement
Quick Links
Advertisement
Table of Contents

Related Manuals for ACME GLAMOUR 700Z


Summary of Contents for ACME GLAMOUR 700Z
-
Page 2: Table Of Contents
CONTENTS 01/ Safety Instructions ....................2 02/ Technical Specifications ..................4 03/ Control Panel ......................6 04/ Fixture Installation ....................7 05/ How To Set The Unit ....................8 5.1 Main Functions ....................8 5.2 Home Position Adjustment ................. 19 06/ Control By Universal DMX Controller .............. -
Page 3: 01/ Safety Instructions
01/ Safety Instructions Please read the instruction carefully which includes important information about the installation, usage and maintenance. WARNING Please keep this User Guide for future consultation. If you sell the unit to another user, be sure that they also receive this instruction manual. Important: Damages caused by the disregard of this user manual are not subject to warranty. - Page 4 DO NOT touch any wire during operation as there might be a hazard of electric shock. Avoid entanglement of the power cord with other wires. The minimum distance to objects/surface must be more than 5 meters. Disconnect mains power before fuse replacement or servicing. ...
-
Page 5: 02/ Technical Specifications
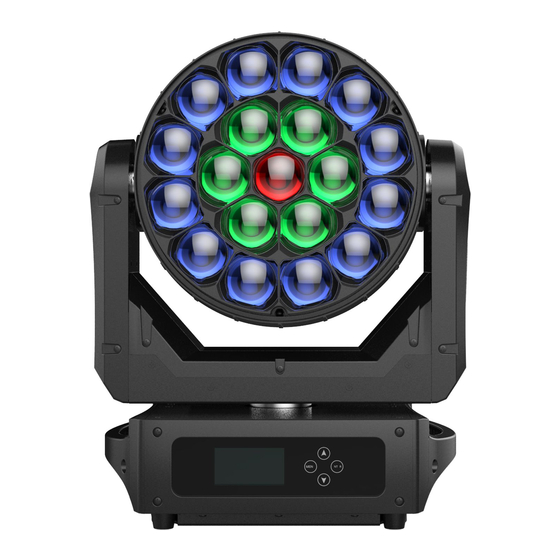
02/ Technical Specifications Power Voltage 100-240V~ 50/60Hz Power Consumption 680W Light Source 19x40W RGBW LED Zoom Range 5°-50° 0-100% smooth dimming; outstanding strobe effect with variable Dimmer/Strobe speed 540° Tilt 220° Movement Pan/Tilt Resolution 16 bit Automatic pan/tilt position correction DMX Channel 15/27/17/15+ Channels DMX512... - Page 6 Photometric Diagram: - 5 -...
-
Page 7: 03/ Control Panel
03/ Control Panel 1. Display To show the various menus and the selected function MENU To enter into move backward or leave the menu UP To go backward to move up in the menu 2. Buttons DOWN To go forward to move down in the menu ENTER To perform the desired functions For DMX512 link, use 3/5-pin XLR cable to link the unit and... -
Page 8: 04/ Fixture Installation
04/ Fixture Installation DO install and operate by qualified operator. Fixture(s) should be installed in areas outside walking paths, seating areas, or away from areas were unauthorized personnel might reach the fixture by hand. NEVER stand directly below the fixture(s) when rigging, removing or servicing. -
Page 9: 05/ How To Set The Unit
05/ How To Set The Unit 5.1 Main Functions To access the control menus, press the [MENU] button. Navigate the menu structure, using the [ENTER], [ UP] and [ DOWN] buttons. To select a menu option or to confirm a selection, press the [ENTER] button. ... - Page 10 MENU SUBMENU OPTIONS Display Invert Backlight Intensity 1-10 (Default=10) Display Settings °C Temperature Unit °F English Language Chinese Auto Test 0-255 Pan Fine 0-255 Tilt 0-255 Tilt Fine 0-255 P/T Speed 0-255 Function 0-255 Dimmer 0-255 Fixture Test Manual Test Dimmer Fine 0-255 Shutter...
- Page 11 DMX Settings Enter the control menu and select DMX Settings, press ENTER. Use the UP/DOWN button to select DMX Address, Channel Mode or View DMX Value. DMX Address Select DMX Address, press ENTER. Use UP/DOWN button to select an address, confirm your selection with ENTER.
- Page 12 Fixture Settings Enter the control menu and select Fixture Settings, press ENTER. Use the UP/DOWN button to select Pan Invert, Tilt Invert, P/T Feedback, Bl.o P/T Moving, White Balance, Cooling Mode, Dimmer Curve or Dimmer Speed. Pan Invert Select Pan Invert, press ENTER. Use UP/DOWN button to select No (pan invert deactivated) or Yes (pan invert activated), confirm your selection with ENTER.
- Page 13 White Balance Select White Balance, press ENTER. Use UP/DOWN button to select Red, Green or Blue, confirm your selection with ENTER. Use UP/DOWN button to select a value between 125 and 255, confirm your selection with ENTER. To exit the menu, press MENU, or wait 30 seconds. Cooling Mode Select Cooling Mode, press ENTER.
- Page 14 Display Settings Enter the control menu and select Display Settings, press ENTER. Use the UP/DOWN button to select Display Invert, Backlight Intensity, Temperature Unit or Language. Display Invert Select Display Invert, press ENTER. Use UP/DOWN button to select No (display normal) or Yes (display inverted), confirm your selection with ENTER.
- Page 15 Fixture Test Enter the control menu and select Fixture Test, press ENTER. Use the UP/DOWN button to select Auto Test or Manual Test. Auto Test Select Auto Test, press ENTER. The device immediately performs an automatic self-test. To end the automatic self-test and exit the menu, press MENU, or wait 30 seconds.
- Page 16 LED Use Hour Select LED Use Hour, press ENTER. Use UP/DOWN button to select Total LED Hour (total time) or LED On Hour (current switch-on time), confirm your selection with ENTER. The total time or current switch-on time is displayed. Use UP/DOWN button to select LED Hours Reset, confirm your selection with ENTER.
- Page 17 Reset Functions Enter the control menu and select Reset Functions, press ENTER. Use the UP/DOWN button to select Pan & Tilt, Effect or All. Pan & Tilt Select Pan & Tilt, press ENTER. Use UP/DOWN button to select No or Yes (the device will run built-in program to reset pan/tilt to their home positions), confirm your selection with ENTER.
- Page 18 Special Functions Enter the control menu and select Special Functions, press ENTER. Use the UP/DOWN button to select Factory Settings. Factory Settings Select Factory Settings, press ENTER. If you wish to reset the device to the factory settings, select Yes. If you do not wish to reset anything, select No.
- Page 19 RDM functions: Certain menus of the device and functions can be called up via the RDM protocol. The parameter IDs are implemented as follows for different commands: Command Command Command Parameter ID ‘Discovery’ ‘Set’ ‘Get’ DISC_UNIQUE_BRANCH √ DISC_MUTE √ DISC_UN_MUTE √...
-
Page 20: Home Position Adjustment
5.2 Home Position Adjustment To access the control menus, press the [MENU] button. To access the offset menus, long-press the [ENTER] button. Navigate the offset menus, using the [ENTER], [ UP] and [ DOWN] buttons. To select a menu option or to confirm a selection, press the [ENTER] button. ... -
Page 21: 06/ Control By Universal Dmx Controller
06/ Control By Universal DMX Controller 6.1 DMX512 Connection 1. At last unit, the DMX cable has to be terminated with a terminator. Solder a 120-ohm 1/4W resistor between pin 2(DMX-) and pin 3(DMX+) into a 3-pin XLR-plug and plug it in the DMX-output of the last unit. -
Page 22: Address Setting
6.2 Address Setting If you use a universal DMX controller to control the units, you have to set DMX address between 1 and 512 so that the units can receive DMX signal. Press the MENU button to access the control menus, select DMX Settings, press the ENTER button to confirm. - Page 23 15 Channels (Mode 1): CHANNEL VALUE FUNCTION 000-255 0°540° 000-255 PAN FINE TILT 000-255 0°220° 000-255 TILT FINE PAN/TILT SPEED 000-255 Fast to Slow SPECIAL FUNCTIONS 000-009 Null 010-014 Reset 015-255 Null DIMMER 000-255 0%100% 000-255 DIMMER FINE SHUTTER Close 000-019 Open 020-024...
- Page 24 BLUE 0%100% 000-255 WHITE 000-255 0%100% COLOR MACRO Null 000-009 010-014 Color 1 015-019 Color 2 Color 3 020-024 025-029 Color 4 030-034 Color 5 Color 6 035-039 Color 7 040-044 045-049 Color 8 050-054 Color 9 Color 10 055-059 Color 11 060-064 065-069...
- Page 25 250-255 Open ZOOM 000-255 WideNarrow 27 Channels (Mode 2): CHANNEL VALUE FUNCTION 000-255 0°540° 000-255 PAN FINE TILT 000-255 0°220° 000-255 TILT FINE PAN/TILT SPEED 000-255 Fast to Slow ZOOM WideNarrow 000-255 SPECIAL FUNCTIONS 000-009 Null 010-014 Reset 015-255 Null DIMMER 0%100% 000-255...
- Page 26 210-224 Strobe 9: sine wave, fastslow 225-229 Open 230-244 Strobe 10: burst, fastslow 245-255 Open RED 1 000-255 0%100% GREEN 1 000-255 0%100% BLUE 1 000-255 0%100% WHITE 1 000-255 0%100% COLOR MACRO 1 000-009 Null 010-017 Color 1 018-024 Color 2 025-032 Color 3...
- Page 27 RED 2 0%100% 000-255 GREEN 2 000-255 0%100% BLUE 2 000-255 0%100% WHITE 2 0%100% 000-255 COLOR MACRO 2 000-255 (Same as COLOR MACRO 1) RED 3 000-255 0%100% GREEN 3 000-255 0%100% BLUE 3 000-255 0%100% WHITE 3 000-255 0%100% COLOR MACRO 3 000-255...
- Page 28 17 Channels (Mode 3): CHANNEL VALUE FUNCTION 000-255 0°540° 000-255 PAN FINE TILT 000-255 0°220° 000-255 TILT FINE PAN/TILT SPEED 000-255 Fast to Slow SPECIAL FUNCTIONS 000-009 Null 010-014 Reset 015-255 Null DIMMER 000-255 0%100% 000-255 DIMMER FINE SHUTTER Close 000-019 Open 020-024...
- Page 29 BLUE 0%100% 000-255 WHITE 000-255 0%100% COLOR MACRO Null 000-009 010-014 Color 1 015-019 Color 2 Color 3 020-024 025-029 Color 4 030-034 Color 5 Color 6 035-039 Color 7 040-044 045-049 Color 8 050-054 Color 9 Color 10 055-059 Color 11 060-064 065-069...
- Page 30 250-255 Open ZOOM 000-255 WideNarrow MACRO EFFECT SELECT 000-007 Null 008-016 Built-in Effect 1 017-025 Built-in Effect 2 026-034 Built-in Effect 3 035-043 Built-in Effect 4 044-052 Built-in Effect 5 053-061 Built-in Effect 6 062-070 Built-in Effect 7 071-079 Built-in Effect 8 080-088 Built-in Effect 9 089-097...
- Page 31 15+ Channels (Mode 4): CHANNEL VALUE FUNCTION 000-255 0°540° 000-255 PAN FINE TILT 000-255 0°220° 000-255 TILT FINE PAN/TILT SPEED 000-255 Fast to Slow SPECIAL FUNCTIONS 000-009 Null 010-014 Reset 015-255 Null DIMMER 000-255 0%100% SHUTTER Close 000-019 Open 020-024 Strobe 1: fastslow 025-064 Open...
- Page 32 000-255 0%100% WHITE 000-255 0%100% COLOR MACRO 000-009 Null 010-017 Color 1 018-024 Color 2 025-032 Color 3 033-039 Color 4 040-047 Color 5 048-054 Color 6 055-061 Color 7 062-069 Color 8 070-076 Color 9 077-084 Color 10 085-091 Color 11 092-099 Color 12...
-
Page 33: 07/ Error Information
112-127 Built-in Effect 6 128-143 Built-in Effect 7, Slow to Fast 144-159 Built-in Effect 8, Slow to Fast 160-175 Built-in Effect 9, Slow to Fast 176-191 Built-in Effect 10, Slow to Fast 192-207 Built-in Effect 11, Slow to Fast 208-223 Built-in Effect 12, Slow to Fast 224-239 Built-in Effect 13, Slow to Fast... - Page 34 Pan Encode Error Check whether the encoder on the pan is damaged. Check whether the lead connecting the encoder on the pan and the PCB board is in poor contact or disconnected. Tilt Reset Error Check whether the position of the tilt where the magnet is installed falls off or is damaged.
-
Page 35: 08/ Troubleshooting
08/ Troubleshooting Following are a few common problems that may occur during operation. Here are some suggestions for troubleshooting: A. The unit does not work, no light and the fan does not work Check the connected power and main fuse. ... - Page 36 Declaration of Conformity We declare that our products (lighting equipments) comply with the following specification and bears CE mark in accordance with the provision of the Electromagnetic Compatibility (EMC) Directive 2014/30/EU. EN 55032: 2015; EN 61000-3-2: 2014; EN 61000-3-3: 2013; EN 55103-2: 2009. &...
Need help?
Do you have a question about the GLAMOUR 700Z and is the answer not in the manual?
Questions and answers