Table of Contents
Advertisement
Quick Links
Advertisement
Table of Contents

Related Manuals for ACME ICARUS 620


Summary of Contents for ACME ICARUS 620
-
Page 2: Table Of Contents
CONTENTS 1. Safety Instructions ..................2 2. Technical Specifications ................. 4 3. How To Set The Unit ..................5 3.1 Control Panel ................... 5 3.2 Main Function ..................6 3.3 Home Position Adjustment ..............14 4. Control By Universal DMX Controller ............14 4.1 DMX512 Connection ................ -
Page 3: Safety Instructions
1. Safety Instructions Please read the instruction carefully which includes important information about the installation, usage and maintenance. WARNING Please keep this User Guide for future consultation. If you sell the unit to another user, be sure that they also receive this instruction manual. Important: Damages caused by the disregard of this user manual are not subject to warranty. - Page 4 DO NOT operate in a dirty or dusty environment. DO clean the fixture regularly. DO NOT touch any wire during operation as there might be a hazard of electric shock. Avoid entanglement of the power cord with other wires. ...
-
Page 5: Technical Specifications
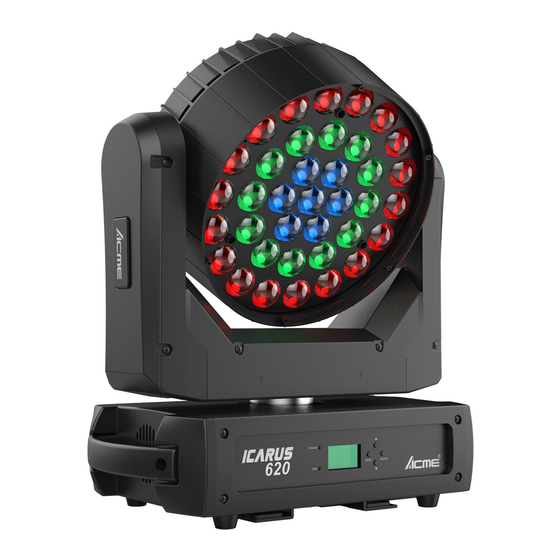
2. Technical Specifications Power Voltage: 100-240V~ 50/60Hz Power Consumption: 610W Light Source: 37x20W RGBW LED Zoom Range: 10°~60° Movement: Pan: 540° Tilt: 270° Pan/Tilt Resolution: 16bit Dimming/Strobe: 0~100% smooth dimming, variable strobe speeds Control: DMX Channel: 14/26/15 Channels Control Mode: DMX512, RDM Firmware Upgrade: Update via DMX link Construction: Display: LCD display... -
Page 6: How To Set The Unit
Dimension/Weight: 430x246x512mm, 19.5kgs 17"x9.7"x20"in, 42.9lbs Photometric Diagram: 3. How To Set The Unit 3.1 Control Panel 1. Display: To show the various menus and the selected functions 2. LED: POWER Power on DMX input present... -
Page 7: Main Function
3. Button: MENU To enter into move backward or leave the menu DOWN To go forward in the selected functions To go backward in the selected functions ENTER To confirm the selected functions 4. DMX IN: For DMX512 link, use 3/5-pin XLR cable to link the unit and the DMX controller 5. - Page 9 DMX Functions To select DMX Functions, press the ENTER button to confirm, use the UP/DOWN button to select DMX Address, DMX Channel Mode or View DMX Value. DMX Address To select DMX Address, press the ENTER button to confirm. Use the UP/DOWN button to adjust the address from 001 to 499/487/498, press the ENTER button to setup.
- Page 10 P/T Feedback To select P/T Feedback, press the ENTER button to confirm. Use the UP/DOWN button to select No (Pan or tilt’s position will not feedback while out of step) or Yes (Feedback while pan/tilt out of step), press the ENTER button to setup. Press the MENU button back to the last menu or let the unit idle 30 seconds to exit menu mode.
- Page 11 Dimmer Speed To select Dimmer Speed, press the ENTER button to confirm. Use the UP/DOWN button to select Fast or Smooth. Once selected, press the ENTER button to setup. Press the MENU button back to the last menu or let the unit idle 30 seconds to exit menu mode. Display Setting To select Display Setting, press the ENTER button to confirm, use the UP/DOWN button to select Display Inverse, Backlight Auto Off, Backlight Intensity, Temperature Unit, Display Warning or...
- Page 12 Display Warning To select Display Warning, press the ENTER button to confirm. Use the UP/DOWN button to select No (Normal) or Yes (display will show the error warning when the unit went wrong), press the ENTER button to store. Press the MENU button back to the last menu or let the unit idle 30 seconds to exit menu mode.
- Page 13 LED Use Hour To select LED Use Hour, press the ENTER button to confirm, use the UP/DOWN button to select Total LED Hour, LED On Hour or LED Hours Reset, press the ENTER button to store. Use the UP/DOWN button to select LED Hours Reset, press the ENTER button to confirm, use the UP/DOWN button to set the password 050 to reset the LED hours, press the ENTER button to store.
- Page 14 store. Press MENU button to exit menu mode. Special Functions To select Special Functions, press the ENTER button to confirm, use the UP/DOWN button to select Fixture Maintenance or Factory Setting. Fixture Maintenance To select Fixture Maintenance, press the ENTER button to confirm. Use the UP/DOWN button to select Interval or Remain Time.
-
Page 15: Home Position Adjustment
3.3 Home Position Adjustment Press the MENU button into menu mode, then press the ENTER button for about 3 seconds into offset mode to adjust the home position. Select the function by pressing the ENTER button. Use the UP/DOWN button to choose the submenu, press the ENTER button to store and automatically return to the last menu. -
Page 16: Address Setting
1. At last unit, the DMX cable has to be terminated with a terminator. Solder a 120-ohm 1/4W resistor between pin 2(DMX-) and pin 3(DMX+) into a 3-pin XLR-plug and plug it in the DMX-output of the last unit. 2. Connect the unit together in a “daisy chain” by XLR plug cable from the output of the unit to the input of the next unit. -
Page 17: Dmx512 Configuration
4.3 DMX512 Configuration Please control the fixture by referring to the configurations below Attentions: 1. The unit will maintain the last condition until reset if you cut-off the DMX signal. 2. For the channel Function, keep the value for about 3 seconds, then the corresponding function will take into effect. - Page 18 205-209 Open 210-224 Strobe 9: sine wave, fast to slow 225-229 Open 230-244 Strobe 10: burst, fast to slow 245-255 Open 000-255 RED (0%100%) GREEN (0%100%) 000-255 000-255 BLUE (0%100%) 000-255 WHITE (0%100%) COLOR MACRO 000-009 Open 010-014 LEE 790-Moroccan Pink 015-019 LEE 157-Pink 020-024...
- Page 19 175-179 Open 180-201 Color Wheel Clockwise Rotation, fast to slow 202-207 Stop (this will stop wherever the color is at the time) 208-229 Color Wheel Counter-Clockwise Rotation, slow to fast 230-234 Open 235-239 Random Color, Fast 240-244 Random Color, Medium 245-249 Random Color, Slow 250-255...
- Page 20 130-144 Strobe 5: random opening pulse, fast to slow 145-149 Open 150-164 Strobe 6: random closing pulse, fast to slow 165-169 Open 170-184 Strobe 7: burst pulse, fast to slow 185-189 Open 190-204 Strobe 8: random burst pulse, fast to slow 205-209 Open 210-224...
- Page 21 204-210 Color27 211-217 Color28 218-225 Color29 226-232 Color30 233-240 Color31 241-247 Color32 248-255 Color33 000-255 RING 2 RED (0%100%) 000-255 RING 2 GREEN (0%100%) 000-255 RING 2 BLUE (0%100%) 000-255 RING 2 WHITE (0%100%) RING 2 COLOR PRESET 000-255 (The same as CH14:RING 1 COLOR PRESET) 000-255 RING 3 RED (0%100%) 000-255...
- Page 22 15 Channels Mode: CHANNEL VALUE FUNCTION 000-255 0°540° PAN FINE 000-255 TILT 000-255 0°270° 000-255 TILT FINE PAN/TILT SPEED 000-255 Fast to Slow SPECIAL FUNCTIONS 000-009 No function 010-014 Reset 015-255 No function DIMMER 000-255 0%100% SHUTTER 000-019 Blackout 020-024 Open 025-064 Strobe 1: fast to slow...
- Page 23 000-255 WHITE (0%100%) Color 000-009 Open 010-017 Color1 018-024 Color2 025-032 Color3 033-039 Color4 040-047 Color5 048-054 Color6 055-061 Color7 062-069 Color8 070-076 Color9 077-084 Color10 085-091 Color11 092-106 Color12 107-113 Color13 114-121 Color14 122-128 Color15 129-136 Color16 137-143 Color17 144-151 Color18 152-158...
-
Page 24: Troubleshooting
144-159 Effect8 160-175 Effect9 176-191 Effect10 192-207 Effect11 208-223 Effect12 224-239 Effect13 240-255 Effect14 5. Troubleshooting Following are a few common problems that may occur during operation. Here are some suggestions for troubleshooting: A. The unit does not work, no light and the fan does not work 1. -
Page 25: Fixture Cleaning
6. Fixture Cleaning It is absolutely essential that the fixture is kept clean to ensure the maximum light-output and allow the fixture to function reliably throughout its life. The fixture must be cleaned regularly to avoid dust, dirt and smoke-fluid residues building up on or within the fixture. The cleaning frequency depends on the application environment. - Page 27 Declaration of Conformity We declare that our products (lighting equipments) comply with the following specification and bears CE mark in accordance with the provision of the Electromagnetic Compatibility (EMC) Directive 2014/30/EU. EN 55032: 2015+A11:2020; EN 55035: 2017+A11: 2020; EN IEC 61000-3-2: 2019; EN 61000-3-3: 2013+A1: 2019. &...
- Page 28 Innovation, Quality, Performance...
Need help?
Do you have a question about the ICARUS 620 and is the answer not in the manual?
Questions and answers