
Related Manuals for Extreme Networks ExtremeWireless AP560h


Summary of Contents for Extreme Networks ExtremeWireless AP560h
- Page 1 ExtremeWireless™ AP560h Access Point Installation Guide 9036166-04 Rev AB October 2023...
- Page 2 Extreme Networks, Inc. reserves the right to make changes in specifications and other information contained in this document and its website without prior notice. The reader should in all cases consult representatives of Extreme Networks to determine whether any such changes have been made.
-
Page 3: Table Of Contents
Table of Contents Preface............................................v Conventions......................................v Text Conventions..................................v Documentation and Training..............................vii Help and Support..................................... vii Subscribe to Product Announcements....................... viii Send Feedback....................................viii AP560h Overview..........................9 New in this Guide....................................9 AP560h Features....................................10 Purchase Order Information..............................11 AP560h purchase order information........................11 New in this Guide........................ - Page 4 Table of Contents Installation location................................40 External antenna..................................40 Installation procedure................................41 Instructions d'installation professionnelle......................41 Safety Guidelines....................................41 FCC Declaration of Conformity Statement........................42 FCC Caution:....................................42 Federal Communications Commission (FCC) Notice..................42 Industry Canada (IC) Notice..............................43 Industry Canada (IC) Notice............................43 CE Information....................................44 CE Information..................................44 All Operational Modes................................44 European Waste Electrical and Electronic Equipment (WEEE) Notice..........45 Index..............................46 ExtremeWireless™...
-
Page 5: Preface
Preface Read the following topics to learn about: • The meanings of text formats used in this document. • Where you can find additional information and help. • How to reach us with questions and comments. Conventions To help you better understand the information presented in this guide, the following topics describe the formatting conventions used for notes, text, and other elements. - Page 6 Text Conventions Preface Table 1: Notes and warnings (continued) Icon Notice type Alerts you to... Caution Risk of personal injury, system damage, or loss of data Warning Risk of severe personal injury Table 2: Text Convention Description This typeface indicates command syntax, or represents screen displays information as it is displayed on the screen.
-
Page 7: Documentation And Training
Extreme Optics Compatibility Other resources such as white papers, data sheets, and case studies Extreme Networks offers product training courses, both online and in person, as well as specialized certifications. For details, visit www.extremenetworks.com/education/. Help and Support If you require assistance, contact Extreme Networks using one of the following... -
Page 8: Subscribe To Product Announcements
You can modify your product selections or unsubscribe at any time. Send Feedback The Information Development team at Extreme Networks has made every effort to ensure that this document is accurate, complete, and easy to use. We strive to improve our documentation to help you in your work, so we want to hear from you. -
Page 9: Ap560H Overview
AP560h Overview New in this Guide on page 9 AP560h Features on page 10 Purchase Order Information on page 11 The AP560h is a Wi-Fi 6, 802.11ax/ac/abgn outdoor access point. The access point caters to the stadium environment by supporting high density of users and devices. It offers flexible deployment options and can be mounted to a pole, and to a wall, thereby ensuring exceptional mobile experience throughout the stadium. -
Page 10: Ap560H Features
AP560h Features AP560h Overview AP560h Features The AP560h access point has the following features: • Radios: Two radios 1 dual-band, 2.4GHz and 5GHz, and 1 band-locked 5GHz ◦ 1 IoT Radio (2.4 GHz) ◦ • Two Ethernet ports 1 x 100/1000/2500/5000 Mbps auto-negotiation Ethernet port, RJ45 ◦... -
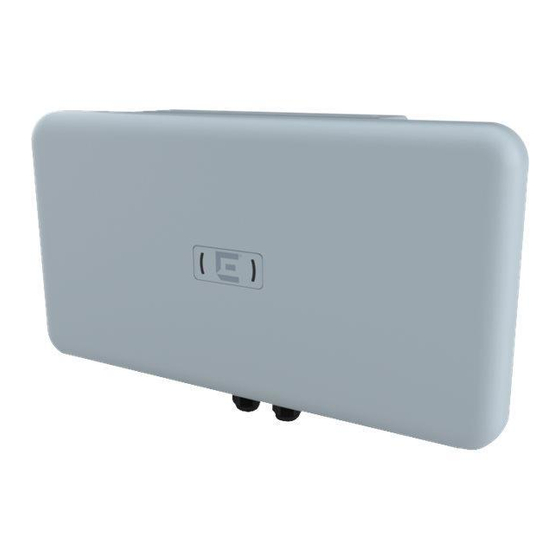
Page 11: Purchase Order Information
AP560h Overview Purchase Order Information Figure 2: AP560h access point side ports Callout Description GE1 port GE2 port Console port Note The console port cap must be tightened to a torque of 5 in-lbs. If a torque wrench is not available, a flat-bladed screwdrive can be used. The flat blade must be 7/16 in. - Page 12 AP560h purchase order information AP560h Overview AP560h purchase order information Part number Description AP560h-FCC Cloud-ready, Dual 5GHz, Dual-band, Sensor radio, Dual Radio 802.11ax/ac/abgn, 4x4:4 MIMO Outdoor 11ax access point. Internal 30deg/70deg Panel Antenna. Domain: US and Columbia You can install the access point to a wall using the KT-147407-02 bracket parts (+/-15 degree, 1-axis) or the MBO-ART02 (20 degree increments +/-80 degrees, 10 inch extension).
- Page 13 AP560h Overview AP560h purchase order information The contents of the KT-150173-01 extension arm are described in the following table. Part number Box contents KT-150173-01 One KT-150173-01 12 in. extension arm Two hex-head M12 stainless-steel screws Two hex-head M12 stainless-steel nuts One URL card Note You must provide the required M6 hex-head screws and nuts for flat surface...
-
Page 14: New In This Guide
New in this Guide The following sections shows the recent documentation revisions for this guide. Use this information to locate the latest updates. Table 5: October 2023 Revisions Section Description AP560h Features Removed Reset button documentation error. AP560h Features Updated torque specifications for gland caps. -
Page 15: Install The Access Point
When you receive the access point bundle, perform a visual inspection of the access point, the bracket, and the accessories for any physical damage. Contact Extreme Networks Support in case of any damage. Before installing the access point: Procedure Verify the box contents. -
Page 16: Access Point Bracket Usage And Mounting Options
Access Point Bracket Usage and Mounting Options Install the Access Point Procedure 1. Verify that the box contains the following items: Quantity Item AP560h Quick Reference AP560h access point 2. Verify the purchase order information of the bracket or accessory you have ordered to install the access point. -
Page 17: Install The Access Point On A Wall
Install the Access Point Install the Access Point on a Wall Table 6: AP560h mounting brackets and accessories usage (continued) Mounting bracket/ Wall install Pole install Notes accessory and part number WS-MBO-POLE01 If the pole diameter (#30520); bracket; is <= 1.0 in. (25.4 also known as mm), use small the pole mounting... - Page 18 Install the Access Point on a Wall Install the Access Point Other wall install options include using the: • MBO-ART03 bracket Note You can use the MBO-ART02 bracket if you have one. The MBO-ART02 wall mount bracket is End of Sale (EOS) as of January, 2023. It is replaced by the MBO-ART03 bracket.
-
Page 19: Bracket
Install the Access Point on a Wall Using MBO-ART02 Install the Access Point Articulating Mounting Bracket Install the Access Point on a Wall Using MBO-ART02 Articulating Mounting Bracket About This Task Note The MBO-ART02 wall mount bracket is End of Sale (EOS) as of January, 2023. It is replaced by the MBO-ART03 bracket. - Page 20 Install the Access Point on a Wall Using MBO-ART02 Articulating Mounting Bracket Install the Access Point Procedure 1. Using the MBO-ART02 articulating mounting bracket’s shorter bracket end as a template, mark and drill four holes on the wall. Figure 3: MBO-ART02 bracket template for attachment holes ExtremeWireless™...
- Page 21 Install the Access Point on a Wall Using MBO-ART02 Install the Access Point Articulating Mounting Bracket 2. Attach the MBO-ART02 to the access point using two M6 hex-head screws. Use the mounting holes shown in Figure 4 to mount the MBO-ART02 bracket onto the AP560h access point.
-
Page 22: Install The Access Point On A Wall Or Flat Surface Using The Kt-147407-02 Bracket Parts
Install the Access Point on a Wall or Flat Surface Using the KT-147407-02 Bracket Parts Install the Access Point Install the Access Point on a Wall or Flat Surface Using the KT-147407-02 Bracket Parts Before You Begin Hardware requirements for a wall or flat surface installation: •... - Page 23 Install the Access Point on a Wall or Flat Surface Using Install the Access Point the KT-147407-02 Bracket Parts Figure 6: 1-axis tilt bracket Procedure 1. Attach the flat part of the KT-147407-02 bracket to the access point using two M6 screws.
-
Page 24: Install The Access Point Using Kt-147407-02 Bracket Parts And Kt-150173-01
Install the Access Point Using KT-147407-02 Bracket Parts and KT-150173-01 Extension Arm Install the Access Point Install the Access Point Using KT-147407-02 Bracket Parts and KT-150173-01 Extension Arm Before You Begin The hardware required for installation: • Flat part of the KT-147407-02 bracket •... -
Page 25: Install The Access Point Using Kt-150173-01 Extension Arm
Install the Access Point Using KT-150173-01 Extension Install the Access Point 3. Using the KT-150173-01 extension arm as a template, mark and drill four hole centers on a flat surface. The holes must be within the circular cuts in the end of the flange. 4. -
Page 26: Install The Access Point On A Pole Using Mbo-Art02 Articulating Mounting Bracket And Pole01 Bracket
Install the Access Point on a Pole Using MBO-ART02 Articulating Mounting Bracket and POLE01 Bracket Install the Access Point The following hardware is required to install the AP560i access point on a pole: • Flat part of the KT-147407-02 bracket •... - Page 27 Install the Access Point on a Pole Using MBO-ART02 Install the Access Point Articulating Mounting Bracket and POLE01 Bracket Table 8: Hardware requirements for pole installation (continued) Quantity Item M3 screws with nuts and washers to attach the WS- MBO-POLE01 bracket to the MBO-ART02 articulating mounting bracket Cable clamps Note...
- Page 28 Install the Access Point on a Pole Using MBO-ART02 Articulating Mounting Bracket and POLE01 Bracket Install the Access Point 2. Attach the WS-MBO-POLE01 bracket to the MBO-ART02 articulating mounting bracket using four M3 screws, nuts, and washers. ExtremeWireless™ AP560h Access Point...
- Page 29 Install the Access Point on a Pole Using MBO-ART02 Install the Access Point Articulating Mounting Bracket and POLE01 Bracket 3. Attach both the cable clamps to the WS-MBO-POLE01 bracket. Open the cable clamp by turning a flat bladed screwdriver counterclockwise. Then insert the non-clamp end into the pole bracket through the holes.
-
Page 30: Install The Access Point On A Pole Using Kt-147407-02 Bracket Parts
Install the Access Point on a Pole Using KT-147407-02 Bracket Parts Install the Access Point 5. Tighten the cable clamp screw clockwise, tightening the band around the pole. Figure 9: Tightening the cable clamps on the POLE01 bracket Install the Access Point on a Pole Using KT-147407-02 Bracket Parts Before You Begin The following hardware is required for pole installation using KT-147407-02 bracket parts:... - Page 31 Install the Access Point on a Pole Using KT-147407-02 Install the Access Point Bracket Parts Figure 10: Pole part of the KT-147407-02 bracket Procedure 1. Attach the KT-147407-02 flat part and 1-axis tilt part to the access point. For instructions on how to attach the bracket parts, see Install the flat part and the 1-axis tilt part of the KT-147407-02 bracket to the access point.
-
Page 32: Kt-150173-01 Extension Arm
Install the Access Point on a Pole Using KT-147407-02 Bracket Parts and KT-150173-01 Extension Arm Install the Access Point 2. Attach the KT-147407-02 pole part to the 1-axis tilt bracket using two M12 bolts through the large bracket holes on the 1-axis tilt bracket and the pole bracket. 3. - Page 33 Install the Access Point on a Pole Using KT-147407-02 Install the Access Point Bracket Parts and KT-150173-01 Extension Arm 7. Insert the ends of the cable clamps around the pole and tighten the clamp screws to a torque of 11 in-lbs. Mount the Access Point to a Pole using the Pole Part of the KT-147407-02 Bracket Before You Begin The following hardware is required for pole installation using KT-147407-02 pole bracket...
-
Page 34: Secure The Access Point After Installation
Secure the Access Point after Installation Install the Access Point 2. Attach the pole bracket part of the KT-147407-02 bracket to the other end of the KT-150173-01 bracket using two hex-head M12 stainless-steel screws and two hex- head M12 stainless-steel nuts. Attach the pole bracket to a pole by following steps 5, 6, and 7. -
Page 35: Power Or Pressure Washing Guidelines
Install the Access Point Power or Pressure Washing Guidelines Procedure 1. Insert the safety cable through the security cable hole on the metal base of the access point. Figure 11: Security cable hole on the access point Callout Description Security cable hole 2. - Page 36 Power or Pressure Washing Guidelines Install the Access Point • Use only commercially available ice-melt products. Warning Do not use cleaning agents, solvents, and ice-melt products that are flammable, contain polycarbonate or rubber dissolving ingredients, uses refined petrochemical materials, and any other materials that can damage a concrete surface.
-
Page 37: Ground The Access Point
Ground the Access Point Learn how to safely ground the access point. About This Task Ground the outdoor access point for outdoor installations. A ground terminal is provided for lightning protection. Note Ground connection is not required for indoor deployments. The ground connector on the access point is not a protective earth ground. -
Page 38: Ge1 Or Ge2 Cable Connection
GE1 or GE2 Cable Connection About This Task The GE1 or GE2 cable is connected through the GE1 or GE2 gland port. Procedure 1. Attach the ground wire to the access point. 2. Remove the GE1 port gland cap, plastic cage, and gasket. 3. -
Page 39: Product Specifications
Product Specifications Table 9: Physical specifications Item Description Dimensions 11.3 in. × 18.9 in. × 3.5 in. (288 mm × 481 mm × 88 mm) Housing 10.5lbs (4.77 kg) IP rating IP67 Console port RJ45 PoE failover Redundant PoE capable Anti-theft locks Security hanger hole LEDs... -
Page 40: Regulatory And Compliance Information
Regulatory and Compliance Information Professional Installation Instruction on page 40 Safety Guidelines on page 41 FCC Declaration of Conformity Statement on page 42 Federal Communications Commission (FCC) Notice on page 42 Industry Canada (IC) Notice on page 43 CE Information on page 44 European Waste Electrical and Electronic Equipment (WEEE) Notice... -
Page 41: Installation Procedure
Regulatory and Compliance Information Installation procedure Installation procedure Refer to the installation instructions for details. Warning Select the installation position and make sure that the final output power does not exceed the limit set force in relevant rules. The violation of the rule could lead to serious federal penalty. -
Page 42: Fcc Declaration Of Conformity Statement
FCC Declaration of Conformity Statement Regulatory and Compliance Information FCC Declaration of Conformity Statement Warning This device is restricted for indoor use. This equipment has been tested and found to comply with the limits for a Class B digital device, pursuant to Part 15 of the FCC Rules. These limits are designed to provide reasonable protection against harmful interference in a residential installation. -
Page 43: Industry Canada (Ic) Notice
Regulatory and Compliance Information Industry Canada (IC) Notice and used in accordance with the instructions, may cause harmful interference to radio communications. However, there is no guarantee that interference will not occur in a particular installation. If this equipment does cause harmful interference to radio or television reception, which can be determined by turning the equipment off and on, the user is encouraged to try to correct the interference by one of the following measures:... -
Page 44: Ce Information
CE Information Regulatory and Compliance Information économique Canada. L'opération est soumise aux deux conditions suivantes: (1) Cet appareil ne doit pas provoquer d'interférences. (2) Cet appareil doit accepter toute interférence, y compris les interférences susceptibles de provoquer un fonctionnement indésirable de l'appareil. Warning IC Radiation Exposure Statement: This equipment complies with ISED radiation exposure limits set forth for an... -
Page 45: European Waste Electrical And Electronic Equipment (Weee) Notice
European Waste Electrical and Electronic Equipment Regulatory and Compliance Information (WEEE) Notice • 5180-5240MHz: 22.96 dBm • 5260-5320MHz: 22.95 dBm • 5500-5700MHz: 29.94 dBm • 2405-2480MHz: 5.51 dBm European Waste Electrical and Electronic Equipment (WEEE) Notice In accordance with Directive 2012/19/EU of the European Parliament on waste electrical and electronic equipment (WEEE): 1. -
Page 46: Index
Index (continued) mounting options mounting accessories 16 announcements vii, viii mounting bracket 16 AP560h features 10 New in this guide 9, 14 Box Contents notices v AP560h box contents 15 order information cable configuration AP560h order information 11, 12 GE1 cable configuration 38 bracket order 11, 12 GE2 cable configuration 38 overview 9... - Page 47 Index (continued) wall installation wall install using KT-147407-02 and KT-150173-01 extension arm 24 Wall installation wall installation using KT-147407-02 bracket 22 warnings v...
Need help?
Do you have a question about the ExtremeWireless AP560h and is the answer not in the manual?
Questions and answers