Advertisement
Quick Links
Advertisement

Subscribe to Our Youtube Channel
Related Manuals for Glow Bricks Disney Castle Lego 43222


Summary of Contents for Glow Bricks Disney Castle Lego 43222
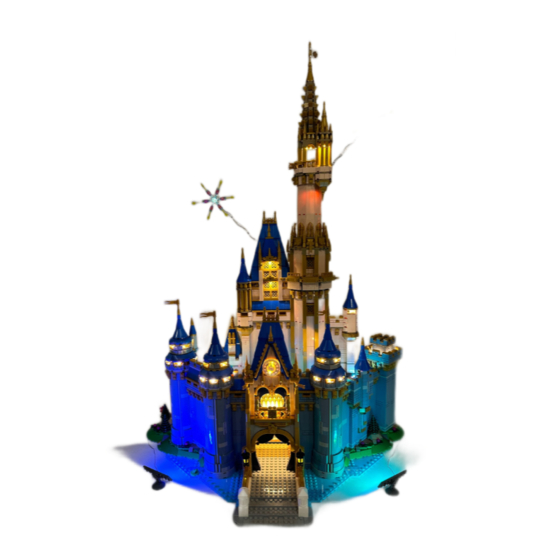
- Page 1 Castle...
- Page 2 Split the castle as shown before getting started...
- Page 3 Detach upper walls from the base level and take the lighting part A be ready *There’s difference between the left and right side by the quantity of flames, make sure the connector is located on the right Start by assembling the grey lighting plate at the front door...
- Page 4 Replace the lanterns at the entrance, remove the shown gold part in purpose to hide the wire underneath it...
- Page 5 Remove the dishes from the lantern and place them on the lighting parts Assemble the clear lighting round plates the each side on the head...
- Page 6 Hide the wire in between the studs of the shown spot Then restore the gold parts removed before...
- Page 7 Then remove the shown parts at the top Remove the 2x10 white plate then assemble the brown lighting tiles at the front side of the balcony and place the wire in between the studs...
- Page 8 Restore the white plate, settle the remain lights to the outside and get the wire placed in between the pink and blue parts Once the wire is settled restore the pink wall...
- Page 9 Follow the picture to restore the parts one by one, do it slow to prevent the wire get damaged, at last the lights would be placed on the clock location...
- Page 10 Stick the led’s then restore the clock and the remain parts Back inside the castle, replace all the flames from the candles...
- Page 11 Here’s how the wires should go and cover them by the parts next to the candles Now do the same thing for the other side Start by assembling from the end, it’s easier to recognize which flame to use...
- Page 12 Assemble the flames follow by the red lines again Restore the walls and this part is done...
- Page 13 Take lighting part B to assemble it on this part Make sure the connector is placing at the right side Start by replacing the flames on the candles...
- Page 14 Restore the candle lights then assemble the lighting plate at the middle Lift up the part from the red circle area to get space for the other lighting plates pass through the arches...
- Page 15 Assemble the remain lighting plates as shown Combine the parts from the previous steps, then take lighting part C to assemble...
- Page 16 Remove and detach the pavilion on the left side And take the tan lighting parts at the end to assemble them Assemble the top 1x1 lighting plate as shown...
- Page 17 Assemble the tan lighting parts around the pavilion then restore the walls Then assemble the remain 1x1 lighting plates to the lower level...
- Page 18 Restore the pavilion, place the wire in between the studs Assemble the remain lighting plates on the platform...
- Page 19 Connect with the plug from lighting part B Get the lighting part D to assemble them to the towers...
- Page 20 Connect the plug then start sticking the led’s from the bottom To move the remain lights to the 2 floor, split the top and leave one corner of the plates then place the wire in between them...
- Page 21 Restore the 2 level of the tower, place the led’s to assemble them and put the top back Restore the plate and this side is done...
- Page 22 Now turn to the other tower and do the same steps as before Restore the plate and this side is done...
- Page 23 To make it looks better, hide the excess wires and the connectors inside the body Restore the plate and this side is done...
- Page 24 To make it looks better, hide the excess wires and the connectors inside the body After that this installation for the base is finished...
- Page 25 Let’s continue by assembling part E to the upper part of the castle Find the end side of the lighting part with a clear round plate and 2 led’s Detach the top and the windows attached to it...
- Page 26 Assemble the 1x4 lighting plate at the shown spot, then place the clear round plate onto the firework spark Restore the plate and this side is done...
- Page 27 Restore the brown arch, use a cutter to remove the cover from the tape sticked on led Stick one led to the window next to the lighting plate...
- Page 28 Restore the window right below the led mentioned from last step then stick the other one, the wire can be hidden right behind the window Restore the other window that put it back to the castle...
- Page 29 The remain lighting parts will be passed through the shown hole to downstairs Remove the shown parts to give it some space Assemble the 1x6 lighting plate and leave the connect at the top to combine with the lighting part F later...
- Page 30 Restore the parts and make sure the wire in red circle are placed in between the studs Then restore the blue blocks...
- Page 31 Assemble the other 1x6 lighting plate Remove the shown plate to move the lighting parts with 1x8 attached to the bottom level, and assemble the 1x2 lighting plate at the red circle area The wire can be hidden in between the gap shown by the blue line...
- Page 32 The led strip would be sticked at the arch above the stove Move the lighting 1x2 orange plate to replace the plate on the oven Remove the shown part to give it space to get through it...
- Page 33 Then restore the parts in the kitchen Then assemble the 1x8 lighting plate at the ceiling in dining room and replace the lighting fires to the candle...
- Page 34 Remove the shown part to move the 1x1 lighting plate to above and assemble it The wire could be hidden nicely after restoring the parts from the previous step...
- Page 35 Lift the plate at the bottom to move the connect passing through to outdoor Now part E is done...
- Page 36 Get lighting part F for the tower top of the castle Get the end side of the lighting parts, remove the shown parts from the castle and assemble the lighting 1x1 and 1x3 plates...
- Page 37 Restore the top and combine the lighting round plate on the firework spark To move the remain lights to the lower level, take some parts out from the side and get the wire into the gap of the plates shown...
- Page 38 Assemble the lighting 1x2 plate at the lower level Restore the wall on both sides first and place the next 1x2 lighting plate at lower level then you can restore the floor...
- Page 39 Assemble the other 1x2 lighting plate Then restore everything belongs to that level except the floor...
- Page 40 Place the remain parts out from the side then restore the tower Lift up the floor, assemble the last lighting plate...
- Page 41 Move the connector out from the side Try to spin the shown part to see if it’s getting blocked by the lighting plate If so, move the plate more closer to the entrance...
- Page 42 Connect and combine with part E...
- Page 43 Reunion the whole castle and connect the plug from part E At last, connect the spot lights with the USB cable and place the spot lights on the side of castle...
Need help?
Do you have a question about the Disney Castle Lego 43222 and is the answer not in the manual?
Questions and answers