Table of Contents
Advertisement
Quick Links
WASHING MACHINE
MODEL: EWF-N1287D(GR)
Owner's Manual
Please read this manual carefully before
operating your set.
Retain it for future reference.
Record model number and serial number
of the set.
See the label attached on the set and
quote this information to your dealer when
you require service.
For The Warranty Terms & Conditions, Please Refer To Warranty Certificate
Advertisement
Table of Contents

Subscribe to Our Youtube Channel
Related Manuals for Elba EWF-N1287D(GR)


Summary of Contents for Elba EWF-N1287D(GR)
- Page 1 WASHING MACHINE MODEL: EWF-N1287D(GR) Owner’s Manual Please read this manual carefully before operating your set. Retain it for future reference. Record model number and serial number of the set. See the label attached on the set and quote this information to your dealer when you require service.
-
Page 2: Safety Precautions
• In order to avoid electric shock, please make sure the appliance has been shut off before carrying out the maintenance. • Use only original accessories provided by ELBA or its authorized service center. • Do not use wet parts of the body to touch the appliance. -
Page 3: Installation
3. INSTALLATION 3.1 ENVIRONMENT Leave some space Maintain at least 10cm between the washer and the wall Place the washer on a sturdy flat surface If the washer is placed on an uneven surface, noise or vibration will occurs. (Max. tilt angle on the supporting surface: 2°... -
Page 4: Leveling The Washer
LEVELING THE WASHER If the washer is not leveled with the ground, it makes the machine tremble more or be out of order. So, make sure that the washer is leveled properly. SEE IF THE MACHINE IS PLACED LEVEL BY CHECK THE POSITION OF THE WASHING Open the lid of the machine, pour water into the tub up to the level just below the pulsator, and adjust the adjustable feet so that the pulsator is positioned at the center of the water as shown in the figure. -
Page 5: Before The Installation
3.2 BEFORE THE INSTALLATION • Please check the products and make sure there is no damage on the appliance. • The appliance door is level, and you can open and close the appliance door flexibly. • Specification on the marking plate is in compliance with the regulations. •... -
Page 6: Installation Type
3.4 CONNECTION OF THE WATER SUPPLY HOSE Connect the other end of the water supply hose to the inlet water valve at the back of the washer. Screw the hose clockwise tightly. INSTALLATION TYPE 1 If the water tap is a screw type, assembly a water supply hose that fit to the tap as shown. -
Page 7: Water Draining Connection
3. Connect adaptor to the water tap by tightening the screws firmly. Then, turn part (b) anti-clockwise and put part(a) and part(b) together. 4. Connect the water supply hose to the adaptor. Pull down the part (c) of the water supply hose. -
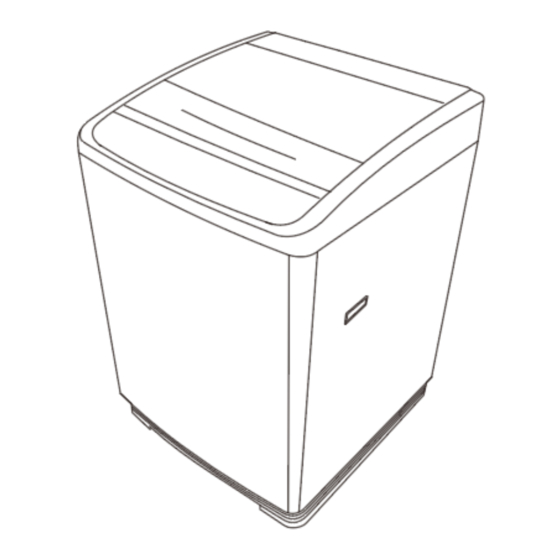
Page 8: Product Description
4. PRODUCT DESCRIPTION 5. HOW TO USE YOUR WASHING MACHINE Detergents • Detergent or washing powder shall be selected according to fabric type, colors, washing temperatures, dirty degree and types. • Bleacher belongs to alkaline type can damage clothes. • Powder detergents can easily leave the residues in the clothes so as to generate the bad smell;... - Page 9 • The articles of different sizes are washed together to increase the washing effects. • Soft articles shall be washed separately. As for new pure wool textiles, curtains and silks, the soft washing procedure shall be selected. Check the labels in all washing articles. •...
- Page 10 5.2 WASHING CLOTHES FOR THE FIRST TIME Before washing clothes for the first time, you must run a complete cycle without clothes. To do this: 1. Press the button. 2. Pour a little detergent into detergent box or the inner tub. 3.
-
Page 11: Program Setting
6. PROGRAM SETTING Cotton You can select this program to wash the daily washable clothes. The washing period is longer with strong washing intensions. It is recommended to wash the daily cotton articles, for example: daily laundry, bed sheets, quilt covers, pillowcases, gowns, underwear etc. Quick Wash You can select this program on lightly soiled, cotton, colored and linen textiles. -
Page 12: Program Selection
6.1 PROGRAM SELECTION Once the washer is turned ON, press this program button the select desired program. With every press of this button, the washing program changes. Washing program will follow this sequence: Cotton > Quick Wash > Extra Clean > Baby Care > Heavy Duty > Tub Clean. Press button to start. -
Page 13: Delay End
Method 2: Firstly, press the button. Press this button and hold for 3 seconds, the washer will sense the laundry automatically. The water level will be set automatically and start the washing program immediately. Method 3: Firstly, press the button. Press this button and then press button, the washer will sense the laundry automatically. -
Page 14: Child Lock
6.6 CHILD LOCK Once the washing program is running, press the “Water Level” button & “Program” button simultaneously and hold for 3 seconds to activate the child-lock function. All the button will be locked except the power button. The child lock indicator will appear on the display screen once it is activated. - Page 15 6.9 TABLE OF WASHING PROGRAM Recommended Duration Program Water Level Laundry Type Capacity (Hours) Automatic Sensing Lightly soiled, cottons and Cotton 12 kg 0:49 (Leve 1 – 8) linen textiles Lightly, soiled, cotton, colored and linen textiles. Due to short washing time of this program, it is Automatic Sensing recommend that less...
-
Page 16: Cancelling A Program
6.10 CANCELLING A PROGRAM To cancel a running program at any time: 1. Press the button to pause the program. 2. Press button. 3. Your machine will stop the washing operation and the program will be interrupted. 4. Select any other program to drain the machine. 5. -
Page 17: Cleaning And Maintenance
7. CLEANING AND MAINTENANCE Before cleaning or performing maintenance on your appliance, disconnect the appliance from the power supply. To extend the lifespan of your appliance, it must be cleaned frequently. The enamel or stainless steel parts should be cleaned without using any abrasive powders or corrosive substances which could damage the surface. -
Page 18: Troubleshooting
8. TROUBLESHOOTING Troubles Reason Solution Appliance cannot Door is not closed properly. Check if the door is closed tightly. start up No power supplied. Check if power plug is inserted well. No water supplied. Check if water supply tap is opened. Check if button “Start/Pause”... -
Page 19: Technical Specification
washer will not work. Please ensure the lid is closed. Press the start button again. EA / EC Alarm Press start button reoperation. If still unable to solve problem, please contact the after sales service center. Electrical Warning • To avoid the risk of fire, electrical shock and other accidents, please take note on the following: i.
Need help?
Do you have a question about the EWF-N1287D(GR) and is the answer not in the manual?
Questions and answers