Table of Contents
Advertisement
Advertisement
Table of Contents

Subscribe to Our Youtube Channel
Related Manuals for Elba Smart Drive


Summary of Contents for Elba Smart Drive
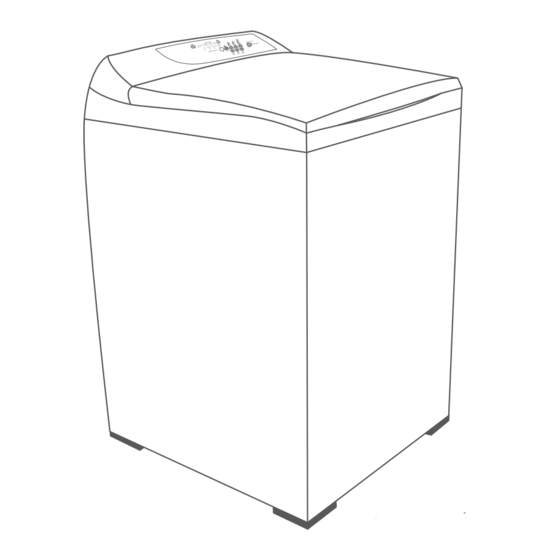
- Page 1 Installation instructions User guide Clothes washer NZ AU...
-
Page 3: Table Of Contents
Contents Introduction Installation instructions Getting started Using your washer Lid lock Wash cycles and options Wash cycles and options Wash options and advancing the cycle Water levels Saving water – Eco option, Spin Hold Washing bulky items, Woollens Before you wash Sorting, Loading Detergent Fabric softener, Scrud... -
Page 4: Introduction
Introduction Thank you for buying an Elba washing machine. We are very proud of this Smart Drive™ washer and trust it will serve you well for many years. At Fisher & Paykel we aim to provide innovative products that are simple to use, ergonomic and energy efficient. -
Page 5: Installation Instructions
Installation instructions Note: you owe it to yourself and your Elba washer to have it installed correctly by an Authorised Service Agent. Unpacking To ensure the best performance from your new Smart Drive™ please follow the instructions below. Removing the packaging Remove the outer packaging. - Page 6 Installation instructions Inlet hoses Connect the straight ends of the inlet hoses to the taps. There are washers fitted in both ends. Connect the elbow ends of the inlet hoses to the machine inlet valves. Inlet valves are marked on the back of the machine.
- Page 7 Washer safety This washer is not intended for use by young children or infirm persons without supervision. Your Smart Drive™ can now be opened while it is filling and agitating, supervise young children to ensure they do not play with it.
-
Page 8: Using Your Washer
Using your washer Remove fabric softener dispenser. Place the load evenly around the agitator. (Refer to ‘Sorting and loading’ page 14). A. Detergent Follow the instructions on the detergent package. Use the mark on the agitator, nearest to the top of the clothes, as a guide to the correct amount of detergent to use. - Page 9 Using your washer C. Power Press to turn the machine on. POWER D. Wash cycle Select the cycle you want by pressing the CYCLE button located below the option. Scroll through the cycles REGULAR until the one you want is lit. E.
-
Page 10: Lid Lock
Lid lock Your Smart Drive™ has a lid lock, which locks when your machine is spinning. This ensures the lid cannot be opened during hazardous parts of the cycle, providing added safety for you and your family. light (above the... -
Page 11: Wash Cycles And Options
Wash cycles and options Default settings REGULAR HEAVY DUTY DELICATE WOOL Wash Time 12 min 15 min 6 min 6 min Wash Action REGULAR HEAVY DUTY DELICATE DELICATE Wash Temp WARM WARM WARM WARM Spray rinse Spray rinse + Spray rinse + 2 cold deep Rinse + warm-cold... -
Page 12: Wash Options And Advancing The Cycle
Fig.10 Selecting wash options The wash progress lights lights show all the tasks your Smart Drive™ will do during the wash cycle. As WASH PROGRESS each task is completed a light goes out, so you can tell at a glance how far the cycle has to go. -
Page 13: Water Levels
They indicate the level of dry clothes suitable for the water level. Your Smart Drive™ may occasionally add water during agitation. This is to maintain the water level due to the release of air trapped in the garments. -
Page 14: Saving Water - Eco Option, Spin Hold
REGULAR cycles. If you try to select these options HEAVY DUTY on the cycle, your Smart Drive™ will WOOL DELICATE skip over the option. The option will take slightly longer than a normal spray and deep rinse. -
Page 15: Washing Bulky Items, Woollens
Nappy sanitisers/ Bleach Nappy sanitisers and bleach are very corrosive to metal surfaces. DO NOT use your Smart Drive™ to soak items in bleach or sanitiser, or tip the contents of the nappy bucket into your machine. -
Page 16: Before You Wash
Where possible, turn lint collectors inside out. Examples of different care label symbols. Loading Lint givers Lint collectors Check pockets Loose items can damage both your Smart Drive™ Towels Synthetics and your clothes. Chenille Corduroy Close zippers, hooks and eyes... -
Page 17: Detergent
Model 5.5kg 6.5kg 7.5kg (powder, liquid or tablets). water level Number of scoops Soap flakes or granulated soap powders should not be used in your Smart Drive™ high 1 rounded 11⁄3 11⁄2 eg Lux Soap Flakes. med high 1 scant 1 heaped 11⁄3... -
Page 18: Fabric Softener, Scrud
Fabric softener How the fabric softener is dispensed The fabric softener goes into the dispenser on the top of the agitator. During the rinse the machine spins to release the fabric softener, delivering it down the agitator stem as the machine fills for the final deep rinse. -
Page 19: Changing Pre-Set Options
Changing pre-set options Option Adjustment mode After using your Smart Drive™ you may want to fine tune some of the options to suit your wash needs. There are a number of preset options, which can be altered: the warm wash temperature... - Page 20 Changing pre-set options Press and hold down. Press START/PAUSE POWER The diagram below shows how the lights relate to the options you can change. It also shows what lights will be on when you first enter the Option Adjustment mode. Use this diagram to help you adjust the options: Fig.19 Option Adjustment mode options Use the buttons on the panel to change the pre-set options.
-
Page 21: Wash Temperatures, Rinse Options
Changing pre-set options Wash temperatures The warm temperature can be adjusted if you think it is too hot or too cold. Note: on these models the hot temperature will be the same as the hot water supply temperature. Select the you want to adjust. -
Page 22: Out Of Balance Recovery Routine
REGULAR Machine Stops option light off = machine stops Your Smart Drive™ will stop, give a short burst of beeps every 5 seconds, and the light RINSE SPIN Fig.22 Adjusting Out of Balance Recovery routine will flash. -
Page 23: Cleaning Your Washer
Machine information When you have finished Turn off the taps to prevent the chance of flooding should a hose burst. Turn off the power at the wall. Cold water washing If you always use cold water, we recommend that a warm or hot wash be used at regular intervals, eg every 5th wash should be at least a warm one. -
Page 24: Products That Might Damage Your Washer, Sounds And Beeps
Machine information Products that might damage your washer Concentrated bleaches, nappy sanitisers and hydrocarbon solvents (eg petrol and paint thinners) can cause damage to the paintwork and components of your washer. (Be careful when washing garments stained with solvents as they are flammable. DO NOT put them in your dryer). Do not use pre-treatment sprays or liquids on or near your washer as they can damage your machine’s control panel. -
Page 25: If Your Washer Beeps For Help
If your washer beeps for help Your washer is capable of diagnosing its own troubles. If your washer gives a musical series of beeps every 5 seconds it is telling you that it has a problem which YOU can solve using the checklist below. - Page 26 If your washer beeps for help light is flashing. LID LOCK Make sure the lid is closed. Press (refer to page 8). START/PAUSE If the symptom persists call your Fisher & Paykel Dealer or Authorised Service Centre. First light is flashing as well as the light.
-
Page 27: Operating Problems
Operating problems Pressing does not turn the machine on. POWER Is the power switched on at the wall? Switch the power off at the wall and wait 60 seconds before turning the power on again. Could your household power supply be at fault? Try plugging in another electrical appliance. Pressing does not start the fill. -
Page 28: Wash Problems
Wash problems Listed below are possible causes and solutions to some common wash problems. Creasing. Overloading the washer or dryer. Choose the cycle which has been designed to minimise creasing. DELICATE Try selecting a slower spin speed. Do not leave wet clothes to sit in the washer or laundry basket. Poor Soil Removal. -
Page 29: Manufacturers Warranty
Manufacturer’s warranty You automatically receive a 2 year Manufacturer’s Warranty with the purchase of this Product covering parts and labour for servicing within the country of purchase. Fisher & Paykel undertakes to: Repair or, at its option, replace without cost to the owner either for material or labour any part of the Product, the serial number of which appears on the back of the Product, which is found to be defective within TWO YEARS of the date of purchase. -
Page 30: Customer Care
Customer care Before you call for service or assistance ... Check the things you can do yourself. Refer to the installation instructions and your user guide and check that: Your appliance is correctly installed. You are familiar with its normal operation. If after checking these points you still need assistance, please refer to your nearest AUTHORISED SERVICE CENTRE, or contact us through our local website listed on the back cover. - Page 32 Under our policy of continuous product improvement, these specifications may change at any time. You should therefore check with your Customer Care Centre to ensure this booklet correctly describes the product currently available. www.elba.co.nz www.elba.com.au NZ AU Clothes washer Installation instructions and user guide Published: 04/2009 Part No.
Need help?
Do you have a question about the Smart Drive and is the answer not in the manual?
Questions and answers