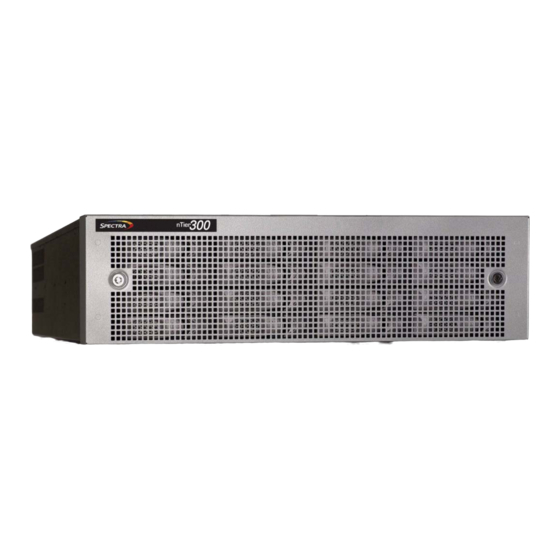
Spectra Logic Spectra nTier300 Instructions Manual
Data drive
Hide thumbs
Also See for Spectra nTier300:
- Release note (12 pages) ,
- Installation manual (88 pages) ,
- User manual (112 pages)
Table of Contents
Advertisement
Quick Links
Advertisement
Table of Contents

Subscribe to Our Youtube Channel
Related Manuals for Spectra Logic Spectra nTier300


Summary of Contents for Spectra Logic Spectra nTier300
- Page 1 Spectra Data Drive Replacement Instructions PN 90990012 Revision B...
-
Page 2: Part Number
If you do not agree to the above, do not use the Spectra product; instead, promptly contact Spectra Logic for instructions on how to return the product for a refund. -
Page 3: Contacting Spectra Logic
Contacting Spectra Logic To obtain general information Spectra Logic Web Site: www.spectralogic.com United States Headquarters Spectra Logic Corporation 1700 North 55th Street Boulder, CO 80301 Phone: (800) 833-1132 or (303) 449-6400 International: 00 (1) 303 449 6400 Fax: (303) 939-8844... -
Page 4: Table Of Contents
Contents Introduction Typographical Conventions ......... . . 5 Replacing an nTier300 VTL or nTier500 Data Drive Preparing for Replacement . -
Page 5: Introduction
Introduction These instructions describe replacing a data drive in the following Spectra products: Spectra nTier300 Virtual Tape Library (VTL) appliance (nTier300 VTL) Spectra Tier500 Intelligent Secondary Storage appliance (nTier500) Spectra nTier700 VTL appliance (nTier700 VTL) Spectra Tier700 Intelligent Secondary Storage appliance (nTier700) -
Page 6: Replacing An Ntier300 Vtl Or Ntier500 Data Drive
Preparing for Replacement Spectra Logic recommends that you back up your nTier300/500 configuration before replacing a data drive. Refer to the documentation that accompanied your nTier300/500 for information about backing up your configuration. -
Page 7: Materials And Tools
A grounded anti-static wristband A replacement data drive A #2 Phillips screwdriver An anti-static bag for the malfunctioning data drive Shipping materials for returning the malfunctioning data drive to Spectra Logic Recommended: An anti-static mat Identify the Malfunctioning Drive Note: If you are uncertain about which drive to replace, contact SpectraGuard Support for assistance (see Contacting Spectra Logic on page 3). - Page 8 Replacing an nTier300 VTL or nTier500 Data Drive 3. The BlueScale web interface displays the Overview page. The red Drives tab indicates that a drive is experiencing an error condition. Figure 1 The Overview page (nTier500). 4. Select the Drives tab on the Overview screen to display status information about the drives.
-
Page 9: Remove The Front Cover
Using the nT500 Operator Panel to Identify a Malfunctioning Drive The operator panel on the nTier500 cover also indicates when there is a problem with one of the drives. When a drive is not operating correctly, a red warning symbol displays on the general status tab (Figure 3). -
Page 10: Replacing The Drive
The data drives are mounted on custom drive sleds that provide the mounting and electrical connections required to operate them in the nTier300/500 chassis. Only install drives that you purchase from Spectra Logic. For assistance, see Contacting Spectra Logic on page 3. - Page 11 3. Slide the sled latch to the right to release it (Figure 6). 4. Open the drive sled handle by rotating it outward and toward the left to disengage the drive sled from the chassis (Figure 7). Figure 6 Release the latch. 5.
- Page 12 Replacing an nTier300 VTL or nTier500 Data Drive 2. Remove the new drive from its anti-static bag. 3. Place the drive into the sled so that the drive connectors are positioned at the back of the drive sled and the mounting screw holes are toward the bottom of the drive sled (Figure 8).
- Page 13 Rebuilding an array may take hours to complete. Backups continue uninterrupted but may be slower until the rebuild is completed. 5. Package the malfunctioning drive and ship it to Spectra Logic as described in Returning a Malfunctioning Drive on page 27.
-
Page 14: Installing The Front Cover
Replacing an nTier300 VTL or nTier500 Data Drive Installing the Front Cover The front cover secures the drives to prevent unauthorized removal. 1. Insert a key into the lock on each side of the front cover. 2. Examine the back of the cover. Using the keys, position of the locking tabs on each end so they are in the unlocked position (Figure 10). -
Page 15: Replacing An Ntier700 Or Ntier700 Vtl Data Drive
Replace any malfunctioning drive(s) as soon as possible to avoid degraded performance. Preparing for Replacement Spectra Logic recommends that you back up your nTier700 configuration before replacing a data drive. Refer to the documentation that accompanied your nTier700 for instructions. -
Page 16: Materials And Tools
A grounded anti-static wristband A replacement data drive A #2 Phillips screwdriver An anti-static bag for the malfunctioning data drive Shipping materials for returning the malfunctioning data drive to Spectra Logic Recommended: An anti-static mat Identify the Malfunctioning Drive and Power It Down Use the following steps to identify the malfunctioning drive through the BlueScale web interface. - Page 17 4. Select the Blades tab on the Overview screen to display status information about the blade components. An error icon appears next to the blade containing the malfunctioning drive. Figure 12 The Blades tab when a drive is malfunctioning. 5. The Unlock button below the graphic toggles between Unlock and Lock. If the text above the button reads “Bezel keypads are locked,”...
- Page 18 Replacing an nTier700 or nTier700 VTL Data Drive 7. Select the Drives category for the blade containing the malfunctioning drive. The category expands to list the drives. The malfunctioning drive is indicated by an error icon and a status of failed (Drive 1-2 in Figure 13). Figure 13 Drives category with drives listed.
-
Page 19: Unlock And Extend The Blade
9. Select Yes if you want to power down the drive or select No to return to the list of drives. If the drive is part of a RAID volume, a second message asks you to reconfirm that you want to power down the drive (Figure 14 on page 18). If the drive is not part of a RAID volume, the second confirmation does not display. - Page 20 Replacing an nTier700 or nTier700 VTL Data Drive 3. Press the O button on the operator panel to select (more...) The Chassis Status screen displays. This screen shows more detailed information about the nTier700 chassis components. 4. Using the > button, move to the Unlock tab to display the Unlock Blades screen.
- Page 21 7. Grasp the handle on the blade containing the malfunctioning drive and carefully pull the blade out of the chassis until the drive you want to remove is accessible. Do not operate the nTier700 with the blades pulled out of the Warning enclosure except when servicing the drives.
-
Page 22: Replacing The Drive
The data drives are mounted on custom drive sleds that provide the mounting and electrical connections required to use them in a blade. Only install drives that you purchase from Spectra Logic. For assistance, see Contacting Spectra Logic on page 3. Any damage to the nTier700 caused by failure to protect it Caution from electrostatic discharge (ESD) voids the warranty. - Page 23 3. Locate the malfunctioning drive you previously identified (see Identify the Malfunctioning Drive and Power It Down on page 16). The LED on the sled for drive that is powered off will be illuminated orange. Figure 15 shows the drive numbering and latch locations for the drives in the blade.
-
Page 24: Install The New Drive On The Sled
Replacing an nTier700 or nTier700 VTL Data Drive Install the New Drive on the Sled 1. Using a #2 Phillips screwdriver, unscrew the four screws securing the malfunctioning drive to the drive sled (Figure 17). Remove the drive from the drive sled and set the drive aside. - Page 25 Use the following steps to install the new drive in the blade. 1. If necessary, release the latch on the drive sled by sliding the locking tab to the left and rotating the latch toward the top of the sled (see Figure 18 and Figure 19). Note: You only need to move the latch enough to release it.
- Page 26 RAID volume begins. 4. Using the blade handle, slide the blade completely into the nTier700 enclosure until it is firmly seated. 5. Package the malfunctioning drive and ship it to Spectra Logic as described in Returning a Malfunctioning Drive on page 27.
-
Page 27: Returning A Malfunctioning Drive
You may be invoiced if the returned drive is damaged due to incorrect shipping. You can request replacement packaging material if original packaging has been discarded. Ask your Spectra Logic Sales Representative for details (additional charges may apply). 1. Place the drive inside the anti-static bag. -
Page 28: Shipping Rma Returns
Instructions 1. Fill out your portion of the International Shipping Instructions form, available on the Spectra Logic Web site at www.spectralogic.com/returns. 2. Return the completed form to Spectra Logic using one of the following methods: Email: intlreturns@spectralogic.com 303.939.8844 Fax: Post:...
Need help?
Do you have a question about the Spectra nTier300 and is the answer not in the manual?
Questions and answers