Spectra Logic Spectra nTier300 Installation Manual
Virtual tape library appliance
Hide thumbs
Also See for Spectra nTier300:
- Release note (12 pages) ,
- Instructions manual (28 pages) ,
- User manual (112 pages)

Subscribe to Our Youtube Channel
Related Manuals for Spectra Logic Spectra nTier300


Summary of Contents for Spectra Logic Spectra nTier300
- Page 1 Spectra nTier300 Virtual Tape Library Appliance Installation Guide PN 90990034 Revision B...
- Page 2 WARRANTIES OF MERCHANTABILITY OR FITNESS FOR A PARTICULAR PURPOSE, BOTH OF WHICH ARE EXPRESSLY DISCLAIMED. In no event shall Spectra Logic be liable for any loss of profits, loss of business, loss of use or data, interruption of business, or for indirect, special, incidental or consequential damages of any kind, even if Spectra Logic has been advised of the possibility of such damages arising from any defect or error.
-
Page 3: High Voltage
Warnings AC Power Warning: Risk of electrical shock. To remove AC power from the Spectra nTier300 VTL, unplug all three of the power cords from the power inlets. Warnung: Gefahr eines elektrischen Schlages. Um den Wechselstrom des Spectra nTier300 VTL abzuschalten, ziehen Sie alle Drei Netzkabel aus den Eingangsbuchsen. -
Page 4: Contacting Spectra Logic
Contacting Spectra Logic Contacting Spectra Logic To obtain general information Spectra Logic web Site: www.spectralogic.com United States Headquarters Spectra Logic Corporation 1700 North 55th Street Boulder, CO 80301 Phone: (800) 833-1132 or (303) 449-6400 International: 00 (1) 303 449 6400... -
Page 5: Table Of Contents
Conventions Used in This Guide ........10 Chapter 1 – Spectra nTier300 VTL Overview Features . - Page 6 Web Interface Powering On the Spectra nTier300 VTL ....... . 37 Accessing the BlueScale Web Interface .
- Page 7 RAID Storage Specifications ........
- Page 8 Contents Notes...
-
Page 9: About This Guide
About This Guide This guide is a supplement to the “Getting Started” chapter in the Implementing nTier Deduplication guide and describes the following: ® Installing the Spectra nTier300 nTier300 VTL or the nTier300 VTL). Configuring the initial IP address. Using the BlueScale web interface to monitor the status of the hardware components. -
Page 10: Related Publications
About This Guide Related Publications The following publications related to the Spectra nTier300 VTL and nTier FalconStor Deduplication are available from the Spectra Logic web site at documents. The Spectra nTier300 Virtual Tape Library Appliance Release Notes—available on Spectra Logic’s web site—provide the most up-to date information about the nTier300, including information about the latest firmware releases. -
Page 11: Chapter 1 - Spectra Ntier300 Vtl Overview
Single Instance Repository (SIR) functionality in a single, preconfigured appliance. This chapter provides an overview of the nTier300 VTL appliance features and components. Features The energy-efficient Spectra nTier300 VTL includes the following features: ® VTL software. The included FalconStor VTL software provides nTier FalconStor Virtual Tape Library (VTL) and FalconStor Single Instance Repository (SIR) deduplication functionality for the nTier300 VTL. - Page 12 RAID storage. Once the data is written to the cache memory, the host can move on to another operation while the data is written to disk.
-
Page 13: Components
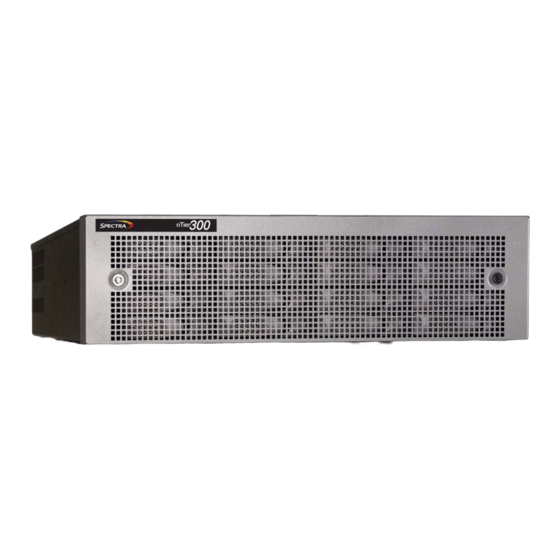
Components The following sections show the locations of and briefly describe the nTier300 VTL’s major front and rear panel components. Front Panel Figure 1-2 shows the major components on the front panel of the nTier300 VTL. Data drives Drive blanks Figure 1-1 The front view of the nTier300 VTL (nTier300 VTL V80 shown, front cover removed). -
Page 14: Rear Panel
Chapter 1 – Spectra nTier300 VTL Overview Rear Panel Figure 1-2 shows the major components on the rear panel of the nTier300 VTL. Note: Depending on the options you purchased, the rear panel of your nTier300 VTL chassis may differ from the one shown in Figure 1-2. -
Page 15: Integrated Server
Console and BlueScale web interface used to configure, manage, and monitor the nTier300 VTL. USB ports. The USB ports can be used to connect a USB storage device to the nTier300 VTL for saving configurations and uploading firmware packages. If desired, you can use these ports to connect a USB mouse and a USB keyboard to the nTier300 VTL integrated server. -
Page 16: The Ntier300 Vtl Software
FalconStor Software The FalconStor software provides the Virtual Tape Library (VTL) and Single Instance Repository (SIR) deduplication functionality for the Spectra nTier300 Deduplication VTL. For detailed configuration and use information, read the Implementing nTier Deduplication guide, which is included as a PDF on the nTier Deduplication CD. -
Page 17: Chapter 2 - Installing The Ntier300 Vtl
Install the Front Cover on page 34 Preparing for the Installation Before unpacking and installing the Spectra nTier300 VTL, confirm the following: The installation location has adequate clearance for ventilation, minimal dust and debris, and proximity to an appropriate AC power source. -
Page 18: Unpacking The Ntier300 Vtl
Unpacking the nTier300 VTL The Spectra nTier300 VTL and its drives are shipped in a cardboard box attached to a pallet. The only tool needed to unpack the box is a pair of scissors. -
Page 19: Unpack The Components
Do not unpack the nTier300 VTL or its drives if the Tip N Tell or Shockwatch indicator has been tripped. Contact both the shipping company and Spectra Logic to report the problem. 3. Use scissors to cut the straps securing the nTier300 VTL box to the shipping pallet. - Page 20 Chapter 2 – Installing the nTier300 VTL 5. Refer to Figure 2-7 to remove the drives, accessories, and nTier300 VTL chassis from the shipping box. Place the chassis and the drives on your work surface. Warning: The nTier300 VTL weighs approximately 54 lb. (25 kg) without drives installed.
-
Page 21: Inventory The Components
A license key for the nTier Deduplication VTL software documentation Spectra nTier300 VTL Deduplication VTL documentation: Implementing nTier Deduplication Spectra nTier300 Virtual Tape Library Appliance Installation Guide (this guide) Unpacking the nTier300 VTL... -
Page 22: Rackmounting The Ntier300 Vtl
Chapter 2 – Installing the nTier300 VTL Rackmounting the nTier300 VTL Install the nTier300 VTL in a standard 4-post, 19-inch rack using 3 units (3U) of rack space. Warning: If you are not installing any other equipment in the rack, install the nTier300 VTL near the bottom of the rack to prevent the rack from being top-heavy. - Page 23 Component Small nut plates and screws Large nut plates and screws # Required Bag labeled 4 small nut plates 12 (or more) screws Bag labeled 4 large nut plates 12 (or more) screws Bag labeled 4 clip nuts Clip nuts 4 screws and screws Rackmounting the nTier300 VTL...
-
Page 24: Prepare The Rails
Chapter 2 – Installing the nTier300 VTL Prepare the Rails Disassemble the rail assemblies. Each assembly consists of an outer rail and an inner slider. 1. Extend the slider from the outer rail until the safety latch is visible, as shown in Figure 2-8. - Page 25 3. Slide the end of the slider (furthest from the latch) under the tab near the front of the chassis so that the tab fits into the notch on the end of the slider, as shown in Figure 2-10. Front of chassis Figure 2-10 Insert the slider under the tab.
-
Page 26: Adjust The Length Of The Outer Rails
Chapter 2 – Installing the nTier300 VTL Adjust the Length of the Outer Rails 1. Make sure the extender on the outer rail can slide a little to extend the length of the rail. If necessary, loosen or tighten the screws attaching the extender to the rail. Refer to Figure 2-12 to see a close-up of the rail with the extender attached. - Page 27 3. Position a nut plate behind one rack post at the desired position, then use a #2 Phillips screwdriver to screw three ½-inch screws into the plate, as shown in Figure 2-13. Tighten the screws only enough to hold the plate in place. Screws Figure 2-13 Loosely attach the nut plate to the rack.
- Page 28 Chapter 2 – Installing the nTier300 VTL 5. Fit the tabs on one rail extender between the nut plate and one of the back rack legs. Then, fit the front tabs on the rail between the nut plate and corresponding legs on the front of the rack (see Figure 2-14).
-
Page 29: Install The Ntier300 Vtl Into The Rack
Install the nTier300 VTL into the Rack 1. Lift the nTier300 VTL and slide it onto the rails in the rack until the mounting ears on the front of the chassis fit against the rack, with the mounting ear screw holes directly over the clip nut holes (see Figure 2-16). -
Page 30: Installing The Data Drives
Chapter 2 – Installing the nTier300 VTL 2. Use a #2 Phillips screwdriver to install the two clip nut screws in each mounting ear to secure the chassis to the rack (see Figure 2-17). Mounting ear Figure 2-17 Secure the chassis to the rack (left side shown) Installing the Data Drives Each of the nTier300 VTL’s data drives is mounted on a drive sled for easy installation. - Page 31 1. Put on the provided anti-static wristband and attach it to an unpainted metallic surface. Caution: Any damage to the Spectra nTier300 VTL caused by failure to protect it from electrostatic discharge (ESD) voids the nTier300 VTL’s warranty. To protect the nTier300 VTL drives...
-
Page 32: Connecting Cables And Powering On
Chapter 2 – Installing the nTier300 VTL 5. When the drive sled is in position, push the handle inward and to the right until it locks in place. An audible click indicates that the drive sled is locked into position. Note: The latch occasionally sticks in the open position. - Page 33 2. Connect the interface cable from your backup server to the appropriate connector on the nTier300 VTL rear panel. See Figure 1-3 on page 15 for the location of the connectors and expansion slots on the back panel. If the backup server is on an iSCSI network, connect an Ethernet cable from your switch to one of the Ethernet ports on the nTier300 VTL rear panel.
-
Page 34: Install The Front Cover
Chapter 2 – Installing the nTier300 VTL 5. Using a stylus or other similar non-conductive object, press the recessed power button on the front panel (Figure 2-20). 6. Wait for the system to complete its power-on sequence. Figure 2-20 Press the recessed power button. Install the Front Cover The front cover secures the drives to prevent unauthorized removal. -
Page 35: Next Steps
Next Steps Your nTier300 VTL hardware is installed. For information about using the nTier300 VTL, read the following: Read the Implementing nTier Deduplication guide to learn about installing and using the FalconStor software. If you have not already done so, install the VTL Console on a Windows-based computer on the same network as the nTier300 VTL. - Page 36 Chapter 2 – Installing the nTier300 VTL Notes...
-
Page 37: Chapter 3 - Using The Ntier300 Vtl Bluescale Web Interface
BlueScale Web Interface This chapter describes how to use the BlueScale web interface and the blade operator panels to configure and monitor the Spectra nTier300 VTL. Powering On the Spectra nTier300 VTL on page 37 Accessing the BlueScale Web Interface on page 38... -
Page 38: Accessing The Bluescale Web Interface
Chapter 3 – Using the nTier300 VTL BlueScale Web Interface Wait while the nTier300 VTL completes its power-on sequence, which takes about five minutes, depending on the nTier300 VTL configuration. During the power-on sequence, the nTier300 VTL initializes all of its installed components and starts the BlueScale web server. - Page 39 3. Enter the IP address for Ethernet port on the nTier300 VTL in the browser address bar using the form https://nnn.nnn.nnn.nnn, where nnn.nnn.nnn.nnn is the IP address. Note: The BlueScale web interface uses a secure internet connection. You must prefix the IP address with https:// instead of just entering the IP address.
-
Page 40: Using The Bluescale Web Interface
Chapter 3 – Using the nTier300 VTL BlueScale Web Interface 4. Select “Continue to this website” to ignore the warning and display the Overview page (Figure 3-3). 5. To exit the BlueScale web interface, simply close the browser to end the session. Figure 3-3 The Overview page. -
Page 41: Menus
Menus The Menu panel (shown in Figure 3-4) appears along the left edge of each page. Menu buttons in this panel let you navigate through the available menus to select options. Selecting a menu button expands the menu to display the available options. Current menu Additional... -
Page 42: Bluescale Status Icons
Chapter 3 – Using the nTier300 VTL BlueScale Web Interface BlueScale Status Icons Icons indicate the status of a component and the highest severity level for any system messages, as described in the following table. Click the icon to view the related system messages (see Viewing Messages on page 42). - Page 43 Figure 3-6 Unread Messages list in the Messages page. Pay extra attention to any message flagged with the Warning or Error icon, and follow any recommended steps. Contact SpectraGuard Support if you need help (see Contacting Spectra Logic on page 5). Using the BlueScale Web Interface...
- Page 44 Chapter 3 – Using the nTier300 VTL BlueScale Web Interface Marking Messages as Read The nTier300 VTL can store hundreds of messages at a time. After you read and resolve errors or issues described in all of the unread messages, scroll down (if necessary) to the bottom of the new messages list and select number and the status icon shown on the Messages button are updated to reflect the status of any new messages.
-
Page 45: Monitoring The Status Of Components
Monitoring the Status of Components The tabs on the Overview page (Figure 3-8) provide an at-a-glance system status. Each tab represents a group of related components. From this screen, you can display more detailed status information for individual components. The ability to monitor components status using the BlueScale web interface is especially useful when your nTier300 VTL is operating in a “lights out”... - Page 46 Chapter 3 – Using the nTier300 VTL BlueScale Web Interface The following table describes the types of status information on each component tab. Shows... Drives Overall status for all drives Status of each drive Fans Status of midplane fans Status of the rear panel fans RAID HBA RAID controller status HBA batteries (for RAID write cache) status...
- Page 47 To view the detailed status information for all of the components in a group, click the tab. For example, clicking the red DRIVES tab in Figure 3-10 changes the graphic to show the components associated with DRIVES. Selecting Drives from the list below the graphic expands the page to show a list of the drives (Figure 3-11) in the system.
-
Page 48: Viewing And Configuring Ip Addresses
Chapter 3 – Using the nTier300 VTL BlueScale Web Interface Viewing and Configuring IP Addresses The nTier300 VTL includes two onboard Gigabit Ethernet (GigE) ports on the nTier300 VTL rear panel (see Figure 1-3 on page 15). Depending on your configuration, you may have one additional 10 GigE NIC installed in one of the integrated server expansion slots. - Page 49 3. The Network page displays information about the nTier300 VTL’s network connections (Figure 3-12). Figure 3-12 The Network page. 4. In the panel corresponding to the connection you want to configure, select either DHCP or Static as the addressing method. If you select static addressing, enter the following information: Address—Enter a valid Class A, B, or C IP address in the form of nnn.nnn.nnn.nnn.
-
Page 50: Restarting Or Shutting Down The Ntier300 Vtl
Chapter 3 – Using the nTier300 VTL BlueScale Web Interface Restarting or Shutting Down the nTier300 VTL Under normal circumstances, you restart or shut down the nTier300 VTL from the VTL Console as described in this section. The shutdown process saves the system configuration and stops the operating system, then readies the system to be powered off. - Page 51 4. Wait until the server completes its restart or the Halt sequence. If you selected Halt, wait for approximately 90 seconds for the VLT console to stop the operating system, then press power button until the blue LED in the button turns off.
- Page 52 Chapter 3 – Using the nTier300 VTL BlueScale Web Interface Notes...
-
Page 53: Chapter 4 - Maintenance
Maintenance This chapter describes how to replace a data drive in the Spectra nTier300 VTL. Replacing a Data Drive If one or more data drives in the nTier are not functioning properly, the Drives tab on the Overview page of the BlueScale web interface is red, indicating an error condition. -
Page 54: Identify The Malfunctioning Drive
A grounded anti-static wristband An nTier300 VTL data drive A #2 Phillips screwdriver An anti-static bag for the malfunctioning data drive Shipping materials for returning the malfunctioning data drive to Spectra Logic Recommended An anti-static mat Identify the Malfunctioning Drive 1. -
Page 55: Replace The Drive
The drives used in the nTier300 VTL are mounted on custom drive sleds that provide the mounting and electrical connections required to use them in a blade. Only install drives that you purchase from Spectra Logic into your nTier300 VTL. For assistance, see Contacting Spectra Logic on page 5. - Page 56 Chapter 4 – Maintenance Remove the Drive Caution: When removing a drive while the system is powered-on, slide the drive sled out of the chassis approximately 1 inch, just enough to disengage the drive sled’s interface connector from the chassis. Leave the sled in that position for approximately 20 seconds before completely removing it from the system.
- Page 57 Install the New Drive on the Sled 1. Using a #2 Phillips screwdriver, unscrew the four screws securing the malfunctioning drive to the drive sled (Figure 4-5). Remove the drive from the drive sled and set the drive aside. Front of sled Drive sled handle Figure 4-5 Remove the screws securing the drive to the drive sled.
- Page 58 As soon as the drive is seated, it powers on and the process of rebuilding the RAID volume begins. 5. Package the malfunctioning drive and ship it to Spectra Logic as described in RMA Returns on page 61.
-
Page 59: Appendix A - Technical Support
Appendix A – Technical Support This chapter reviews the Spectra nTier300 VTL warranty and Spectra Logic’s repair policies and processes: About SpectraGuard Technical Support RMA Returns on page 61 Repair Policy: Warranty on page 62 Limited Warranty on page 63... -
Page 60: Opening A Support Ticket
Opening a Support Ticket You can open a ticket using telephone, e-mail, or the Spectra Logic Web site. 1. Note the problem, including what happened just before the failure occurred. 2. Gather the information you will need to provide to SpectraGuard Technical Support. -
Page 61: Rma Returns
RMA Returns Your SpectraGuard Technical Support representative may ask you to return a problem component to Spectra Logic for servicing. To return a component: 1. Obtain a Return Materials Authorization (RMA) number from a SpectraGuard Technical Support representative. This number identifies the component when it arrives at Spectra Logic. -
Page 62: Repair Policy: Warranty
Appendix A – Technical Support Repair Policy: Warranty Spectra Logic warrants the nTier300 VTL to be in good working order for a period of one full year from the date of shipment from Spectra Logic or an authorized Spectra Logic dealer. Should this product fail to be in good working order at any time during this one-year period, Spectra Logic will, at its option, repair or replace this product at no additional charge except as listed below. -
Page 63: Limited Warranty
The standard warranty for the nTier300 VTL is one year of SpectraGuard Standard service. For more information on SpectraGuard Standard, see SpectraGuard Standard, below. In addition to SpectraGuard Standard, Spectra Logic provides the following upgraded service offerings for the nTier300 VTL: SpectraGuard Classic on page 64... -
Page 64: Spectraguard Classic
SpectraGuard Technical Support staff Monday through Friday from 8:00am to 5:00pm, customer local time zone. An exception to telephone support is Spectra Logic and U.S. nationally recognized holidays. Software and Firmware Updates—Spectra Logic provides updates to software and firmware as they become available. Online Support—Customers have access to SpectraGuard knowledge base and all online documentation. -
Page 65: Requirements For Service
A spare drive can be used to immediately replace a failed drive in the system, restoring full data protection in a timely manner. The drive that had the failure can be returned to Spectra Logic for replacement, as long as it is under warranty or a current support contract. - Page 66 Appendix A – Technical Support Notes...
-
Page 67: Appendix B - Specifications
Integrated Server on page 68 Size and Weight on page 68 Power Requirements on page 69 Environmental Specifications on page 70 RAID Storage Specifications The following table shows the RAID storage specifications for the nTier300 VTL. Parameter RAID Capacity Drive RPM: RAID... -
Page 68: Integrated Server
Appendix B – Specifications Integrated Server The following table provides an overview of the integrated server in the Spectra nTier300 VTL. Parameter Processor Interfaces Host Tape library (optional) a. Gigabit Ethernet. Size and Weight Parameter Dimensions Height (3U) Width Depth Weight Single 1 TB drive No drives... -
Page 69: Power Requirements
Current Input Frequency Power Cord Specifications The power cords included with the Spectra nTier300 VTL are considered part of the unit and cannot be used with any other equipment. 120 Volt-AC Power Cord for Use the Spectra nTier300 VTL appliance are standard, three-conductor, 16-AWG power cords safe for 120-volt use in the United States and Canada. -
Page 70: Environmental Specifications
Appendix B – Specifications 220 Volt-AC Power Cord for International Use Note: To use the nTier300 VTL outside of North America, the power cord must meet the specifications for that country. The criteria for an international 220-volt AC power cord are as follows: It must have an attachment plug of the proper type, rating, and safety approval for the intended country. -
Page 71: Appendix C - Regulatory And Safety Standards
Appendix C – Regulatory and Safety Standards This appendix contains information on the regulatory and safety standards that apply to the Spectra nTier300 VTL appliance. See the following sections for detailed information on each: EU Declaration of Conformity on page 72... -
Page 72: Eu Declaration Of Conformity
Boulder, CO 80301 declare under sole responsibility that the Spectra nTier300 Virtual Tape Library appliance to which this declaration relates, meets the essential health and safety requirements and is in conformity with the EU Directives listed below using the relevant section of... -
Page 73: Fcc Notice
The Spectra nTier300 VTL appliance complies with all safety-relevant provisions referring to: Protection against electrical hazards Protection against hazards such as: Mechanical hazards Fire hazards Noise Vibration The safety issues of this information technology equipment type have been evaluated by a government-accredited European third-party organization, such as UL Demko International. -
Page 74: Safety Standards And Compliance
Appendix C – Regulatory and Safety Standards Safety Standards and Compliance The Spectra nTier300 VTL appliance complies with the following domestic and international product safety standards. IEC 60950-1 First Edition UL 60950-1 First Edition CSA-C22.2 No. 60950-1-03 EN 60950-1 Low Voltage Directive (EU: CE Mark) -
Page 75: Glossary Of Terms
A single sector on a disk. The smallest unit of data stored (written) to or retrieved (read) from a disk. BlueScale• Software available on Spectra nTier300 VTL appliance that supports nTier300 VTL configuration and monitoring. A bus is a collection of wires through which data is transmitted from one part of a computer to another (or from one device to another). - Page 76 Glossary of Terms – D chassis The metal housing of an enclosure, a physical storage device containing disk drives. controller The control logic in a storage subsystem that performs command transformation and routing, aggregation (RAID, mirroring, striping, or other), high-level error recovery, and performance optimization for multiple storage devices.
- Page 77 A hardware storage device that contains disk drives. Ethernet A network technology used to connect devices together through hubs and/or switches to create a highly reliable, centrally managed network. 10BASE-T – The most commonly installed Ethernet type. Provides transmission speeds of up to 10 Mbps and is typically used to connect workstations to a local area network (LAN).
- Page 78 HSM software constantly monitors disk capacity and moves data from one storage level to the next based on age, category and other criteria as specified by the network or system administrator.
- Page 79 Light-Emitting Diode. It lights up when electricity passes through it. logical drive A section of disk storage that is seen by the host operating system as a single physical drive. A logical drive might be located on one or more physical drives.
- Page 80 Glossary of Terms – O Network Interface Card An I/O adaptor that connects a computer or other type of node to a network. Acronym for Network File System. Acronym for Network Interface Card. NIST Acronym for National Institute of Standards and Technology. NDMP Network Data Management Protocol.
- Page 81 In the nTier300, RAID level 6 includes data striping and dual parity. Return Materials Authorization. Required by Spectra Logic for the repair or exchange of any nTier300 components. Storage Area Network. A SAN is a network environment involving a high speed subnetwork allowing storage devices to be shared.
- Page 82 TCP/IP protocol that defines the message format and the message transfer agent (MTA), which stores and forwards the mail. SpectraGuard Spectra Logic Technical Support. static address An unchanging IP identifier permitting remote access to a device through the Internet or an intranet.
- Page 83 (SAN). As the tier number increases, less expensive, slower storage media can be used. Thus, tier 3 in a 3-tier system might contain event-driven, rarely used, or archival data stored on tape.
- Page 84 Glossary of Terms – W volume group A set of drives that the disk array controller logically groups together in a virtual disk to provide one or more volumes to a host. World Wide Name (specific to Fibre Channel). A unique 48-bit or 64-bit number that identifies a connection or a set of connections to the network.
-
Page 85: Index
Fibre Channel connectors Ethernet keyboard, mouse, and monitor main AC power specifications, AC power specifications, international power contacting Spectra Logic data center, monitoring VTL components data, nTier300 VTL storage capacity dimensions nTier300 VTL chassis shipping drive blank, description drives... - Page 86 Index – E e-mail addresses, Spectra Logic enclosure status, on Overview page environment, specifications Error Condition icon Ethernet cables, connecting Ethernet connections to backup servers Ethernet ports description IP addresses Ethernet, configuring through web interface EU compliance exiting the BlueScale web...
- Page 87 On/Off main AC switches operating system shutting down See also VTL Console Overview page, description parts replacement options SpectraGuard Classic SpectraGuard Premier SpectraGuard Standard phone numbers, Spectra Logic policies advanced service options warranty repair power cord and connector requirements input specifications requirements...
- Page 88 Overview page status icons supported browsers viewing status messages See also BlueScale web interface web sites Knowledge Base obtaining Spectra Logic manuals Spectra Logic WEEE weight nTier300 VTL chassis shipping warnings...
Need help?
Do you have a question about the Spectra nTier300 and is the answer not in the manual?
Questions and answers