Table of Contents
Advertisement
Quick Links
Advertisement
Table of Contents

Related Manuals for Insportline Profigym C400


Summary of Contents for Insportline Profigym C400
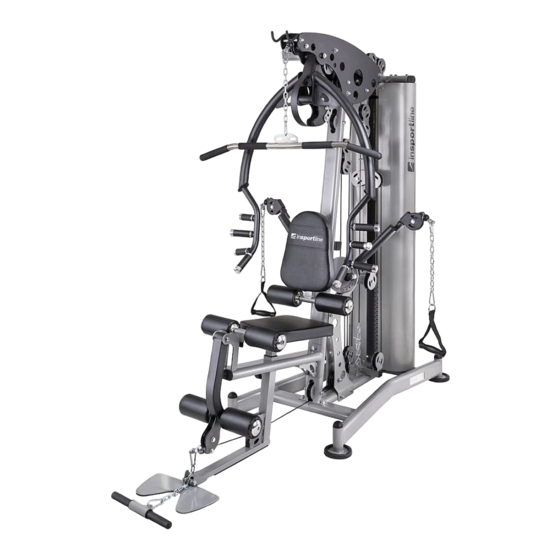
- Page 1 USER MANUAL – EN IN 20770 Multi-Gym inSPORTline Profigym...
-
Page 2: Table Of Contents
CONTENTS SAFETY INSTRUCTIONS ........................3 PARTS LIST ............................4 ASSEMBLY ............................. 8 STEP 1 ..............................8 STEP 2 ..............................9 STEP 3 ............................... 10 STEP 4 ............................... 11 STEP 5 ............................... 12 STEP 6 ............................... 13 STEP 7 ............................... 14 STEP 8 ............................... -
Page 3: Safety Instructions
SAFETY INSTRUCTIONS • Thank you for purchasing this product. Please read the manual carefully before starting the assembly and before using the product. Keep this manual for future reference. In case of doubt, contact a specialist service. • Before finishing the assembly, check all parts for completeness and integrity. Use only original spare parts and accessories. -
Page 4: Parts List
PARTS LIST Name Specification Qty. Base frame ø25x1853 Guide rod ø259x1757.5 Back support rod Hexagon bolt M0x65 ø10 Washer Hexagon bolt M10x20 ø10 Spring washer ø60xø26x42 Rubber washer ø60xø26x20 Weight rubber washer Hexagon bolt M8x70 Weight select rod 92 kg Weight 6 kg Top weight... - Page 5 Hexagon bolt M8x16 ø12 ø17x134 Shaft ø17x100 Shaft Handle bracket Safety cover Handles Hexagon bolt M10x70 Hexagon bolt M10x16 Right frame Left frame Support frame Reinforcing plate Footplate Hexagon bolt M10x130 Hexagon bolt M10x115 Hexagon bolt M10x45 Hexagon bolt M10x45 Pulley frame ø95x26 Pulley...
- Page 6 Backrest adjustable frame Backrest Seat Hexagon bolt M8x25 Cover Cover ø10x75 Foam roller ø25x480 Foam roller bar ø25x450 Foam roller bar Cover Long bar Handle Hexagon bolt M8x25 Hexagon bolt M10x40...
-
Page 8: Assembly
ASSEMBLY STEP 1 Name Specification Qty. Base frame ø25x1853 Guide rod ø259x1757.5 Back support rod Hexagon bolt M0x65 ø10 Washer Hexagon bolt M10x20 ø10 Spring washer ø60xø26x42 Rubber washer... -
Page 9: Step 11
Attach the back support rod (3) to the base (1) using the bolt (4), washers (7 and 5). Attach the guide rod (2) to the base (1) with the screw (6) and washers (7 and 5). Place the rubber washer (8) on the guide rod (2). STEP 2 Name Specification... -
Page 10: Step 12
Attach the rubber washer (9) to the top of the guide rod using the bolt (10), washers (15) and nut (11). Use the weight selection pin (16) to set the desired load. STEP 3 Name Specification Qty. Safety pin ø10 Hexagon bolt M12x70 ø12... -
Page 11: Step 13
Front frame Attach the front frame (22) to the base (1) with the bolt (19), washer (20) and nut (21). Insert the pin (17) into the front frame (22). Insert the pin (18) into the front frame (22). STEP 4 Name Specification Qty. -
Page 12: Step 14
Hexagon bolt M12x70 ø12 Washer Weight cover Top frame Slide the weight cover (24) onto the guide rod. Attach the top frame (25) to the guide rod with the bolt (19), washer (7 and 5). Attach the top frame (25) to the front frame using the bolt (19), washer (7 and 5). Attach the weight cover (24) to the upper frame (14) with the bolt (4), washer (5) and nut (23). -
Page 13: Step 15
Left frame Attach the right and left frame (27/28) to the frame with the bolt (26), washer (20) and nut (21). STEP 6 Name Specification Qty. ø10 Washer ø10 Spring washer ø10 ø12 Washer Hexagon bolt M10x25 ø17x57 Axis... -
Page 14: Step 16
Adjustable seat frame Seat frame Leg press Attach the seat frame (33) to the front frame using the bolt (29), washer (20) and nut (21). Attach the leg press frame (34) to the seat frame (33) using the bolt (30) axis (31), washer (7 and 5). Attach the adjustable seat frame (32) to the seat frame (33) using the pin (18). -
Page 15: Step 17
Hexagon bolt M8x16 ø12 ø17x134 Shaft ø17x100 Shaft Handle bracket Safety cover Handles Attach the handle bracket (40) to the left and right frame using the shaft (38), bolt (6), washer (7 and 35). Attach the handles (42) to the handle bracket (40) with the shaft (39), bolt (6), washer (35) and pin (37). - Page 16 ø12 Washer Hexagon bolt M12x75 ø25x10x2.0 Big washer Hexagon bolt M10x70 Hexagon bolt M10x16 Right frame Left frame Support frame Reinforcing plate Footplate Attach the left and right frame (46 and 45) to the front frame using the bolt (44), washer (7 and 35). Attach the pulley support frame (47) to the front frame with the bolt (29), washer (20), nut (21) and plate (48).
- Page 17 STEP 9...
- Page 18 Name Specification Qty. ø10 Washer Hexagon bolt M10x130 Hexagon bolt M10x115 Hexagon bolt M10x45 Hexagon bolt M10x45...
- Page 19 Pulley frame ø95x26 Pulley ø14x100 Connection plate ø22x ø10.5x45.5 Pulley spacer Cable 4540 mm Attach the 4 pulleys (55) to points A, B, C, E with screws (52), washers (5) and nuts (23). Attach 2 pulleys (55) to points I, D with screws (50), spacers (57), washers (5) and nuts (23). Attach the pulleys (55) to the G point using the bolt (50), washer (5) and nut (23).
- Page 20 STEP 10...
- Page 21 Name Specification Qty. ø10 Washer ø12 Washer Hexagon bolt M10x45 ø95x26 Pulley Cable hook 9 link chain + hook Double pulley plate Middle cable 1500 mm Connect the chain (60) with the middle cable (62) and then to the base. Pass the cable through the washer (20), the cable hook (59) and connect it to the double pulley plate (61).
- Page 22 STEP 11...
- Page 23 Name Specification Qty. ø10 Washer ø8 Washer Hexagon bolt M10x45 ø95x26 Pulley Hexagon bolt M8x45 Cable 5375 mm Attach the 8 pulleys (55) to the points K, L, N, O, P, Q, R, S, T using the bolts (52), washers (5) and nuts (23).
- Page 24 Remove the cable end (64) and pass from P through L, M, N, O, P, Q, R, S, T, and then retighten the terminal. Attach the bolt (63), washer (15) and nut (11) near K, T. STEP 12...
- Page 25 Name Specification Qty. ø10 Washer ø8 Washer Hexagon bolt M10x130 Hexagon bolt M10x115 Hexagon bolt M10x45 ø95x26 Pulley Hexagon bolt M8x45 Hexagon bolt M10x75 Hexagon bolt M10x85 ø10 Sleeve Left support frame Right support frame Hexagon bolt M10x40...
- Page 26 Attach the left and right support frames (68 and 69) to the base with bolts (50 and 65), washers (5) and nuts (23). Attach the 4 pulleys to V, W, Z, A1 using the bolt (52), washer (5) and nut (23). Attach the pulley (55) to the Y point using the bolt (51), washer (5) and nut (23).
- Page 27 Name Specification Qty. 9 link chain + hook Cable 3365 mm Short bar Remove the cable end (70). Route the cable (70) from the U point through the V, W, X, Y, Z, A1 points and then reattach the cable terminal.
- Page 28 STEP 14 Name Specification Qty. ø8 Washer ø8 Spring washer Hexagon bolt M8x40 Backrest adjustable frame Backrest Seat Hexagon bolt M8x25 Attach the seat (76) to the frame with the bolt (73), washer (72 and 15). Attach the backrest (75) to the frame (74) with the screws (73), washers (72 and 15). Attach the backrest adjustable frame (74) to the front frame using a pin.
- Page 29 STEP 15 Name Specification Qty. Hexagon bolt M8x25 Cover Cover ø10x75 Foam roller ø25x480 Foam roller bar ø25x450 Foam roller bar Attach the foam roller bar (81) to the rear frame and then attach the cap (79) to the rod, a foam cylinder (80), an end piece (78) and a bolt (77).
- Page 30 STEP 16 Name Specification Qty. ø8 Washer Hexagon bolt M8x16 ø8 Spring washer Cover Attach the cover (83) with the bolt (36), washer (72 and 15).
-
Page 31: Exercise Instructions
STEP 17 Name Specification Qty. 9 link chain + hook Long bar Handle Attach the chain (60) to the handles (85) and then to the shoulders. Attach the chain (60) to the handles (85) and then to the cable. BEFORE USE MAKE SURE THAT ALL BOLTS ARE TIGHTENED. EXERCISE INSTRUCTIONS Exercise is beneficial to your health, improves physical condition, shapes muscles and, in combination with a calorie-balanced diet, leads to weight loss. - Page 32 2. EXERCISING This phase is the most physically demanding part. Regular exercise strengthens the muscles. You can determine the tempo yourself, but it is very important that it is the same throughout the exercise. Heart rate should be within the target zone (see figure below). This phase should last at least 12 minutes.
-
Page 33: Maintenance
WEIGHT LOSS The number of calories burned depends on the length and intensity of the exercise. The essence is the same as in fitness exercise, but the goal is different. MAINTENANCE 1. After exercising, wipe off any sweat to avoid corrosion. Clean the device with a soft cloth and mild detergents. - Page 34 SEVEN SPORT s.r.o. Strakonická 1151/2c, Praha 5, 150 00, ČR Registered Office: Dělnická 957, Vítkov, 749 01 Headquaters: Warranty & Service: Čermenská 486, Vítkov 749 01 CRN: 26847264 VAT ID: CZ26847264 Phone: +420 556 300 970 E-mail: eshop@insportline.cz reklamace@insportline.cz servis@insportline.cz Web: www.inSPORTline.cz...
- Page 35 Headquaters, warranty & service center: Električná 6471, Trenčín 911 01, SK CRN: 36311723 VAT ID: SK2020177082 Phone: +421(0)326 526 701 E-mail: objednavky@insportline.sk reklamacie@insportline.sk servis@insportline.sk Web: www.inSPORTline.sk...
Need help?
Do you have a question about the Profigym C400 and is the answer not in the manual?
Questions and answers