Table of Contents
Advertisement
Quick Links
Advertisement
Table of Contents

Subscribe to Our Youtube Channel
Related Manuals for Insportline Profigym C75


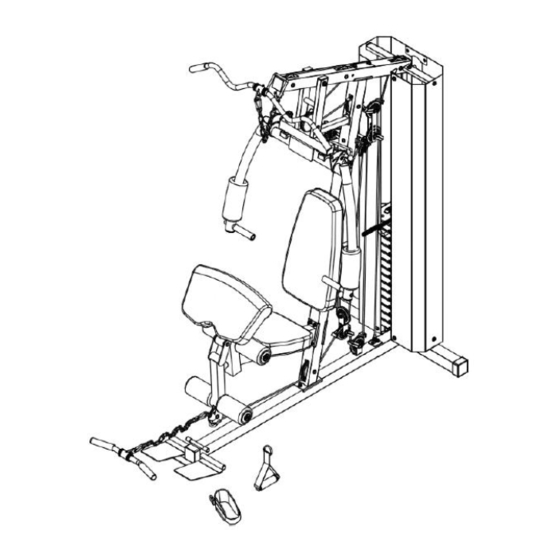
Summary of Contents for Insportline Profigym C75
- Page 1 USER MANUAL – EN IN 20805 Multigym inSPORTline Profigym C75 (HG-5002)
-
Page 2: Table Of Contents
CONTENTS SAFETY INSTRUCTIONS ........................3 PARTS LIST ............................4 ASSEMBLY ............................11 STEP 1 ............................... 11 STEP 2 ............................... 12 STEP 3 ............................... 13 STEP 4 ............................... 15 STEP 5 ............................... 16 STEP 6 ............................... 17 STEP 7 ............................... 18 STEP 8 ............................... -
Page 3: Safety Instructions
SAFETY INSTRUCTIONS • Thank you for purchasing this product. Please read the manual carefully before starting the assembly and before using the product. Keep this manual for future reference. In case of doubt, contact a specialist service. • Before finishing the assembly, check all parts for completeness and integrity. Use only original spare parts and accessories. -
Page 4: Parts List
PARTS LIST Name Specifications Qty. Front frame Rear frame Base Top frame Guide rod Front press base Left arm Right arm Seat post Leg press Arm curl stand Backrest adjustment frame Front press stopper Foot plate Pulley holder Front press handle Swivel pulley bracket frame Foot plate tube Selector rod... - Page 5 Weight select pin Top cable 124” 160” Lower cable 116” Arms cable Seat Backrest Arm curl pad Cable holder Spacer Ankle strap Handle Plastic ring Foam roller end cap Foam roller Arm foam rollers Hand knob Quick release safety pin Ø1 ¼”...
- Page 6 1 ½” x 1 ½” End cap Ø1” x 1 1/8” Rubber washer Ø1” End cap Ø1” End cap Numeric lock M10 x 6 ¾” Axle M10 x 2 ¾” Axle Hook Chain 15 links Chain 10 links Ø 1/8” x 3/8” Rivet M10 x 3 3/8”...
-
Page 11: Assembly
ASSEMBLY STEP 1... -
Page 12: Step 11
Connect the base (3) to the rear frame (2) with 2x bolts (85), plate (29), 2x washers (100) and 2x nuts (102). Attach the guide rods (5) to the rear frame (2) using 2x rubber washers (65), 2x washers (100) and 2x bolts (92). -
Page 13: Step 12
Attach the front frame (1) to the base (3) with 2x bolts (85), plate (31), 2x washers (100) and 2x nuts (102). Attach the seat post (9) to the front frame (1) with 4x bolts (85), plate (30), 4x washers (100) and 4x nuts (102). - Page 14 Attach the footrest (14) to the base (3) using the axle (18) and the 2x end caps (76). Slide the weights (35) onto the guide bars (5), then slide the weight selection rod (19) and the top of the weight (34).
-
Page 15: Step 13
STEP 4 Attach the top frame (4) to the front frame (1) using the plate (31), 2x bolts (85), 2x washers (100) and 2x nuts (102). Attach the top frame (4) to the guide rods (5) using 2x washers (100) and 2x bolts (92). -
Page 16: Step 14
STEP 5 Attach the front press stopper (13) to the front frame (1) with the bolt (88) and washer (61). Attach the 2x swivel pulley bracket (25) to the pulley bracket (17) using 2x bolts (89), 4x washers (100) and 2x nuts (102). Attach the swivel pulley bracket (17) to the front frame with a bolt (88), 2x washers (61) and a nut (102). - Page 17 Attach front press base (6) to the upper frame (4) with the axle (79), 2x washers (100) and 2x nuts (102). STEP 6 Attach the backrest adjustment frame (12) to the front frame (1) with the hand screw (51). Attach the arm curl stand (11) to the seat post (9) with the hand knob (51). Attach the leg press (10) with the axis (80), 2x bolts (92) and 2x washers (100).
- Page 18 STEP 7 Attach the right arm (8) to the right butterfly adjustment frame (21) with the spacer (58), washer (100), bolt (92), quick release safety pin (52), bolt (96), 2x washers (101) and nut (103). Attach the right butterfly adjustment frame (21) to the front press base (6) with the spacer (59), washer (100) and bolt (93).
- Page 19 Slide the foam cylinder (50) onto the right arm (8) and then attach the handle (16) to the arm (8) using the washer (100) and the bolt (92). Repeat for the other side. STEP 8...
- Page 22 Attach 4x pulleys (62) to the upper frame and double pulley bracket (28), each with a bolt (87), 2x washers (100) and a nut (102) as shown in Figure 8-A. Attach the pulley (62) to the double pulley bracket (28) using the bolt (90), 2x washers (100), the cable bracket (43), 2x spacers (44) and the nuts (102) as shown in Figure 8-B.
- Page 23 STEP 9...
- Page 24 Attach 2x pulleys (62) with 4x cable holders (43), 4x spacers (44), 4x washers (100), 2x bolts (90) and 2x nuts (102). Attach the pulley (62) with 2x cable holders (43), 2x spacers (44), 2x washers (100), bolt (90) and nut (102).
- Page 25 STEP 10...
- Page 26 Attach the right and left arm (33 and 32) with 2x bolts (97), 4x washers (101) and 2x nuts (103). STEP 11...
- Page 28 Pass the cable (38) as shown. Attach the pulley (62) to the leg press (10) with the bolt (98), 2x washers (100) and nut (102) as shown in Figure 11-A. Attach the pulley (62) to the front frame (1) using the bolt (87), 2x washers (100), and the nut (102) as shown in Figure 11-B.
- Page 29 STEP 12...
- Page 30 Attach the backrest (41) to the backrest frame (12) with 2x bolts (95) and 2x washers (101). Attach the saddle (40) to the saddle post (9) using 2x bolts (94) and 2x washers (101). Attach the arm curl pad (42) to the frame (11) with 2x bolts (97) and 2x washers (101). Attach the foam roller tube (26) to the frames (10 and 11).
- Page 31 STEP 13...
- Page 32 Attach the covers (27) together with the plate (105) to the bottom and top frame with 12x bolts (93) and 12x washers (100). STEP 14...
-
Page 33: Diagram
Attach the handle (22) to the upper frame with the chain (83) and the hook (81). Attach the handrail (23) or ankle strap (45) or the handrail (43) with the chain (82) to the leg press (10). DIAGRAM... -
Page 34: Weight Plate Installation
WEIGHT PLATE INSTALLATION Slide weight plates onto Guide Rod from top to bottom. The deep groove on each weight plate needs to face FRONT and DOWNWARDS. CABLE RESISTANCE ADJUSTMENT You can adjust the resistance by sliding the pulley on the double pulley bracket. -
Page 35: Lock Set Up Instructions
LOCK SET UP INSTRUCTIONS Turn the dials to the combination numbers you have set and pull up the shackle to open the lock. The lock is set at the manufacturer to open at 0-0-0 (all zeros are positioned on the straight line). It is recommended to change the combination to ensure safety. -
Page 36: Weight Resistance Chart
WEIGHT RESISTANCE CHART Weights Front press Back press Butterfly Lat pull Low pulley 45.2 75.2 120.2 Each plate weighs 6.9 kg (15.2 lb). Numbers are approximate. Actual weights may vary. Values for butterfly are for each arm. EXERCISE INSTRUCTIONS Exercise is beneficial to your health, improves physical condition, shapes muscles and, in combination with a calorie-balanced diet, leads to weight loss. -
Page 37: Maintenance
2. EXERCISING This phase is the most physically demanding part. Regular exercise strengthens the muscles. You can determine the tempo yourself, but it is very important that it is the same throughout the exercise. Heart rate should be within the target zone (see figure below). This phase should last at least 12 minutes. -
Page 38: Environment Protection
ENVIRONMENT PROTECTION After the product lifespan expired or if the possible repairing is uneconomic, dispose it according to the local laws and environmentally friendly in the nearest scrapyard. By proper disposal you will protect the environment and natural sources. Moreover, you can help protect human health. - Page 39 26847264 VAT ID: CZ26847264 Phone: +420 556 300 970 E-mail: eshop@insportline.cz reklamace@insportline.cz servis@insportline.cz Web: www.inSPORTline.cz inSPORTline s.r.o. Headquaters, warranty & service center: Električná 6471, Trenčín 911 01, SK CRN: 36311723 VAT ID: SK2020177082 Phone: +421(0)326 526 701 E-mail: objednavky@insportline.sk reklamacie@insportline.sk servis@insportline.sk...
Need help?
Do you have a question about the Profigym C75 and is the answer not in the manual?
Questions and answers