Advertisement
Quick Links
Advertisement

Related Manuals for Insportline Cable Column CC410


Summary of Contents for Insportline Cable Column CC410
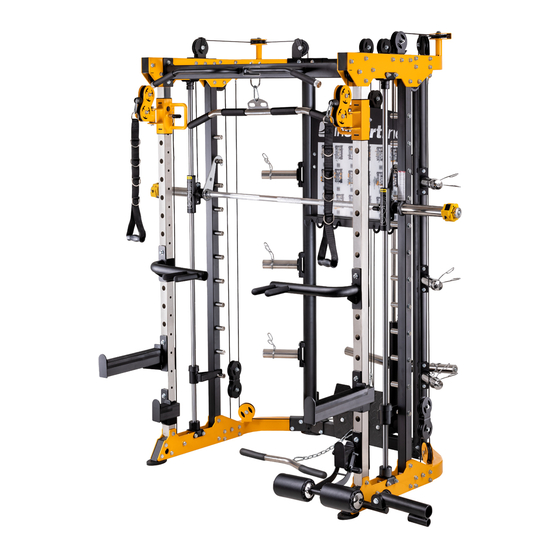
- Page 1 USER MANUAL – EN IN 21393 Power Rack inSPORTline Cable Column CC410...
-
Page 2: Table Of Contents
CONTENTS SAFETY INSTRUCTIONS ........................3 PARTS LIST ............................4 ASSEMBLY ............................. 7 EXERCISE INSTRUCTIONS ........................ 24 MAINTENANCE ............................ 25 ENVIRONMENT PROTECTION ......................25 TERMS AND CONDITIONS OF WARRANTY, WARRANTY CLAIMS ..........25... -
Page 3: Safety Instructions
SAFETY INSTRUCTIONS • Thank you for purchasing this product. Please read the manual carefully before starting the assembly and before using the product. Keep this manual for future reference. In case of doubt, contact a specialist service. • Before finishing the assembly, check all parts for completeness and integrity. Use only original spare parts and accessories. -
Page 4: Parts List
PARTS LIST Name Specifications Qty. Connection frame Upright frame - left Upright frame - right Bend frame - left Bend frame - right Upper connection frame Top bend frame - right Top bend frame - left Hexagon bolt M10*75 Φ10 Washer Chin up bar Upper plate... - Page 5 Φ60*Φ48.5*27L Ring Φ50*310*T0.5 Weight stack part Button head socket screw M12*40 Φ12 Spring washer Φ12 Washer Barbell bar Φ48*298*2.5T Weight stack inner part Rubber pad Top short connection frame Lower connection tube Big sliding sleeve Hollow guide rod Rubber pad Hexagon bolt M10*25 Hexagon bolt...
- Page 6 Barbell plate holder Hexagon bolt M8*20 Φ8 Washer Core trainer Φ33.2*Φ 29*Φ20*18 Sleeve Barbell rod holder Φ25*10*2.0 Big washer Dip bar left Dip bar right Barbell rod holder right Barbell rod holder left Barbell rod holder short left Barbell rod holder short right Barbell clamp collar Long bar Ship rod...
-
Page 7: Assembly
ASSEMBLY STEP 1 Attach all bolts and nuts before tightening. Do not overtighten. Name Specifications Qty. Connection frame Upright frame - left Upright frame - right Bend frame - left Bend frame - right Upper connection frame Top bend frame - right Top bend frame - left Hexagon bolt M10*75... - Page 8 1. Attach bend frame - left (4) to the upright frame - left (2) with bolts (9), washers (11) and nuts (10). 2. Attach bend frame - right (5) to the upright frame - right (3) with bolts (9), washers (11) and nuts (10).
- Page 10 Name Spec. Qty. Name Spec. Qty. Hexagon bolt M10*75 Right adjusting frame Left adjusting frame Φ10 Washer Bottom frame Chin up bar Right slider Upper plate Left slider Right pulley frame Foot tube cover Pulley frame tube left Frame end caps Top frame Hexagon bolt M10*80...
- Page 11 STEP 3 Name Spec. Qty. Name Spec. Qty. Socket set screw M8*10 Φ51*Φ Φ10 Washer End cap 42.5*36.6L Φ60*Φ48.5*27L bottom base Ring Φ50*310*T0.5 top base Weight stack part Button head socket Φ25*1850 Guide rod M12*40 screw Φ12 Lock sleeve Spring washer Φ12 Sliding sleeve Washer...
- Page 12 1. Attach the bottom base (25) to the bottom plate with bolts (33), washers (11) and nuts (10). 2. Attach the top base (26) to the top plate with bolts (33), washers (11) and nuts (10). 3. Slide the rubber pad (30), safety hook (32), sliding sleeve (29) onto the guide rod (27), and then attach the guide rod to the sleeves (28) and secure with Socket set screw (34).
- Page 13 STEP 4 Name Spec. Qty. Name Spec. Qty. Rubber pad Φ10 Washer Hexagon bolt M10*25 Φ12 Spring washer Hexagon bolt M10*95 Φ12 Washer Hexagon bolt M10*55 Top short connection frame Hexagon bolt M12*30 Lower connection tube Double pulley bracket Big sliding sleeve Socket set screw M8*10 Hollow guide rod...
- Page 14 1. Attach the top short connection frame (44) to the main frame with the bolts (52), washers (39) and nuts (40). 2. Attach lower connection tube (45) to main frame with bolts (52), washers (39) and nuts (40). 3. Attach double pulley bracket (53) to frame (45) with bolts (51), washer (11) and nut (10). 4.
- Page 15 1. Attach weight (61) to cable (56). 2. Attach pulleys (57) to upper bent frame with bolts (60), pulley holder (58), washer (11) and nut (10). 3. Attach the pulley (57) to the upper bent frame with bolts (59), pulley holder (58), washer (11) and nut (10).
- Page 16 1. Attach pulleys (57) to main frame and pulley frame (63) with bolts (59), plate (58), washer (11) and nut (10). 2. Route the cable (62) as shown. 3. Attach the short handle (64) to the cable with the chain (66). 4.
- Page 17 1. Attach pulleys (57) to upper frame with bolts (24), washers (11), nuts (10) and bushing (68). 2. Attach pulley (57) to pulley frame (63) with bolts (59), washers (11) and nuts (10). 3. Secure cables (67) with bolts (59), washers (11) and nuts (10). The cable must be attached vertically.
- Page 18 STEP 8 Name Spec. Qty. Name Spec. Qty. Pulley frame Φ10 Washer Cable Φ95 Pulley Chain with snap hook Hexagon bolt M10*45 1. Attach pulleys (57) to pulley frame (63) with bolts (59), washers (11) and nuts (10). 2. Pass cable (70) through frame (69) and secure to main frame with carabiner chain (71).
- Page 19 STEP 9 Hand tight the bolts and nuts. Name Spec. Qty. Name Spec. Qty. Hexagon bolt M10*45 Φ10 Φ20*10.5*L20.5 Washer Pulley spacer sleeve Φ5*9715 mm Hexagon bolt M10*80 Cable Φ50 Hexagon bolt M10*25 Pulley Φ95 Pulley...
- Page 20 1. Attach pulleys (57) to frame with bolts (59), washers (11) and nuts (10). 2. Attach the pulleys (73) to the bottom plate with bolts (24), washer (11), nut (10) and bushing (68). 3. Route the cable (72) as shown.
- Page 21 STEP 10 Attach all bolts and nuts before tightening. Name Spec. Qty. Name Spec. Qty. Φ8 Shield Washer Barbell plate holder Hexagon bolt M8*20 1. Attach shield (74) to main frame with bolts (76), washer (77) and nut (78). 2. Attach the bar holder (75) to the main frame with bolts (76) and washer (77).
- Page 22 STEP 11 Name Spec. Qty. Name Spec. Qty. Core trainer Φ10 Φ33.2*Φ 29*Φ20*18 Washer Sleeve Hexagon bolt M10*25 Barbell rod holder Φ25*10*2.0 Hexagon bolt M10*95 Big washer 1. Attach the core trainer (79) to the main frame with bolts (49), large washer (82) and bushing (80).
- Page 23 STEP 12 Name Spec. Qty. Name Spec. Qty. Dip bar left Long bar Dip bar right Ship rod Barbell rod holder right Hand belt Barbell rod holder left Pull lift device Φ10*100 Barbell rod holder short left T shape pin Barbell rod holder short Leg curl tube right...
-
Page 24: Exercise Instructions
EXERCISE INSTRUCTIONS Exercise is beneficial to your health, improves physical condition, shapes muscles and, in combination with a calorie-balanced diet, leads to weight loss. 1. WARM UP This phase serves to improve the blood circulation of the whole body and to warm up the muscles, to reduce the risk of convulsions and muscle injury. -
Page 25: Maintenance
This phase serves to soothe the cardiovascular system and relax the muscles. It should take approximately 5 minutes. You can repeat warming up exercises or continue exercising at slower pace. Stretching your muscles after exercise is extremely important - you need to avoid sudden movements and vibrations. - Page 26 These Conditions of Warranty and Warranty Claims are an integral part of every Purchase Agreement made between the Seller and the Buyer. All Warranty Conditions are valid and binding, unless otherwise specified in the Purchase Agreement, in the Amendment to this Contract or in another written agreement.
- Page 27 26847264 VAT ID: CZ26847264 Phone: +420 556 300 970 E-mail: eshop@insportline.cz reklamace@insportline.cz servis@insportline.cz Web: www.inSPORTline.cz inSPORTline s.r.o. Headquaters, warranty & service center: Električná 6471, Trenčín 911 01, SK CRN: 36311723 VAT ID: SK2020177082 Phone: +421(0)326 526 701 E-mail: objednavky@insportline.sk reklamacie@insportline.sk servis@insportline.sk...
Need help?
Do you have a question about the Cable Column CC410 and is the answer not in the manual?
Questions and answers