
Subscribe to Our Youtube Channel
Related Manuals for iLoq D5S SB Series


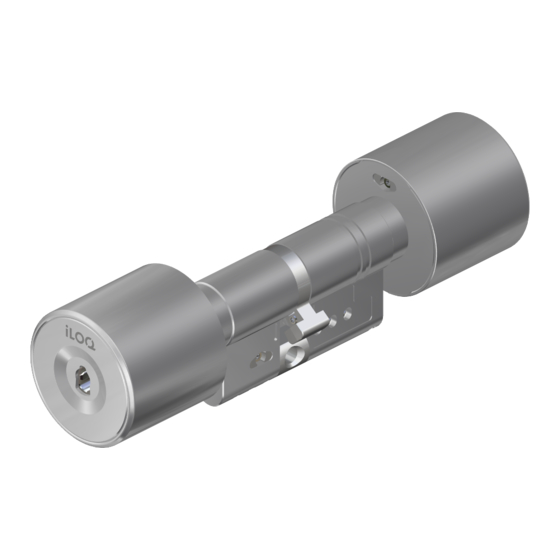
Summary of Contents for iLoq D5S SB Series
- Page 1 S5 Europrofile Lock Cylinder iLOQ D5S.XXX(A).SB iLOQ D5S.XXX(L).SB User Guide 06/2023 Rev. 2.0 Document ID 300598 iLOQ Oy support.iloq.com...
-
Page 2: Table Of Contents
One side - Version 2 (35 - 70 mm) ..............24 Both sides ....................... 27 Long neck ....................... 27 After installation ..................... 28 Disposal of decommissioned products ..............29 Compliance ......................30 Document ID - 300598 iLOQ 5 Series (iLOQ D5S.XXX(A).SB, D5S.XXX.(L).SB) -
Page 3: Safety Information
• The key is to be kept secure so that only an authorized person can use it. • If a key is lost, blocklisting of the lost key shall be done with the iLOQ Manager software and affected locks shall be reprogrammed. -
Page 4: General Notes
B or C. Such security lock furniture corresponds to DIN 18 257 class ES 2 and ES 3. • To meet the Dutch SKG*** requirements use a D5S.XXXA.SB high security cylinder. Consult an iLOQ sales representative for correct configuration. -
Page 5: Manufacturers Involvement
Manufacturers involvement No liability is accepted for damage to the doors or components due to incorrect installation. We reserve the right to make modifications or further technical developments without further notice. Document ID - 300598 iLOQ 5 Series (iLOQ D5S.XXX(A).SB, D5S.XXX.(L).SB) -
Page 6: Installation
Make sure that the cam is pointing downwards. 2. Secure the cylinder to the lock case with an iLOQ fixing screw (A10.64, part of the delivery). Use a tightening torque of 0.9 ...1.1 Nm. If necessary, cut the screw to the correct length (calculation screw length: L = backset + 10 mm). -
Page 7: Iloq D5S.2Xx Series
Make sure that the cam is pointing downwards. 3. Secure the cylinder to the lock case with an iLOQ fixing screw (A10.64, part of the delivery). Use a tightening torque of 0.9 … 1.1 Nm. If necessary, cut the screw to the correct length (calculation screw length: L = backset + 10 mm). - Page 8 4. Install the electronic knob as described in chapter “6. Removing and installing the electric knob”. NOTE! Make sure that the cylinder frame is a maximum of 1.0 mm from the door leaf or escutcheon. Max. 1.0 mm Document ID - 300598 iLOQ 5 Series (iLOQ D5S.XXX(A).SB, D5S.XXX.(L).SB)
-
Page 9: Iloq D5S.3Xx Series
Loosen the fixing screw just enough to be able to remove the knob, do not remove it completely. 2. Slide the lock cylinder into the lock case. Make sure that the cam is pointing downwards. Document ID - 300598 iLOQ 5 Series (iLOQ D5S.XXX(A).SB, D5S.XXX.(L).SB) - Page 10 3. Secure the cylinder to the lock case with an iLOQ fixing screw (A10.64, part of the delivery). Use a tightening torque of 0.9...1.1 Nm. If necessary, cut the screw to the correct length (calculation screw length: L = backset + 10 mm).
-
Page 11: Iloq D5S.4Xx Series
Make sure that the cam is pointing downwards. 2. Secure the cylinder to the lock case with an iLOQ fixing screw (A10.64, part of the delivery). Use a tightening torque of 0.9...1.1 Nm. If necessary, cut the screw to the correct length (calculation screw length: L = backset + 10 mm). -
Page 12: Iloq D5S.7Xx Series
Make sure that the cam is pointing downwards. 2. Secure the cylinder to the lock case with an iLOQ fixing screw (A10.64, part of the delivery). Use a tightening torque of 0.9...1.1 Nm. If necessary, cut the screw to the correct length (calculation screw length: L = backset + 10 mm). -
Page 13: Removing And Installing The Electronic Knob
2. Use a Torx T6 tool to loosen the fixing screw. Do not remove the fixing screw completely, only loosen it just enough to be able to remove the knob. Document ID - 300598 iLOQ 5 Series (iLOQ D5S.XXX(A).SB, D5S.XXX.(L).SB) - Page 14 3. Remove the cover cup. 4. Remove the side screw counterclockwise with a Torx T6 tool and carefully detach the knob with the PCB. Document ID - 300598 iLOQ 5 Series (iLOQ D5S.XXX(A).SB, D5S.XXX.(L).SB)
- Page 15 5. Loosen the back-plate screw with a Torx T6 tool. Do not remove the screw completely, only loosen it just enough to be able to turn the back plate. 6. Rotate the backplate counterclockwise and pull it off. Document ID - 300598 iLOQ 5 Series (iLOQ D5S.XXX(A).SB, D5S.XXX.(L).SB)
-
Page 16: Cylinder Extensions
• D5S.4xx > Cylinder with dummy inside The iLOQ D5S.1xx can only be extended on the knob side. The iLOQ D5S.7xx.SD anti-panic cylinders are only provided in a set length due to safety reasons. The length cannot be adjusted. NOTE! It is not possible to chain multiple extension pieces. Only one extension piece on each side can be installed. - Page 17 (spare part kit available “A5.005”). NOTE! Make sure that the assembly (cylinder housings) is aligned straight. NOTE! Make sure that the assembly of the cylinder extension is done in a dry environment. Document ID - 300598 iLOQ 5 Series (iLOQ D5S.XXX(A).SB, D5S.XXX.(L).SB)
- Page 18 5. Slide the assembly with the backbone into the assembly with the extension piece and align the housings. 6. Secure the lock unit with the three body fixing screws set aside earlier. Use a tightening torque of 0.55 … 0.65 Nm. Document ID - 300598 iLOQ 5 Series (iLOQ D5S.XXX(A).SB, D5S.XXX.(L).SB)
-
Page 19: One Side - Version 2 (5-15 Mm)
One side - Version 2 (5-15 mm) 1. Remove the three body fixing screws with a Torx T6 tool and set the screws aside for later use. 2. Pull the lock unit modules apart. Document ID - 300598 iLOQ 5 Series (iLOQ D5S.XXX(A).SB, D5S.XXX.(L).SB) - Page 20 4. Slide the assembly with the backbone into the assembly with the extension piece and align the housings. 5. Secure the lock unit with the three body fixing screws set aside earlier. Use a tightening torque of 0.55 … 0.65 Nm. Document ID - 300598 iLOQ 5 Series (iLOQ D5S.XXX(A).SB, D5S.XXX.(L).SB)
-
Page 21: One Side - Version 2 (20 - 30 Mm)
One side - Version 2 (20 - 30 mm) 1. Remove the three body fixing screws with a Torx T6 tool and set the screws aside. 2. Pull the lock unit modules apart. Document ID - 300598 iLOQ 5 Series (iLOQ D5S.XXX(A).SB, D5S.XXX.(L).SB) - Page 22 4. Stretch the two O-rings carefully by using a tweezer, and pull out the (marked) metal piece horizontally (without damaging the O-rings). Dispose of the removed part in accordance with local rules and regulations. Document ID - 300598 iLOQ 5 Series (iLOQ D5S.XXX(A).SB, D5S.XXX.(L).SB)
- Page 23 5. Install the extension to the back bone. The O-rings will secure the assembly. 6. Slide the assembly with the backbone into the assembly with the extension piece and align the housings. Document ID - 300598 iLOQ 5 Series (iLOQ D5S.XXX(A).SB, D5S.XXX.(L).SB)
-
Page 24: One Side - Version 2 (35 - 70 Mm)
7. Secure the lock unit with the body fixing screws. Use a tightening torque of 0.55 … 0.65 Nm. One side - Version 2 (35 - 70 mm) 1. Remove the three body fixing screws with a Torx T6 tool and set the screws aside for later use. Document ID - 300598 iLOQ 5 Series (iLOQ D5S.XXX(A).SB, D5S.XXX.(L).SB) - Page 25 NOTE! Make sure that the assembly (cylinder housings) is aligned straight. NOTE! Make sure that the assembly of the cylinder extension is done in a dry environment. Document ID - 300598 iLOQ 5 Series (iLOQ D5S.XXX(A).SB, D5S.XXX.(L).SB)
- Page 26 4. Secure the lock unit with the two provided screws. Use a tightening torque of 0.55 … 0.65 Nm. 5. Slide the assembly with the backbone into the assembly with the extension piece and align the housings. Document ID - 300598 iLOQ 5 Series (iLOQ D5S.XXX(A).SB, D5S.XXX.(L).SB)
-
Page 27: Both Sides
Long neck If the outside housing of the long-neck version of the backbone needs to be extended, only two screws can be used to secure the backbone (see the following image). Document ID - 300598 iLOQ 5 Series (iLOQ D5S.XXX(A).SB, D5S.XXX.(L).SB) -
Page 28: After Installation
• the lock cylinder has been installed correctly. • the mortice lock is not defective. • the locking plates have been installed correctly. • the door is not warped etc. Document ID - 300598 iLOQ 5 Series (iLOQ D5S.XXX(A).SB, D5S.XXX.(L).SB) -
Page 29: Disposal Of Decommissioned Products
Never discard an electrical appliance in household waste. Follow the local laws and regulations for safe and environmentally friendly product disposal. Before discarding products, bear in mind that most iLOQ products are reusable. All programmable products can be reset to factory settings, after which they can be reused in another system. -
Page 30: Compliance
SIMPLIFIED EU DECLARATION OF CONFORMITY: Hereby, iLOQ Oy declares that the radio equipment type D5S Lock Cylinders are in compliance with Directive 2014/30/EU. The full text of the EU declaration of conformity is available at the following internet address: https://www.iloq.com/en/declaration-of-compliance/... - Page 31 S5 Europrofile Lock Cylinder iLOQ D5S.XXX(A).SB iLOQ D5S.XXX(L).SB User Guide iLOQ www.support.iloq.com Elektroniikkatie 10 90590 Oulu Finland...
Need help?
Do you have a question about the D5S SB Series and is the answer not in the manual?
Questions and answers