Advertisement
iLOQ Clock battery A00.14 installation instructions
Before replacing/adding the battery
1)
These instructions should be carefully followed during replacing the battery.
2)
These instructions should be passed on by the installer to the user.
3)
The product should not be modified in any way except in accordance with those modifications described in these instructions.
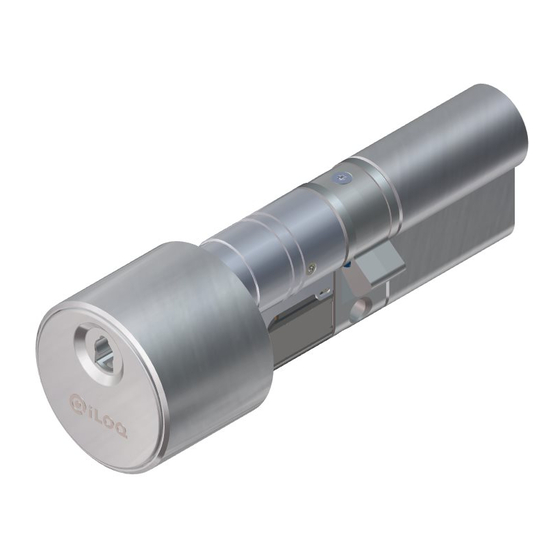
Replacing/adding the battery in iLOQ D10S.x Europrofile cylinder
A.
Insert a TORX 6 tool into the knob hole and remove the screw.
B.
Remove the front plate.
E.
Turn the authorized key 15° clockwise.
F.
Turn the TORX 6 tool ~90° clockwise.
G.
Remove the knob cover.
26875 / 30 / 01
1
C.
Insert the TORX tool 6 into the marked hole.
D.
Insert an authorized key into the cylinder.
3
H.
Remove the battery cover from the battery holder.
I.
Slide old battery out from the battery holder with the TORX 6
tool.
Replace the battery with a new one. Put the battery cover back
in its place.
2
4
Page 1
Advertisement
Table of Contents

Related Manuals for iLoq D10S Series


Summary of Contents for iLoq D10S Series
- Page 1 The product should not be modified in any way except in accordance with those modifications described in these instructions. Replacing/adding the battery in iLOQ D10S.x Europrofile cylinder Insert a TORX 6 tool into the knob hole and remove the screw.
- Page 2 Slide the knob cover fully in its place. Turn authorized key ~15°. Insert the TORX 6 tool into the cover hole. Turn the TORX 6 tool 90° counterclockwise. Insert authorized key into the cylinder. After adding a Clock battery, the cylinder must be Install the front plate.
Need help?
Do you have a question about the D10S Series and is the answer not in the manual?
Questions and answers