Knauer BlueShadow Pump 80P Service Instructions Manual
Hide thumbs
Also See for BlueShadow Pump 80P:
- Instructions manual (70 pages) ,
- Instructions manual (74 pages)

Related Manuals for Knauer BlueShadow Pump 80P


Summary of Contents for Knauer BlueShadow Pump 80P
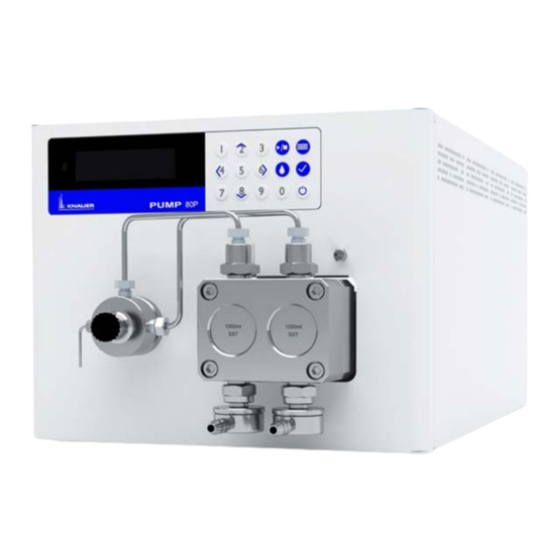
- Page 1 BlueShadow Pump 80P Service Instructions HPLC HPLC Document No. V7681A Document Number: V6700...
- Page 2 (login required): www.knauer.net/Service-instructions Copyright: This document contains confidential information and may not be reproduced without written consent of KNAUER Wissenschaftliche Geräte GmbH. © KNAUER Wissenschaftliche Geräte GmbH 2021 All rights reserved. BlueShadow® is a registered trademark of...
-
Page 3: Table Of Contents
Spare parts . . . . . . . . . . . . . . . . . . . . . . . . . . . . . . . . . . . . . . . . . . . . . . . . . . . . . . . . . .17 BlueShadow Pump 80P Service Instructions V7681A... - Page 4 17 .2 Screws in materials made of plastic . . . . . . . . . . . . . . . . . . . . . . . . . . . . . . . . . . . . . . . . . . . . . . .45 BlueShadow Pump 80P Service Instructions V7681A...
- Page 5 19 .9 Power supply . . . . . . . . . . . . . . . . . . . . . . . . . . . . . . . . . . . . . . . . . . . . . . . . . . . . . . . . . . . . . . . . . .56 BlueShadow Pump 80P Service Instructions V7681A...
-
Page 6: General
Observe the RoHS conformity for mainboards! Never perform mainte- on the mainboard nance on the mainboards independently. Always replace the mainboards and return the defective boards to KNAUER technical support, otherwise he warranty will lapse. Signal words Possible dangers related to the device are distinguished in personal and material damages. -
Page 7: Additional Typographical Conventions
Most KNAUER products are sold with the blue seal on the rear side to confirm that KNAUER was the last who took care of the instrument. An authorized service technician must order and affix the orange warranty seal after opening the instrument (order no. -
Page 8: Safety Instructions For Service Technicians
The service technician is qualified to handle the device if all of the following points apply: Fluent English to be able to use the English-lan guage service software ƒ and online help. Knowledge about the properties of the used solvents and their health ƒ risks. BlueShadow Pump 80P Service Instructions V7681A... -
Page 9: Service Request Form And Decontamination Report
Service request form and decontamination report We advise you not to repair devices which are not accompanied by the completed document “Service request form and decontamination report” (www.knauer.net/decontamination-report). BlueShadow Pump 80P Service Instructions V7681A... -
Page 10: What Is Maintained Or Repaired
3. What is maintained or repaired? Check Check the number of operating hours in the KNAUER Service Tool operating hours software. Hours in operation Measures 1.000 Check the torque of the screw fittings ƒ Clean the pistons ƒ Check check valves ƒ... -
Page 11: Pump Head Repair And Maintenance
Please refer to the pump head service instructions (VSM-001) in the part- ner area on the KNAUER website for detailed instructions. Removing the pump head 1. To remove the capillaries, loosen the capillary screw fittings (A) at the pump head outlet and pressure sensor inlet. -
Page 12: Disassembling The Housing
Level 2 (from 1 to 7, very easy to very difficult) ƒ Process Figure 1. Unscrew the 6 Torx screws (A) and washers with the screwdri- ver and store them safely. Fig. 2: Removing screws of device hood BlueShadow Pump 80P Service Instructions V7681A... -
Page 13: Spare Parts
2. Push device hood (B) back. 3. Lift the device hood up with both hands. Fig. 3: Removing device hood Result The device has been opened. 5.1.1 Spare parts Component Comment Order number Device hood P5163A BlueShadow Pump 80P Service Instructions V7681A... -
Page 14: Overview Of The Device
Fig. 4: Top view of the open device Legend: A Motor B Piston backflushing pump C Carbon brushes of the motor D Pressure sensor Fig. 5: View from left side of the open device BlueShadow Pump 80P Service Instructions V7681A... -
Page 15: Replacing The Lc Display
Note: The display unit, consisting of LC display and display board must be replaced as a component. Electronic defect Electrostatic discharge can destroy the electronics. Wear a protective bracelet against electrostatic discharge and ground. BlueShadow Pump 80P Service Instructions V7681A... -
Page 16: Display Spare Parts
1. Install a new display component in reverse order. 2. Switch on the device and check if the display, standby func tion and standby light work properly. 7.1.1 Display spare parts Component Comment Order number Display assembly complete G1957A Display board G1813XA BlueShadow Pump 80P Service Instructions V7681A... -
Page 17: Replacing The Keypad
3. Lift up the keypad and pull it from the device. 4. Carefully remove residues of glue from the front plate. 5. Using a cloth and isopropanol, degrease the surface. Fig. 10: Keypad BlueShadow Pump 80P Service Instructions V7681A... -
Page 18: Installing A New Keypad
Slot for keypad cable 5. Connect the ribbon cable (A) to the display board. Fig. 13: Keypad cable connector Result The keypad has been replaced. 8.2.1 Keypad spare parts Component Comment Order number Keypad Complete M3220E BlueShadow Pump 80P Service Instructions V7681A... -
Page 19: Replacing The Fans
3. Insert a new fan. 4. Insert the fan power supply cable into the PIN connector on the mainboard. Duration Approx. 10 min. ƒ Level of difficulty Level 2 (from 1 to 7, very easy to very difficult) ƒ BlueShadow Pump 80P Service Instructions V7681A... -
Page 20: Spare Parts
(see „Fig. 51: Assi- gnment of the plug connections on the main board“ on page 38). 9.1.1 Spare parts Component Comment Order number Complete G5029 Fan sleeve M2431 BlueShadow Pump 80P Service Instructions V7681A... -
Page 21: Replacing The Fan Of The Power Board
A new fan can be mounted in reverse order and connected to the main board. Note: Pay attention to the air path of the fan which is marked with an arrow on the fan. The air path leads towards the power board. BlueShadow Pump 80P Service Instructions V7681A... -
Page 22: Spare Parts
Replacing the fans 9.2.1 Spare parts Component Comment Order number Fan for the power board G4117B BlueShadow Pump 80P Service Instructions V7681A... -
Page 23: Replacing The Piston Backflushing Pump
3. At the bottom of the device, loosen the 2 Torx screws (A) of the pis ton backflushing pump. 4. Remove the piston back Fig. 20: Piston backflushing flushing pump from the pump screw fitting housing. BlueShadow Pump 80P Service Instructions V7681A... -
Page 24: Spare Parts
The piston backflushing pump has been removed. Next steps A new piston backflushing pump can be installed in reverse order. 10.1.1 Spare parts Component Comment Order number Piston backflushing G1659XA pump Tubing clamp M0707 BlueShadow Pump 80P Service Instructions V7681A... -
Page 25: Replacing The Pressure Sensor
The pressure sensor is adjusted to the mechanical and electrical proper- ties of the pump through a calibration procedure. The calibra tion proce- dure requires a test station from KNAUER and the KNAUER Service Tool software. For better results the procedure can be repeated. -
Page 26: Removing The Pressure Sensor
5. Hold the pressure sensor and guide it out through the ope- ning together with the cable. Fig. 23: Screws and cable of pressure sensor Result The pressure sensor has been replaced. Next steps Install new pressure sensor. BlueShadow Pump 80P Service Instructions V7681A... -
Page 27: Installing A New Pressure Sensor
350–400 bar (end point of the calibration) ƒ 11.2.1 Spare parts Component Comment Order number Pressure sensor G2705C Ventilation screw Without O-ring P2719XA O-ring M1368 Sealing ring 12.8 x 10 x 1.5 P7022 PEEK BlueShadow Pump 80P Service Instructions V7681A... -
Page 28: Repairing The Pump Drive
Fig. 24: Motor with carbon brushes Legend: 5. Insert new carbon brushes. 6. Screw on closures. A Closure 7. Secure cable plug. B Cable connection C Spring D Carbon brush Fig. 25: Carbon brush BlueShadow Pump 80P Service Instructions V7681A... -
Page 29: Spare Parts
3. Remove motor with mounting plate. Fig. 26: Loosening motor screws 4. Install a new motor. Result The motor has been replaced. Next steps Tighten the timing belts (see see chap. 12.3.2 on page 28) BlueShadow Pump 80P Service Instructions V7681A... -
Page 30: Spare Parts
4. Insert new timing belts. 5. Tighten the screws slightly. Tools and supplies Hexagon screwdriver, size 4 ƒ Time Approx. 20 minutes ƒ Level of difficulty Level 3 (from 1 to 7, very easy to very difficult) ƒ BlueShadow Pump 80P Service Instructions V7681A... - Page 31 (C). Fig. 27: Removing long timing belt 3. Lift the gear and remove it. 4. Remove the short timing belt (D). 5. Insert a new short timing belt. Fig. 28: Removing short timing belt BlueShadow Pump 80P Service Instructions V7681A...
- Page 32 Fig. 31: Correct position of belt Result The timing belts have been replaced. Next step Tighten the timing belt (see next chapter). BlueShadow Pump 80P Service Instructions V7681A...
-
Page 33: Tightening The Timing Belts On The Pump Drive
12.3.2.1 Tightening the long timing belt (M1547) Process Figure 1. Pull the gear box (A) forwards (see direction of the arrow) to tighten the long timing belt (B) approximately. Fig. 32: Tightening long belt BlueShadow Pump 80P Service Instructions V7681A... - Page 34 Fig. 34: Zero dial gauge 6. Release the dial gauge from the surface. It must show the value printed on the the test tool (in this case: -4.10 mm). Fig. 35: Setting dial gauge BlueShadow Pump 80P Service Instructions V7681A...
- Page 35 Timing belt Min. dimension Max. dimension WP0003 M1547 3.00 4.00 10. To adjust the tension, loosen the 2 screws on the gear box and move the gear box again. Fig. 38: Adjusting the tension BlueShadow Pump 80P Service Instructions V7681A...
- Page 36 4. Tighten the screw (A) when the timing belt moves roughly 3-5 mm when pressed lightly with your index fin ger. Fig. 41: Tightening short belt BlueShadow Pump 80P Service Instructions V7681A...
- Page 37 M1546 2.20 3.20 12. When the correct tension is reached, tighten the front hexagon socket screw (A) and release the screw driver. 13. Tighten the rear hexagon socket screw (B). Fig. 45: Tightening screws BlueShadow Pump 80P Service Instructions V7681A...
-
Page 38: Spare Parts And Equipment
5. Reinsert the screw. Fig. 46: Removing the hall sensor 6. Re-establish all elec trical connections. Result The hall sensor has been replaced. 12.5 Spare parts Component Comment Order number Hall sensor incl. board G2777A BlueShadow Pump 80P Service Instructions V7681A... -
Page 39: Replacing The Fuses That Protect The Boards
Fuses that protects the boards (safety fuses) ƒ Tools Tweezers ƒ Duration Approx. 10 min for removal and installation ƒ Level of difficulty Level 2 (from 1 to 7, very easy to very difficult) ƒ BlueShadow Pump 80P Service Instructions V7681A... -
Page 40: Spare Parts
Result The fuses have been replaced. 13.1 Spare parts Component Comment Order number Fuse 62 mA Main board M0734 Fuse 250 mA Main board M0731 Fuse Main board fuse M2099 Fuse 2 A Power board M2288 BlueShadow Pump 80P Service Instructions V7681A... -
Page 41: Replacing The Power Board
3. Remove the power board. Fig. 49: Replacing power board Result The power board has been removed. Next step A new power board can be installed. 14.1 Spare parts Component Comment Order number Power board G1169XA BlueShadow Pump 80P Service Instructions V7681A... -
Page 42: Replacing The Main Board
Torx screwdriver, T10 ƒ 5.5 mm wrench ƒ Tweezers ƒ Precision engineering screwdriver ƒ Duration Approx. 20 min for installation and removal ƒ Level of difficulty Level 3 (from 1 to 7, very easy to very difficult) ƒ BlueShadow Pump 80P Service Instructions V7681A... -
Page 43: Loosening Plug Connections Of The Main Board
H RFID-Board I Connections for events (TTL) J RS-232 K LAN L Connections for analog Fig. 51: Assignment of the plug connections on the main board IN/OUT or control M LPG (Low pressure gradient) BlueShadow Pump 80P Service Instructions V7681A... -
Page 44: Removing The Main Board
FFC cable connector 15.2 Removing the main board Process Figure 1. Loosen the 2 Torx screws (A) for the attachment of the board and remove them from the main board with tweezers. Fig. 54: Torx screws BlueShadow Pump 80P Service Instructions V7681A... -
Page 45: Spare Parts
Check the 4 spacers under the main board before installing a new main board. Result The main board has been removed. Next steps A new main board can be installed. 15.2.1 Spare parts Component Comment Order number Main board ZG1156AC BlueShadow Pump 80P Service Instructions V7681A... -
Page 46: Replacing Rfid Printed Circuit Board
4. Reinsert screws. 5. Attach the flexible flat cable and lock the plug. Fig. 56: RFID printed circuit board Result The RFID board has been replaced. 15.3.1 Spare parts Component Comment Order number RFID-PCB board G1153AA BlueShadow Pump 80P Service Instructions V7681A... -
Page 47: Replacing The Power Supply
3. Loosen all cable con nections at the power supply. 4. Remove the 4 Torx screws (C) on the bottom of the device. Hold the power supply secure- ly while doing so. Fig. 58: Bottom of the device BlueShadow Pump 80P Service Instructions V7681A... -
Page 48: Spare Parts
Screws at the bottom of the holder Result The power supply has been removed. Next steps A new power supply can be installed in reverse order. 16.1.1 Spare parts Component Comment Order number Power supply K0785 BlueShadow Pump 80P Service Instructions V7681A... -
Page 49: Tightening Torque For Screws
Tightening torque (in Nm)* Tightening torque (in Nm)** 0.65 10.0 17.0 41.0 13.0 83.0 * valid for screw strength (8.8) in stainless steel (A2/A4) ** valid for screw strength (12.9) in stainless steel (A2/A4) BlueShadow Pump 80P Service Instructions V7681A... -
Page 50: Screws In Materials Made Of Plastic
17.2 Screws in materials made of plastic The following materials are considered plastic: PEEK ƒ PETP ƒ ƒ PMMA ƒ PTFE ƒ Size Tightening torque (in Nm) BlueShadow Pump 80P Service Instructions V7681A... -
Page 51: Troubleshooting
12C Init failed Error_23 Cannot read RTC Error_24 12C operation failed Error_25 Cannot write data on FRAM Error_26 Cannot read data from FRAM Error_27 Instrument remote controlled Error_28 Error input activated Error_29 Time already exists BlueShadow Pump 80P Service Instructions V7681A... - Page 52 Error_47 Wake up time already passed! Error_48 Not supported Error_49 Line in time table is empty Error_50 Invalid index in time table Error_51 Invalid time in time table Error_52 No time table to start BlueShadow Pump 80P Service Instructions V7681A...
- Page 53 Auto pump head type: read failed! Error_69 Auto pump head type: write failed! Error_70 Motor failure Error_71 Motor failure: max current Error_72 Motor failure: position error Error_99 I2C failed for panel Error_122 GUI internal error! BlueShadow Pump 80P Service Instructions V7681A...
-
Page 54: Possible Problems And Rectifications
Short circuit in the Replace main board ƒ ƒ and no fan sounds main board or in on pump can be heard other elec tronic compo nents BlueShadow Pump 80P Service Instructions V7681A... - Page 55 Defective fuse on Replace fuse ƒ ƒ 5 V power supply the main board at the WAGO ter minal strip Loud running noise Timing belt worn Replace timing belt ƒ ƒ from pump and adjust belt tension BlueShadow Pump 80P Service Instructions V7681A...
-
Page 56: Spare Parts
19. Spare parts 19.1 Pump heads Please refer to the Pump Head Service Instructions (VSM-001) in the partner area on the KNAUER website for spare part information. 19.2 Housing P5163A Order number Name P5163A Device hood 19.3 Display and keypad... -
Page 57: Fan
Spare parts M3220E Order number Name G1957A Display assembly G1813XA Display board M3220E Keypad 19.4 Fan G4117B G5029 M2431 Order number Name G5029 Device fan M2431 Fan sleeve G4117B Fan of the power board BlueShadow Pump 80P Service Instructions V7681A... -
Page 58: Piston Backflushing Pump
19.5 Piston backflushing pump G1659XA M0707 Order number Name G1659XA Piston backflushing pump M0707 Tubing clamp, 5-7 mm 19.6 Pressure sensor M1368 P2719XA Order number Name G2705C Pressure sensor complete 1/8” M1368 O-ring P2719XA Ventilation screw BlueShadow Pump 80P Service Instructions V7681A... -
Page 59: Pump Drive
A1634 G2763-1 Order number Name G1256 Pump drive G2763-1 Complete motor M1546 Timing belt, left (short) M1547 Timing belt, right (long) A1634 Carbon brushes, set G2777A Hall sensor printed circuit board G1153AA RFID-PCB module BlueShadow Pump 80P Service Instructions V7681A... -
Page 60: Boards And Fuses
19.8 Boards and fuses ZG1156AC G1169XA M0731 M0734 M2288 G2777A Order number Name ZG1156AC Main board G1169XA Power board M0734 Fuse 62 mA, main board M0731 Fuse 250 mA, main board M2099 Main board fuse BlueShadow Pump 80P Service Instructions V7681A... -
Page 61: Power Supply
Spare parts Order number Name M2288 Fuse 2 A, power board G1153AA RFID-PCB module G2777A Hall sensor printed circuit board 19.9 Power supply K0785 Order number Name K0785 Power supply BlueShadow Pump 80P Service Instructions V7681A... - Page 62 Latest KNAUER instructions online: www.knauer.net/service-instructions KNAUER Phone: +49 30 809727-0 Wissenschaftliche Geräte GmbH Fax: +49 30 8015010 Hegauer Weg 38 E-Mail: info@knauer.net 14163 Berlin Internet: www.knauer.net © KNAUER 2021...
Need help?
Do you have a question about the BlueShadow Pump 80P and is the answer not in the manual?
Questions and answers