Table of Contents
Advertisement
Quick Links
Advertisement
Table of Contents

Related Manuals for Philco POB 18 XP


Summary of Contents for Philco POB 18 XP
- Page 1 BUILT-IN ELECTRIC OVEN USER’S MANUAL POB 18 XP...
- Page 2 Dear customer, Thank you for buying a PHILCO brand product. So that your appliance serves you well, please read all the instructions in this user's manual.
-
Page 3: Table Of Contents
CONTENTS PART 1: IMPORTANT SAFETY INSTRUCTIONS ....................2 PART 2: PRODUCT DESCRIPTION ........................6 PART 3: OPERATION INSTRUCTIONS ......................7 PART 4: ACCESSORIES ............................ 10 PART 5: INSTALLATION ..........................12 A) INSTRUCTIONS FOR INSTALLATION ......................12 B) TECHNICAL DRAWINGS FOR INSTALLATION ................... 14 PART 6: CLEANING AND MAINTENANCE ...................... -
Page 4: Part 1: Important Safety Instructions
PART 1: IMPORTANT SAFETY INSTRUCTIONS ACKNOWLEDGMENT Thank you for purchasing our product. We hope you enjoy using the many features and benefits it provides. Before using this product please study this entire Instruction Manual carefully. Keep this manual in a safe place for future reference. - Page 5 • If the surface is cracked, switch off the appliance to avoid the possibility of electric shock. • This appliance can be used by children aged from 8 years and above and persons with reduced physical, sensory or mental capabilities or lack of experience and knowledge if they have been given supervision or instruction concerning use of the appliance in a safe way and understand the...
- Page 6 • Children should be supervised to ensure that they do not play with the appliance. • This appliance is not intended for use by persons (including children) with reduced physical, sen- sory or mental capabilities, or lack of experience and knowledge, unless they have been given su- pervision or instruction concerning use of the ap- pliance by person responsible for their safety.
-
Page 7: Control System
• The appliances are not intended to be operated by means of an external timer or separate remote- control system. • Appliance must not be installed behind a decora- tive door in order to avoid overheating. Safety hints • Do not use the oven unless you are wearing something on your feet. Do not touch the oven with wet or damp hands or feet. -
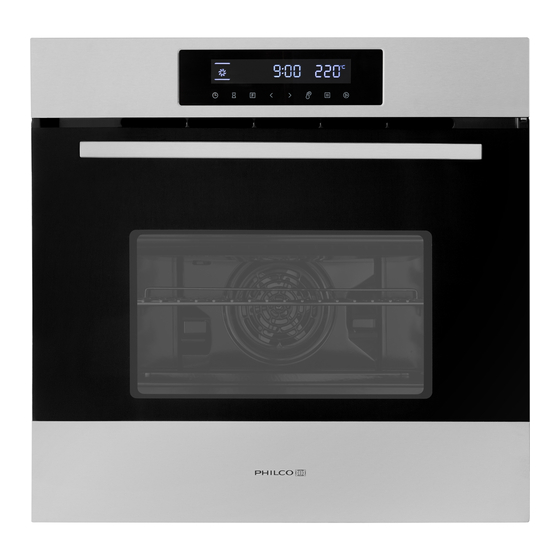
Page 8: Part 2: Product Description
PART 2: PRODUCT DESCRIPTION Symbol Function description Oven Lamp: Which enables the user to observe the progress of cooking without opening the door. Oven lamp will light for all cooking functions. Defrost: The circulation of air at room temperature enables quicker thawing of frozen food, (without the use of any heat). -
Page 9: Part 3: Operation Instructions
PART 3: OPERATION INSTRUCTIONS 1. Clock Setting After connectiong the unit to the power, the symbols “0:00” will be visible on the display. Press “ ”, the hour figures will flash. Press “ ” to adjust the hour figures, (time should be within 0--23). Press “... -
Page 10: Child Lock Function
5. Child lock function To Lock: press “ ” and “ ” simultaneously for 3 seconds, there will be a long “beeping” sound and the “ ” will be illuminated. Lock quitting: press “ ” and “ ” simultaneously for 3 seconds, there will be a long “beeping” sound indicating the child-lock is released. -
Page 11: Meat Probe Function
Under the energy-saving mode, press any key can quit the energy-saving mode. 10. Meat probe function In waiting state, insert the meat probe, the LCD will display “PROB” and the icon “ ” will light. Press “ ” to choose function you need. The related indicator will illuminated. Functional sequence diagram: . -
Page 12: Part 4: Accessories
PART 4: ACCESSORIES Meat probe Before using, insert the probe into the center of the thickest portion of meat or into the inner thigh or breast of poultry, away from fat or bone. Place food in oven and connect the meat probe. Keep probe as far away from heat source as possible. - Page 13 Telescopic runner Some of models might with telescopic runners to facilitate the use of oven. These telescopic runners could be disassembled for cleaning by unscrew the screws use to fix it. (only for specific models) SHELF PLACEMENT WARNING: To ensure the oven shelves operate safely, correct placement of the shelves between the side rail is imperative. This will ensure that during careful removal of the shelf or tray, hot food items should not slide out.
-
Page 14: Part 5: Installation
PART 5: INSTALLATION A) INSTRUCTIONS FOR INSTALLATION Installation WARNING! Only a qualified person must install this appliance. • Remove all the packaging. • Do not install or use a damaged appliance. • Obey the installation instruction supplied with the appliance. •... -
Page 15: Securing The Oven To The Cabinet
Securing the oven to the cabinet Fit oven into the cabinet recess. Open the oven door. Secure the oven to the kitchen cabint with two distance holders “A” which fit the holes in the oven frame and fit the two screws “B”. Ventilating openings When cooking is finished or in pause state or in waiting state, if the oven’s center temperature is over 75 de- gree, the cooling fan will continue working for 15 minutes. -
Page 16: B) Technical Drawings For Installation
B) TECHNICAL DRAWINGS FOR INSTALLATION Remark: Only plus deviations are admissible for all dimension. The cabinet is not include the power switch or socket. NOTE: The number of accessories included depends on the particular appliance purchased. EN - 14 Copyright © 2016, Fast ČR, a. s. 08/2016... -
Page 17: Part 6: Cleaning And Maintenance
PART 6: CLEANING AND MAINTENANCE For the sake of a good appearance and reliability, keep the unit clean. The modern design of the unit facilitates maintenance to a minimum. The parts of the unit which come into contact with food have to be cleaned regularly. -
Page 18: Part 7: Information Sheet
PART 7: INFORMATION SHEET INFORMATION SHEET: Philco Philco brand: Name Philco Model identification number POB 18 XP Energy efficiency index * Energy efficiency class Power consumption per cycle for baking area ** 0.90 kWh/cycle Power consumption per cycle for baking area *** 0.83 kWh/cycle... - Page 19 Changes to the text, design and technical specifications may occur without prior notice and we reserve the right to make these changes. Czech is the original version. Manufacturer address: PHILCO, Praha 10, Černokostelecká 2111, CZ-10000; CZECH REPUBLIC EN - 17 Copyright © 2016, Fast ČR, a. s.
- Page 20 EN - 18 Copyright © 2016, Fast ČR, a. s. 08/2016...
Need help?
Do you have a question about the POB 18 XP and is the answer not in the manual?
Questions and answers