Table of Contents
Advertisement
Quick Links
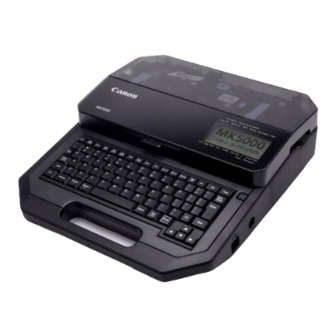
CABLE ID PRINTER
Basic Operation Guide
Please read "Important Safety Instructions" before operating this product.
After you nish reading this guide, store it in a safe place for future reference.
The information in this document is subject to change without notice.
All functions of this printer are described in User's Guide. Please visit the following
website to read User's Guide.
► Users in the U.S.A
https://www.usa.canon.com/internet/portal/us/home/support/
► Users in the South & Southeast Asia
https://asia.canon/en/support/
Advertisement
Table of Contents

Related Manuals for Canon MK5000


Summary of Contents for Canon MK5000
- Page 1 The information in this document is subject to change without notice. All functions of this printer are described in User's Guide. Please visit the following website to read User's Guide. ► Users in the U.S.A https://www.usa.canon.com/internet/portal/us/home/support/ ► Users in the South & Southeast Asia https://asia.canon/en/support/...
- Page 2 If you find any omissions or mistakes in this manual. • The text of this manual describes an example environment using an MK5000 and Windows 10. Some display screens and operating procedures may differ when using an MK3000 or a different operating...
- Page 3 States and/or other countries. • The Bluetooth® word mark and logos are registered trademarks owned by Bluetooth SIG, Inc. and any use of such marks by CANON FINETECH NISCA INC. is under license. • QR code is trademark of Denso Wave Inc.
-
Page 4: Table Of Contents
Cutting Position Is Not Correct ���������������� 38 Names and Functions of Keys ���������� 10 The Print Position Is Shifted/ Not Printed with the Set Length ��������������������43 MK5000 Keyboard ���������������������������������������� 10 A Message Is Displayed ������������������������������� 45 MK3000 Keyboard ���������������������������������������� 12 Specifications ����������������������������������������� 46 How to Read the Display �������������������... -
Page 5: Important Safety Instructions
Important Safety Instructions Prior to using this printer, please read this section (”Important Safety Instructions”) thoroughly. Do not attempt to operate this printer in any way other than those mentioned in the manual (this manual and User's Guide). ■ For Cardiac Pacemaker Users WARNING •... - Page 6 ■ Power Cord and AC Adapter WARNING • Only use the AC adapter (PR-TP001) and power cord included with this product. Failure to do so may result in fire, electric shock, or malfunction. Also, do not use the included AC adapter and power cord with other products.
- Page 7 Important Safety Instructions ■ Battery WARNING • To prevent fires, damage or injury due to battery leakage, overheating or rupture, be sure to observe the following rules. - Make sure to set the batteries correctly, paying attention to the polarity (the direction of the + and - ends).
- Page 8 ■ Handling WARNING • Do not attempt to disassemble or modify this product. Failure to do so may result in fire, malfunction, or injury. • Do not insert any metal objects into the product or drop metal pieces such as paper clips or staples into it.
- Page 9 Important Safety Instructions ■ Maintenance and Inspections WARNING • Clean the AC adapter plug periodically. If dust, dirt, soot, etc., is allowed to accumulate on the plug, the dust could absorb moisture, creating an insulation fault that could cause a fire. •...
-
Page 10: Precautions For Use
Precautions for use Operating Environment • Be sure to observe the following rules concerning the storage and operating environment. For more information, please refer to ”Specifications (P�46)”. • Water droplets (condensation) may form on the surface of or inside of the product when the room is suddenly heated or when the product is moved to a warmer room. - Page 11 • When using the MK5000, we recommend that you back up the data created and saved with this product to another storage device such as a computer. (The MK3000 does not support data backup.) Damage •...
-
Page 12: Names Of Components
Names of Components External View ■ Top View Keyboard Cover Power key AC adapter connector USB connector (Type-B) ■ Bottom View Battery cover Battery case Rating plate * * The rating plate shows the manufacturer, model name, electrical rating, and serial number�... -
Page 13: Inside View
Names of Parts Inside View Connector for tube warmer Attachment/Media cassette mount Media feed port (When the attachment installed) Display Ribbon cassette mount Transport roller 1 Print head Transport roller 2 Transport roller 3 Connector for ribbon cassette Cutter Media delivery port Blade receiver Jam recovery lever Tube Attachment... -
Page 14: Names And Functions Of Keys
Names and Functions of Keys MK5000 Keyboard For details on the functions that can be set from each function key, refer to ”List of MK5000 Function (P�50)”. This key allows you to check the page number of the currently [Page] key displayed page and the total number of pages in the data. - Page 15 Names and Functions of Keys [File] key Sets up the saving and loading of data. (P�26) Sets the connection method when printing from a PC (P�30) or tablet [Connect] key device. [Warmer] key Switches between tube warmer settings (optional). (P�15) [Settings] key All functions can be set using this key.
-
Page 16: Mk3000 Keyboard
MK3000 Keyboard For details on the functions that can be set from each function key, refer to ”List of MK3000 Function (P�52)”. [Format] key Sets the page/text input orientation and the text frame. [Style] key Specifies character size, number of lines, and space between characters. Specifies the length of one tube (or one label), character alignment, [Length/Margin] key and margins. - Page 17 Names and Functions of Keys Press this key while printing to stop printing, and then stop after cutting [Cancel] key the print media. If you press and hold this key for 2 seconds or more, the printer will stop without cutting. If pressed during the operation of a function, the operation will be canceled.
-
Page 18: How To Read The Display
(No indication) : Overwrite mode Displays the printing speed settings. Printing speed H: High M: Middle (MK5000 only) L: Low The settings for adding a half cut to tubes or label tapes are indicated Half cut setting by the following symbols. - Page 19 Cut Length (mm) Alignment (Centered “C” ) 1 5 . 0 C • When using the ”Specify” cut length feature (Even Distribution and Plate Printing Area are MK5000 only) Cut Length (mm) Alignment (Centered “C”, Left-aligned “L” , Right-aligned “R” , Even Distribution “E” ) 4 0 .
- Page 20 Character Size Displays the character size setting for the current page. Frame Displays the frame setting for the current page. Displays the print orientation and character orientation settings for the Orientation current page. Displays the page number of the current page. Page : Displayed when there is a page before the current page : Displayed when there is a page after the current page.
-
Page 21: Before You Begin
Before You Begin Before You Begin Preparing the Power Supply Make sure that the power is turned off� ■ Connecting the AC Adapter Remove the battery cover� CAUTION • Be sure to use the supplied genuine AC adapter and power cord. Connect the power cord to the AC adapter, and plug the AC adapter into the printer�... -
Page 22: Basic Operations
Basic Operations Flow of Operation Installing the Ribbon Cassette (P� 19) Loading the Print Media (P� 20) • When using a tube or plate (P.20) • When using a label tape cassette (P.22) Turning the Printer On (P� 22) Inputting Text (P� 23) Printing (P�... -
Page 23: 1� Installing The Ribbon Cassette
• When printing on a plates, use a black, 40m ribbon cassette. Other ribbon cassettes (black, 150m; white, 85m) will not print correctly. • Only the MK5000 supports printing on plates. Open the cover� IMPORTANT • If the ribbon is loose, it may not operate properly. -
Page 24: 2� Loading The Print Media
”Print Media (P�48)”. printer and push it in firmly until it clicks into place. • Only the MK5000 supports printing on plates. Prepare the attachment� For tubes (round) Use the cleaner (blue) by attaching it to the tube attachment. - Page 25 Basic Operations IMPORTANT Insert the tube (or plate)� • If the tip of the tube Insert the tip of the tube (or plate) into the (or plate) is inserted as media feed port in the direction shown in shown in the figure, the the figure, and push it in until it hits transport tube (or plate) may get roller 2.
-
Page 26: 3� Turning The Printer On
7 mm as shown in the figure. When the power is turned on, the following information will be displayed. ”Startup display” • For MK5000 • For MK3000 NOTE • If label tape or other material has gotten into the ... -
Page 27: 4� Inputting Text
Basic Operations 4. Inputting Text Input ”Pump Room”� Example; Creating two sets of tubes as follows 3 1 . 0 C (Tube to be used: Ø4�0mm) Pump Room Input ”A1”� NOTE • Press the [Del All] key (or [Delete] key for MK3000) to delete all characters in all pages you are inputting. -
Page 28: 5� Printing
• Select media type by navigating to ”Tube”, ”Shrink ”Printing preference display” Tube”, ”Label”, ”Clear tube”, ”Wrap around”, ”Plate” / P rev ie w Print (MK5000 only), or ”Flat Tube”. S e t s t o p r i n t : 1 Φ3. 0㎜ Tube Press [ ] or [ ] to select ”Ø4�0mm”... - Page 29 A l l - When the power is not turned off. - When you do not change the type or size of the For MK5000: print media in the print settings. Printing will be started. Go to step 9. - When the feed function and remove function are not used.
-
Page 30: 6� Saving Data
Example; Save the created data in ”Folder 1” with the file name of ”A-1”� Operate the printer as follows� For MK5000: When printing is finished, the tube will be Press the [File] key. automatically cut. The tube is half cut to permit easy cutting by hand. -
Page 31: 7� Turning The Printer Off
Basic Operations 7. Turning the Printer Off Select ”Yes, ” and press the [Enter] key� Sav e as Press and hold the power key for 1 second or more� After ”Saving... ” is displayed, the screen will return to the character input display. S av i n g. -
Page 32: Printing Using A Computer
When the following screen is displayed, place - Users in the South & Southeast Asia a check mark in the box for [Always trust https://asia�canon/en/support/download software from ”CANON FINETECH NISCA INC. ” ], and then click [Install]. Open the decompressed file, double click ”setup�exe”�... - Page 33 This completes the installation of the software. 1) Press the [Option] key. NOTE 2) Select ”Connect” and press the [Enter] key. • On the MK5000, when using multiple units of this Op tion product connected to a single computer, install Conn ect Warm er the printer driver once for each of those units.
-
Page 34: Connecting To A Computer
”Receiving... ” is not shown on the printer display, and then press the [Canc] key (or [Cancel] key). Connect the printer to the PC with the • On the MK5000, you can change the function of USB cable� the [Connect] key when you press it. If you assign a frequently used connection to the [Connect] key, Turn on the printer�... -
Page 35: Printing Using The Mk Desktop Utility
Printing Using a Computer Printing Using the MK Specify the print media and media size� Desktop Utility This section describes the basic printing procedure. For detailed instructions, refer to the User's Guide. Start up the MK Desktop Utility� Double-click the [MK Desktop Utility] shortcut icon on the desktop. - Page 36 NOTE • The data on the character input display will be retained after printing is completed. • On the MK5000, when reprinting the last printed data, follow the steps below. (1) Select [Print Data in Printer] from the [Remote] menu.
-
Page 37: Frequently Asked Questions
Frequently Asked Questions Frequently Asked Questions Replacing the Ribbon Cassette Replacing the Print Media If the message ”End of ribbon” is displayed during To replace the print media installed in the printer printing, replace the ribbon cassette with a new with a different one, follow the procedure below. - Page 38 ■ For Other Print Media (When using a tube or plate) Pull out the tube (or plate)� Turn on the power� (P�22) Press the [Remove] key� The following screen will be displayed. Unload print media? If the tube (or plate) cannot be removed, close the cover and press the [Remove] key again.
-
Page 39: If A Tube Or Label Tape Becomes Jammed
Frequently Asked Questions If a Tube or Label Tape Open the cover� Becomes Jammed If the print media gets jammed inside the printer, a ”Feed error” message will be displayed on the display and printing will be canceled. Follow the procedure below to remove the print media. - Page 40 (When using tube or plate) After removing the print media (or cassette), press any key� As shown in the figure, pull the tube (or plate) out while pressing the jam After pressing a key, instructions will be displayed on the screen. recovery lever in the direction of the arrow�...
- Page 41 Frequently Asked Questions When the print media has been removed, use [ ] or [ ] to select ”Yes” and press the [Enter] key� Can the print media in the media path be removed? You will return to the character input display. ...
-
Page 42: Printing Is Not Clear/ Print Media Dose
(P�41) Are the depth and motion of the Adjust the depth and motion of the cutter. cutter appropriate? • For MK5000 Select the [Adjust] key, then [Full Cut Depth] (or [Full Cut Motion]). • For MK3000 Select the [Option] key, then [Print adjust] > [Full Cut Depth] (or [Full Cut Motion]). - Page 43 Close the cover, and then operate the C le an in g m od e printer as follows� Aft er c leani ng , For MK5000: c los e safet y co ver . Press the [Settings] key. For MK3000: Wipe off any dirt on the transport roller Press the [Option] key.
- Page 44 ■ Cleaning the Print Head Close the cover� WARNING • When cleaning the print head, be sure to turn off the power and unplug it from the power outlet. Also, remove the batteries from the printer. • Do not use alcohol, thinner, or other flammable solvents.
- Page 45 Frequently Asked Questions ■ ■ Cleaning/Replacing the Replacing the Cutter Cleaners If the tube or label tape does not cut properly even after adjusting the depth and motion of the The tube attachment, (optional) tube warmer, cutter, replace the cutter. when replacing Also, and (optional) plate and flat tube attachment...
- Page 46 Remove the cutter� Close the cover� Turn on the power� (P�22) Insert the new cutter� Operate the printer as follows� For MK5000: Press the [Settings] key. For MK3000: Press the [Option] key. Paying attention to its orientation, insert the...
-
Page 47: The Print Position Is Shifted
Frequently Asked Questions The Print Position Is Shifted/ Record the Mounted Cutter Count� Not Printed with the Set Length (P�54), and then press the [Enter] key� Depending on your print media and environment, Mounted Cutter Count the print position may be shifted or the length of 50000 ti m es one tube (or one label) may be different from the Tot al Feed L en gt h... - Page 48 Move the print start position 2.0 mm to the right. Normal (no adjustment): Top pos it i on ad ju st Operate the printer as follows� For MK5000: Nor m al Press the [Adjust] key. For MK3000: 1) Press the [Option] key.
-
Page 49: A Message Is Displayed
Frequently Asked Questions A Message Is Displayed If a problem occurs during operation of or printing using product, an error message will be displayed on the display. Read the message, and follow the corresponding procedure. NOTE • If the message is not listed in the table below, refer to the User's Guide. Message Description/Action Battery is running low. -
Page 50: Specifications
Specifications Printer Product name MK5000 MK3000 Printing method Thermal transfer using one-line head Resolution 300 dpi Printing speed High speed mode: 40 mm/sec *1 High speed mode: 25 mm/sec Middle speed mode: 25 mm/sec Low speed mode: 18.5 mm/sec Low speed mode: 18.5 mm/sec... - Page 51 Specifications Interface USB2.0 Full-Speed USB2.0 Full-Speed Bluetooth Specification Version 5.0 (Bluetooth Low Energy Technology) Operating environment Temperature: 15 to 32.5 degrees Celsius * Humidity: 10% to 85% (no condensation) * With the tube warmer installed: 5 to 18 degrees Celsius Maximum power 25 W 24 W...
-
Page 52: Print Media
Please test the operation on a given print media before use. *2 The optional plate and flat tube attachment is required. *3 Printing on plates is supported only by the MK5000. System Requirements for Software Compatible OS Windows 11, Windows 10 (64bit/32bit), Windows 8.1 (64bit/32bit) -
Page 53: Appendix
It is used for printing characters on plates or flat tubes. have become stiff due to cold. The tube * Only the MK5000 supports printing on plates. warmer allows for clean printing even in low One each of the cleaner (blue) and plate cleaner (gray) are included. -
Page 54: List Of Function
List of Function ■ List of MK5000 Function The functions that can be set for each function key are as follows. All functions can be set using the [Settings] key. [Settings] key Connect PC connect [Connect] key *2 Bluetooth Distributed Print... - Page 55 Appendix Print Settings Half cut [Set Cut] key Full cut Plate Full cut Underline 6, 9 Center Line Delete All Text only [Del All] key Text+settings File Save [File] key Load Delete Print adjust Top position [Adjust] key Vertical Position Length Half Cut Depth Half Cut Motion...
- Page 56 ■ List of MK3000 Function The functions that can be set for each function key are as follows. All functions can be set using the [Option] key. [Option] key Connect PC connection Warmer Warmer Control Warmer Temp. Character Edit Numbering [Number.] key Symbol [Symbol] key...
- Page 57 Appendix Print adjust Top position Vertical Position Length Half Cut Depth Half Cut Motion Full Cut Depth Full Cut Motion Print density Setting Print speed Display contrast Backlight (ADPTR) Backlight (BAT) Sound Others Remove [Remove] key Cleaning Forced full cut Feed Replace cutter Auto Off (adapter)
-
Page 58: Cutter Operation Record
Cutter Operation Record We recommend that you keep a record of each cutter change. Cutter Count Date times times times times times times times times times times times times times times 4Y9-8011-020... - Page 59 CANON U.S.A., INC. One Canon Park, Melville, NY 11747, U.S.A. Website : www.usa.canon.com CANON SINGAPORE PTE. LTD. 1 Fusionopolis Place, #14-10 Galaxis, Singapore 138522 Website : asia.canon 4Y9-8011-020 CANON FINETECH NISCA INC. 2022 PRINTED IN CHINA...
Need help?
Do you have a question about the MK5000 and is the answer not in the manual?
Questions and answers