Table of Contents
Advertisement
Quick Links
Advertisement
Table of Contents

Related Manuals for Canon MK3000


Summary of Contents for Canon MK3000
- Page 1 User's Guide Precautions for safe use are described in the "Basic Operation Guide." Please read it carefully before using this product. * Please note that the contents of this manual are subject to change without notice. CANON FINETECH NISCA INC. 2022 4Y1-8640-010...
-
Page 2: Table Of Contents
Contents the Tube Warmer ............35 Before You Begin Viewing This Manual ...........1 2. Input / Edit Trademarks ................2 Basic Input Operations ......... 37 Before Input ..............37 Names of Components Entering Text ..............39 External View ..............3 Entering Symbols ............40 Inside View ................4 Deleting Characters ..........41 Tube Attachment ............5 Deleting All Characters That Have Been... - Page 3 Page Combining ............69 Printer Driver .............. 115 Connecting to a Computer (Switching to PC Connection Standby Mode) ..118 3. Print / Save Starting Up/Exiting the Program ....119 Basic Printing Operations ......72 Start up the MK Desktop Utility...... 119 Printing ................72 Exit the MK Desktop Utility.
- Page 4 Cleaning the Outside of the Printer ..... 149 List of Function ..........194 Cleaning the Inside of the Printer ....150 List of Symbols ..........196 Cleaning the Transport Roller ......152 Index ..............197 Cleaning the Print Head ........154 Cleaning/Replacing the Cleaners ....155 Replacing the Cutter ........156 Changing the Printer Settings ....160 Changing the Auto Power Off Settings...
-
Page 5: Before You Begin
Before You Begin Viewing This Manual ■ Marks WARNING Instructions that, if ignored, could result in death or serious personal injury caused by incorrect operation of the equipment. These must be observed for safe operation. CAUTION Instructions that, if ignored, could result in personal injury or material damage caused by incorrect operation of the equipment. -
Page 6: Trademarks
• Microsoft Windows 8.1 is abbreviated as “Windows 8.1” • Microsoft Windows is abbreviated as “Windows” Trademarks • Canon and the Canon logo are trademarks of Canon Inc. • Microsoft and Windows are trademarks or registered trademarks of Microsoft Corporation in the United States and/or other countries. -
Page 7: Names Of Components
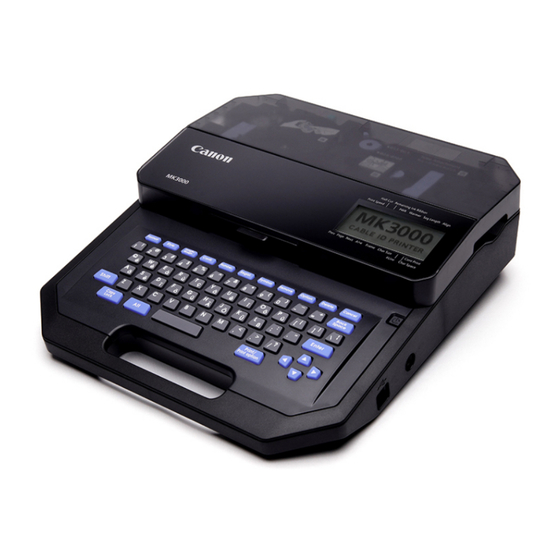
Names of Components External View ■ Top View Keyboard Cover Power key AC adapter connector USB connector (Type-B) ■ Bottom View Battery cover Battery case Rating plate * * The rating plate shows the manufacturer, model name, electrical rating, and serial number. -
Page 8: Inside View
Inside View Connector for tube warmer Transport roller 2 Attachment/Media cassette mount Transport roller 3 Media feed port (When the Connector for ribbon cassette attachment installed) Cutter Display Media delivery port Ribbon cassette mount Blade receiver Transport roller 1 Jam recovery lever Print head... -
Page 9: Tube Attachment
Tube Attachment Size switch lever Tube retainer lever Cleaner... -
Page 10: Names And Functions Of Keys
Names and Functions of Keys [Format] key Sets the page/text input orientation and the text frame. Specifi es character size, number of lines, and space between [Style] key characters. Specifi es the length of one tube (or one label), character [Length/Margin] key alignment, and margins. - Page 11 Press this key while printing to stop printing, and then stop [Cancel] key after cutting the print media. If you press and hold this key for 2 seconds or more, the printer will stop without cutting. If pressed during the operation of a function, the operation will be canceled.
-
Page 12: How To Read The Display
How to Read the Display Half Cut Remaining Ink Ribbon Print Speed PWR Warmer Seg Length Align H / H Prev Page Next Frame Char Size Cont Print #Line Char Space Indicates whether the Caps Lock mode is active. Caps Lock : Active, so all alphabetic characters are entered in uppercase. - Page 13 Indicates the remaining capacity of the ink ribbon with a mark. Remaining Ink Ribbon : The display changes every 10%. When the (Ribbon remaining) remaining capacity is low, prepare a new … ribbon cassette. (Out of ribbon) (Not displayed) : The ribbon cassette is not loaded, or the information cannot be read.
- Page 14 Displays the settings for the length (cut length) of a tube (or a label), Cut Length/ (P.55) Alignment/Margin alignment, and margin of the current page. • When using the "Automatic" cut length feature (The set value is highlighted.) Cut Length (mm) Alignment (Centered “C” ) •...
-
Page 15: Preparation/Setup
Chapter 1 Preparation/Setup Preparing the Power Supply ......................12 Connecting the AC Adapter ......................12 Use with Batteries ..........................13 Turning the Printer On/Off ......................... 15 Turning the Printer On ........................15 Turning the Printer Off ........................17 Installing the Ribbon Cassette ......................18 Loading the Print Media ........................ -
Page 16: Preparing The Power Supply
Preparing the Power Supply Connecting the AC Adapter CAUTION • Be sure to use the supplied genuine AC adapter and power cord. Connect the power cord to the AC adapter, and plug the AC adapter into the printer. Insert the power plug into a power outlet. IMPORTANT •... -
Page 17: Use With Batteries
Use with Batteries If you are outdoors or in any other place where you do not have access to a power supply, you can use the product with batteries. CAUTION • Be sure to use fully charged "eneloop AA Standard Model Batteries (Part No. : BK- 3MCCA (for North America), BK-3MCCE (for Asia). - Page 18 Put the battery cover back on. Push the battery cover in until it clicks into place, and close it completely so that there is no gap between the battery cover and the printer. IMPORTANT • If the product has batteries installed and the AC adapter is also plugged into a power outlet, the AC adapter will be given priority as the power supply.
-
Page 19: Turning The Printer On/Off
Turning the Printer On/Off Turning the Printer On Press and hold the power key for 1 second or more. When the power is turned on, the screen are " Startup display" switched in the order "Startup display">"Ribbon cassette information display">"Character input display. - Page 20 NOTE • Hide the initial delete check message You can choose not to display the screen to confi rm the deletion of data upon startup. When set to "No, " the program will start without deleting the data being edited. Press the [Option] key.
-
Page 21: Turning The Printer Off
Turning the Printer Off Press and hold the power key for 1 second or more. The "Shutting down... " message will be displayed, and then the printer will turned off . Unplug the power plug from the power outlet. CAUTION •... -
Page 22: Installing The Ribbon Cassette
Installing the Ribbon Cassette IMPORTANT "Consumable Supplies and • For more information on the ribbon cassette that can be used, refer to Options (P.192)" • Dispose the used ribbon cassette according to local government regulation. Open the cover. When replacing the ribbon cassette, remove it from the printer. - Page 23 Remove the new ribbon cassette packing material. IMPORTANT • Do not touch the IC chip on the ribbon cassette. Doing so may render the ribbon cassette information unreadable. Remove any slack in the ribbon. IMPORTANT • If the ribbon is loose, it may not operate properly.
- Page 24 Install the ribbon cassette into the printer. Push the cassette in until it clicks into the place. IMPORTANT • If the ribbon cassette is slack, it may not operate properly. Close the cover.
-
Page 25: Loading The Print Media
Loading the Print Media Loading a Tube IMPORTANT • Do not use the following types of tubes. Not only will the product not print cleanly, but use with such tubes may also cause a malfunction. - Broken - Crushed - Twisted - Uneven thickness - Soiled - Uneven... - Page 26 Open the cover. Install the attachment into the printer. Align the attachment with the slot on the printer and push it in fi rmly until it clicks into place. Set the size switch lever to match the size of the tube.
- Page 27 Insert the tube. For tubes (round) Insert the tip of the tube into the media feed port in the direction shown in the figure, and push it in until it hits transport roller 2. Transport roller 2 For and flat tubes Insert the tip of the flat tube into the media feed port in the direction shown in the...
- Page 28 from getting stuck inside the printer, use a tube of suffi cient length. • If the tube is not set correctly, this device may print onto the transport roller. Close the cover.
-
Page 29: Loading A Label Tape Cassette
Loading a Label Tape Cassette IMPORTANT • Dispose the used label tape cassette according to local government regulation. NOTE • The procedure for removing set print media from the printer, please refer to "Replacing the Print Media (P.27)" Check the condition of the cassette. If the release paper has a high spot, or the tips are not aligned, cut that portion off . - Page 30 Install the cassette into the printer. Align the cassette with the slot on the printer, and push it in fi rmly until it clicks into place. Close the cover.
-
Page 31: Replacing The Print Media
Replacing the Print Media To replace the print media installed in the printer with a diff erent one, follow the procedure below. NOTE "Print Media (P.191)" • For information on the print media that can be used with this product, refer to ■... - Page 32 For Other Print Media ■ (P.15) Turn on the power. Press the [Remove] key. The following screen will be displayed. Select "Yes" with [ ] or [ ] and press the [Enter] key. The print media will be rotated backwards. Unload print media? Unloading…...
- Page 33 Remove the attachment (or media cassette, tube warmer). When using the attachment or media cassette. While pulling the lever to the right, lift it upward to remove it. When using the tube warmer. Grasp the tube warmer while pushing its two stoppers and pull it straight upward.
- Page 34 Load the print media. "Loading a Tube (P.21)" When using a tube, refer to "Loading a Label Tape Cassette (P.25)" When using a media cassette, refer to IMPORTANT • When the print media feed is reversed, the ribbon in the ribbon cassette may become slack. If the (P.19) ribbon is slack, remove the ribbon cassette and remove the slack in the ribbon.
-
Page 35: Using The (Optional) Tube Warmer
Using the (Optional) Tube Warmer The tube warmer is an attachment that warms up tubes that have become stiff at low temperatures to make them easier to print on and feed into the printer. CAUTION • Do not leave the tube warmer heated with a tube set in it. Excessive heating of a tube may cause a fi re. - Page 36 Prepare the tube warmer. Open the cover. Set the tube warmer in place. Insert the connector of the tube warmer into the connector for the tube warmer on the printer and push down on it vertically until it clicks into place. Set the size switch lever to match the size of the tube, and set the tube.
- Page 37 Close the cover. (P.15) Turn on the printer. Check the control settings of the tube warmer. The current control settings of the warmer will be shown on the display. For information on how to control settings of "Changing the Control the warmer, refer to Setting of the Tube Warmer (P.34)"...
-
Page 38: Tube Warmer
Changing the Control Setting of the Tube Warmer Switches between tube warmer settings. Setting Details Auto Only warms the tube during printing. When printing is executed, the tube (Auto) will be warmed up to the set temperature, and then printing will start. Warms the tube except while printing. -
Page 39: The Tube Warmer
Changing the Temperature Setting of the Tube Warmer If you cannot print correctly even with the tube warmer (for example, printing is blurred), change the temperature setting of the tube warmer. The default setting is "Mid. " [Example] Printing is blurred, so set the tube warmer temperature to "High." Press the [Option] key. -
Page 40: Input / Edit
Chapter 2 Input / Edit Basic Input Operations ..........37 Setting the Cut Length Settings for All Pages..................59 Before Input .................37 Creating and Editing Pages ........60 Entering Text ...............39 Creating a New Page .............60 Entering Symbols .............40 Copying a Page ..............61 Deleting Characters ............41 Moving Pages ..............63 Deleting All Characters That Have Been... -
Page 41: Basic Input Operations
Basic Input Operations Before Input ■ About Pages This product treats the string of characters to be printed on one tube (or one label) as a single page. Press the [Enter] key to create a new page. ( Page Break) Press Press [Enter] key... - Page 42 Use [ ] or [ ] to select "Page Display" and press the [Enter] key. Page Display screen will appear on the display. O t h er s Init. DeleteCheck Press the [Shift]+[Cancel] keys to return to the Page Display character input display.
-
Page 43: Entering Text
Entering Text [Example] Input "Res7-1." Input "Res7-1. " Enter [Shift]+[R], [E], [S], [7], [-], and [1] in this order. When entering capital letters, hold down [Shift] and press the desired key. If you make a mistake, use the [Back Space] key to delete the character, and then enter the (P.41) correct character. -
Page 44: Entering Symbols
Entering Symbols You can use the input symbol function to enter symbols that cannot be entered using the keyboard. [Example] Input "Ω." Press the [Symbol] key. Use the arrow keys ([ ], [ ], [ ], [ ]) to select "Ω" from the list of symbols. The symbol screen is divided into two groups. -
Page 45: Deleting Characters
Deleting Characters There are two ways to delete a character: using the [Back Space] key. [Example] Change "27V" to "2V." Move (the cursor) to "V. " Press the [Back Space] key. The character to the left of the cursor position will be deleted. -
Page 46: Deleting All Characters That Have Been Entered
Deleting All Characters That Have Been Entered This deletes all the characters entered in the page. ( Delete All) For Delete All, select one of the following. Text only: Delete all pages of text, leaving the format setting of the last page. Text+settings: Reset the character size and other format settings to their default values, and delete text from all pages. -
Page 47: Editing Characters And Lines
Editing Characters and Lines Setting the Character Size This is how the character size is set. The character size can be selected from those below; the default value is "3 mm full-width. " 1.3 mm 2.6 mm 4 mm 200V 200V 200V full-width... - Page 48 Press the [Enter] key. The display returns to the character input display. The character size setting can be checked on the display. If you select "half-width, " the text will be displayed in half-width. NOTE • The character size can be set for each page. •...
-
Page 49: Surround Text With A Frame
Surround Text with a Frame This allows you to surround text with a frame. The default setting is "None. " Pump Room [Example] Enclosing text in a frame. Display the page where you want to change the frame settings. Press the [Format] key. Use [ ] or [ ] to select "Frame"... -
Page 50: Specifying The Orientation And Character Direction
Specifying the Orientation and Character Direction The orientation (Vert/Hor) and text direction (Vert char/Hor char) are specifi ed in the "Orientation" settings. The default setting is set to "Hor/Hor char. " Setting Details Print Image Hor/Hor char Orientation: horizontal Pump Room (Default Setting) Text direction: horizontal Orientation: vertical... - Page 51 Press the [Enter] key. The display returns to the character input display. The orientation settings can be checked on the display. NOTE • The orientation can be set for each page. • If you change the orientation, a confi rmation message will appear if any characters do not fi t within the page.
-
Page 52: Specify The Character Spacing
Specify the Character Spacing Sets the space between characters. The default setting is set to "Narrow. " Setting Details Print Image Narrow No character spacing Pump Room (Default Setting) Medium Character spacing 0.5 mm Pump Room Wide Character spacing 1.0 mm P u m p R o o m [Example] Setting the character spacing to "Wide."... -
Page 53: Specifying The Number Of Lines
Specifying the Number of Lines Sets the number of lines. The default setting is "1 Line. " Setting Details Print Image 1 Line (Default Setting) Input in one line 2 Lines Input in two lines [Example] 2 line input. Display the page where you want to change the number of lines. Press the [Style] key. - Page 54 • You may not be able to select "2 Lines" depending on the selected character size. • No error message will be displayed even if the print data extends beyond the width (top and bottom) of the print media. It is recommended that you refer to the preview to make sure that no characters are (P.76) missing before printing.
-
Page 55: Numbering
Numbering You can print a fi xed string of characters with a sequential number or letter of the alphabet. The possible numbering settings are as follows. Setting Set range Print Image Decimal 0 to 999 Pump Room 1 Pump Room 2 Pump Room 3 Hexadecimal 0 to FFF... - Page 56 Use [ ] or [ ] to select "End value" and enter "10. " Decimal Settings Start value: 1 End value : 10 [ 0 to 999 ] Press the [Enter] key. You will then be returned to the padding character settings screen. Use [ ] or [ ] to select "None.
- Page 57 • The settings for padding characters are as follows. Setting Details Print Image None No padding characters. Pump Room 8 Pump Room 9 Pump Room 10 A leading "0" will be entered as a Zero Pump Room 08 Pump Room 09 Pump Room 10 padding character.
-
Page 58: Underline 6, 9
Underline 6, 9 The numbers 6 and 9 can be underlined to distinguish them from each other. The default setting is "Off . " 9 6 Press the [Option] key. Use [ ] or [ ] to select "Print Settings" and press the [Enter] key. O p t io n Pa g e S e t t i n g s Pr i n t S e t t i n g s... -
Page 59: Setting The Cut Length
Setting the Cut Length About Cut Length The length of one tube (or one label) is called the " Cut Length. " The default setting is "Automatic. " Pump Room Cut length Setting Details Print Image Automatically sets and prints the optimal cut length based on the number of characters entered, Automatic... -
Page 60: Specify The Cut Length And Alignment
Specify the Cut Length and Alignment This is how the cut length and alignment are set. If you set the cut length to "Specify, " you can change the alignment. The default setting for alignment is set to "Centered. " Setting Details Print Image... - Page 61 [Example] Creating a tube as follows. Margin (5 mm) Alignment (Left) Pump Room Cut length (40 mm) Press the [Length/Margin] key. Use [ ] or [ ] to select "Cut Length, " and press the [Enter] key. Cut Length Cut Length Alignment Batch Setting Use [ ] or [ ] to select "Specify, "...
- Page 62 Use [ ] or [ ] to select "Left" and enter "5" (margin). The value can be set by entering numbers or Alignment Centered using arrow keys ([ Left : 5㎜ [2 to 5] Right : 5㎜ [2 to 5] Press the [Enter] key. The display returns to the character input display.
-
Page 63: Setting The Cut Length Settings For All Pages
Setting the Cut Length Settings for All Pages. You can set the Cut Length settings (Cut Length and Alignment) for all pages at once. Press the [Length/Margin] key. Use [ ] or [ ] to select " Batch Setting, " and press the [Enter] key. The cut length setting screen will appear. -
Page 64: Creating And Editing Pages
Creating and Editing Pages Creating a New Page To create a new page, press the [Enter] key. (Page Break) [Example] Create a new page after the currently displayed page. 200V (Page 1) 200V (Page 1) (Page 2) Move the cursor to the end of the line. Press the [Enter] key. -
Page 65: Copying A Page
Copying a Page You can copy the page where you have entered text and paste it before or after another page. [Example] Copy the fi rst page and paste it after the second page. Pump 200V Room (Page 1) (Page 2) (Page 3) Pump 200V... - Page 66 Use [ ] or [ ] to select "Yes" and press the [Enter] key. The fi rst page will be copied and you will be Copy data of page returned to the character input display. Press the [Option] key. Use [ ] or [ ] to select "Page Edit" and press the [Enter] key. O p t io n Wa r m e r C h a r a c t e r E d i t...
-
Page 67: Moving Pages
Moving Pages Cut the page on which you have entered text and paste it before or after another page. [Example] Cut the second page and paste it after the third page. Pump 200V Room (Page 1) (Page 2) (Page 3) Pump Pump 200V... - Page 68 Use [ ] or [ ] to select "Yes" and press the [Enter] key. The second page will be cut and you will be Cut data of page returned to the character input display. Press the [Option] key. Use [ ] or [ ] to select "Page Edit" and press the [Enter] key. O p t io n Wa r m e r C h a r a c t e r E d i t...
-
Page 69: Inserting A Page
Inserting a Page Inserts a blank page at the specifi ed location. [Example] Insert a new blank page between the fi rst and second pages. Pump 200V Room (Page 1) (Page 2) (Page 3) Pump 200V Room (Page 1) (Page 2) (Page 3) (Page 4) Display the page at the position where you want to insert a blank page (page... -
Page 70: Delete A Page
Delete a Page Deletes a specifi ed page. When you delete a page, the data entered on that page will also be deleted. [Example] Deleting the second page. Pump 200V Room (Page 1) (Page 2) (Page 3) Pump 200V Room (Page 1) (Page 2) Display the page you want to delete (page 2). -
Page 71: Page Division
Page Division You can divide the data which is entered two lines in one page into two pages. [Example] Page division of page 3. Display the page to be divided (page 3). Press the [Option] key. Use [ ] or [ ] to select "Page Edit" and press the [Enter] key. O p t io n Wa r m e r C h a r a c t e r E d i t... - Page 72 Use [ ] or [ ] to enter "1" (for page) and press the [Enter] key. The second line of the third page will be How many pages do you divide from the created as the fourth page, and you will be current page? returned to the character input display.
-
Page 73: Page Combining
Page Combining You can combine two pages of data into two lines on one page. [Example] Combine pages 3 to 6. Display the page you wish to make into a combined one (page 3). Press the [Option] key. Use [ ] or [ ] to select "Page Edit" and press the [Enter] key. O p t io n Wa r m e r C h a r a c t e r E d i t... - Page 74 Use [ ] or [ ] to enter "4" (page) and press the [Enter] key. Pages 3 to 6 will be combined and you will How many pages do you combine from the be returned to the character input display. current page? Page count: Combining pages...
-
Page 75: Print / Save
Chapter 3 Print / Save Basic Printing Operations ........................72 Printing ................................72 Checking the Print Preview ......................76 Printing by Specifying a Print Range ..................77 Setting Up Repeat Printing of a Page ..................79 Adjustment of Printing Results ......................80 Fine Adjustment of Print Position and Cut Length ............80 Changing the Print Density ......................86 Changing the Print Speed .......................87 Cutter Settings ............................ -
Page 76: Basic Printing Operations
Basic Printing Operations Printing After you have fi nished entering and editing text, you can print. [Example] Print two tubes as shown below (using ø4.0 mm tubes). Pump Room Display the data to be printed, and press the [Print] key. Use [ ] to select "Set to print"... - Page 77 Use [ ] or [ ] to select "ø4.0mm, " and then press the [Enter] key. You will then be returned to the printing T u b e siz e 2. 5 preference display. 3. 0 IMPORTANT • In the following cases, the printer will not be able to detect that the tube has run out during printing, and may print on the transport roller.
- Page 78 Use [ ] or [ ] to select "Print head" and press [Enter] key. Media Head Position Printing will be started. Cutter Print head IMPORTANT • Check the head position of the loaded print media, then select "Cutter" or "Print head. " Select "Print head"...
- Page 79 • Do not pull the tube or label tape forcibly during printing. Doing so may result in printing failure or malfunction. NOTE • To cancel printing, press the [Cancel] key. The printer will stop printing and cut the print media, then stop.
-
Page 80: Checking The Print Preview
Checking the Print Preview Before printing, you can check the print preview on the display. Display the data to be printed, and press the [Print] key. Use [ ] to select Preview, and then press the [Enter] key. The print preview will be displayed, fl owing from Pr in t P re vie w S e t s t o p r i n t : 1... -
Page 81: Printing By Specifying A Print Range
Printing by Specifying a Print Range You can specify a specifi c page or range to print. The default setting for the print range is set to "All pages. " Setting Details All pages Prints all pages. (Default Setting) Cursor page Prints only the currently displayed page. - Page 82 Use [ ] or [ ] to select "Start page" and enter [2]. Use the numeric keys or the arrow keys Print /Preview Range : Specified ]) to enter the data. Start page : 2 End page : 2 Use [ ] or [ ] to select "End page" and enter [4]. Use the numeric keys or the arrow keys Print /Preview...
-
Page 83: Setting Up Repeat Printing Of A Page
Setting Up Repeat Printing of a Page If you want to set up repeat printing for a page, enter the number of times in "Continuous Print. " For Continuous Print, you can set the number of prints from 2 to 200 per page. [Example] Print the second page three times. -
Page 84: Adjustment Of Printing Results
Adjustment of Printing Results Fine Adjustment of Print Position and Cut Length Depending on your print media and the environment, the print position may be shifted or cut length may be diff erent from the setting. If you cannot get the result you expected even after setting the cut length and margins, fi ne-tune the print position and cut length. - Page 85 Fine-tuning of the Print Start Position ( Top Adjust) ■ [Example] When printing on a tube in the "Centered" position, the text is shifted to the left, so move the print start position 2.0 mm to the right. ABCD ABCD Move the print start position 2.0 mm to the right.
- Page 86 Fine-tuning the Print Position in the Vertical Direction ( Vertical ■ Adjust) [Example] When printing on a tube (ø6.0 mm), the print position is shifted upward, so move the print position downward by 0.5 mm. ABCD Move the print position ABCD downward by 0.5 mm.
- Page 87 Use [ ] to display "Down 0.5 mm" and press the [Enter] key. Use [ ] (upward)/[ ] (downward) to enter the Vertical adjust adjust value. Down 0. 5 ] You can adjust the range from 1.0 mm upward to 1.0 mm downward in 0.1 mm increments. Press the [Shift]+[Cancel] keys.
- Page 88 Fine-tuning the Cut Length ( Length Adjust) ■ [Example] When printing on a tube with a cut length of "30 mm," the tube is printed shorter than the setting, so the cut length is increased by 2 mm. ABCD The cut length is increased by 2mm. Press the [Option] key.
- Page 89 Press the [Shift]+[Cancel] keys. The display returns to the character input display. IMPORTANT • No further adjust in the negative direction will be applied when there is no more space for adjust (other than characters) or when the minimum cut length or less is reached. For the minimum cut length of "Specifi cations (P.189)"...
-
Page 90: Changing The Print Density
Changing the Print Density Depending on the print media you are using and the environment, the printing may be too light or too dark. In such cases, adjust the print density. The density can be set for each print media. The default setting is "3. " [Example] Adjust the print density of the tube so that it is the darkest. -
Page 91: Changing The Print Speed
Changing the Print Speed If printing is blurred or uneven, adjust the print speed. The default setting is "High. " [Example] Setting the speed to "Low" because the text is blurred. Press the [Option] key. Use [ ] or [ ] to select "Setting, " and press the [Enter] key. O p t io n P r int ad ju s t S e t tin g... -
Page 92: Cutter Settings
Cutter Settings Changing the Set Cut This product automatically cuts the print media when printing is fi nished. (Full cut) In addition, a half cut is made between the tubes and labels after printing, so that you can cut the tubes by hand or cleanly peel off labels from release paper. - Page 93 [Example] Printing a cut line (Dotted) without a half cut. Press the [Option] key. Use [ ] or [ ] to select "Print Settings" and press the [Enter] key. O p t io n Pa g e S e t t i n g s Pr i n t S e t t i n g s D e l e t e A l l Use [ ] or [ ] to select "Half Cut"...
- Page 94 Changing the Full Cut Settings ■ The default setting is "End only. " Setting Details Print Preview End only Cuts the print Full cut (Default media at the end Pump Room Pump Room Setting) of printing. Full cut Full cut Pump Room Pump Room Cuts match the...
-
Page 95: Adjusting The Cutter Depth
Adjusting the Cut Depth If the cutter blade is becoming less sharp or half cutting is too deep, adjust the depth of the cut. Adjustment can be set for both "Half cut" and "Full cut. " ■ Changing the Cut Depth for Half Cut The cut depth for half cut can be set for each print media. - Page 96 Use [ ] or [ ] to select the half cut depth adjustment value, and press the [Enter] key. The Half Cut Depth can be set in 11 levels: H al f C u t D ep th "Deep (1-5), " "Normal, " and "Shallow (1-5). " Each time you press [ ], the cut is deepened by Deep 1 one step.
- Page 97 Changing the Cut Depth for Full Cut ■ The cut depth for the full cut can be set for each print media. The default setting is set to "Normal. " [Example] The full cut of the tube is not cut properly, so make the cut one step deeper. Press the [Option] key.
- Page 98 Press the [Shift]+[Cancel] keys. The display returns to the character input display. IMPORTANT • If you make the cut depth deeper than necessary, the cutter and blade receiver will wear out quickly.
-
Page 99: Using Forced Full Cut
Using Forced Full Cut If the situation is not improved after adjusting the cut depth for full cut, use "Forced full cut. " With Forced full cut, the cut is made to the deepest point. If the situation is not improved even after using Forced full cut, replace the cutter. -
Page 100: Adjusting The Cutter Motion
Adjusting the Cut Motion If it does not cut well when you change the print media, adjust the motion of the cut. Adjustment can be set for both "Half cut" and "Full cut. " NOTE (P.91) • If the cutter blade is becoming less sharp, adjust the depth of the cut. Changing the Motion of the Half Cut ■... - Page 101 Use [ ] to select "Intense" and press the [Enter] key. You can set the Half Cut Motion in two levels, H al f C u t M o t io n "Normal" and "Intense. " Normal Intense Press the [Shift]+[Cancel] keys. The display returns to the character input display.
- Page 102 Changing the Cutting Motion of Full Cut ■ You can set the motion of the full cut for each print media. The default setting is set to "Normal. " [Example] The tube is not cut properly when using a full cut, so make the cut stronger. Press the [Option] key.
-
Page 103: Saving And Loading Text Data
Saving and Loading Text Data Saving a File You can save the text data you have created as a "File" in the device. In addition, the product comes with 10 pre-made "folders, " and each folder can hold up to 99 fi les. Pump 200V Room... - Page 104 Enter "A-1" (fi le name), and then press the [Enter] key. You can enter up to 8 characters for the fi le Input file name name. A−1 Select "Yes" with [ ] or [ ] and press [Enter] key. The "Saving... " message will be displayed, and Save as A−1 then the display returns to the character input...
-
Page 105: Loading A File
Loading a File There are two types of loading for saved fi les: "New" and "Add. " Depending on the selected mode, the data will be loaded as follows. Setting Item Details Text only Only the data currently being edited will be erased and replaced with the loaded data. - Page 106 Use [ ] or [ ] to select "Add" and press the [Enter] key. Load N e w A d d Use [ ] or [ ] to select "Text+settings" and press the [Enter] key. A d d T e xt o n l y T e xt+s et t in gs Use [ ] or [ ] to select "Folder 1"...
-
Page 107: Deleting A File
Deleting a File This is how to delete a saved fi le. Select one of the following options for fi le deletion. One fi le: Deletes only one fi le in the folder. Folder contents: Deletes all the fi les in the folder. All fi les: Deletes all fi les in all folders. - Page 108 Use [ ] or [ ] to select "A-1" and press the [Enter] key. S e l e c t Fil e A−1 A−2 A−3 Select "Yes" with [ ] or [ ] and press the [Enter] key. The "Deleting... " message will be displayed, and Delete then the display returns to the character input A−1...
-
Page 109: Changing The Folder Name
Changing the Folder Name This is how to change the name of a folder. The product comes with 10 folders ("Folder 1" to "Folder 10"). [Example] Rename "Folder 1" to "Pump." Press the [Regist.] key. Use [ ] or [ ] to select "Save, " and press the [Enter] key. File S ave Lo a d... - Page 110 Press the [Shift]+[Cancel] keys. The display returns to the character input display. NOTE "Basic Input Operations (P.37)" • For more information on character input, refer to • To return the changed folder name to the original fi le name ("Folder 1" to "Folder 10"), press the [Back Space] key in step 4 above to erase all characters, and then press the [Enter] key.
-
Page 111: Print Using A Computer
Chapter 4 Print Using a Computer Installing the Software ..........108 Print ..................138 Install the MK Desktop Utility and Printer Printing ................138 driver ..................108 View the Status Monitor ..........144 Uninstalling the MK Desktop Utility and View Settings for the Status Monitor ....144 Printer Driver ..............115 View Printer Status ............146 Connecting to a Computer (Switching to... -
Page 112: Installing The Software
• If the printer and computer are connected with a USB cable, unplug the connected USB cable. Download the software on the computer. Connect to the internet from a computer and access the following Canon website. - Users in the U.S.A https://www.usa.canon.com/internet/ portal/us/home/support/ - Users in the South &... - Page 113 Select the model, and then click [OK]. Select the installation type, and then click [Installation]. When installing either the MK Desktop Utility or the printer driver, select "Custom. " When you click [Installation], the screen for starting the installation of the MK Desktop Utility will appear.
- Page 114 Read the license agreement carefully, select [I accept the terms of the license agreement], and then click [Next]. The license agreement for the MK Desktop Utility is displayed. Select the destination folder. If you want to install the software in the displayed folder, click [Next].
- Page 115 Click [Finish]. The installation of "MK Desktop Utility" is completed. When you click [Finish], the printer driver installation start screen appears. Click [Next]. Read the license agreement carefully, and then select [I accept the terms of the license agreement] and click [Next]. The license agreement for the printer driver is displayed.
- Page 116 Click [Install]. NOTE • If the Windows Security screen appears, check the box for "Always trust software from CANON FINETECH NISCA INC. " and click [Install]. Click [OK]. Select [Yes, I want to restart my computer now.] and click [Finish].
- Page 117 After restarting the computer, connect the printer to the computer with the USB cable. (P.15) Turn on the printer. Press the [Option] key. Use [ ] or [ ] to select "Connect" and press the [Enter] key. The message "Standby... " will be displayed, and O p tio n Co n n ec t the printer will switch to the PC connection...
- Page 118 Open the printer folder and confi rm that the printer icon is displayed. For Windows 11: Select [Start] > [All apps] > [Windows Tools] > [Control Panel] > [Hardware and Sound] > [Devices and Printers]. For Windows 10: Select [Start] > [Windows System Tools] > [Control Panel] >...
-
Page 119: Uninstalling The Mk Desktop Utility And Printer Driver
Uninstalling the MK Desktop Utility and Printer Driver This will uninstall the "MK Desktop Utility" application software and the printer driver. This section explains how to uninstall the "MK Desktop Utility" application software and the printer driver at the same time. Disconnect the USB cable. - Page 120 Click [Finish]. The uninstallation of "MK Desktop Utility" is completed. Select "Canon MK3000 Printer Driver" from the list, and then click [Uninstall]. A confi rmation message will appear. NOTE • User Account Control may be displayed. If it appears, click [Yes].
- Page 121 Click [Yes]. Select "Yes, I will restart my computer now. " and click [Finish]. The uninstallation of the printer driver is completed. The uninstallation of the "MK Desktop Utility" application software and the printer driver is complete.
-
Page 122: Connecting To A Computer
Connecting to a Computer (Switching to PC Connection Standby Mode) To print from your computer, switch the product into the PC connection standby mode. Connect the printer to the PC with the USB cable. Turn on the printer. (P.15) Press the [Option] key. Use [ ] or [ ] to select "Connect"... -
Page 123: Starting Up/Exiting The Program
Starting Up/Exiting the Program Start up the MK Desktop Utility. Double-click the [MK Desktop Utility] shortcut icon on the desktop. Once launched, the main screen will be displayed. You can also start the program in the following way. For Windows 11: Start menu >... -
Page 124: Exit The Mk Desktop Utility
Exit the MK Desktop Utility. Click the (Close) button in the upper right corner of the main window. Alternatively, click [Exit] on the [File] menu. -
Page 125: Screen Confi Guration
Screen Confi guration Main Screen The main screen of the MK Desktop Utility is organized as follows. For more information, refer to "Menu Bar (P.122)" Menu bar For more information, refer to "Toolbar (P.124)" Toolbar There is a Data Toolbar, a Send Toolbar and an Edit Toolbar. Displays the formatting information for the selected page. -
Page 126: Menu Bar
Menu Bar The menu bar displays the functions of the MK Desktop Utility. Click on a menu to display a drop-down list of submenus. NOTE • Functions not supported by this printer are displayed in light gray. ■ [File] menu (P.125) Creates a new data list. - Page 127 Send page selection Add or remove check marks from multiple pages at once. Page Cut Cut the specifi ed page and paste it to the clipboard. Page Copy Copy the contents of the specifi ed page to the clipboard. Page Paste Pastes the contents of the clipboard to the front of the specifi ed page.
-
Page 128: Toolbar
Toolbar The toolbar displays frequently used menus as buttons. Data Toolbar (P.125) (New) Creates a new data list. (P.126) Open an existing fi le or CSV fi le to load data. (Open) (P.131) (Save) Overwrite and save the data currently being edited. Send Toolbar (Print) Print the data currently being edited. -
Page 129: Working With Files
Working with Files Creating a New File Click (New). Or, you can select [New] from the [File] menu. A new fi le will be created. NOTE • For more information on entering and editing data, refer to "Input and Edit (P.132)" •... -
Page 130: Opening A File
Opening a File The fi le formats that can be opened with MK Desktop Utility are as follows. • MK Desktop Utility File (*.md5) "Opening a File Created with this Software (P.126)" For more information, refer to • Conventional Application File (*.md4; *.md3; *.md2; *.MTD) "Opening a File Created with a Conventional For more information, refer to Application (P.127)"... - Page 131 Opening a File Created with a Conventional Application ■ Click (Open). Or, select [Open] from the [File] menu. Select "Conventional Application File (*.md4; *.md3; *.md2; *.MTD)" for the fi le type. Select a fi le in the conventional application fi le (*.md4; *.md3; *.md2; *.MTD) and click [Open].
- Page 132 Opening a CSV fi le ■ When a CSV fi le is opened in the MK Desktop Utility, it will be loaded into the data list under the following conditions. Row 1: Text data of 1st line 1st page Row 2: Text data of 2nd line 2nd page Invalid data 3rd page...
- Page 133 Select a fi le in CSV File (*.CSV) and click [Open]. The specifi ed fi le will open and be displayed in the data list. When you open the fi le, the "Read Format Selection" dialog box will appear. Set the format, and then click [OK]. For details on format setting, refer to "Confi gure the Format Setting (P.133)"...
-
Page 134: Load Additional Data
Load Additional Data The contents of the specifi ed fi le can be additionally loaded at the end of the data list being edited. Select [Add] from the [File] menu. Select the fi le to be loaded and click [Open]. The data of the specifi ed fi le will be added to the end of the data list being edited. -
Page 135: Saving A File
Saving a File ■ To Overwrite and Save the File You Are Editing Click (Save). Or, select [Save] from the [File] menu. The fi le will be saved. NOTE • When saving a new fi le, the [Save As] dialog box will appear. For details on how to set this up, refer to "Saving a fi le as a new name (P.131)"... -
Page 136: Input And Edit
Input and Edit Entering Text Enter text in the data list. Click (or double-click) on the location where you want to enter text. Enter the text and then press the [Enter] key (or click on another position). NOTE • You may not be able to enter text depending on the format setting, such as when a set length is "Confi gure the Format Setting (P.133)"... -
Page 137: Configure The Format Setting
Confi gure the Format Setting Change the character size, number of lines, and other format setting. (P.126) Open the fi le. Select the print media and media size to specify the set length. Since the range of set length that can be specifi ed varies depending on the print media, set the "Print Media"... - Page 138 Click (Setting). Or, from the [Edit] menu, select [Format Setting], then [Page Setting]. Format setting can also be selected from the menu that appears by right-clicking on the data list. Set each item. [Orientation] The orientation (Vert/Hor) and text direction (Vert char/Hor char) are specifi ed in the "Orientation"...
- Page 139 [Alignment] If you set the set length to "Specify, " you can change the alignment. The default setting for alignment is set to "Centered. " For print image, refer to "Specify the Cut Length and Alignment (P.56)" [Character Size] Sets the character size. The default setting is "3 mm Norm. " When printing from the MK Desktop Utility, the character size cannot be set to "1.3 mm Norm.
-
Page 140: Numbering
Numbering Automatically create pages by assigning consecutive numbering or letters to a fi xed string of characters. The possible numbering settings are as follows. Setting Set range Decimal 0 to 999 Hexadecimal 0 to FFF Upper case letter A to Z Lower case letter a to z [Example] Create a page for "Pump Room 1"... - Page 141 Set each item. In this section, we will use the following settings. Mode: Decimal Start value: 1 End value: 10 Padding Character: None NOTE • If you want to set numbering in descending order, such as "10 to 1, " enter "10" for the "Start value" and "1"...
-
Page 142: Print
Print Printing After entering text and creating a data list, start printing. Connect the printer to the PC with a USB cable, and switch the printer to PC (P.118) connection standby mode. Confi rm that "Standby... " appears on the P C Co nne c t printer's display. - Page 143 Select the print media and media size. When you change the print media and media size, the settings will be refl ected in the preview area display. NOTE • Except for labels, the minimum set length is 8 mm. If there are pages of 8 mm or less in the data list and the print media is changed to one other than label, a message to change the set length to 8 mm will be displayed.
- Page 144 Place a check mark in the [Send] box of the page you want to print. To add or remove check marks from multiple pages at once, make the settings from [Send page selection] in the [Edit] menu. To select pages, do one of the following. - When selecting multiple pages in a row: Click on the start point to select it, then click on the end point while holding down [Shift]...
- Page 145 Specify the transfer mode. Select either [Overwrite internal memory] or [Add to internal memory] as the transfer mode. The data just sent to the printer will be retained on the printer’s character input display even after printing (or saving) is completed. [Overwrite internal memory] [Example] Select this option when you want to print the...
- Page 146 [Add to internal memory] Select this option when you want to add the [Example] data you entered in step 6 to the data stored in the printer and print it. The additional data will 0001 be added after the last page of the data in the (Page 1) printer.
- Page 147 Click [OK]. After the data is created on the printer's character input display as per the transfer mode used, printing will begin. Also, the data on the character input display will be retained after printing is completed. NOTE • If the message "Unable to open printer. " appears, confi rm the following.
-
Page 148: View The Status Monitor
View the Status Monitor The status monitor starts automatically when printing starts and displays the printer status and remaining ink ribbon level. View Settings for the Status Monitor Set to show or hide the status monitor. The default setting is "Use the Status Monitor. " Select [Start] >... - Page 149 Graphics sheets. Any changes to the settings will not be refl ected in the printing from the MK Desktop Utility. NOTE • Click [Version...] to check the printer driver version, copyright, and other information.
-
Page 150: View Printer Status
View Printer Status Displays a message informing you of the current printer status. Status Displays the type of ribbon cassette. There are three types: "White 85m, " Ribbon type "Black 150m, " and "Black 40m compatible with plate. " Displays the approximate remaining amount of ink ribbon. (There Ribbon remaining may be a slight diff erence from the actual remaining amount.) If the... -
Page 151: List Of Message
List of Message If a problem occurs while connected to the printer, an error message or warning message will be displayed on the status monitor. Read the message, and follow the corresponding procedure. Message Solution Low ribbon level The ribbon is running low. Prepare a new ribbon cassette. "Battery is running low. -
Page 152: Maintenance/Printer Settings
Chapter 5 Maintenance/Printer Settings Cleaning the Printer ..........................149 Cleaning the Outside of the Printer ..................149 Cleaning the Inside of the Printer ....................150 Cleaning the Transport Roller .....................152 Cleaning the Print Head ........................154 Cleaning/Replacing the Cleaners ....................155 Replacing the Cutter ..........................156 Changing the Printer Settings ......................160 Changing the Auto Power Off Settings (Adapter/Battery) ........160 Changing the Display Settings ....................162... -
Page 153: Cleaning The Printer
Cleaning the Printer Cleaning the Outside of the Printer Wipe the surface of the printer periodically to keep it clean. WARNING • Before cleaning, be sure to turn off the power and unplug the power supply. Also, remove the batteries from the printer. Doing so may result in fi re or electric shock. •... -
Page 154: Cleaning The Inside Of The Printer
Cleaning the Inside of the Printer If the inside of the printer is dirty, the print media may become dirty or dust may enter the unit, causing printing defects. Wipe it regularly to keep it clean. WARNING • Before cleaning, be sure to turn off the power and unplug the power supply. Also, remove the batteries from the printer. - Page 155 Wipe the inside of the printer. Wipe the printer with a cloth moistened with water and wrung out tightly. Use a lint- free cloth. Allow the water to dry completely before proceeding to the next step. IMPORTANT • Do not touch the ink ribbon connector, print head, or connector for tube warmer inside the Connector for printer.
-
Page 156: Cleaning The Transport Roller
Cleaning the Transport Roller If printing is not clear or the print media cannot be fed properly, the transport roller may be dirty. We recommend cleaning the rollers about once a month. WARNING • Do not use alcohol, thinner, or other fl ammable solvents to clean the unit. Doing so may result in fi re or electric shock. - Page 157 Open the cover. When the cover is opened, instructions will be displayed on the screen. Cle a ni ng m od e Af te r cl e a ni ng , cl o se s a f e ty c o v e r. Wipe off any dirt on the transport roller 1, 2 and 3 with a cloth moistened with water and wrung out tightly.
-
Page 158: Cleaning The Print Head
Cleaning the Print Head If printing is not clear or white streaks appear, the print head may be dirty. We recommend cleaning the print head about once a month. WARNING • Before cleaning, be sure to turn off the power and unplug the power supply. Also, remove the batteries from the printer. -
Page 159: Cleaning/Replacing The Cleaners
Cleaning/Replacing the Cleaners The tube attachment, (optional) tube warmer, and (optional) plate and fl at tube attachment are equipped with a cleaner to remove dirt from the surface of the print media. Remove the cleaner as shown in the fi gure, and then remove the dirt from the sponge. If the sponge is damaged, replace the entire cleaner. -
Page 160: Replacing The Cutter
Replacing the Cutter If the tube or label tape does not cut properly even after adjusting the depth and motion of the cutter, replace the cutter. Also, when replacing the cutter, replace the blade receiver at the same time. CAUTION •... - Page 161 (P.17) Turn off the power. Open the cover. Remove the cutter. Insert the new cutter. Paying attention to its orientation, insert the new cutter until it hits the back of the cutter bay.
- Page 162 Remove the blade receiver. Insert the new blade receiver. Close the cover. (P.15) Turn on the power. Press the [Option] key.
- Page 163 Use [ ] or [ ] to select "Others, " and then press the [Enter] key. O p tio n Pr in t a d j u st S e tt in g O t he r s Use [ ] or [ ] to select "Counter, " and then press the [Enter] key. O the rs Init.
-
Page 164: Changing The Printer Settings
Changing the Printer Settings Changing the Auto Power Off Settings (Adapter/Battery) Change the amount of time that the unit will automatically turn off after a certain period of inactivity. The auto power off setting can be set for each power source used, and the default setting for both is "30 min. - Page 165 Press the [Shift]+[Cancel] keys. The display returns to the character input display. IMPORTANT • In the following cases, the automatic power off function will not work. - When an error has occurred. - When the cover is open. • The time will be reset when you switch the power source used. •...
-
Page 166: Changing The Display Settings
Changing the Display Settings You can change the contrast and brightness of the display. Adjusting the Display Contrast ■ The default setting of the display contrast is set to "5. " Press the [Option] key. Use [ ] or [ ] to select "Setting, " and press the [Enter] key. O p t io n P r int ad ju s t S e t tin g... - Page 167 Adjusting the Brightness of the Backlight (Adapter/Battery) ■ The backlight brightness can be set for each power source used, with the default setting being "4" when using the AC adapter and "1" when using batteries. Press the [Option] key. Use [ ] or [ ] to select "Setting, " and press the [Enter] key. O p t io n P r int ad ju s t S e t tin g...
- Page 168 Changing the Automatic Backlight Off Setting ■ Change the time for the display backlight to automatically turn off after a certain period of inactivity. The default setting is "5 min. " Press the [Option] key. Use [ ] or [ ] to select "Others, " and then press the [Enter] key. O p t io n P r int ad j us t S e t t ing...
-
Page 169: Turning Off Sounds
Turning Off Sounds Turns off the key operation sounds and warning sounds. The default setting for the sound is "On. " Press the [Option] key. Use [ ] or [ ] to select "Setting, " and press the [Enter] key. O p t io n P r int ad ju s t S e t tin g... -
Page 170: Initializing This Printer
Initializing this Printer Restores all settings to their original settings. (Initializes the printer) IMPORTANT • The all current data and saved fi les will be erased when initialized. Erased data and fi les cannot be restored. (P.17) Turn off the power. While pressing the [Delete] key, press and hold the power key for at least one second. -
Page 171: Troubleshooting
Chapter 6 Troubleshooting If a Tube or Label Tape Becomes Jammed ................168 What to Do in Case of Trouble .......................173 A Message is Coming Up ........................180 Updating the Firmware ........................185 Checking the Firmware Version ....................185 Running the Firmware Update ....................186... -
Page 172: If A Tube Or Label Tape Becomes Jammed
If a Tube or Label Tape Becomes Jammed If the print media gets jammed inside the printer, a "Feed error" message will be displayed on the display and printing will be canceled. Follow the procedure below to remove the print media. Feed error Media is jammed in the feeding path. - Page 173 Remove the ribbon cassette. If the ribbon is wound around the cassette and cannot be removed, do not remove it forcibly, and proceed to step 4. Press any key. While pushing the After pressing a key, instructions will be Jam recovery lever, displayed on the screen.
- Page 174 After removing the print media (or cassette), press any key. Set the ribbon After pressing a key, instructions will be cassette and close displayed on the screen. the cover. Remove any slack in the ribbon. IMPORTANT • If the ribbon is loose, it may not operate properly. Replace the ribbon cassette and close the cover.
- Page 175 Cut out the bent or damaged portion of the jammed print media or the printed portion of the print media if it exists. (P.21) Reload the print media. NOTE • Using the feed function to remove the print media If the tube or label tape is in a position where it cannot be removed by hand, use the feed function. However, if you continue to feed with the feed function, it may damage the print media or the ribbon in the ribbon cassette might get rolled up, causing it to jam.
- Page 176 Use [ ] (Forward) or [ ] (Reverse) to feed the print media to the desired position. As long as you keep pressing [ Fe ed or [ ], it will be fed forward or For w ar d : backward continuously.
-
Page 177: What To Do In Case Of Trouble
What to Do in Case of Trouble Problem Cause/Things to Check Solution The power does not turn Check that the AC adapter After confi rming that the AC and power cord are properly adapter and power cord are connected. connected, insert the power plug fi rmly into the power outlet. - Page 178 Problem Cause/Things to Check Solution The device does not print Is the type and size of the print Check the loaded print media clearly. media selected in the print and set the print media type settings the same as the print and size correctly.
- Page 179 "Maximum Printable (Continued from previous No error message will be Refer to Character Size (P.44)" page) displayed even if the print data extends beyond the width of for information on setting the The device does not print the print media. character size and frame.
- Page 180 (Continued from previous Is the operating environment For information concerning the page) appropriate? operating environment, refer to "Specifi cations (P.189)" The device does not print If you use a tube warmer clearly. (optional), you can print at The printing is external temperatures as low as misaligned.
- Page 181 Problem Cause/Things to Check Solution Characters are squashed Are you printing small or Adjust the print density. (P.86) or blurred. complicated characters? The surface of the print Ink may stick to the ribbon due Use a dry cloth to wipe off any media is dirty after to the top of the print media dirt on the print media.
- Page 182 Problem Cause/Things to Check Solution The print media cannot Is there any load on the tube Place the printer and the print be fed properly. transport? media on the same table (or at the same vertical position) so that no load is applied to the transport.
- Page 183 Problem Cause/Things to Check Solution The device cannot make Are the cutter and blade Refer to "Replacing the Cutter (P.156)" full cuts. receiver set correctly? information on how to set The device cannot make the cutter and blade receiver half cuts. correctly.
-
Page 184: A Message Is Coming Up
A Message is Coming Up If a problem occurs during operation of or printing using product, an error message will be displayed on the display. Read the message, and follow the corresponding procedure. Message Details/Solution Input value is out of the Enter a value within the setting range. - Page 185 Message Details/Solution 99 fi les already exists in 1 A maximum of 99 fi les can be saved in one folder. Delete selected folder. unnecessary fi les before saving, or save them in a diff erent folder. Exceeded character The character count limit for the specifi ed cut length has been (P.55) exceeded.
- Page 186 Message Details/Solution Replace print media. Load a new print media and press the [Enter] key to resume (P.21) printing. End of ribbon. Replace the ribbon cassette with a new one and press the [Enter] key to resume printing from the interrupted page. Replace ribbon cassette.
- Page 187 Message Details/Solution Feed error The print media jammed during printing. Follow the instructions on the screen to remove the jammed print Media is jammed in the media. (P.168) feeding path. No ribbon information. Information could not be read from the IC chip in the ribbon Ribbon remaining amount cassette.
- Page 188 Message Details/Solution (P.189) Exceeding Memory There is insuffi cient memory to receive text. Capacity. Reduce the number of characters and send the data again. Reduce the data size and resend. Loading data exceeds the When a fi le with text exceeding the cut length is inserted cut length.
-
Page 189: Updating The Firmware
Updating the Firmware New fi rmware is released to add new functions or resolve issues with existing functions. It is recommended that you always use the latest fi rmware to improve the functionality and ease-of- use of the printer. Checking the Firmware Version Please check the fi rmware version of this product before updating it. -
Page 190: Running The Firmware Update
Running the Firmware Update IMPORTANT Download the latest fi rmware from the Canon website; - Users in the U.S.A https://www.usa.canon.com/internet/portal/us/home/support/ - Users in the South & Southeast Asia https://asia.canon/en/support/download • Use the AC adapter when updating the fi rmware. • Multiple printers cannot be updated at the same time. Only one printer should be connected at a time, be it an MK5000 or MK3000 model. - Page 191 Use [ ] or [ ] to select "Yes" and press the [Enter] key. Firmware update If you select "Yes", the printer will be on standby state to receive from the fi rmware update fi le. Please update the firmware with update file via PC.
-
Page 192: Appendix
Chapter 7 Appendix Specifications ............................189 Printer ............................189 Print Media ..........................191 System Requirements for Software ................191 Consumable Supplies and Options ....................192 List of Function ............................194 List of Symbols ............................196 Index ................................197... -
Page 193: Specifi Cations
Specifi cations Printer Product name MK3000 Printing method Thermal transfer using one-line head Resolution 300dpi Printing speed High speed mode: 25 mm/sec Low speed mode: 18.5 mm/sec Throughput High speed mode (25 mm/sec): 35 tube segments/min <Printing conditions> Low speed mode (18.5 mm/sec): - Printing media;... - Page 194 Power AC adapter 100 to 240 V 50/60 Hz 0.74 A supply (PR-TP001) Rechargeable battery eneloop AA Rechargeable Batteries, Standard Model (Model Number: BK-3MCCA (for North America), BK- 3MCCE (for Asia): 6 pieces Interface USB2.0 Full-Speed Operating environment Temperature: 15 to 32.5 degrees Celsius * Humidity: 10% to 85% (no condensation) * With the tube warmer installed: 5 to 18 degrees Celsius...
-
Page 195: Print Media
Print Media The following print media can be used for printing. PVC tube ø 1.5 mm to ø 10 mm inside diameter 0.4 mm to 0.6 mm thickness * With the tube warmer installed: ø 1.5 mm to ø 6.5 mm Clear tube Tube *1 inside diameter... -
Page 196: Consumable Supplies And Options
Consumable Supplies and Options Details on consumable supplies and options can be found below. For details on how to purchase consumable supplies and options, please contact your place of purchase. NOTE "Print Media • Please purchase commercially available tubes for use. For more information, refer to (P.191)"... - Page 197 Options ■ Tube Warmer ● This device is used to warm up tubes that have become stiff due to cold. The tube warmer allows for clean printing even in low temperature environments. ● Plate and fl at tube attachment It is used for printing characters on fl at tubes. * This printer does not support printing on plates.
-
Page 198: List Of Function
List of Function The functions that can be set for each function key are as follows. All functions can be set using the [Option] key. [Option] key Connect PC Connect Warmer Warmer Control Warmer Temp. Character Edit Numbering [Number.] key Symbol [Symbol] key Page Edit... - Page 199 Print Settings Half cut Full cut Underline 6, 9 Delete All Text only [Delete] key Text+settings File Save [Regist.] key Load Delete Print adjust Top position Vertical Position Length Half Cut Depth Half Cut Motion Full Cut Depth Full Cut Motion Print contrast Setting Print speed...
-
Page 200: List Of Symbols
List of Symbols <Symbol 1> <Symbol 2>... -
Page 201: Index
Index Cont print ................10, 79 Copy page .................. 61 AC adapter ................. 12 Cover ....................3 AC adapter connector ............3 Cursor ..................10, 38 Alignment ................10, 56 Cut length ..............10, 55, 56 Arrow keys ................7, 38 Cut page ..................63 Auto backlight off ..............164 Cutter ....................4 Auto off (Adapter) ..............160 Cutter set ..................192... - Page 202 Half cut motion ...............96 Half cut settings ..............8, 88 Numbering ............... 51, 136 Init. DeleteCheck ..............16 Orientation ................10, 46 Initializes the printer ............166 Insert page .................65 Page ....................10 Installing the software ............108 Page break ................37, 60 Internal memory ..............189 Page combining ..............69 Page division ................67 Jam recovery lever ........
- Page 203 Ribbon cassette information display ......15 Save file ..................99 [Settings] key ................194 Size switch lever ............5, 22, 32 Sound ..................165 Space key ..................7 Startup display ................. 15 Status monitor ...............144 Top adjust ................... 81 Transport roller ................4 Tube attachment ............5, 21, 193 Tube retainer lever ............
Need help?
Do you have a question about the MK3000 and is the answer not in the manual?
Questions and answers