Advertisement
dossier
Installation Guides
Section:
DESKS, L-RETURNS, BRIDGE RETURNS, RUN-OFFS
Description:
FLUGHT MOUNT, FLUSH PLATE
ZJRP, ZJRF, ZJUP, ZJUF, ZJBF, ZJBN, ZJNF, ZJNP, ZJEF, ZJEP
B
C
A
NOTE: Do not fasten Credenza
Top to Credenza if Flush
Run-Off is Specified.
Date:
Feb 2023
DOS_006a
Part and Product Identification
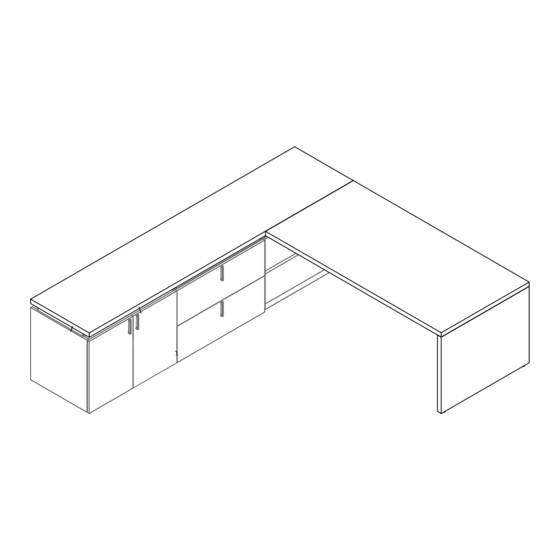
A - Run-Off Worksurface (ZJNP)
x 1
B - Credenza Top, Full Depth
(ZJAC) X 1
C - Flush Plate (AS 540) x 3
D - #8 x 1" Pan Head Wood
Screw x 24
1
E -
" Modular Screw (AS121) x 2
2
F - Modeze Clip (AS111) x 2
For Customer Support please contact
product.support@teknion.com
1 of 7
Page No:
Rev. No: 1
Advertisement
Table of Contents

Summary of Contents for Teknion Dossier ZJRP
- Page 1 D - #8 x 1" Pan Head Wood Screw x 24 " Modular Screw (AS121) x 2 F - Modeze Clip (AS111) x 2 NOTE: Do not fasten Credenza For Customer Support please contact Top to Credenza if Flush product.support@teknion.com Run-Off is Specified.
- Page 2 dossier Installation Guides Section: DESKS, L-RETURNS, BRIDGE RETURNS, RUN-OFFS Date: Feb 2023 Page No: 2 of 7 Description: FLUGHT MOUNT, FLUSH PLATE DOS_006a PULL CREDENZA TOP FLUSH PLATE TO BOTTOM OF CREDENZA TOP STEP 2: Fasten Flush Plates to underside of Credenza top using screws provided. STEP 1: Pull Credenza Top to expose enough area to fasten Flush Plates.
- Page 3 dossier Installation Guides Section: DESKS, L-RETURNS, BRIDGE RETURNS, RUN-OFFS Date: Feb 2023 Page No: 3 of 7 Description: FLUGHT MOUNT, FLUSH PLATE DOS_006a POSITION CREDENZA TOP ALIGN CREDENZA TOP Align Align STEP 3: Place Credenza Top back to original Position. Align side edge of Crdenza Top to side of Credenza and front edge of Credenza Top to front of Credenz.
- Page 4 dossier Installation Guides Section: DESKS, L-RETURNS, BRIDGE RETURNS, RUN-OFFS Date: Feb 2023 Page No: 4 of 7 Description: FLUGHT MOUNT, FLUSH PLATE DOS_006a MODEZE CLIP LOCATION DRILL HOLES AND SCREW Measure Distance Measure Distance Measure Distance Measure Distance Measure Distance Measure Distance STEP 5: Drill hole and insert Modular Screws (E)
- Page 5 dossier Installation Guides Section: DESKS, L-RETURNS, BRIDGE RETURNS, RUN-OFFS Date: Feb 2023 Page No: 5 of 7 Description: FLUGHT MOUNT, FLUSH PLATE DOS_006a RUN OFF TO CREDENZA TOP FASTEN FLUSH PLATE TO RUN-OFF STEP 6: Bring Run-Off to Credenza Top resting on Flush Plate while inserting Modular Screw STEP 7: Fasten Flush Plate to underside of Run-Off using screws provided.
- Page 6 dossier Installation Guides Section: DESKS, L-RETURNS, BRIDGE RETURNS, RUN-OFFS Date: Feb 2023 Page No: 6 of 7 Description: FLUGHT MOUNT, FLUSH PLATE DOS_006a ALIGN CREDENZA TOP TO CREDENZAS Plan view - Full Depth Credenza Top Align Align Plan view - Reduce Depth Credenza Top STEP 8: For Full Depth and Reduced Depth Credenza Top, line up Credenza Top front edge with the front surface of doors or drawers.
- Page 7 dossier Installation Guides Section: DESKS, L-RETURNS, BRIDGE RETURNS, RUN-OFFS Date: Feb 2023 Page No: 7 of 7 Description: FLUGHT MOUNT, FLUSH PLATE DOS_006a EXAMPLE NOTE: If there is adequate space, fasten the Credenza Top to the Credenzas before Flush Plates are installed.


Need help?
Do you have a question about the Dossier ZJRP and is the answer not in the manual?
Questions and answers