Table of Contents
Advertisement
Quick Links
Advertisement
Table of Contents

Related Manuals for TANNER Scientific Cryostat TN60

Summary of Contents for TANNER Scientific Cryostat TN60
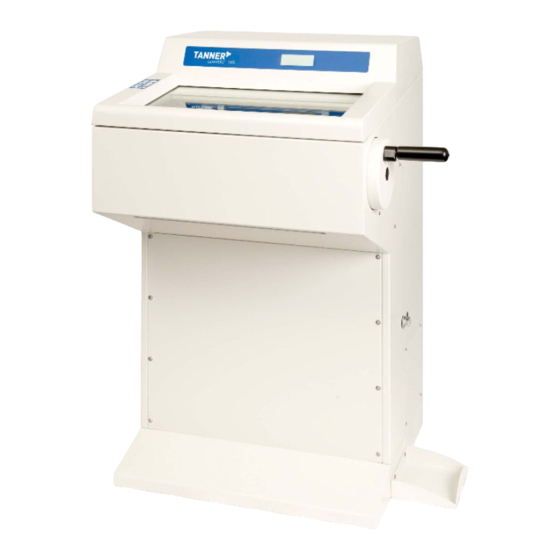
- Page 1 OPERATING INSTRUCTIONS Cryostat TN60 INS2410GB 2021-09-001.00...
- Page 2 Manual_TN60_ _EN_Tanner.docx 2021-09-001.00...
-
Page 3: Table Of Contents
CONTENTS 1. INTENDED USE ............4 2. SYMBOLS ............4 3. SAFETY NOTES ............4 4. COMPONENTS ............8 5. SPECIFICATIONS ............9 6. UNPACKING AND INSTALLATION ............11 7. INITIAL OPERATION ............15 8. OPERATION OF MICROTOME ............21 9. -
Page 4: Intended Use
1. INTENDED USE The floor standing open top cryostat TN60 is intended for rapid freezing and cutting thin sections of frozen specimens for professional use in routine and research laboratories in the fields of biology, medicine and industry. The system of knife advance operates very reliable from 0.5 to 100 µm with trimming function up to 750 µm. - Page 5 3.1 Hand wheel stop Always use the finger protection with the knife-/blade holder and put hand wheel in stop position • before working with the knife or specimen • before changing the specimen • during break time The hand wheel can be stopped in any position.
- Page 6 3.2 FINGER PROTECTION Always use the finger protection • Before you start any work with the knife or specimen • Before changing the specimen • During work break Finger protection released. Finger protection activated. Manual_TN60_ _EN_Tanner.docx 2021-09-001.00...
- Page 7 3.3 ELECTRICAL POWER CONNECTION Do not use any extension lead. Make sure that electric power is constant. Make sure that electric power is constant. Please note that the compressor requires a start-up current between 25 and 35 A. The electric circuit at the installation site must be inspected by an electrical engineer to ensure that it meets the requirements for a smooth operation of the instrument.
-
Page 8: Components
4. COMPONENTS The Tanner Scientific open top cryostat TN60 is provided with the following standard components: TN60 • Basic unit with refrigeration system • Semi-automatic rotary microtome • Operation manual • Specimen holder (5x Ø 22mm; 5x Ø 35 mm) •... -
Page 9: Specifications
5. SPECIFICATIONS TN60 General Nominal power 115 V AC +/-10% 60 Hz Nominal frequence 1.350 VA Power 35 A Max. current for 5 sec Protective class 2 * T 20 A Fuses Pollution class Overcurrent protective class 1.360 J/s Max. heat energy +10 to +25 °C Temperature range during operation +5 to +55 °C... - Page 10 Microtome rotary microtome, incapsulated Type 0.5 – 100 µm Thickness range 0 – 2 µm in 0.5 µm steps Thickness settings 2 – 20 µm in 1 µm steps 20 – 50 µm in 2 µm steps 50 – 100 µm in 5 µm steps 28 mm Horizontal movement 58 mm...
-
Page 11: Unpacking And Installation
6. UNPACKING AND INSTALLATION 6.1 UNPACKING THE INSTRUMENT In standard design you will receive the unit in a cardboard box standing on a wooden pallet. The unit is equipped with four castors and two feet, adjustable in height in the front. - Page 12 6.2 INSTALLATION SITE REQUIREMENTS The site for installation for TN60 should meet the following requirements: • A maximum ambient temperature of 22°C • No direct sunlight into the cooling chamber • Mains power supply within 3 m • No air circulation (for example by air conditioning) •...
- Page 13 The device is delivered with a defrosting water collecting container, which must be installed before the device is put into operation. First mount the metal bracket for the defrosting water container on the right side of the device. Loosen the screws and hang the bracket in the screws.
- Page 14 6.4 COLLAPSIBLE HANDWHEEL LEVER The instrument is delivered with a ready to use hand wheel lever that is folded away for transport reasons. • Before you start any work unfold the hand wheel lever by simply pulling the lever into a horizontal position.
-
Page 15: Initial Operation
7. INITIAL OPERATION 7.1 MAIN DISPLAY The main display will show the day and time, the TUE 13:05:05 cutting thickness, the trimming thickness, the current CUT: 7 µm Trim: 19µm chamber temperature, the target chamber Cha: -20 °C (-22) QF: 0 temperature, the status of the quick-freeze unit Status:OK 0000... - Page 16 7.3 SOFTWARE SETTINGS > Chamber temp -20 °C Press to open the Settings menu. Quickfreeze UV disinfection Light Auto To move further down in the main menu list, Retraction 5 µm Start defrost press Contrast > TIME TUE 13:05:05 To move further up in the main menu list, >...
- Page 17 7.4 AUTOMATIC DEFROST, DISINFECTION AND POWER SAVING SETTINGS > Chamber temp -20 °C Press to open the Settings menu. Quickfreeze UV disinfection Light Auto TIME Select Program settings and press to open the 13 05 05 Language English menu for setting automatic defrost and power saving Display version times.
- Page 18 Disinf. delay 1 2 _ _ _ _ _ Select temperature increase days and set the days at Incr. start 21:00 that the automatic power saving mode will be active Incr. end 04:00 for 24 hours. > Incr. days _ _ _ _ 5 6 _ (e.g.
- Page 19 7.5 List of available software settings -35 °C to ambient Chamber temperature The recommended working temperature is -15 °C to -25 °C Object cooling ON / OFF If the instrument is equipped with the optional object cooling system, its function can be activated or deactivated.
- Page 20 For power saving, a higher temperature can be set Chamber Increase for defined times and/or days. The selected temperature should be below 0 °C to avoid damage to the microtome by freezing moisture. Retraction 0 - 200 µm Start defrost Activate A manual defrost procedure is activated.
-
Page 21: Operation Of Microtome
8. OPERATION OF MICROTOME 8.1 INSERTION AND ORIENTATION OF KNIFE Activate hand wheel lock. Loosen the knife fixation by turning two screws in front of the knife holder counter clockwise Remove/Insert knife Adjust knife height by turning the wheels on the left and right side of the knife holder base. - Page 22 8.2 INSERTION AND ORIENTATION OF DISPOSABLE BLADE Activate hand wheel lock. Remove finger protection. Loosen the blade fixation by turning the right lever counter clockwise. Use the blade ejector to remove the blade. Remove/Insert blade from right side. Loosening of blade fixation and insertion of new blade. Tighten the blade fixation by turning the right lever clockwise.
- Page 23 To change the cutting angle, loosen the blade holder by turning the right lever on the blade holder base counterclockwise. Tilting the blade holder to the sample increases the cutting angle, tilting the blade holder away from the sample reduces the cutting angle.
- Page 24 8.3 SPECIMEN MOUNTING The instrument is equipped with 24 freezing positions. The temperature is approx. 10 °C lower than the actual cryochamber temperature. In order to prepare a specimen for sectioning, place the specimen holder on a freeze point, add some drops of embedding medium (e.g.GSV1) on the holder and carefully press the object on top.
- Page 25 8.5 SPECIMEN ORIENTATION ADJUSTMENT Turn hand wheel to its highest position and activate the hand wheel lock. 1. For a new sample orientation, loosen the fixation lever on the left side of the sample holder counterclockwise. 2. To adjust the orientation, swing the right orientation screw.
- Page 26 8.6 FAST APPROACH TO SPECIMEN Press to move the knife holder base towards the sample. Press to move the knife holder away from the sample. 8.7 SLOW APPROACH TO SPECIMEN Press to move the knife holder base slowly towards the sample. 8.8 THICKNESS ADJUSTMENT FOR TRIMMING To change the trimming settings, press continuously and press...
- Page 27 8.11 MANUAL CUTTING Deactivate the hand wheel stop. Release the finger protection. Turn hand wheel evenly clockwise. A counter clockwise movement will also result in cutting and incremental advance of the specimen. Approach specimen either by trimming or slow approach. TUE 13:05:05 Set the required section thickness.
- Page 28 8.12 ANTI-ROLL PLATE Each instrument is equipped with an anti-roll plate. To adjust the anti-roll-plate vertically, turn the wheel on the base to the left (towards the blade) or to the right (away from the blade). To remove the slices, swing the anti-roll-plate to the left.
- Page 29 8.13 TIPS AND TRICKS It is common knowledge that the temperature of the cryostat plays an important role in the quality of the tissue sections obtained. Each type of tissue needs a different temperature as shown in the following list. The temperature ranges indicated in the table below are approximate values and may require adjustments for individual tissues.
-
Page 30: Operation Of Cryostat
UV light without the addition of chemicals. The cryostat TN60 can be equipped with an UVC light source that can either request activation in defined periods (see section 7.3) or is manually activated. - Page 31 Picture 2: Picture 3: Slide the UV lamp as shown into the glass bulb. Keep 2 cm space before the end position will be reached, this place will be needed to connect the UV Lamp with the connecting plug. (Pic. 2 & 3) Picture 4: Picture 5: The connector can be plugged into two...
- Page 32 9.2 QUICK FREEZE POSITION For convenience of the user, the cryostat TN60 is equipped with a quick freeze shelf with two positions located in the object freezing shelf. Upon activation the installed peltier element will cool down the two quick freeze position to approximately -55 °C.
- Page 33 9.4 AUTOMATIC/MANUAL DEFROST For optimum performance of the cooling unit a low thermal contact resistance at the cooling lamella is required. Upon frequent use of the instrument moisture will condensate and freeze on the surface of the cooling lamella and increase the thermal contact resistance.
- Page 34 9.5 SHUTDOWN AND CLEANING THE DEVICE It is highly recommended to defrost the instrument at least every 6 months. If the instrument is used regularly in warm tropical climate a more frequent complete defrost might be necessary. The unit should be defrost for a minimum period of 48 h, better over the weekend.
-
Page 35: Cleaning And Maintenance
10. CLEANING AND MAINTENANCE 10.1 CLEANING The recommended frequency of cleaning of the cryostat chamber depends on how frequently the instrument is used. Wear protective clothing and disposable gloves according to Good Laboratory Practices. Please take note of the safety aspects of the instrument. Do not use acetone or xylene for cleaning the unit. - Page 36 Check of temperature sensor in cryochamber. Monthly Cleaning of cryostat ventilation (see section 10.4). Yearly Complete Service (performed by authorized Tanner Scientific service technician) • check of all functions • complete defrost • removing of microtome • oiling of movable parts •...
- Page 37 10.4 CLEANING OF DISPOSABLE BLADE HOLDER Turn the handwheel to the highest position and operate the handwheel lock. Loosen the blade by turning the lever counterclockwise. Use the blade ejector to remove the blade. Pull out the lever and release the upper blade holder.
-
Page 38: Service
It must be returned in its original packing. If the instrument or parts thereof are sent back in a dirty or non-disinfected condition, Tanner Scientific reserves the right to return the parts to the debit of the customer. Manual_TN60_ _EN_Tanner.docx... -
Page 39: Optional Accessories
12. OPTIONAL ACCESSORIES Disposable Blade Holder (low profile) #10157005 Disposable Blade Holder (high profile) #10158005 Debris extraction system #10167100 Heat extractor block # 31000253 Cork plate (100 pcs.; Ø 20 mm) #30001001 CryoGlue embedding medium (4x 125 ml) #30001100 brush clear-cut #30001030 Anti-roll plate (disposable blade holder) -
Page 40: Warranty
13. WARRANTY Tanner Scientific guarantees that the product delivered has been subjected to a comprehensive quality control procedure, and that the product is faultless and complies with all technical specifications and / or agreed characteristics warranted. Tanner Scientific guarantees that the device is manufactured under an ISO 9001:2015 and ISO 13485:2016 quality management system. - Page 41 Notes Manual_TN60_2021-09-001.00_EN_Tanner.docx...
- Page 42 Notes Manual_TN60_ _EN_Tanner.docx 2021-09-001.00...
- Page 43 Notes Manual_TN60_2021-09-001.00_EN_Tanner.docx...
- Page 44 Tanner Scientific 12210 Rangeland Parkway 34211 Bradenton FL / US Tel. (888) 708-5233 sales@tannerscientific.com www.tannerscientific.com...