Table of Contents
Advertisement
Quick Links
Advertisement
Table of Contents

Subscribe to Our Youtube Channel
Related Manuals for V-ZUG AiroClearCabinet V6000


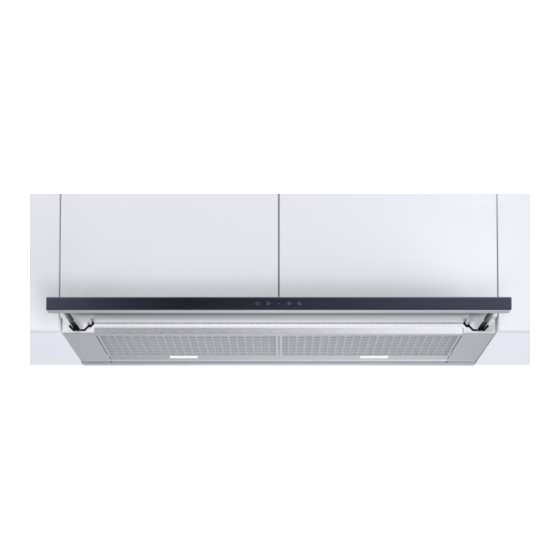
Summary of Contents for V-ZUG AiroClearCabinet V6000
- Page 1 Operating instructions AiroClearCabinet V6000 Range hood...
- Page 2 Model designation Model number Type Size system AiroClearCabinet V6000 61057 AE6T5FT.. , AE6T5FTP.. AiroClearCabinet V6000 61058 AE6T6FT.. , AE6T6FTP.. AiroClearCabinet V6000 61060 AE6T9FT.. , AE6T9FTP.. Variations depending on the model are noted in the text. © V-ZUG Ltd, CH-6302 Zug, 2023...
-
Page 3: Table Of Contents
Contents Safety precautions 4 Service & Support 23 Symbols used............ 4 General safety precautions........ 4 Appliance-specific safety precautions .... 5 Appliance installation .......... 6 Instructions for use.......... 6 Appliance description 8 Introduction ............. 8 Extraction mode ............. 8 Recirculation mode with activated charcoal filter .................. -
Page 4: Safety Precautions
Safety precautions Symbols used Denotes important safety precau- ▪ This appliance can be used tions. Failure to observe said precautions by children aged 8 and above can result in injury or in damage to and by persons with reduced the appliance or fittings! physical, sensory or mental Information and precautions that capabilities, or lack of experi-... -
Page 5: Appliance-Specific Safety Precautions
1 Safety precautions turer or its Customer Services ▪ This appliance is intended for or a similarly qualified person use in the home and similar in order to avoid hazard. settings such as: in staff kit- chens in shops, offices and Appliance-specific safety other commercial establish- precautions... -
Page 6: Appliance Installation
1 Safety precautions Appliance installation Instructions for use Before using for the first time ▪ The appliance must be installed and connected to the electricity supply in ▪ The appliance must be installed by accordance with the separate installa- qualified personnel only. tion instructions. - Page 7 1 Safety precautions ▪ Avoid a cross-current of air, which ▪ When carrying out maintenance work could blow the cooking vapours over on the appliance, including replacing the cooking area. light bulbs, cut off the electricity supply ▪ If other appliances – fired by gas or to the appliance: remove the screw fuse other fuels –...
-
Page 8: Appliance Description
Appliance description Introduction The appliance is designed for use in the home for extracting cooking odours from above a cooking area and can be used in the extraction or recirculation mode. Extraction mode Recirculation mode Extraction mode A fan extracts cooking fumes and smells from above the cooking surface. The metal grease filters clean the extracted air, which is then passed through a connecting pipe fit- ted with an integrated non-return valve and through the air duct to the outside. -
Page 9: Operating And Display Elements
3 Operating the appliance Operating and display elements Buttons Switch appliance on/off Select power level 1–3; activate intensive level Switch illumination on/off; set colour temperature Activate after-running time Display symbols Wipe protection After-running time Power level 1 Power level 2 Power level 3 Intensive level (flashing) Saturation indicator for grease filter... -
Page 10: Switching The Appliance On/Off
3 Operating the appliance Setting up the appliance for use in the extraction mode ▸ Pull the deflector plate completely out. ▸ Switch the appliance and the illumination off. ▸ Hold the button depressed for 3 seconds. – The display symbol and, depending on the cleaning interval setting set, flash. -
Page 11: Selecting Power Level
3 Operating the appliance The appliance can be switched on simply by touching the button. First pull the deflector plate completely out. Selecting power level Four power levels are available. Power levels1–3 with low, medium and high extraction, as well as the intensive level. ▸... -
Page 12: Wipe Protection
3 Operating the appliance – While the after-running time is activated, the display symbol and the correspond- ing power level illuminate. ▸ To end the after-running time before time: Touch the button. – This switches the appliance and the illumination off. Power level After-running time in minutes (flashing) -
Page 13: Optilink
3 Operating the appliance OptiLink With this function, the user no longer needs to control the range hood manually. OptiLink monitors the power levels set for the cooking zones and automatically sets the optimum power level for the range hood. The following settings are available for selection: OptiLink is turned off Silent mode... - Page 14 3 Operating the appliance Selecting operating mode ▸ Pull the deflector plate completely out. ▸ Switch the appliance and the illumination off. ▸ With the appliance switched off, press the buttons simultaneously. – The currently selected operating mode is shown in the display by the power level symbol ( = Silent mode, = Standard mode, = Intensive mode).
-
Page 15: Remote Control (Accessories)
4 Care and maintenance Trouble-shooting connection error No connection can be established between the range hood and the hob. ▸ Ensure that the hob is in «connecting mode». ▸ Turn off the OptiLink function on the hob. ▸ Hold the button on the range hood depressed for 15 seconds. -
Page 16: Metal Grease Filters
4 Care and maintenance Metal grease filters The metal grease filters should be cleaned at least every two months with normal use (more frequently with intensive use) and whenever the saturation indicator alarm is triggered. If properly cared for, the grease filters should provide years of service. Removing ▸... -
Page 17: Reset Saturation Indicator Alarm
4 Care and maintenance Removing 200°C ▸ Pull the deflector plate completely out and remove the metal grease filters. ▸ Using the handle , remove the activated charcoal filter unit down and out of the guide rail. Cleaning and regenerating ▸... -
Page 18: Trouble-Shooting
5 Trouble-shooting Trouble-shooting This section lists faults that can be solved simply by following the instructions given. If the fault cannot be remedied, please call Customer Services. Before calling Customer Services: Please note down the serial number (for SN, see iden- tification plate under «Technical data») and what led to the fault. -
Page 19: Technical Data
Product fiche In accordance with EU Regulation No. 65/2014 and No. 66/2014. Description Abbreviations Unit Value Brand V-ZUG LTD Model identifier 61057 / 61058 / 61060 Annual Energy Consumption kWh/a 31.2 hood Energy Efficiency Index 42.0... -
Page 20: Disposal
8 Disposal Measured power consumption of standby mode Time increase factor Measured air flow rate at the best ef- 380.6 ficiency point Measured air pressure at the best ef- ficiency point Measured value of the electric power 103.0 input at the best efficiency point Nominal power of the lighting system Average illumination of the lighting middle... - Page 21 140/36, 17th Floor ITF Tower, London W1U 1PN Silom Road GREAT BRITAIN Suriyawong Sub-district Bangrak District Bangkok 10500 THAILAND HK/MO V-ZUG Hong Kong Co. Ltd. GÜRELLER 12/F, 8 Russell Street Anchor Sit.3A/1-2 Çayyolu Causeway Bay 06690 ÇANKAYA/ANKARA HONG KONG TURKEY Frigo 2000 S.p.A Private enterprise “Stirion”...
-
Page 22: Index
Index Correct use ............ 6 Instructions for use......... 6 Accessories ............18 Note on use ............. 6 Addresses of the importers ......21 Safety warnings After-running time..........11 Appliance installation ........ 6 Appliance Appliance-specific .......... 5 Disposal............ 20 General ............. 4 Appliance configuration........9 Saturation indicator.......... 12 Appliance description ........ - Page 23 V‑ZUG service centre. Technical questions, accessories, warranty extensions V-ZUG is happy to help you with any general administrative or technical queries, to take your orders for accessories and spare parts and to inform you about our progressive service agreements.
- Page 24 Display symbols Wipe protection After-running time Power level 1 Power level 2 Power level 3 Intensive level (flashing) Saturation indicator for grease filter Saturation indicator for activated charcoal filter (recirculation air only) 1075521-02 V-ZUG Ltd, Industriestrasse 66, CH-6302 Zug info@vzug.com, www.vzug.com...
Need help?
Do you have a question about the AiroClearCabinet V6000 and is the answer not in the manual?
Questions and answers