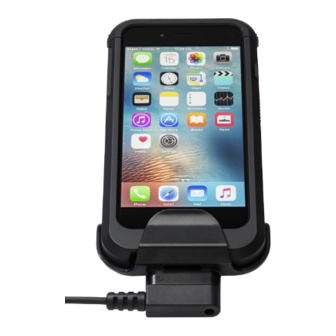
Infinite Peripherals Linea Pro 6 Quick Start Manual
Charging cup
Hide thumbs
Also See for Linea Pro 6:
- User manual (32 pages) ,
- How to use (4 pages) ,
- Quick start manual (2 pages)
Table of Contents
Advertisement
Quick Links
Linea Pro
Charging Cup
QUICK START GUIDE
GETTING STARTED
INSTALLATION
1.
Ensure environmental conditions
are within appropriate operating
specifications for the charger, as well as
for the Linea Pro 6 and iOS device.
2.
Clip the charging cup onto the bottom of
Linea Pro 6 device and check that cup is
properly aligned and fully seated on the
bottom of the Linea Pro 6 device.
3.
Plug USB connector end of Linea Pro 6
Charging Cup into appropriate power
supply (5.2V 2.4A, not included).
4.
Confirm that the Linea Pro 6 LED
indicator turns green to indicate
charging is active.
Note: Refer to Installation Diagram above.
REMOVAL
1.
Grip the bottom of the cup with palm of
hand.
2.
Pull down on the rear tab with fingertips
to unlock cup from device.
3.
Separate the charging cup from the
device.
Note: Refer to Removal Diagram above.
6
®
PRODUCT SPECIFICATIONS
The following table describes Linea Pro 6 Charging Cup specifications.
Compatibility
Weight
Dimensions
Cable Length
Connector
Input
Operating Temperature
Storage Temperature
ABOUT YOUR LINEA PRO 6
Mechanical
Linea Pro 6 Standard with
iPhone 6
56 g (1.98 oz.)
82.4 mm x 57.9 mm x 29.9 mm
(3.24" x 2.28" x 1.18")
3'
Electrical
USB A
5.2V 2.4A DC
Environmental
32°F to 95°F (0°C to 35°C)
-4°F to 113°F (-20°C to 45°C)
CHARGING CUP
Installation
Removal
Linea Pro 6 Rugged Case with
iPhone 6
58 g (2.05 oz.)
89 mm x 64.7 mm x 35.7 mm
(3.50" x 2.55" x 1.41")
Advertisement
Table of Contents

Related Manuals for Infinite Peripherals Linea Pro 6


Summary of Contents for Infinite Peripherals Linea Pro 6
- Page 1 Charging Cup QUICK START GUIDE PRODUCT SPECIFICATIONS GETTING STARTED INSTALLATION The following table describes Linea Pro 6 Charging Cup specifications. Ensure environmental conditions are within appropriate operating Mechanical specifications for the charger, as well as for the Linea Pro 6 and iOS device.
- Page 2 When not in use, place the charger in a cool, dry place. Note: iOS device and other additional items The LED is illuminated on the Linea Pro 6 upon shown on cover page may not be included. • Do not place the charger near a heat source.
Need help?
Do you have a question about the Linea Pro 6 and is the answer not in the manual?
Questions and answers