
Related Manuals for Sandstrom SPH1512


Summary of Contents for Sandstrom SPH1512
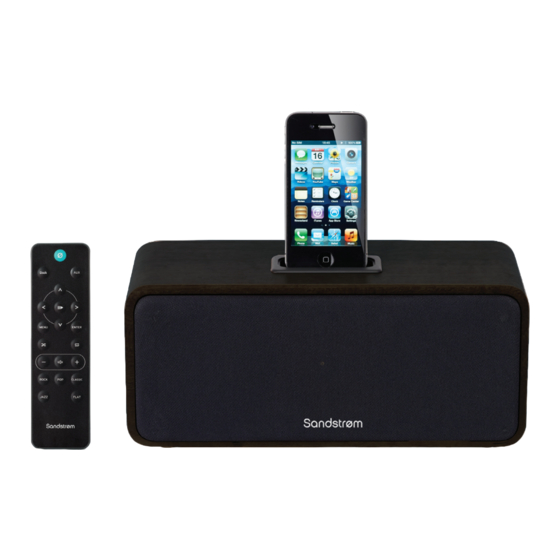
- Page 1 Instruction Manual Docking for iPhone and iPod SPH1512 iPod and iPhone not included...
-
Page 3: Table Of Contents
contents Unpacking ..........................4 Product Overview .........................5 Main Unit .................................5 – Front View ..............................5 – Top View ..............................5 – Rear View ...............................5 Remote Control .............................6 Removing the Insulating Strips from the Remote Control ..........7 Battery Replacement for the Remote Control ..............7 –... -
Page 4: Unpacking
Thank you for purchasing your new Sandstrøm Docking for iPhone and iPod. We recommend that you spend some time reading this instruction manual in order that you fully understand all the operational features it offers. You will also find some hints and tips to help you resolve any issues. Read all the safety instructions carefully before use and keep this instruction manual for future reference. -
Page 5: Product Overview
Product Overview Main Unit Front View Power Indicator Speakers Remote Control Sensor Top View iPod / iPhone Dock Rear View DC IN AUX IN VIDEO OUT DC IN Socket AUX IN Socket Connects to the mains socket Video Out Socket with the mains adapter. -
Page 6: Remote Control
Remote Control STANDBY Button Switches the unit between the ON and STANDBY modes. Dock Button DOCK Switches to the iPod mode. Button Navigates up to select an item on a iPod / iPhone menu screen. Button • Skips backwards to the beginning MENU ENTER of the track or to the previous track. -
Page 7: Removing The Insulating Strips From The Remote Control
Removing the Insulating Strips from the Remote Control Remove the insulating mylar strip from the battery if the battery is being used for the first time. It is located at the bottom rear side of the remote control. Battery Replacement for the Remote Control The remote control requires a CR2025, 3V Lithium battery. -
Page 8: Handling The Remote Control
Handling the Remote Control • If you are having difficulty removing the battery cover, use a paper clip to squeeze the battery tab before pulling out the battery cover. Remove the battery. • Do not drop the remote control. • Do not allow anything to impact the remote control. • Do not spill water or liquid on the remote control. -
Page 9: General Operation
General Operation Switching ON / OFF • When you first connect the unit to the mains socket, the unit will be in STANDBY mode. • Press the STANDBY button on the remote control to turn on the unit. The power indicator will light up green (iPod mode) or orange (AUX mode). -
Page 10: Ipod / Iphone Operation
iPod / iPhone Operation This unit can support the iPhone, iPhone 3G/3GS/4/4S and various iPod models with 30-pin dock connectors, such as the iPod touch 1 Generation, iPod Classic and iPod nano 1 Generation. Inserting the iPod / iPhone Press the DOCK button to select iPod mode. Carefully slot your iPod / iPhone into the iPod / iPhone dock. -
Page 11: Random Playback
Random Playback All the tracks on the disc can be played in a random order. • During playback, press the button on the remote control. • Press the buttons on the remote control to play the next random track. • After all the tracks have been played once, the playback will stop automatically. • To cancel the random playback, press the button on the remote control during RANDOM playback. -
Page 12: Aux In Operation
AUX IN operation Before connecting to the mains socket, use a 3.5mm AUX IN cable (not included) to connect your audio device through the AUX IN socket at the rear of the unit. Connect the mains adapter to the unit and then the mains socket. Press the AUX button to switch to AUX mode. -
Page 13: Maintenance
Maintenance Cleaning the Unit Ensure the unit is fully unplugged from the mains socket before cleaning. • To clean the unit, wipe the case with a slightly moist, lint-free cloth. • Do not use any cleaning fluids containing alcohol, ammonia or abrasives. • Do not spray an aerosol at or near the unit. -
Page 14: Specifications
Specifications Model SPH1512 AC Power AC 100 -240V ~50/60Hz Unit Output Power 2 x 10 Watts DC Output Voltage 12V 2A Features and specifications are subject to change without prior notice. -
Page 15: Safety Warnings
Safety Warnings Ventilation • Read all the instructions carefully before using the unit and keep them for future • To prevent the risk of electric shock or reference. fire hazard due to overheating, ensure • Retain the manual. If you pass the unit onto that curtains and other materials do not a third party, make sure to include this obstruct the ventilation vents. - Page 16 Batteries • Batteries used in the unit are easily swallowed by young children and this is dangerous. • Keep loose batteries away from young children and make sure that the battery holder tray is secure in the unit. Seek medical advice if you believe a cell has been swallowed.
- Page 17 Please note that the use of this accessory with iPod or iPhone may affect wireless performance. iPhone, iPad, iPod, iPod classic, iPod nano, and iPod touch are trademarks of Apple Inc., registered in the U.S. and other countries. All other trademarks appearing herein are the property of their respective owners. DSG Retail Ltd • Maylands Avenue • Hemel Hempstead Herts • HP2 7TG • England IB-SPH1512-120912V2...
Need help?
Do you have a question about the SPH1512 and is the answer not in the manual?
Questions and answers