Pilz PSS Series Operating Manual
Hide thumbs
Also See for PSS Series:
- User manual ,
- Operating manual (77 pages) ,
- Installation manual (49 pages)

Related Manuals for Pilz PSS Series


Summary of Contents for Pilz PSS Series
- Page 1 Programmable Safety Systems PSS-Range PSS SB TESTER Operating Manual Item No. 20 757-02 The spirit of safety.
- Page 2 All rights to this manual are reserved by Pilz GmbH & Co. Copies may be made for internal purposes. While every effort has been made to ensure that the information in this manual is accurate, no responsibility can be accepted for errors or omissions contained within it.
-
Page 3: Table Of Contents
Contents Introduction Validity of documentation Overview of documentation Definition of symbols Overview Range Safety Intended use EMCD Warranty and liability Disposal Operation Supply Charging the battery Commissioning Switching on Setting the contrast Switching the backlight on/off Setting the time and date Setting the signal runtime Calibration Performing the tests... - Page 4 Contents Tests/Measurements Connection test Performing the connection test Separate test: Resistance between CAN_H and CAN_L Separate tests: Short circuits between the bus cable wires Screening test Performing the screening test Length measurement Performing the length measurement 5-13 Signal test 5-16 Performing the signal test 5-16 Separate test: Measuring the voltage at Vcc...
-
Page 5: Introduction
Introduction This operating manual is intended to give users all the information they need to use the PSS SB TESTER. To fully understand this manual you will need to be conversant with the information found in the general documentation for the SafetyBUS p PSS- range. -
Page 6: Definition Of Symbols
Introduction 7 Fault Diagnostics When a fault is detected on SafetyBUS p, this chapter helps you find the source of the fault and rectify it. 8 Technical Details Definition of symbols Information in this manual that is of particular importance can be identified as follows: DANGER! This warning must be heeded! It warns of a hazardous situation that... -
Page 7: Overview
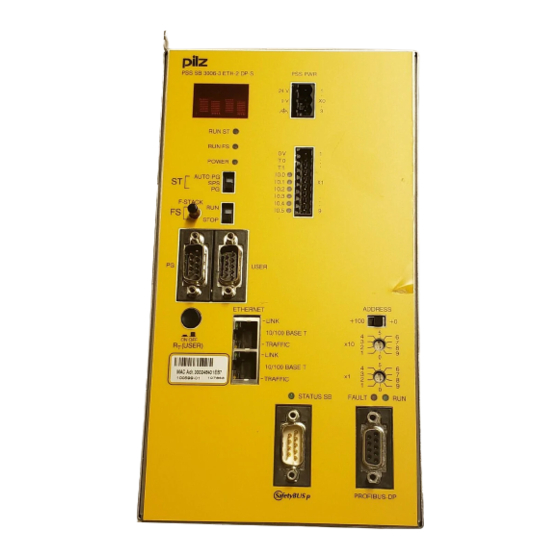
Overview The PSS SB TESTER is a hand-held device that can be used to carry out various tests and measurements on SafetyBUS p. Each test may comprise several separate tests. • Connection test - Checks the terminating resistors - Checks the bus cable wires for short circuits •... - Page 8 Overview 1: SafetyBUS p interface 2: Single-colour graphic display with backlight 3: Operator panel 4: USB port for uploading the test results to a PC Fig. 2-1: View Operating Manual: PSS SB TESTER...
-
Page 9: Safety
Safety Intended use The PSS SB TESTER is designed for use in SafetyBUS p networks. Specific data for the PSS SB TESTER is given in the chapter entitled “Technical Details”. Use of the device outside the specifications given here will be deemed as improper use. Any component, technical or electrical modifications carried out will be deemed as improper use. -
Page 10: Disposal
Safety Disposal The module must be disposed of properly when it reaches the end of its service life. Operating Manual: PSS SB TESTER... -
Page 11: Operation
Operation Supply The PSS SB TESTER is supplied via a battery, which is located in the back of the housing. A charged PSS SB TESTER can be operated for 1 to 2 hours, depending on the application conditions. If the battery charge drops to a particular value during testing, the message “Charge battery”... -
Page 12: Commissioning
Operation INFORMATION The battery should not be left in the charger over a long period of time (several weeks). • Charge the battery until the LED on the charger flashes (25 % on, 75 % off) • Remove the battery and place in the PSS SB TESTER. Commissioning Switching on INFORMATION... -
Page 13: Setting The Contrast
Setting the contrast • Press F2 in the “Start” window. • The “Settings” window opens. Use the arrow keys to move the cursor to the symbol for “Contrast” and press VAL. • Now you can use the “left” and “right” arrow keys to increase or reduce the display’s contrast. -
Page 14: Setting The Time And Date
Operation The information on the backlight is stored in a memory that is supplied by the battery. If the battery is removed, the contents of the memory will be retained for 10 minutes. If it takes longer for the battery to be replaced, the contents of the memory will be lost. -
Page 15: Setting The Signal Runtime
The ex-works setting for the signal runtime is 4.5 ns/m. This value is valid for the Pilz standard cable for SafetyBUS p (order no. 311 070). If you use a cable with a different signal runtime, you will need to amend the set value. -
Page 16: Performing The Tests
Operation Performing the tests All the tests are described in detail in the chapter entitled “Tests/ Measurements”. This section is only intended to explain how to save, upload and delete the test results. Saving the test results With the exception of the results for real-time mode, all the test results can be saved. -
Page 17: Uploading The Test Results To A Pc
Uploading the test results to a PC The saved results can be uploaded to a PC, where they can be saved as a text file. • Connect the PSS SB TESTER to a USB port on the PC. • Start the “PSS SB TESTER” software (see Chapter 6). •... - Page 18 Operation Notes Operating Manual: PSS SB TESTER...
-
Page 19: Tests/Measurements
Tests/Measurements The PSS SB TESTER can be used to perform various tests and measurements on SafetyBUS p: • Connection test • Screening test • Length measurement • Signal test • Real-time measurements These tests and measurements are described in this chapter. To be able to carry out the measurements, the PSS SB TESTER will need to be added to SafetyBUS p. -
Page 20: Connection Test
Tests/Measurements Connection test The connection test comprises the following separate tests: • Measuring the resistance between CAN_H and CAN_L • Test for short circuit between CAN_H and Vcc • Test for short circuit between CAN_L and Vcc • Test for short circuit between CAN_H and CAN_GND •... - Page 21 The PSS SB TESTER then checks whether “Vcc” is without voltage. If this is the case, the test is performed and the following message appears on the display: “Connection test in progress”. If voltage is present at “Vcc”, the test will not be carried out because the test results could be corrupted or the Tester could be damaged.
-
Page 22: Separate Test: Resistance Between Can_H And Can_L
Tests/Measurements Separate test: Resistance between CAN_H and CAN_L Abbreviation for this separate test in the “Results” window: R CAN_H/CAN_L Measurement of the resistance between CAN_H and CAN_L. You can use this measurement to detect whether the terminating resistors are present and whether they are the correct size (120 Ω... -
Page 23: Separate Tests: Short Circuits Between The Bus Cable Wires
Separate tests: Short circuits between the bus cable wires Abbreviations for these separate tests in the “Results” window: • KS CAN_H/Vcc • KS CAN_L/Vcc • KS CAN_H/CAN_GND • KS CAN_L/CAN_GND • KS CAN_H/CAN_SHLD • KS CAN_L/CAN_SHLD Test for short circuit between the bus cable wires. The PSS SB TESTER measures the resistance between the wires. -
Page 24: Screening Test
Tests/Measurements Screening test The screening test can be used to check for breaks in the cable screening. You can therefore determine whether the cable screening is attached correctly to each bus connector. The screening test corresponds to a resistance measurement between CAN_H and CAN_SHLD. - Page 25 Tested screening subscribers Shorting Terminating plug resistor Terminating resistor subscribers Terminating resistor Tested screening Shorting plug Fig. 5-2: Screening test Operating Manual: PSS SB TESTER...
- Page 26 Tests/Measurements If voltage is present at “Vcc”, the test will not be carried out because the test results could be corrupted or the Tester could be damaged. NOTICE While the screening test is in progess, no voltage must be supplied to the “Vcc”...
-
Page 27: Length Measurement
The ex-works setting for the signal runtime is 4.5 ns/m. This value is valid for the Pilz standard cable for SafetyBUS p (order no. 311 070). If you use a cable with a different signal runtime, you will need to amend the set value. - Page 28 Tests/Measurements The bus topology must be taken into account in the measurement: • Main line without stub lines The PSS SB TESTER is connected to one end of the bus line. The terminating resistors at both ends of the bus line must be removed. Measured cable runs subscribers Remove...
- Page 29 • Main line with stub lines It is not possible to perform a length measurement on a main line with stub lines. The stub lines have to be removed. Measured cable runs subscribers Remove terminating resistor Separate Remove stub line terminating resistor Fig.
- Page 30 Tests/Measurements • Main line with Bridge or Router Measured cable runs subscribers PSS SB Router1 PSS SB BRIDGE Remove terminating resistor Fig. 5-5: Main line with Bridge or Router • Main line with sub branches Measured cable runs subscribers Remove Remove terminating terminating...
-
Page 31: Performing The Length Measurement
Performing the length measurement • Add the PSS SB TESTER to SafetyBUS p as shown in Figs. 5-3 to 5-6. • Switch on the PSS SB TESTER. • Highlight the symbol in the “Start” window and press VAL. • The “SafetyBUS p” window opens, in which you can select the test/ measurement. - Page 32 Tests/Measurements Function of the keys in this window: F1: Activate/deactivate cursor (symbol <–>) F2: Enlarge view (symbol Z+) F3: Reduce view (symbol Z-) < >: Move view to left or right VAL: Perform new measurement ESC: Close window The key factor in the measured curve is the falling edge. •...
- Page 33 If there is a short circuit on SafetyBUS p between CAN_H and CAN_L, the measured curve will deviate from the typical curve: a step is visible within the measured curve. On long bus lines, you will need to enlarge the view to make the step visible.
-
Page 34: Signal Test
Tests/Measurements Signal test The signal test comprises the following separate tests: • Measures the voltage at Vcc • Tests the transmission rate for all devices • Tests the electrical signal level on the lines CAN_H and CAN_L for all devices •... -
Page 35: Separate Test: Measuring The Voltage At Vcc
The display will show the message “Signal test in progress” and the value of the voltage at Vcc. The test may take up to 5 minutes. The test can be aborted by pressing ESC. When the test is complete, the “Results” window is opened. This displays a list showing all the devices on SafetyBUS p, i.e. -
Page 36: Separate Test: Testing The Transmission Rate
Tests/Measurements Separate test: Testing the transmission rate Abbreviation for this separate test in the “Device xx” window: Transmission rate Each device on SafetyBUS p is tested to ensure it has the correct transmission rate. In the detailed display of the result from this separate test, four pieces of information are displayed: the lower limit, the upper limit, the measured value and the result. -
Page 37: Separate Tests: Testing The Electrical Signal Level
Separate tests: Testing the electrical signal level Abbreviations for these separate tests in the “Device xx” window: • Rec. Level CAN_H • Dom. Level CAN_H • Rec. Level CAN_L • Dom. Level CAN_L Each device on SafetyBUS p is tested to ensure the signals it is sending have the correct level. -
Page 38: Separate Tests: Testing The Signal Edges
Tests/Measurements Example for “Dom. Level CAN_H”: lower limit: 2.8 V upper limit: 4.5 V measured value: 3.5 V test result: OK Separate tests: Testing the signal edges Abbreviations for these separate tests in the “Device xx” window: • Rising edge CAN_H •... -
Page 39: Real-Time Mode
Real-time mode Real-time mode comprises the following measurements: • Bus load • Error rate • Failure rate • Number of errors Performing the real-time measurement Before performing the real-time measurement, the transmission rate must be set in the PSS SB TESTER. •... - Page 40 Tests/Measurements Notes 5-22 Operating Manual: PSS SB TESTER...
-
Page 41: Software
Software To transfer the test results from the PSS SB TESTER to a PC you will need to install the Upload-Software. System requirements • Operating system: Windows 98, ME, 2000 or XP • Hard drive: Approx. 1 MB of available disk space •... - Page 42 Software Notes Operating Manual: PSS SB TESTER...
-
Page 43: Fault Diagnostics
Fault Diagnostics If you detect faults on SafetyBUS p, the following tables may help you to find the source of the fault and to rectify it. Connection test Problem Cause Correcting the problem Resistance between A terminating resistor has an Check the terminating CAN_H and CAN_L invalid value or there are too... - Page 44 Fault Diagnostics Signal test Problem Cause Correcting the problem Device’s signal level lies Connection is faulty or device Check the connection. If outside the measurable is defective nothing helps, change the range device Error message “Problem Short circuit between CAN_L Check line from CAN_L CAN_L”...
-
Page 45: Technical Details
Technical Details Electrical data Supply voltage Battery: Ni-Cd 4.8 VDC, 1000 mAh Charger: 110/230 VAC, 50 Hz Display Display type Single-colour graphic LC display Resolution 128 x 64 pixels Contrast adjustment Back lighting Operator elements Keyboard type Short-stroke keys with positive feedback No. - Page 46 Technical Details Notes Operating Manual: PSS SB TESTER...
- Page 47 Pilz Ges.m.b.H. Pilz lndustrieelektronik S.L. Pilz de Mexico, S. de R.L. de C.V. Pilz Elektronik Güvenlik Ürünleri Modecenterstraße 14 Camí Ral, 130 Circuito Pintores # 170 ve Hizmetleri Tic. Ltd. ¸ Sti. Polígono Industrial Palou Nord 1030 Wien Cd. Satelite Tan i¸...
Need help?
Do you have a question about the PSS Series and is the answer not in the manual?
Questions and answers