Arista 7000 Series Quick Start Manual
1 ru-gen 2 data center switches
Hide thumbs
Also See for 7000 Series:
- Quick start manual (54 pages) ,
- Quick start manual (38 pages) ,
- Quick start manual (27 pages)
Table of Contents
Advertisement
Advertisement
Table of Contents

Related Manuals for Arista 7000 Series


Summary of Contents for Arista 7000 Series
- Page 1 Quick Start Guide 7000 Series 1 RU-Gen 2 Data Center Switches DCS-7048T-A DCS-7050T-64 DCS-7050Q-16 DCS-7124FX DCS-7050QX-32 DCS-7124SX DCS-7050S-52 DCS-7150S-24 DCS-7050S-64 DCS-7150S-52 DCS-7050T-36 DCS-7150S-64 DCS-7050T-52 Arista Networks www.arista.com PDOC-00019-14...
- Page 2 © Copyright 2016 Arista Networks, Inc. The information contained herein is subject to change without notice. Arista Networks and the Arista logo are trademarks of Arista Networks, Inc in the United States and other countries. Other product or service names may be trademarks or service marks of others.
-
Page 3: Table Of Contents
Chapter: 5 Configuring the Switch ..................19 Appendix: A Status Indicators ..................21 Front Indicators ............................21 A.1.1 Switch Indicators........................21 A.1.2 Port Indicators........................... 22 Rear Status Indicators ........................... 23 Quick Start Guide: 7000 Series 1 RU-Gen 2 Data Center Switches... - Page 4 Rack Mount Parts ..........................25 B.1.1 Two-Post Rack Mount....................... 25 B.1.2 Four-Post Rack Mount ......................25 Cables..............................26 Appendix: C Front Panel ....................27 Appendix: D Rear Panel ..................... 33 Quick Start Guide: 7000 Series 1 RU-Gen 2 Data Center Switches...
-
Page 5: Overview
Step 3 Attach the mounting brackets and install the switch in an equipment rack (Chapter Step 4 Connect the switch to the power source and network devices (Chapter Step 5 Configure the switch (Chapter Quick Start Guide: 7000 Series 1 RU-Gen 2 Data Center Switches... -
Page 6: Safety Information
Important! Ultimate disposal of this product should be in accordance with all applicable laws and regulations. Safety Information Refer to the Arista Networks document Safety Information and Translated Safety Warnings available at: http://www.aristanetworks.com/en/support/docs/eos Obtaining Technical Assistance... - Page 7 120 W / 210 W DCS-7124FX 150 W / 240 W DCS-7150S-24 191 W / 334 W DCS-7150S-52 191 W / 450 W DCS-7150S-64 224 W / 455 W Quick Start Guide: 7000 Series 1 RU-Gen 2 Data Center Switches...
- Page 8 Specifications Overview Quick Start Guide: 7000 Series 1 RU-Gen 2 Data Center Switches...
-
Page 9: Chapter: 2 Preparation
Power Requirements: The switch requires one of these circuits: • 100-240 VAC, 5.29-2.2 A, 50-60 Hz A. • 40-72 VDC, 13.9–7.72 A. Two circuits provide redundancy protection. Section 4.1 describes power cable requirements. Quick Start Guide: 7000 Series 1 RU-Gen 2 Data Center Switches... -
Page 10: Tools Required For Installation
Keep replacement parts in their original static-free packaging. • Remove all plastic, foam, vinyl, paper, and other static-generating materials from the work area. • Use tools that do not create ESD. Quick Start Guide: 7000 Series 1 RU-Gen 2 Data Center Switches... -
Page 11: Rack Mounting The Switch
Bracket holes are horizontally equidistant, allowing bracket placements where the flange is not flush with either panel (Figure 3-2 on page 8). This placement supports a center-rack mount. After completing the instructions for your rack type, proceed to : Cabling the Switch. Quick Start Guide: 7000 Series 1 RU-Gen 2 Data Center Switches... -
Page 12: Two-Post Rack Mount
Figure 3-4 displays improper bracket mount configuration examples. Figure 3-3: Bracket Mount Examples for Two-Post Rack Mount Figure 3-4: Improper Bracket Mount Examples for Two-Post Rack Mount Quick Start Guide: 7000 Series 1 RU-Gen 2 Data Center Switches... -
Page 13: Attaching Mounting Brackets To The Chassis
Step 2 Select mounting screws that fit your equipment rack. Step 3 Attach the bracket flanges to the rack posts. After completing the two-post rack mount, proceed to : Cabling the Switch. Quick Start Guide: 7000 Series 1 RU-Gen 2 Data Center Switches... -
Page 14: Four-Post Rack Mount
Step 2 Attach the brackets with six M4x5 flat head Phillips screws per bracket, using a #1 Phillips screwdriver. Space the screws evenly, separating them with the widest possible distance. Figure 3-9 on page 11 displays screw placement for the front mount and center mount positions. Quick Start Guide: 7000 Series 1 RU-Gen 2 Data Center Switches... -
Page 15: Assembling The Rails Onto The Equipment Rack
Step 1 Select mounting screws that fit your equipment rack. Each rail requires two screws. Step 2 Attach the rails to the rear rack posts, as shown in Figure 3-11 on page Quick Start Guide: 7000 Series 1 RU-Gen 2 Data Center Switches... -
Page 16: Attaching The Switch To The Rack
Step 4 Verify the distance between the mounting bracket flanges and rail flanges does not exceed 30 inches (Figure 3-10 on page 11). Step 5 Attach the bracket flanges to the rack posts (Figure 3-13 on page 13). Quick Start Guide: 7000 Series 1 RU-Gen 2 Data Center Switches... - Page 17 Rack Mounting the Switch Four-Post Rack Mount Figure 3-13: Attaching the Switch to the Rack Posts After completing the four-post rack mount, proceed to : Cabling the Switch. Quick Start Guide: 7000 Series 1 RU-Gen 2 Data Center Switches...
- Page 18 Four-Post Rack Mount Rack Mounting the Switch Quick Start Guide: 7000 Series 1 RU-Gen 2 Data Center Switches...
-
Page 19: Cabling The Switch
The power supplies require power cables that comply with IEC-320 and have a C13 plug. The accessory kit provides two IEC-320 C13 to C14 power cables, each two meters long. Figure 4-1: AC Power Supply Quick Start Guide: 7000 Series 1 RU-Gen 2 Data Center Switches... -
Page 20: Dc Power Supply
3. Positive (+) source DC cable to the positive (+) connector on the terminal block. Important! Apply the ground connection first during installation and remove last when removing power. Step 4 Replace the terminal cover. Quick Start Guide: 7000 Series 1 RU-Gen 2 Data Center Switches... -
Page 21: Connecting Serial And Management Cables
USB Port: The USB port may be used for software or configuration updates. • Clock Input Port: Port type is MCX connector, 2-5.5V, 50 ohm termination. Caution Excessive bending can damage interface cables, especially optical cables. Quick Start Guide: 7000 Series 1 RU-Gen 2 Data Center Switches... - Page 22 Connecting Serial and Management Cables Cabling the Switch Quick Start Guide: 7000 Series 1 RU-Gen 2 Data Center Switches...
-
Page 23: Configuring The Switch
Chapter 5 Configuring the Switch Arista switches ship from the factory in Zero Touch Provisioning (ZTP) mode. ZTP configures the switch without user intervention by downloading a startup configuration file or a boot script from a location specified by a DHCP server. To manually configure a switch, ZTP is bypassed. The initial configuration provides one username (admin) accessible only through the console port because it has no password. - Page 24 When the management port IP address is configured, use this command to access the switch from a host, using the address configured in step 9: ssh admin@192.0.2.8 Refer to the Arista Networks User Manual for complete switch configuration information. Quick Start Guide: 7000 Series 1 RU-Gen 2 Data Center Switches...
-
Page 25: Appendix: A Status Indicators
The locater function is active. Two or more fans (any combination of fan module s or PSU fans) a re disconnected or malfunctioning. The switch will automatically execute a “graceful shutdown” shortly. Quick Start Guide: 7000 Series 1 RU-Gen 2 Data Center Switches... -
Page 26: Port Indicators
SFP+ ports is consistent. Table A-4 Port LED States LED State Status Port link is down. Green Port link is up. Yellow Port is software disabled. Flashing Yellow Port failed diagnostics. Quick Start Guide: 7000 Series 1 RU-Gen 2 Data Center Switches... -
Page 27: Rear Status Indicators
Table A-6 Power Supply Status LED States LED State Status Power supply not connected to AC power or not inserted fully. Green Power supply operating normally. Amber Power supply has overheated or failed. Quick Start Guide: 7000 Series 1 RU-Gen 2 Data Center Switches... - Page 28 Rear Status Indicators Status Indicators Quick Start Guide: 7000 Series 1 RU-Gen 2 Data Center Switches...
-
Page 29: Appendix: B Parts List
Four-Post M4x5 flat head Phillips screws Two-Post and Four-Post B.1.1 Two-Post Rack Mount Figure B-1: Two-Post Rack Mount Parts B.1.2 Four-Post Rack Mount Figure B-2: Four-Post Rack Mount Parts Quick Start Guide: 7000 Series 1 RU-Gen 2 Data Center Switches... -
Page 30: Cables
Power cables: IEC-320/C13-C14, 13 A, 250 V, 2 meter RJ-45 Patch Panel Cable, 2 meter RJ-45 to DB9 Adapter Cable, 2 meter Warning All provided power cables are for use only with Arista products. Quick Start Guide: 7000 Series 1 RU-Gen 2 Data Center Switches... -
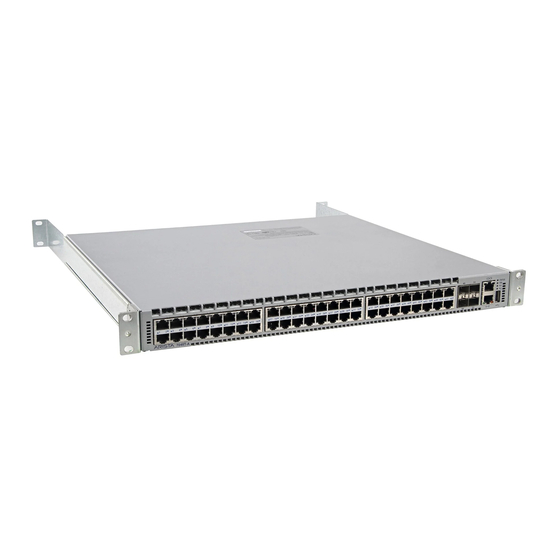
Page 31: Appendix: C Front Panel
Appendix C Front Panel This appendix displays the front panel of all switches covered by this guide. DCS-7048T-A Figure C-1: DCS-7048T-A Front Panel DCS-7050Q-16 Figure C-2: DCS-7050Q-16 Front Panel Quick Start Guide: 7000 Series 1 RU-Gen 2 Data Center Switches... - Page 32 Front Panel DCS-7050QX-32 Figure C-3: DCS-7050QX-32 Front Panel DCS-7050S-52 Figure C-4: DCS-7050S-52 Front Panel DCS-7050S-64 Figure C-5: DCS-7050S-64 Front Panel Quick Start Guide: 7000 Series 1 RU-Gen 2 Data Center Switches...
- Page 33 Front Panel DCS-7050T-36 Figure C-6: DCS-7050T-36 Front Panel DCS-7050T-52 Figure C-7: DCS-7050T-52 Front Panel DCS-7050T-64 Figure C-8: DCS-7050T-64 Front Panel Quick Start Guide: 7000 Series 1 RU-Gen 2 Data Center Switches...
- Page 34 Front Panel DCS-7124FX Figure C-9: DCS-7124FX Front Panel DCS-7124SX Figure C-10: DCS-7124SX Front Panel DCS-7150S-24 Figure C-11: DCS-7150S-24 Front Panel Quick Start Guide: 7000 Series 1 RU-Gen 2 Data Center Switches...
- Page 35 Front Panel DCS-7150S-52 Figure C-12: DCS-7150S-52 Front Panel DCS-7150S-64 Figure C-13: DCS-7150S-64 Front Panel Quick Start Guide: 7000 Series 1 RU-Gen 2 Data Center Switches...
- Page 36 Front Panel Quick Start Guide: 7000 Series 1 RU-Gen 2 Data Center Switches...
-
Page 37: Appendix: D Rear Panel
Appendix D Rear Panel This appendix displays the rear panel of all switches covered by this guide. All Models Figure D-1: Rear Panel Quick Start Guide: 7000 Series 1 RU-Gen 2 Data Center Switches... - Page 38 Rear Panel Quick Start Guide: 7000 Series 1 RU-Gen 2 Data Center Switches...
Need help?
Do you have a question about the 7000 Series and is the answer not in the manual?
Questions and answers