Advertisement
Installation of Express Mini Card
Step 1 Turn off the system, and unplug the power adaptor.
Step 2
Turn the system upside down to locate screws at the side of
the system, and then loosen two screws.
Step 3 Remove the bottom cover (notice the direction mark) and HDD
cover.
Step 4 Please follow your requirement to connect PCI Express Mini
Card module, EX: WIFI, mSATA and GPS.
Step 5 Slide Mini Card into Mini Card slot with caution, and fasten
screw of Express Mini Card.
Step 6 Recover the HDD cover and bottom cover, and then fasten two
screws on the side of the system.
Note: Please refer to the user's manual to get more detail information.
4
©Copyright 2018 Axiomtek Co., Ltd.
Version A1 March 2018
Printed in Taiwan
9416K565010E
eBOX565-312-FL Quick Installation Guide
Packing List
System Unit x 1
DVD/CD x 1 (for Driver & Manual)
Quick Installation Guide x 1
2-pin Terminal block x 1
Pre-installed Foot pad x 4
Screw pack x 1
Do not try to apply power to the system if any damaged components.
Dimensions
©Copyright 2018 Axiomtek Co., Ltd.
Version A1 March 2018
Printed in Taiwan
9416K565010E
1
Advertisement
Table of Contents

Related Manuals for AXIOMTEK eBOX565-312-FL


Summary of Contents for AXIOMTEK eBOX565-312-FL
- Page 1 Installation of Express Mini Card eBOX565-312-FL Quick Installation Guide Step 1 Turn off the system, and unplug the power adaptor. Step 2 Turn the system upside down to locate screws at the side of the system, and then loosen two screws.
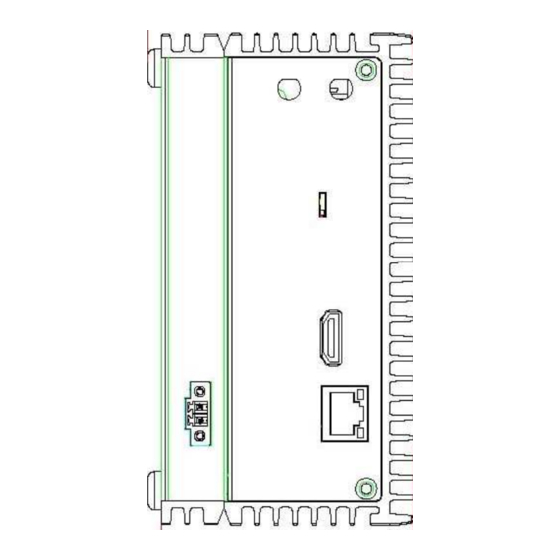
- Page 2 I/O Outlets Installation of Hard Disk Drive The following figures show I/O outlets on the eBOX565-312-FL. Step 1 Turn off the system, and unplug the power adaptor. Step 2 Turn the system upside down to locate screws at the side of Front View the system, and then loosen two screws.
Need help?
Do you have a question about the eBOX565-312-FL and is the answer not in the manual?
Questions and answers