Advertisement
Quick Links
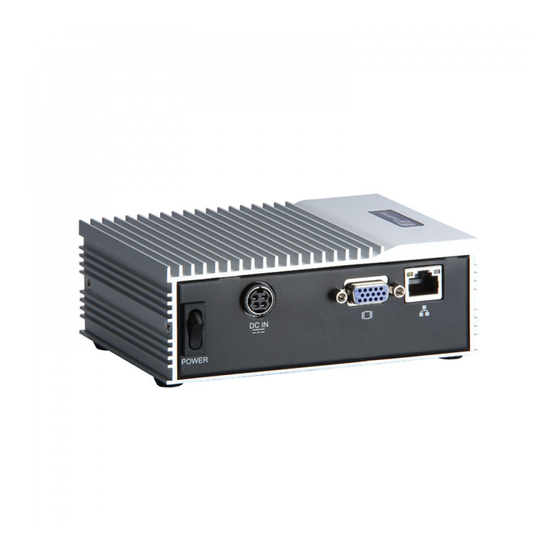
eBOX530-820-FL Quick Installation Guide
V.
Installing the Hard Disk Drive
Step 1 Turn off the system, and unplug the power cord.
Step 2 Turn the system upside down to locate screws at the bottom,
loosen screws to remove the back cover.
Step 3 Assembly the HDD bracket, together with the HDD Mylar, and fix it
all into the system, and plug the power cable in HDD.
Step 4
Close the cover to the chassis, and fasten all screws.
MAXIMUM DEPTH OF THE HDD BRACKET : 2.5mm (when installing DIN
Mount)
D E P T H 2 . 5 m m
4
M A X .
©
Copyright 2009 AXIOMTEK Co., Ltd.
Version A2 April 2009
Printed in Taiwan
94260530020E
eBOX530-820-FL Quick Installation Guide
I.
Packing List
eBOX530-820-FL System
Unit x
1
eBOX530-820-FL Quick
Installation Guide x 1
Power Cord x 1
Wallmount Bracket x 2
M3x4 Screws x 4
Do not try to apply power to the system if any damaged
components.
II.
Dimensions
©
Copyright 2009 AXIOMTEK Co., Ltd.
Version A2 April 2009
Printed in Taiwan
94260530020E
Y Cable for PS/2 Keyboard &
Mouse x 1
CD x 1 (for Driver and SBC
User's Manual)
25W 5V AC/DC Power Adapter
x 1
NOTICE x1
HDD Mylar x1
1
Advertisement

Related Manuals for AXIOMTEK eBOX530-820-FL


Summary of Contents for AXIOMTEK eBOX530-820-FL
- Page 1 Quick Installation Guide eBOX530-820-FL Quick Installation Guide Installing the Hard Disk Drive Packing List Step 1 Turn off the system, and unplug the power cord. eBOX530-820-FL System Y Cable for PS/2 Keyboard & Step 2 Turn the system upside down to locate screws at the bottom,...
- Page 2 Quick Installation Guide eBOX530-820-FL Quick Installation Guide III. I/O Outlets Installing the Memory Module The following figures show you I/O outlets on front and rear panels of the eBOX530-820-FL Series. Step 1 Turn off the system, and unplug the power cord.
Need help?
Do you have a question about the eBOX530-820-FL and is the answer not in the manual?
Questions and answers