Table of Contents
Advertisement
Quick Links
Advertisement
Table of Contents

Related Manuals for Wallenstein LXT95


Summary of Contents for Wallenstein LXT95
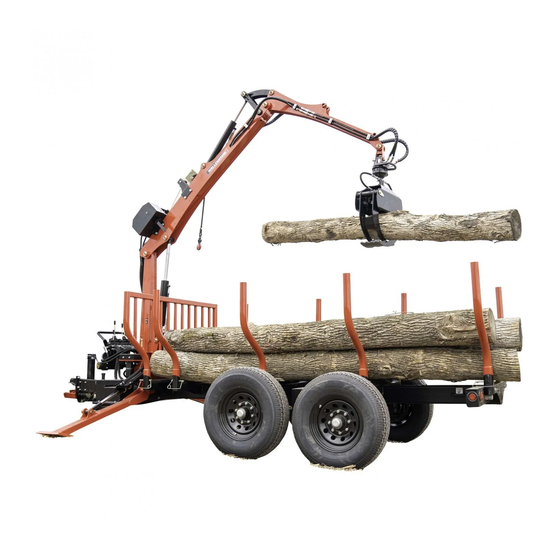
- Page 1 OPERATOR'S MANUAL LXT95 – Serial number 95X130 to 95X146, 1100000 and up LXT115 – Serial number 2E9US1115N5060191, 2E9US1115N5060193 to 2E9US1116PS060207, 1100000 and up LXT 95 / LXT 115 Log Loader Trailer Rev Mar-2023 Document Number: Z97069_En...
-
Page 2: Table Of Contents
1. Introduction ............3 6.7 LXT115 Electric Brake Operation ......40 1.1 Delivery Inspection Report ........4 6.8 LXT95 Sliding Axle Operation ........40 1.2 Serial Number Location ..........5 6.9 Start the Machine ............ 41 1.3 Types of Decals on the Machine ....... 6 6.10 Stop the Machine ............ -
Page 3: Introduction
Keep this manual available for frequent reference and to give to WARNING! new operators or owners. Call your local Wallenstein dealer or the distributor if you need assistance, information, or additional Do not attempt to start or operate the machine copies of the manuals. -
Page 4: Delivery Inspection Report
LXT95 / LXT115 Introduction Log Loader Trailer Delivery Inspection Report Wallenstein Log Loader Trailer To register your product and start the warranty, go to WallensteinEquipment.com. This form must be completed by the dealer at the time of delivery, and then signed by the dealer and customer. -
Page 5: Serial Number Location
LXT95 / LXT115 Introduction Log Loader Trailer Serial Number Location Always provide the model and serial number of your Wallenstein product when ordering parts or requesting service or other information. The product information plate location is shown in the following illustration. -
Page 6: Types Of Decals On The Machine
This type of decal provides information for the operator or explains the While you become familiar with your Wallenstein product, look operation of a control. at the decals. There are different types of decals for safety, information, and product identification. -
Page 7: Safety
YOU are responsible for the SAFE operation and maintenance DANGER – of your Wallenstein product. YOU must make sure that you Indicates an imminently hazardous situation that, if not avoided, and anyone else who is going to use, maintain, or work around will result in death or serious injury. -
Page 8: Safety Rules
W016 cause permanent hearing loss. Power equipment with or without a vehicle Wallenstein Equipment puts considerable effort into designing attached can often be noisy enough to products that are safe to use; however, it is also the cause permanent, partial hearing loss. -
Page 9: Equipment Safety Guidelines
LXT95 / LXT115 Safety Log Loader Trailer Equipment Safety Guidelines SAFE CONDITION 1. If the machine is connected to a tow vehicle, set the tow Safety is one of the main concerns in designing and developing vehicle's parking brake, turn off the engine, and remove equipment. -
Page 10: Sign-Off Form
LXT95 / LXT115 Safety Log Loader Trailer Sign-Off Form The design and manufacture of this product conforms to the applicable provisions in the following standards: Everyone who uses this machine must read and thoroughly • ASABE S318 Safety for Agricultural Field Equipment. -
Page 11: Work Site
LXT95 / LXT115 Safety Log Loader Trailer Work Site • The work zone perimeter must be a minimum of 20 ft (6 m) from any hazard. The area outside the work zone perimeter is the safe zone. CAUTION! • The work zone in a forestry operation must be planned,... - Page 12 LXT95 / LXT115 Safety Log Loader Trailer A safe work area is divided into three zones: 3. Work Zone – The area between the Hazard Zone and the Safe Zone. People assisting with the work who are wearing 1. Safe Zone – The area outside the work zone perimeter.
-
Page 13: Safety Signs
LXT95 / LXT115 Safety Signs Log Loader Trailer 3. Safety Signs WARNING! Risk of personal injury. Replace safety signs that are removed, damaged, or illegible. If a part with a safety sign on it is replaced, a new safety sign must be applied. -
Page 14: Safety Sign Locations
Log Loader Trailer Safety Sign Locations The numbers correspond with the Safety Sign Explanations on page 15. The LXT115 model has the same safety sign locations. 50 ft (15 m) 02030 Figure 3 – Safety sign locations (LXT95 model shown) -
Page 15: Safety Sign Explanations
LXT95 / LXT115 Safety Signs Log Loader Trailer Safety Sign Explanations 4. Warning! Electrocution hazard 1. Warning! Stay 50 ft (15 m) or more away from Read the Operator's Manual overhead electrical cables. Electrocution can occur without direct contact through Read ALL operating instructions and an electrical arc. -
Page 16: Information Decals
LXT95 / LXT115 Safety Signs Log Loader Trailer 7. Warning! 10. Warning! Impact and crush hazard High-pressure injection hazard Do not go below the grapple. Keep people Keep your distance from hydraulic hoses away from the grapple during operation. and do not touch them. The hydraulic Material can fall from the grapple. -
Page 17: Replace A Safety Sign
Replace a Safety Sign • Always replace safety signs that are missing or have become illegible. Replacement safety signs are available through your local Wallenstein Equipment dealer or distributor. • Keep the safety signs clean and legible at all times. -
Page 18: Familiarization
Familiarization Log Loader Trailer 4. Familiarization Your LXT95 or LXT115 log loader trailer is designed for an Operator Orientation operator to load and transport logs. Use the boom and log grapple to lift logs and then place them on the trailer. Power to... -
Page 19: Machine Components
LXT95 / LXT115 Familiarization Log Loader Trailer Machine Components The following sections describe the machine components for each machine assembly. 4.4.1 Trailer Components LXT95 02031 LXT115 02032 Figure 5 – Trailer components 1. Bunk post (removable, self centering) 7. Trailer jack 13. - Page 20 2. Operator control panel 8. Dipper boom 14. Boom turn assembly 3. Hydraulic control valves 9. Log grapple rotator 15. LXT95 sliding axle and winch accessory 4. Main-boom tower 10. Log grapple fork (1 of 2) hydraulic control valves 5. Main-boom hydraulic cylinder 11.
- Page 21 LXT95 / LXT115 Familiarization Log Loader Trailer 4.4.3 Engine and Hydraulic System Components LXT95 LXT115 02034 02035 Figure 7 – Engine and hydraulic components 1. Engine, 6.5 hp (203 cc) 4. Hydraulic fluid reservoir 7. Hydraulic fluid pressure hose 2. Hydraulic fluid pump 5.
- Page 22 LXT95 / LXT115 Familiarization Log Loader Trailer 4.4.4 Hydraulic Winch Components The hydraulic winch is an accessory that is sold separately from the machine. 02036 Figure 8 – Hydraulic winch components (sold separately) 1. Hydraulic valve and control lever (LXT115 only) 4.
-
Page 23: Controls
LXT95 / LXT115 Controls Log Loader Trailer 5. Controls WARNING! STOP Do not operate the machine until you are thoroughly familiar with the position and function of the various controls. Read the operator’s manual thoroughly. Your safety is involved! W065 LX95 6.5 hp Engine Controls... -
Page 24: Lx115 10 Hp Engine Controls
LXT95 / LXT115 Controls Log Loader Trailer 5.1.3 Rewind Start LX115 10 hp Engine Controls WARNING! WARNING! Fast retraction of the starter cord (called Before starting the engine, read and understand kickback) pulls your hand and arm toward the the safety and operating information under engine faster than you can let go of the handle. - Page 25 LXT95 / LXT115 Controls Log Loader Trailer 5.2.2 Fuel-Shutoff Control 5.2.3 Choke Control The throttle control lever has the following functions: The choke control lever has the following functions: Closed and Off Closed The fuel-shutoff valve is closed and the engine Close the choke to start a cold engine.
-
Page 26: Operator Control Panel Lock
LXT95 / LXT115 Controls Log Loader Trailer 5.2.4 Rewind Start Operator Control Panel Lock WARNING! The operator control panel can be turned to the left or right side of the machine. Position the operator controls on the opposite Fast retraction of the starter cord (called side of the machine from the work area. -
Page 27: Boom Lock Pin
LXT95 / LXT115 Controls Log Loader Trailer Boom Lock Pin The boom lock pin prevents the main boom from turning. When it is not in use, put the boom lock pin in the storage bracket on the side of the main boom. -
Page 28: Main Hydraulic Controls
LXT95 / LXT115 Controls Log Loader Trailer Main Hydraulic Controls 5.6.1 LH Stabilizer Control Lever Extend IMPORTANT! Stand at the operator control panel and face Push the lever forward to extend the LH the main boom. The left hand (LH), right hand (RH), forward, stabilizer. -
Page 29: Lxt95 Sliding-Axle Control
5.6.4 Dipper Boom or Log Grapple Control LXT95 Sliding-Axle Control Lever The LXT95 has a second hydraulic control valve and two control levers. The LH control lever is for the sliding axle. The valve and Raise control levers are located on the front of the operator control Push the lever forward to raise the dipper panel. -
Page 30: Lxt95 Surge Brake Control
(backward). then guides the post back to an upright position. For more information, see LXT95 Surge Brake Operation on page 39. Disengage Turn the surge brake control to the horizontal position to disengage the surge brakes (the surge brakes do not operate). -
Page 31: Hydraulic Winch Controls
Pull and hold the lever backward to start the winch, and then wind the winch rope onto the drum. Release the lever to stop. The lever moves to the neutral position. 02038 Figure 24 – Winch gear lever 01649 Figure 23 – Winch control lever (LXT95 model shown) -
Page 32: Operating Instructions
LXT95 / LXT115 Operating Instructions Log Loader Trailer 6. Operating Instructions Read and understand all of the operating instructions before • Never operate the machine alone! Always have a using the machine. minimum of two fully trained people present: - It is recommended that there be one operator and one spotter present during machine operation. -
Page 33: Pre-Start Checklist
LXT95 / LXT115 Operating Instructions Log Loader Trailer Pre-Start Checklist Machine Break-In Complete the following before you start the machine the first Although there are no operational restrictions on the machine time and every time thereafter: when it is used for the first time, the following process is... -
Page 34: Engine Operation
Never operate the engine indoors. Park the and regulations. To purchase a spark arrestor, contact your machine outdoors in a position where the local Wallenstein dealer or distributor. prevailing winds blow the exhaust away from you. • Remove the wire from the spark plug before servicing... - Page 35 LXT95 / LXT115 Operating Instructions Log Loader Trailer • Do not strike the flywheel with a hard object or metal tool. This can cause the flywheel to shatter during operation. Use the correct tools to service the engine. • When the engine is hot, do not touch the muffler, cylinder, or fins.
- Page 36 2. Stop the machine. For instructions, see Stop the Machine on page 41. 3. Do one of the following: Figure 26 – Check the LXT95 6.5 hp engine oil level - For the 6.5 hp engine, pull out the oil-level dipstick. 01758 - For the 10 hp engine, remove the oil-fill cap.
- Page 37 The engine has three oil-fill locations. Two locations are shown in the following image. The third location is on the opposite side Figure 29 – LXT115 10 hp engine oil-fill locations of the engine, below the dipstick. 01779 Figure 28 – LXT95 6.5 hp engine oil-fill locations...
-
Page 38: Hydraulic System Operation
LXT95 / LXT115 Operating Instructions Log Loader Trailer Hydraulic System Operation 6.5.2 Check the Hydraulic Fluid Level A hydraulic system is a closed-loop system that uses IMPORTANT! Do not operate the machine if the hydraulic pressurized automatic transmission fluid (ATF) to provide power fluid level is low. -
Page 39: Lxt95 Surge Brake Operation
IMPORTANT! Before you transport the machine, read and understand the information under Transport on page 50. LXT95 machines are not intended for use or transport on a public roadway. The surge brakes help to decrease the speed of the machine when it goes down a slope. -
Page 40: Lxt115 Electric Brake Operation
- Decrease the trailer-tongue weight (move the axle manufacturer’s information. forward). For more information, see Figure 32. 6.7.1 Electric Brake Safety For more information, see LXT95 Sliding-Axle Control on page 29. WARNING! Never use only the tow vehicle brakes or machine brakes to stop the combined load. -
Page 41: Start The Machine
3. Move the choke control to the Closed position. 2. Remove the cause of the emergency before starting the engine to continue the work. 4. Move the throttle control and fuel-shutoff (LXT95 model) or throttle control (LXT115 model) to the Fast position. LXT115 model 5. -
Page 42: Set Up The Machine
Exhaust from the engine contains correctly. carbon monoxide (CO) that can accumulate to a 9. For the LXT95 model: adjust the sliding axle. dangerous level, even in an area with good air For instructions, see LXT95 Sliding Axle Operation on page fl ow. - Page 43 LXT95 / LXT115 Operating Instructions Log Loader Trailer The numbers in the following figure refer to the step numbers in Set Up the Machine on page 42. 02069 Figure 33 – Set up the machine (LXT115 shown)
-
Page 44: Load The Log Trailer
LXT95 / LXT115 Operating Instructions Log Loader Trailer 6.13 Load the Log Trailer • Make sure that no logs or branches protrude out the side of the trailer. The load must be contained within the bunk posts. WARNING! • Make sure that all the logs are in a stable position. -
Page 45: Unload The Log Trailer
LXT95 / LXT115 Operating Instructions Log Loader Trailer 6.14 Unload the Log Trailer WARNING! Stay 50 ft (15 m) or more away from overhead and underground electrical cables. Electrocution can occur without direct contact through an electrical arc. Electrocution can cause burns, serious injury, or death. - Page 46 LXT95 / LXT115 Operating Instructions Log Loader Trailer 3. Raise the boom until it is higher than the machine bunk posts. 4. Turn the boom to position it above the trailer and the centre- of-mass of a log. 5. Turn the log grapple until it is perpendicular to the log.
-
Page 47: Hydraulic Winch Operation
LXT95 / LXT115 Operating Instructions Log Loader Trailer 6.15 Hydraulic Winch Operation • Always make sure that the anchor you select can withstand the load and the strap or chain cannot slip. This section describes how to use the hydraulic winch •... - Page 48 LXT95 / LXT115 Operating Instructions Log Loader Trailer • Never exceed a winch angle of ±25° from the centerline • When using a snatch block (self-releasing pulley), be aware of the machine. If you are unsure of the winch angle,...
- Page 49 LXT95 / LXT115 Operating Instructions Log Loader Trailer 6.15.2 Winch a Log WARNING! Before using the winch, read and understand the information under Winch Safety on page 47. IMPORTANT! Stand at the operator control panel and face the main boom. The left hand (LH), right hand (RH), forward, and backward directions in this section are referenced from this position.
-
Page 50: Transport
For more information, see LXT95 Surge Brake Control on LXT95 log loader trailers are not intended for use or page 30. transport on public roadways. Therefore, they do not include the necessary lights, reflectors, and markings. - Page 51 LXT95 / LXT115 Transport Log Loader Trailer 8. Stow or raise the trailer jack. For instructions, see Trailer Jack on page 53. 9. Do a circle check to make sure that the machine is safe for transport. 01686 01659 Figure 43 – Log grapple position with a load Figure 45 –...
-
Page 52: Attach To A Tow Vehicle
01230 disconnecting a hitch. Ball-mount hitch coupler sizes: • LXT95 - 2 inch. Figure 46 – Ball-mount hitch connection • LXT115 - 2-5/16 inch. 7.3.1 Connect to a Ball-Mount Hitch 7.3.2 Disconnect from a Ball-Mount Hitch... -
Page 53: Trailer Jack
5. Raise and stow the jack. 7.4.1 Lower the LXT95 Trailer Jack 6. Cross the two safety chains below the trailer tongue, and 1. Pull the pin out of the bracket. - Page 54 LXT95 / LXT115 Transport Log Loader Trailer 7.4.2 Stow the LXT95 Trailer Jack 7.4.3 Lower the LXT115 Trailer Jack 1. Support the machine to remove weight from the jack. 1. Pull the pin out of the jack. Attach the machine to a tow vehicle or support the trailer 2.
- Page 55 LXT95 / LXT115 Transport Log Loader Trailer 7.4.4 Raise the LXT115 Trailer Jack 1. Support the machine to remove weight from the jack. Attach the machine to a tow vehicle or support the trailer tongue with blocks. 2. Pull the pin out of the jack.
-
Page 56: Storage
LXT95 / LXT115 Storage Log Loader Trailer 8. Storage At the end of the season or when the machine is not going to 7. Do one of the following: be used for an extended period of time, completely examine all - If the machine will be in storage for one to three of the major systems. -
Page 57: Replace The Engine Fuel
LXT95 / LXT115 Storage Log Loader Trailer Replace the Engine Fuel Remove the Machine from Storage WARNING! 1. Do the tasks decribed in the Pre-Start Checklist on page Before you replace the fuel, read and understand the information under Engine Safety on page 2. -
Page 58: Service And Maintenance
LXT95 / LXT115 Service and Maintenance Log Loader Trailer 9. Service and Maintenance Regular preventive maintenance can improve performance and Place the machine in a safe condition before you start any prolong the life of the machine. Machine maintenance is the service or maintenance: owner's responsibility. -
Page 59: Fluids And Lubricants
LXT95 / LXT115 Service and Maintenance Log Loader Trailer 9.2.3 Engine Fuel • After the work is complete, do the following: - Check all the fasteners. Tighten any loose bolts, nuts, or For complete fuel information and use at high altitudes, see screws. -
Page 60: Maintenance Schedule
LXT95 / LXT115 Service and Maintenance Log Loader Trailer Maintenance Schedule IMPORTANT! For more information, see the engine, axle, and brake manufacturer manuals. Complete maintenance tasks at the specified time or hour interval, whichever comes first. 600 hours or every... -
Page 61: Grease Points
(three on each stabilizer) For more information, see the following illustrations: Main boom sprocket • Figure 52 – LXT95 grease points on page 62 Trailer tongue bushing • Figure 53 – LXT115 grease points on page 63 Log grapple hydraulic rotator •... - Page 62 LXT95 / LXT115 Service and Maintenance Log Loader Trailer 02074 Figure 52 – LXT95 grease points...
- Page 63 LXT95 / LXT115 Service and Maintenance Log Loader Trailer 02076 Figure 53 – LXT115 grease points...
- Page 64 LXT95 / LXT115 Service and Maintenance Log Loader Trailer 02077 Figure 54 – Log grapple grease points...
- Page 65 LXT95 / LXT115 Service and Maintenance Log Loader Trailer 02078 Figure 55 – Hydraulic winch accessory grease points...
-
Page 66: Clean The Engine Air Filter
5. Install the air filter in the engine. 6. Install the cover. 7. Tighten the two air-filter cover fasteners. Figure 57 – LXT115 10 hyp engine air filter 01809 Figure 56 – LXT95 6.5 hp engine air filter... -
Page 67: Replace The Hydraulic Fluid And Filter
LXT95 / LXT115 Service and Maintenance Log Loader Trailer Replace the Hydraulic Fluid and 9. Fill the reservoir to the top mark on the dipstick. For more information, see Add Hydraulic Fluid to the Filter Reservoir on page 39. 10. Start the machine. -
Page 68: Brake Maintenance
IMPORTANT! All brake repairs or replacements must be done by a qualified mechanic. For more information, see LXT95 Surge Brake Operation on 01692 page 39 and LXT115 Electric Brake Operation on page 40. For the manufacture's information, go to DexterAxle.com. - Page 69 LXT95 / LXT115 Service and Maintenance Log Loader Trailer The following procedure applies to surge brakes and electric brakes. 1. Use a scissor jack or trolley jack to lift one side of the machine. Make sure that the wheels can turn freely.
- Page 70 LXT95 / LXT115 Service and Maintenance Log Loader Trailer 9.7.2 Burnish the Brakes 9.7.3 Examine the LXT95 Surge Brake System WARNING! WARNING! Before starting the burnishing process, make sure that the area is clear of vehicles and There is a potential inhalation hazard from pedestrians.
-
Page 71: Synthetic Winch Rope Maintenance
For information about the correct replacement synthetic winch rope, see the Wallenstein Equipment Parts IMPORTANT! For safe brake performance and Manual. synchronization, read the brake controller manufacturer’s W094 information before you start the synchronization procedure. -
Page 72: Tire Maintenance And Safety
LXT95 / LXT115 Service and Maintenance Log Loader Trailer 9.10 Clean the Machine e. Work your way through the entire rope until the clean rope is on the towel. f. Examine the winch spool and fairlead for sharp or rough IMPORTANT! Using harsh chemicals can damage the surfaces that could damage the rope. - Page 73 Tighten all the hydraulic hose connections. movement is not smooth. Hydraulic control lever does The hydraulic valve spool-return spring is Replace the spool-return or valve. Contact your local Wallenstein not go to the neutral position faulty. Equipment dealer or distributor.
- Page 74 The brakes are not adjusted correctly. Adjust the brakes or contact your local Wallenstein Equipment dealer or distributor.. There is grease or oil on the brake linings. Clean or replace the brake linings. Contact your local Wallenstein Equipment dealer or distributor.
-
Page 75: Specifications
LXT95 / LXT115 Specifications Log Loader Trailer 11. Specifications For engine specifications, see the engine manufacturer's manual. For axle and brake specifications, see the axle and brake manufacturer's information. For available accesories, go to WallensteinEquipment.com. 11.1 Machine Specifications Parameter LXT95... -
Page 76: Bolt Torque
LXT95 / LXT115 Specifications Log Loader Trailer 11.3 Bolt Torque IMPORTANT! If you replace hardware, use fasteners of Imperial Bolt Torque Specifications the same grade. Torque Bolt SAE Gr. 2 SAE Gr. 5 SAE Gr. 8 Diameter IMPORTANT! The torque specifications in these tables lbf•ft... -
Page 77: Hydraulic Fitting Torque
LXT95 / LXT115 Specifications Log Loader Trailer 11.4 Hydraulic Fitting Torque Hydraulic Fitting Torque Specifications Tighten flare-type tube fittings: Hex size Tube size across Flats from finger 1. Check the flare and flare seat for defects that might flats Torque tight cause leaks. -
Page 78: Product Warranty
Log Loader Trailer 12. Product Warranty LIMITED WARRANTY Wallenstein products are warranted to be free of defects in materials and workmanship under normal use and service, for a period of Five Years for Consumer Use Two Years for Commercial/Rental Use from the date of purchase, when operated and maintained in accordance with the opera�ng... -
Page 79: Index
Log grapple �������������������������������������������������������������� 28 Specifications����������������������������������������������������������������� 59 Main boom���������������������������������������������������������������� 28 Fuel, engine RH stabilizer ������������������������������������������������������������� 29 Add �������������������������������������������������������������������������������� 35 Sliding axle, LXT95 �������������������������������������������������� 29 Level check �������������������������������������������������������������������� 35 Winch accessory ������������������������������������������������������ 31 Replace�������������������������������������������������������������������������� 57 Operator control panel lock�������������������������������������������� 26 Shutoff, 6.5 hp ��������������������������������������������������������������� 23 Stabilizer latch ���������������������������������������������������������������... - Page 80 Pre-start checklist ���������������������������������������������������������� 33 Connect �������������������������������������������������������������������� 53 Safety����������������������������������������������������������������������������� 32 Disconnect���������������������������������������������������������������� 53 Set up the machine �������������������������������������������������������� 42 Hydraulic Sliding axle, LXT95 �������������������������������������������������������� 40 Controls Start machine����������������������������������������������������������������� 41 Dipper boom or log grapple �������������������������������������� 29 Stop machine ����������������������������������������������������������������� 41 LH stabilizer�������������������������������������������������������������� 28 Surge brakes, LXT95 �����������������������������������������������������...
- Page 81 Bolts ������������������������������������������������������������������������������� 76 Adjust ����������������������������������������������������������������������� 69 Hydraulic fittings ������������������������������������������������������������ 77 Burnish ��������������������������������������������������������������������� 70 Lug nuts ������������������������������������������������������������������������� 77 Examine, LXT95 surge ��������������������������������������������� 70 Tow vehicle, attach machine ����������������������������������������������� 52 Syncronize, LXT115 electric ������������������������������������� 71 Trailer jack ��������������������������������������������������������������������������� 53 Clean the machine ��������������������������������������������������������� 72...
- Page 84 WallensteinEquipment.com...
Need help?
Do you have a question about the LXT95 and is the answer not in the manual?
Questions and answers