Table of Contents
Advertisement
Quick Links
Advertisement
Table of Contents

Related Manuals for Palm Pre Plus


Summary of Contents for Palm Pre Plus
- Page 1 User Guide...
- Page 2 Palm, Inc. and its suppliers assume no responsibility for any damage or loss resulting from the use of this guide. Palm, Inc. and its suppliers assume no responsibility for any loss or claims by third parties that may arise through the use of this software. Palm, Inc. and its suppliers assume no responsibility for any damage or loss caused by deletion of data as a result of malfunction, dead battery, or repairs.
-
Page 3: Table Of Contents
Contents Chapter 1 Welcome Your Palm Pre™ Plus phone ® What’s in the box? Where can I learn more? Chapter 2 Basics Get to know your phone Set up your phone Charge the battery Turn the phone on/off Use gestures: tap, swipe, drag, flick, pinch... - Page 4 ® wireless technology Chapter 9 Documents Doc View PDF View Chapter 10 Preferences Backup Remotely erase your Palm profile account Date & Time Device Info Regional Settings Screen & Lock Sounds & Ringtones Contents Chapter 11 Troubleshooting For users of other Palm...
-
Page 5: Chapter 1 Welcome
Welcome Congratulations on the purchase of your Palm Plus phone. In this chapter ® Pre™ Your Palm What’s in the box? Where can I learn more? Pre™ Plus phone ® Chapter 1 : Welcome... -
Page 6: Your Palm ® Pre™ Plus Phone
Exchange account for your corporate email, contacts, and events. The Email, Contacts, and Calendar applications on your Pre Plus phone all provide a kind of view in which you can see information from both of those accounts in one place—but even though the information is brought into one view, the sources of that information are webOS™... -
Page 7: What's In The Box
Print material • Quickstart guide • Services Guide • Palm warranty • End User License Agreement Hardware for information that helps • Palm Pre Plus phone and pouch • USB cable • AC charger • 3.5mm headset Chapter 1 : Welcome... -
Page 8: Where Can I Learn More
To view Help topics for a single application: open the application menu, and tap Help. • Online support from Palm: Visit palm.com/support profile, watch how-to animations, access a tool to help you export data from your desktop to your new phone (the Data Transfer Assistant, or DTA), and read comprehensive information about your phone. -
Page 9: Chapter 2 Basics
Basics You’re about to discover the many things about your Palm Pre™ Plus phone that can help you better ® manage your life and have fun, too. As you become more familiar with your phone, you’ll want to personalize the settings and add applications to make it uniquely yours. -
Page 10: Get To Know Your Phone
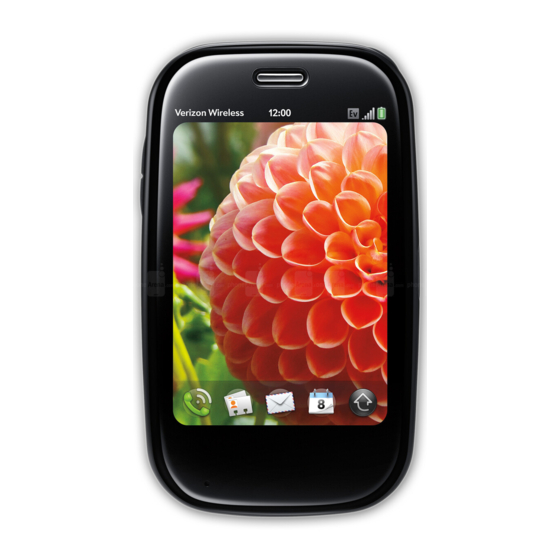
Get to know your phone Slide out the keyboard • Hold the phone as shown below and gently push up. Chapter 2 : Basics Front view Earpiece Touchscreen: Tap and make other gestures directly on the screen. See Touchscreen. Volume Gesture area: Make the back gesture and begin other gestures here. - Page 11 IMPORTANT Be careful not to scratch, crush, or apply too much pressure on the touchscreen. Do not store your phone in a place where other items might damage it. Do not use harsh chemicals, cleaning solvents, or aerosols to clean the phone or its accessories.
-
Page 12: Icons In The Title Bar
Icons in the title bar You can monitor the status of several items using icons in the area at the top of the phone screen: Table 1. Title bar icons and descriptions Item Description The battery is being charged. The battery is fully charged. The battery is low. -
Page 13: Bottom View
Back view The back cover of your Pre Plus phone is compatible with the Touchstone charging dock (sold separately). Camera flash Camera lens Speaker Top view Power: Press to wake up or turn off the screen. Press and hold to turn wireless services on and off, replace the battery, or turn your device completely on and off. -
Page 14: Set Up Your Phone
Set up your phone Insert the SIM card Your SIM (subscriber identity module) card contains information on your wireless account. To make calls or use your phone’s email or web features, you need to insert a SIM card If you don’t have a SIM card, contact AT&T. To take advantage of the high-speed data connection available on your phone, you may need to have a 3G SIM card. - Page 15 Remove the battery by pulling the tab that appears at the top of the battery. WARNING You must remove the battery first whenever you insert or remove the SIM card. Insert the card. * Notch Replace the battery. Make sure to leave the tab showing at the top of the battery.
-
Page 16: Complete Setup
But if you are still using the other phone, you must create a new Palm profile for your Pre Plus phone—you can’t use the same profile on two phones. -
Page 17: What Is A Palm Profile
For detailed information about your Palm profile, see Backup. Although you create a Palm profile by entering a valid email address, setting up a Palm profile is different from setting up email on your phone. To set up email, see Set up email. -
Page 18: Maximizing Battery Life
USB cable. Charging this way takes much longer than using the AC charger. Do not, however, connect the Palm (sold separately) to your computer. NOTE The back cover of your Pre Plus phone is compatible with the Touchstone charging dock (sold separately). Chapter 2 : Basics... -
Page 19: Turn The Phone On/Off
To purchase batteries that are compatible with your phone, go to palm.com/store for your phone. Turn the phone on/off Your Pre Plus phone’s screen can be turned on and off separately from its wireless services (which are the Phone app, Bluetooth app). - Page 20 Do one of the following: • Tap the upper-right corner of any screen to open the connection menu. Turn on Airplane Mode. • Press and hold power and tap Airplane When your phone is in airplane mode, the airplane mode at the top of every screen, and Airplane Mode appears in the upper-left corner of the screen in the Launcher, Card view, and Phone.
-
Page 21: Use Gestures: Tap, Swipe, Drag, Flick, Pinch
When you’re working in an application, the gesture area displays a lighted bar in the center. The lighted bar also appears when you tap the center of the gesture area to maximize a card in Card view. palm.com/ Clips in Help on your phone (see... -
Page 22: Basic Gestures
Basic gestures Tap: Tap with the tip of your finger—not your fingernail. Tap fast and firmly, and then immediately lift your fingertip off the screen. Don’t bear down on what you’re tapping. Don’t wait for a response; the response comes after you lift your finger. -
Page 23: Scroll Gestures
gesture area and the touchscreen, it seems to drag Quick Launch into view. To open one of the apps in Quick Launch, move your finger to its icon. When you see the app name appear, lift your finger. The application opens. You also make the drag gesture as part of a drag and drop. - Page 24 Stop scrolling: Tap or drag the screen while scrolling. Zoom gestures Zoom in/pinch out to increase the size of items on the screen in Email, Web, Photos, Doc View, PDF View, Google Maps: Place two fingers on the screen and spread them slowly apart. Chapter 2 : Basics Zoom out/pinch in to decrease the size of items on the screen in Email,...
-
Page 25: Text Selection Gestures
Text selection gestures For information on working with text after you select it, see paste information Use the Select All and Copy All Insert the cursor in a text field: Tap the location. See information. Move the cursor: Tap the location to insert the cursor. Press and hold Option . -
Page 26: Open Applications
the next paragraph, release Shift , scroll, press paragraph. Tapping any part of the highlighted selection deselects it. Drag an item Tap and hold the item, drag it, and then lift your finger to drop it. You get a visual cue that the item is ready to be dragged. For example, an icon in the Launcher is ready to be dragged when you see a halo around the icon. -
Page 27: Open An Application In Quick Launch
Open an application in Quick Launch Quick Launch is the bar of five icons that is always available at the bottom of Card view and the Launcher. To open an application from Quick Launch, just tap the icon. * Quick Launch Quick Launch can display no more than five icons. -
Page 28: Open An Application Using Search
In Card view, tap You can also open the Launcher by flicking up twice from the gesture area to the screen. If you are in Card view, just flick up once to open the Launcher. To find the app you want, swipe up or down to see all the icons on a page. -
Page 29: Move Among Open Applications
To make the back gesture, swipe right to left anywhere in the gesture area. Display all open applications (Card view) Card view displays open applications as small cards, so that you can easily scroll through them and drag them to change their order. When an application fills the screen and you want to go to Card view, do one of the following: •... -
Page 30: Close An Application
After the card becomes transparent, drag it to another position. Close an application • In Card view (see Display all open applications (Card card off the top of the screen. Chapter 2 : Basics Change the applications that appear in Quick Launch If Quick Launch contains five icons, you must remove an application from Quick Launch before you can add another one. -
Page 31: Reorder Quick Launch Icons
Reorder Quick Launch icons You can change the position of any Quick Launch icon except the Launcher icon. In Card view, tap and hold a Quick Launch After a halo appears around the icon, drag it to another location. Reorder Launcher icons In the Launcher, tap and hold an icon. -
Page 32: Enter And Save Information
Enter and save information Use the keyboard Option: Press to enter numbers, punctuation, and symbols that appear above the letters on the keys (see Enter alternate keyboard characters), or to move the cursor (see gestures). Shift: Enter uppercase letters Text selection Space Backspace Enter:... -
Page 33: Enter Characters From The Symbols Table
Enter characters from the symbols table You can enter symbols and accented characters that don’t appear on the keys by using the symbols table. See Symbols and accented characters list of the available symbols and accented characters. Press to display the symbols table. Narrow the list by pressing the key that corresponds to the character you want. -
Page 34: Enter Information In A Field
Enter information in a field You can enter information in a field by typing or by pasting previously copied information (see Cut, copy, and paste Applications with text fields support the auto-correct feature. If the app recognizes a common misspelling, it auto-corrects the word. To cancel the auto-correction, press Backspace To accept the information you entered, do one of the following:... -
Page 35: Save Information
Cut, copy, and paste information You can copy any selectable text, and you can cut any selectable text that you entered, for example, in a memo or an email. This includes text you can select by dragging the cursor and paragraphs you can select by tapping them (see Text selection gestures). -
Page 36: Open The Connection Menu
In an app, do one of the following: • Drag down from the upper-left corner of the phone (above the screen) onto the screen. • Tap the application name in the upper-left corner of the screen. Tap a menu item to open it. If a menu item displays a right-pointing arrow , tap the item to display the submenu for that item—for example, tap the... -
Page 37: Search To Find Info And Make Calls
Search to find info and make calls Use universal search You can search for contacts and applications on your phone, or search the web. Display Card view (see Display all open applications (Card open the Launcher (see Open an application in the Begin typing a search term or keyword (see application keywords). -
Page 38: Search Within An Application
Table 3. Application keywords Application name Keywords Email Mail Google Maps Maps Location Services Preferences, Settings Memos Notepad, Notes, Stickies Messaging IM, Instant Chat, MMS, SMS, Text Music Audio, Songs, Tunes PDF View Acrobat Phone Dial Photos Pictures Regional Settings Preferences, Settings Screen &... -
Page 39: View All Your Notifications
Throw a dashboard item off the side of the screen to dismiss it. Update the software on your phone Palm continually provides updates to your phone’s operating system. Update notifications are sent to your phone automatically when a system update is... -
Page 40: Respond To A System Software Notification
If Wi-Fi is not turned on when the update becomes available, the Palm servers continue to check your phone for Wi-Fi availability for two days. -
Page 41: Use App Catalog To Shop For New Applications
App Catalog contains both free apps and apps you can buy. NOTE Applications you installed on your old Palm OS Mobile smartphone do not work on your Pre Plus phone because your Pre Plus phone uses the new Palm webOS™ platform. Check App Catalog for a new ®... -
Page 42: Download A Free Application
If the app uses Location Services, a notification is displayed (see Location Services). Tap Continue. Do one of the following: • If you have a billing account, enter your Palm profile password (if prompted) to authorize the purchase, and tap Continue. Open Device Info Catalog). -
Page 43: Manage Applications
NOTE If you enter an incorrect Palm profile password three times, a message appears that explains how you can contact Palm support for help. • If you don’t have a billing account, tap Continue. Enter your Palm profile password, and tap Continue. See Tap OK. -
Page 44: Copy Files Between Your Phone And Your Computer
All files that you store on the USB drive of your phone are not backed up to your Palm profile, and they cannot sync to any of your online accounts. So be sure to keep a copy of all such files somewhere besides your phone just in case you lose your phone or you must do a full erase of the info on your phone. -
Page 45: Copy Music, Photos, And Videos Using Third-Party Software
(sold separately) that facilitate the transfer of media files to your phone. For more information, open the browser on your computer and go to palm.com/sync-solutions. KEY TERM DRM-free: Management. - Page 46 Chapter 2 : Basics...
-
Page 47: Data Transfer Chapter
Address Book and iCal. After you export the data, you can add the data into one of your online accounts or the Palm profile account on your Palm Pre™ Plus phone. -
Page 48: Data Transfer Overview
Google or Exchange, but first need to get your data out of an old phone that you want to stop using? You can do a one-time, one-way export of data to your Pre Plus phone, and then sync the data to Google or computer. -
Page 49: How Do I Get Data Off My Computer
How do I get data off my computer? Do you want to sync your personal information between your Pre Plus phone and Google or Exchange, but first need to get the data out of a desktop app that you want to stop using? You can do a one-time, one-way export of data to your phone, and then if you choose to, sync the data to Google or Exchange. -
Page 50: I Want To Keep Using My Current Desktop App And Sync With An Online Account On My Phone
The data syncs automatically. Table 2. Online account sync table Set up your Pre Plus phone to To sync this data... sync with... Google... -
Page 51: I Don't Need To Sync, But I Do Want A Copy Of My Data Backed Up Somewhere Besides My Phone
I don’t need to sync, but I do want a copy of my data backed up somewhere besides my phone Use the Data Transfer Assistant to move your data into your Palm profile account. For information on your Palm profile account, see Backup. - Page 52 Chapter 3 : Data transfer...
-
Page 53: Phone
You can answer a second call, swap between calls, and set up a six-way conference call. You can also work with other applications while on a call. Your Pre Plus phone helps you to do all these tasks with ease. In this chapter... -
Page 54: Make Calls
Make calls For information on turning the phone off and back on, see on/off. * These indicate that the phone is on. Chapter 4 : Phone Turn the phone * These indicate that the phone is off (airplane mode). Dial using the onscreen dial pad The onscreen dial pad is useful when you need to dial numbers that are expressed as letters and when you need large, brightly lit numbers that you can tap. -
Page 55: Dial Using The Keyboard
Tap the dial pad numbers to enter the number. to dial. Press Backspace or tap the onscreen backspace icon (to the right of the number you enter) to delete numbers one at a time. Tap and hold the icon to delete all the numbers. -
Page 56: Dial Your National Emergency Number
Dial using a speed dial Assign a speed dial to a contact for instructions on creating a speed dial. • In the Launcher, Card view, or Phone, press and hold the speed-dial key you assigned to the number. Dial by contact name in the Phone application How do I add names and other info into Contacts? adding contacts to your phone. -
Page 57: Dial From Another Application
• If Secure Unlock is on, tap Tap to dial emergency Emergency call. Edit the displayed number if needed, and then tap to dial. If the is turned off (that is, if it’s in airplane mode), you NOTE phone don’t have to turn it on. It automatically tries to connect to a network to make the call. -
Page 58: Use Voicemail
• Press volume. • Slide the ringer switch off (red means off). This silences the ringer and any notification sounds. These sounds remain off until you slide the switch back on. Other sounds, such as music and video playback, are not affected by sliding the ringer switch off. -
Page 59: Manage A Call
Manage a call Do any of the following: • Put the call on speakerphone: Tap • Mute the microphone so you can’t be heard: Tap You don’t need an on-hold button to put a call on hold. Just tap the mute icon to mute your end of the line. - Page 60 3G (UMTS or HSDPA) network: You can make simultaneous voice and data connections. So when you’re on a call, you can also send and receive email; browse the web; and send and receive text, multimedia, and IM messages. NOTE You cannot send or receive multimedia messages using a Wi-Fi network. Display Card view (see Display all open applications (Card open the Launcher (see...
-
Page 61: Look Up Or Send A Message To A Contact
to create the conference call. Do any of the following: • To add callers, tap • To extract a call from the conference and talk privately, tap the caller name or number, and then tap • To return an extracted call to the conference, tap When you’re done, tap to end either an extracted call or the conference call. -
Page 62: View Your Call History
View your call history Open Phone (Optional) If a call history entry includes a number next to the call icon on the left, this indicates that you made and/or received that number of calls in a row to or from that number. Tap the entry to see the individual call entries. -
Page 63: Use A Phone Headset
Do one of the following: • Before dialing a number you entered in the dial pad, tap Contacts. • During a call, tap • After a call, from the dial pad, tap . Tap number, and tap Add To Contacts. Tap one of the following: Add New Contact: Create a new contact for the phone number. -
Page 64: Customize Phone Settings
After you set up a connection with a Bluetooth headset or hands-free car kit, you can communicate using that device whenever it is within range and the Bluetooth feature on your phone is turned on. The range varies greatly, depending on environmental factors. The maximum is about 30 feet (10 meters). - Page 65 If you turn off the Show Contact Matches preference, you can still perform a contact search in the Phone application. After opening Phone, tap the contact list icon to the right of “Enter name or number. ” Type the contact name or initials, and tap the number when it appears.
-
Page 66: Use Dialing Shortcuts
Change your voicemail number If AT&T changes the phone number for your voicemail system, you need to change the number on your phone. This is the number your phone dials if you use any of the shortcuts to access voicemail (see messages). - Page 67 Use restricted dialing When restricted dialing is turned on, you can make calls to or answer calls from only those numbers that are on your list of restricted numbers. To add to or change the list, you need to enter a PIN2. If you enter an incorrect PIN2 more times than allowed by AT&T, the SIM card locks.
- Page 68 MMS APN and enter the settings you obtained from AT&T. Change Settings. Enable TTY/TDD A TTY (also known as TDD or text telephone) is a telecommunications device that allows people who are deaf or hard of hearing, or who have speech or language disabilities, to communicate by telephone.
-
Page 69: Email, Text, Multimedia, And Instant Messaging
Email, text, multimedia, and instant messaging Enjoy the ease and speed of keeping in touch with friends, family, and colleagues by email anywhere you can access AT&T’s data network. You can send and receive attachments as well. And keep the Messaging app in mind for times when you need to send a short text, multimedia, or instant message to a mobile phone number—especially handy when you’re in a meeting that’s running late. -
Page 70: Email
Use the Email application on your phone to access the many email accounts you have: company (like Exchange), ISP (like EarthLink or Comcast), and web-based (like Gmail). The Palm Synergy™ feature makes it easy to synchronize all data from an ®... -
Page 71: Set Up Email: Microsoft Exchange
• If this is the first email account you set up, the email address you used for your Palm profile is entered by default. Use that address, or enter an address for one of your other email accounts. Enter your... - Page 72 • If this is the first email account you are setting up, the email address you used for your Palm profile is entered by default. Use that address, or enter an address for one of your other email accounts. Enter your password for the account.
-
Page 73: Enter Advanced Account Settings
Enter info for the incoming and outgoing mail server as needed, based on the server information you got from your system administrator (see BEFORE YOU BEGIN at the beginning of this procedure). Sign Enter advanced account settings These settings apply only to the account you select in step 3. Open Email Open the... -
Page 74: Change Account Login Settings
Show Icon, tap or Off. Tap Alert, and tap any of the following: Vibrate: The phone vibrates with no other sound. System Sound: The system sound plays. If the ringer is off, the phone vibrates. Ringtone: Tap Ringtone., and tap a ringtone. Tap ringtone title to preview it. - Page 75 • to open the full contact list. Tap the contact you want, or enter a name or address to narrow the list. • Enter the full email address for a recipient who is not a contact. To address an email directly from Launcher or Card view, type the email address.
-
Page 76: Open Email Attachments
Tap a message to open it. (Optional) Do any of the following: • To call a number: Tap the number, and tap • To send a text message: Tap and hold the number, and tap Text. • To send an email: Tap and hold the email address, and tap Email. - Page 77 • For other file types, open the application menu the Save As menu item is not available, you cannot save the attachment. To open a saved attachment on your phone, open the application that can display the attachment. The attachment appears in the list of available files. Tap the file to open it.
- Page 78 Reply to a message Open a message. Tap one of the following: : Reply to just the sender. : Reply to the sender and all other addressees. Enter the reply message text and tap Forward a message Open a message and tap Address the forwarded message (see message).
-
Page 79: View Mail Folders
Delete a message Deleting a message moves it to your deleted items folder, so it’s still on your phone. Depending on your email account, this folder is called Deleted Items, Deleted, Trash, or something else. If you accidentally delete a message, you can move it back to the original folder (see Move a message to another folder). - Page 80 • View folder information such as last sync and number of messages: Open the folder, and then tap the folder header. Sort email in a folder Open Email If the folder you want is not displayed, tap one of your accounts. Tap a folder, open the application menu, and tap Sort.
-
Page 81: Reorder Accounts
Smart Folders: Set whether to include All Inboxes and/or All Flagged messages as favorites at the top of Account List view. Accounts: Tap an account name to enter advanced settings (see advanced account settings). Default Account: Tap the account shown and then tap the account you want to set as the new default. -
Page 82: Work With Conversations
The Synergy feature enables the Messaging app to gather all your text, multimedia, and instant messages to and from the same contact into a single conversation (sometimes called a thread). So you can see your entire message history with someone regardless of the different methods you happened to use to communicate with that person (see conversations). -
Page 83: Switch Between Conversations View And Buddies View
Dial a number from a conversation Open Messaging Tap a conversation. Do one of the following: • Tap the contact name or phone number at the top of the screen, and tap the number you want to call. • TEXT or the IM account name in the upper-right corner, and beside the number you want to call. - Page 84 Short dialing a number that contains letters—for example, (555) 256 PALM. To dial a number like this, you must use the onscreen dial pad and tap the numbers that correspond to the letters P, A, L, M— which would be 7256.
- Page 85 NOTE Emoticon combinations that use words, such as :cool or :cry, are not supported in most chat applications. Emoticons created using these combinations may not appear correctly on the recipient’s phone. Table 1. Supported emoticons To display this Enter any of these keyboard character combinations... emoticon...
- Page 86 Add a contact from a text or multimedia message To add a message sender as a contact: In Conversations view, tap a conversation with someone who is not a contact. Tap the header at the top of the screen. Add To Contacts.
-
Page 87: Delete A Conversation
Dial a number from a message • Tap a phone number. Delete a message In a conversation, throw the message off the side of the screen. Delete to confirm. Delete a conversation In Conversations view, throw the conversation off the side of the screen. - Page 88 Tap Buddies. to the left of the text Offline Sign out of an IM account Open Messaging Tap Buddies. Tap the status icon to the left of your online status and tap Sign off. Send and receive IM messages BEFORE YOU BEGIN Make sure that your phone is on and that you’re inside a coverage area (see Turn wireless services...
- Page 89 Tap one of the following: Save As New: Create a new contact for the number or address. Add To Existing: Tap the contact you want to add the number or address to. This option is not available when the phone number or email address is already in Contacts.
- Page 90 Show Notifications, tap or Off. When Show Notifications is on, tap Alert, and tap any of the following: Vibrate: The phone vibrates with no other sound. System Sound: The system sound plays. If the ringer is off, the phone vibrates. Ringtone: Tap a ringtone.
-
Page 91: Contacts, Calendar, And Other Personal Information
Pre™ Plus phone makes it easy to organize your personal information and keep it with you wherever you go. All your personal information is backed up and kept private either in your Palm profile or in one of your online accounts. In this chapter Contacts... -
Page 92: Contacts
You can assign the contact to one of your online address books—if you do, it synchronizes with the online address book. Or you can create the contact in your Palm profile account, which means it shows up on your phone only. Palm profile contacts are included in the daily backup of your Palm profile information, so you can restore them if they are accidentally erased. -
Page 93: Use Contacts For The First Time
1 Tap the stack of photos to see the contacts that are linked. 2 Emily is a contact in your Google online account and in your Palm profile account. 3 Scroll down to see Emily’s combined contact info. You can unlink linked contacts, and you can manually link contacts (see... -
Page 94: Create A Contact
Contacts). (Optional) Tap the account icon to the right of account to which the new contact will be added. * Account icon, showing Palm profile account Name to enter the contact name. To add a prefix and other details to a name, open the... -
Page 95: Find A Contact
When you enter a phone number that requires pauses—for example, a number for which you need to enter a password or respond to prompts, you can insert a pause or a stop in the number. To insert a two-second pause, enter a where you want the pause to appear. - Page 96 Search for a contact (see Find a contact), and tap the contact name. (Optional) To copy a contact, open the Copy All. The contents of the contact entry are copied as plain text, with carriage returns between each element. To edit a contact, tap Edit.
- Page 97 Add a photo to a contact The photo you add appears onscreen when this contact calls you or when you call the contact. While creating (see Create a contact) or editing (see or delete contact information) a contact, do one of the following: •...
- Page 98 For example, if you have contact info for Emily Weeks in Google, Facebook, Microsoft Exchange, and your Palm profile account, go ahead and link all four contacts into a linked contact. But don’t link Emily’s contact info with her sister Allison’s.
-
Page 99: Unlink A Contact
In the open entry, tap the contact name in the header, and tap more profiles. Search for the contact (see Find a contact) and tap it to link the two contacts. After you create the link, be sure the linked contact appears in your Contacts list under the name you’re most likely to search for and recognize (and not, say, under a person’s IM screen name, which can be unrelated to their real name). -
Page 100: Delete A Contact
Tap the contact name. Do any of the following: • Tap the appropriate field to call or send an email or instant message to that contact. For example, tap a phone number to call the contact. • to send a text message. •... -
Page 101: Customize Contacts
Customize Contacts Open Contacts Open the application menu and tap Preferences & Set the following options: List Order: Tap to select the criteria by which the contact list is sorted. If you select Last name to sort on, the names are alphabetized by last name, but they still appear in the Contacts list as first name followed by last name. -
Page 102: Send Contacts
How do I get events into Calendar? You have a few options for getting events to show up in Calendar: Connect to an online calendar: that works with the Palm Send Contact. Microsoft Exchange), you can set up Calendar on your phone to synchronize and display events in the online calendar. -
Page 103: Layered Calendars
You can assign the event to one of your online calendars—if you do, it synchronizes with the online calendar. Or you can create the event in your Palm profile account, which means it shows up on your phone only. Palm profile events are included in the daily backup of your Palm profile information, so you can restore them if they are accidentally erased. -
Page 104: Create An Event
Sign • To open Calendar without creating an online account: Tap Done. This opens your Palm profile account, and you can start creating events in this account. NOTE If you choose to sync Calendar with an online Facebook account, your Facebook events show up in Calendar, but you cannot add calendar events to Facebook from the Calendar app. -
Page 105: Enter The Event Location
• to the right of the name to enter more details about the event. Make the back gesture to return to Day view. Don’t look for a save button—your info is automatically saved when you make the back gesture to close the event. Enter the event location While creating an event (see Create an... -
Page 106: Change The Calendar Display
Open the application menu and tap Under Event Reminders, tap Alert Vibrate: The phone vibrates and makes a vibrating sound but makes no other sound. System Sound: The system sound plays. If the ringer is off, the phone vibrates (see Manage system sounds and Ringtone: A ringtone that you choose plays. -
Page 107: Move Around In Calendar
Tap the account icon in the upper-right corner to do any of the following: • To switch the Calendar account you're viewing: Tap one of your Calendar accounts. • To remove a Calendar account from the layered calendar view (All): Scroll down and tap Calendar View Options. -
Page 108: Customize Calendar
Respond to an event reminder When an event reminder appears in the notification bar at the bottom of the screen, tap the event description to open the event, or tap one of the following: Contact meeting attendees: This opens an email message with the participants’... -
Page 109: Manually Synchronize Calendar With Your Online Accounts
Event Reminders: Select to play a sound when a calendar notification appears. Default Event Duration: The default event duration is set to one hour. Tap to change this to 30 minutes hours. Accounts: For all calendar accounts, tap an account to change login settings or remove the account. -
Page 110: Set Task Priority, Due Date, And Other Details
Open Tasks Enter the list name in the List name field and press Create a task (see Create a task). Create a task Open Tasks Tap the list you want to assign the task to. Chapter 6 : Contacts, Calendar, and other personal information Enter the task name in the Task name field. -
Page 111: View Tasks That Are Due Today
to the right of the task name. Set any of the following: Priority: High priority tasks appear in red. Normal priority tasks appear in bold text, and low priority tasks appear in gray text. List: Assign the task to a different list. Due: No due date, and tap a due date option. - Page 112 Rename a task On the task list, tap the task name. Enter the new name and press Enter Sort a task list You can sort a task list to show all tasks (the default setting), remaining tasks, or completed tasks. Open Tasks Tap the list you want to sort.
-
Page 113: Memos
If you used the Data Transfer Assistant and imported notes from Outlook on your desktop to your phone, those notes are in Memos. Your Microsoft Exchange notes, however, do not sync. All memos are backed up to your Palm profile. All, and then tap Mark All... - Page 114 Create a memo Open Memos Do one of the following: • New Memo • Open the application menu and tap Enter the memo text. Memos are saved as you type. Find a memo • In Memos, begin typing any letters or numbers in the memo, and then tap the memo when it appears.
-
Page 115: Delete A Memo
Delete a memo In an open memo, open the application menu Delete to confirm. Email a memo In an open memo, open the application menu Enter the email address. The subject, Just a quick memo, is automatically filled in. Clock The Clock application lets you set an alarm. -
Page 116: Change The Alarm Volume
, and then tap Set the following options: Alarm Preferences: in the upper right to turn the alarm on. When an alarm is turned on, the alarm icon appears in the lower-right corner of the phone screen. Tap the icon to see alarm details. Name: Enter a name for the alarm. -
Page 117: Perform Calculations
Subtract the currently displayed number from memory. Facebook The Palm Facebook app allows you to make a status comment, view and respond to friends’ comments, and attach photos to your wall. Before you begin, download the Facebook app from the App Catalog. It’s free (see Download a free application). - Page 118 Chapter 6 : Contacts, Calendar, and other personal information...
-
Page 119: Chapter 7 Photos, Videos, And Music
Photos, videos, and music There’s no need to carry a separate media player; you can play music and videos, and view photos, on your Palm ® Pre™ Plus phone. Listen to music through the built-in speaker or through a 3.5mm headset or headphones (sold separately). -
Page 120: Camera
Camera Take a picture Your phone has an easy-to-use, 3-megapixel camera with an LED flash. You can use the camera to take pictures, and then use the Photos app to view them and send them to your friends and family (see a personal touch to your phone, use your pictures as your wallpaper (see Save a picture as wallpaper) and as caller ID images (see... -
Page 121: Organize Your Pictures Into Albums
(sold separately) that facilitate the transfer of media files to your phone. For more information, open the browser on your computer and go to palm.com/sync-solutions. Save a picture as Contains any pictures you copy from your computer that Contains any screenshots that you take. -
Page 122: Add A Picture To A Contact
Connect your phone and your computer using the On your phone, tap Drive. If prompted, tap OK. On your computer, your phone appears as a removable drive. NOTE On a Windows computer, if the Found New Hardware wizard opens, click Cancel to close the wizard. -
Page 123: Share A Picture
(Optional) Do either or both of the following: • To zoom out or in on a part of the picture: Pinch in or out on the picture. • To capture the portion of the picture you want for the contact photo: Tap and hold the picture, and then drag the portion you want to the center of the onscreen box. -
Page 124: Delete A Picture
Likewise, if you set up a Facebook account in Contacts or Calendar, the account is already set up to allow you to upload pictures from Photos. See Online accounts available for Palm information about the behavior of Facebook, Photobucket, and other online accounts on your phone. -
Page 125: Videos
Videos Record a video Your phone has an easy-to-use video camera that lets you record videos in VGA Resolution at 30FPS (frames per second) in MPEG-4, with AAC audio. Background sound is recorded when you record a video. Open Camera is hidden, tap to display it. -
Page 126: Watch A Video
A file that is not protected by Digital Rights Management. DRM-free video files can be copied as many times as you like and can be played on your Pre Plus phone. Before you put videos on your phone, make sure... -
Page 127: Use Video Playback Controls
Use video playback controls Playback controls automatically appear when you start a video. They disappear after a few seconds. Tap the video to manually display or dismiss the controls. Table 1. Video playback controls Control Function Play. Pause. Move forward or backward (tap and hold the slider, and then drag it right to move forward or left to move backward). -
Page 128: Music
• To display the most frequently viewed videos: Tap Most Viewed. • To display videos you have recently viewed: Tap History. When the video you want appears, do one of the following: • To view the video: Tap the video thumbnail. •... - Page 129 A file that is not protected by Digital Rights KEY TERM Management. DRM-free music files can be copied as many times as you like and can be played on your Pre Plus phone. Open Music If the Music application finds no music files on your phone, tap one of...
-
Page 130: Use Music Playback Controls
• To browse a music store to preview or purchase songs (if available): Tap the music store name. Continue making selections until the song you want appears. Tap the song name. Music continues to play in the background if you switch to DID YOU KNOW another application, turn off the screen, or slide the Use music playback controls... -
Page 131: Amazon Mp3
Music application (see NOTE Music you download from Amazon MP3 is not backed up to your Palm profile. To back up your music, you can copy downloaded files from the AmazonMP3 folder on your phone’s USB drive to your computer (see between your phone and your cable. -
Page 132: View Artist Information
Search and enter the song, album, or artist name. Press Enter Do one of the following: • If the item you want appears on the screen: Tap the song, album, or artist name. Tapping the name of a song plays the preview; tapping its price gives you the option to buy it (see •... -
Page 133: View And Work With Downloaded Items
Do either of the following: • Tap the album price and tap Buy. • Tap a song price and tap Buy. IMPORTANT Your credit card is charged for the price of an item as soon as you tap Buy. Preview and buy a song BEFORE YOU BEGIN Before you download a song to your phone, make sure you have enough storage space on your phone to fit the file. - Page 134 Chapter 7 : Photos, videos, and music...
-
Page 135: Chapter 8 Web And Wireless Connections
Web and wireless connections With AT&T’s network and your Palm ® Pre™ Plus phone’s web browser, you can take the web with you almost anywhere you go. The Bluetooth ® wireless technology on your phone helps you easily set up wireless connections to a number of devices. -
Page 136: Wi-Fi
AT&T Wi-Fi Hot Spots AT&T Wi-Fi service is available at access points called AT&T Hot Spots. If you have a Palm webOS standing, and an appropriate data plan, you can access music, email, and the web at over 20,000 AT&T Wi-Fi Hot Spot locations nationwide, including the following: •... - Page 137 To connect to an AT&T Wi-Fi Hot Spot: Turn Wi-Fi on (see Turn Wi-Fi on and off). Tap attwifi. Turn Wi-Fi on and off Do one of the following: • Open Wi-Fi , and tap or Off. • From any screen: Open the connection menu at the upper-right corner, tap Wi-Fi, and tap...
-
Page 138: Connect To A Previously Used Network
Connect to a previously used network • If Wi-Fi is turned off, turn on Wi-Fi (see Turn Wi-Fi on and automatically attempts to connect to a previously used network, starting with the most recently used network. • If Wi-Fi is turned on but you are not connected to a network, your phone automatically attempts to connect to a previously used network, starting with the most recently used network. -
Page 139: Location Services
Tap Done. Location Services The Location Services application provides information about your location to applications that request it. For example, Google Maps may use your location information if you need driving directions. Open Location Services for any of the following: Auto Locate: When Auto Locate is on, applications can automatically identify your location. -
Page 140: Web
The first time you open Google Services you may be asked to review and accept the terms of use, and decide whether to allow anonymous data collection. Do the following: • Review the terms of use. • If you decide not to allow anonymous data collection, tap the checkmark to remove it. -
Page 141: Open Another Browser
Open another browser If you are looking at one web page and need to check something on a different one, simply open another browser. Open , open the application menu Enter an address or search term for the second instance of the browser. To move between the two pages, tap the center of the gesture area to display Card view. -
Page 142: Create A Bookmark
Bookmark. NOTE Web bookmarks are part of the data backed up to your Palm profile. After a partial or full erase, a bookmark is restored with a generic thumbnail icon. After you revisit the page for which you created the bookmark, the original thumbnail icon is restored. -
Page 143: Edit, Reorder, Or Delete A Bookmark
• To open a bookmark if it’s not on the start page, or after you navigate away from the start page: Open the application menu Bookmarks. Then tap a bookmark. Edit, reorder, or delete a bookmark Open Open the application menu and tap Bookmarks. -
Page 144: Customize Web Browser Settings
Return to previously viewed web pages Open the application menu and tap History. Scroll to the page name and tap the page. You can also search for a recently viewed page by entering a term or address in the address bar that matches the page name or address. Use links on a web page •... -
Page 145: Google Maps
Set any of the following: Default Web Search Engine: Select your default search engine. Block Popups: Prevents websites from opening up new browser windows. Tap to turn Block Popups off. Accept Cookies: Allows cookies from any website you view, even if you are redirected to a site from another site. -
Page 146: At&T Navigator
AT&T Navigator You can use AT&T Navigator to get directions, search for an address, view maps and traffic conditions, share your location, and much more. Sign up for AT&T Navigator The first time you open AT&T Navigator, you are offered the opportunity to either subscribe now to the service and pay a monthly fee or pay for a one - day pass on the service. - Page 147 Find a location Open AT&T Navigator If prompted, tap Allow to turn on Location Tap Search. Enter a search term. For example, enter “Cinema” to get a list of cinemas near you. (Optional) Tap Current Location to change the location of your search.
- Page 148 Table 2. AT&T Navigator maps icons Icon Description See your current location. Get a 3D view of the map. Select a new map location. Return to the 2D view of the map. Share an address You can send an address, and directions to that address, to a friend by text message.
- Page 149 Tap Save, and tap OK. To return to this location: Share & More, tap Stuff, and then tap Tap the location. If you saved the location to a category, tap the category name, and then tap the location. Do any of the following: •...
-
Page 150: Ypmobile
Customize AT&T Navigator Open AT&T Navigator If prompted, tap Allow to turn on Location Open the application menu and tap Preferences. Tap any of the following: Route Style: Select your default route type, for example, Shortest, Prefer Highway Ask me each trip. - Page 151 Alternatively, browse through service categories in Categories. The first result displayed is the business or branch closest to your current location. Tap to scroll forward or back through the search results. Tap to see the search results in a list. Tap return to map view.
-
Page 152: Bluetooth ® Wireless Technology
On the service details page, tap Tap OK. To view your favorites, open the application menu Bluetooth wireless technology ® What is Bluetooth wireless technology? ® With the Bluetooth wireless technology on your phone, you can connect to ® a number of Bluetooth devices, including a hands-free device such as a headset or car kit (see Set up and use a Bluetooth Before you can connect to another Bluetooth device, you need to pair with... -
Page 153: Disconnect From A Device
• The screen displays a passkey generated by your phone: Enter the displayed passkey on the other device. • The screen prompts you to enter a passkey: Check the documentation that came with the other device to see if there's a required passkey. -
Page 154: Delete A Device
Tap the connected device name to disconnect from it. Or tap another device name to disconnect from the current device and connect to the new device. Delete a device Deleting a device means you end the relationship you created between your phone and the device. -
Page 155: Chapter 9 Documents
Documents Your Palm ® Pre™ Plus phone enables you to take your office with you—including your Microsoft Office files. You can view and search Microsoft Word, Excel PowerPoint files on your phone. ® You can also view PDF files on your phone. -
Page 156: Doc View
Doc View With Doc View, you can view Microsoft Word, Excel on your phone. Open a file You can view a file that you copy from your computer (see between your phone and your computer) or receive as an email attachment (see Open email attachments). - Page 157 Type the text you want to find and press Enter instance of the text appears highlighted. Do one of the following: • Find the next instance: Tap • Find the preceding instance: Tap To exit search, open the application menu and tap Find.
- Page 158 Tap the text or footnote indicator to open the comment, endnote, or footnote. To close the comment, endnote, or footnote, tap outside it. Select a row or column in an Excel ® • Tap the row header or column header. Resize rows or columns in a spreadsheet Open the application menu...
-
Page 159: Pdf View
• Tap the current sheet number in the lower-left corner of the screen. Enter the page number you want to jump to and press View comments in a spreadsheet In an Excel spreadsheet, comments are indicated by a red triangle in the ®... -
Page 160: Change The Text Display Size
To search for a file, begin typing the name. Tap the file when it appears. If the PDF file was created with a password, enter the password to open the file. To open another file: Open the application menu the file. To move between open PDFs, tap the center of the gesture area to go to Card view. -
Page 161: Save A File With A New Name
Save a file with a new name With the file open, open the application menu Enter the new file name and tap Save Share a file With the file open, open the application menu Create the email message and tap View bookmarks If a PDF file was created with bookmarks, you can see the bookmarks on your phone. - Page 162 Chapter 9 : Documents...
-
Page 163: Chapter 10 Preferences
Preferences There are lots of ways to make your Palm ® Pre™ Plus phone work better for you. Personalize your phone to make it match your lifestyle. You can easily customize many features of your phone like the wallpaper, screen brightness, ringtone for incoming calls, and more. -
Page 164: Backup
All this information is automatically backed up daily to your Palm profile. So if you ever need to erase the info from your phone, you can restore all your backed-up info. You can turn off automatic backup, and you can also perform a manual backup. - Page 165 The following table lists info that is and is not backed up to your Palm profile: Table 1. Backup details Application Backed up Not backed up Amazon Nothing is backed up. can copy files from the AmazonMP3 folder on your...
-
Page 166: Update Your Palm Profile Settings
No photos are backed up. IMPORTANT On your computer, keep a stored on your Palm profile, Palm recommends that you perform a manual backup copy of the photos that are of your data after changing any of your Palm profile settings (see information). -
Page 167: Remotely Erase Your Palm Profile Account
Password. Enter your new password and confirm it. Tap Done. Remotely erase your Palm profile account In the event that your phone is lost or stolen, you can go to your Palm profile palm.com/palmprofile Date & Time You can set your phone to adjust the date and time automatically to the local date and time wherever you are, or you can turn this feature off and enter this information manually. -
Page 168: Device Info
A reset deletes some or all information from your phone (depending on the type of reset you select). After a reset, you must follow the prompts to sign in to your Palm profile again before you can use your phone. -
Page 169: Change Default Applications
Palm profile—is untouched. After either type of full erase, you can sign in to your Palm profile either on a new webOS phone or the same phone you just erased. Signing in restores... -
Page 170: Install A Certificate From An Email Attachment
In addition, if you have more than one application on your phone that can open a particular file type, you can change the default application to use for opening that file type. Open Device Info Open the application menu and tap Do either or both of the following: •... -
Page 171: Delete A Certificate
Delete a certificate Only user-installed certificates can be deleted. Open Device Info Open the application menu and tap Certificate Tap the certificate and tap Delete Certificate. Enable media sync If you use iTunes version 9.0.1 or earlier, you can synchronize non-DRM music, photos, and videos from your computer to your phone by enabling Media Sync mode on your phone. -
Page 172: Screen & Lock
Your phone restarts after you select a new country format. The restart does not affect your data or applications. Screen & Lock Change screen brightness Open Screen & Lock Under Screen, drag the Brightness Set the interval for turning the screen off automatically By default, your screen turns off after one minute of inactivity to save battery power. -
Page 173: Change Your Secure Unlock Password
Open Screen & Lock Switch Applications, tap or Off. Set options for unlocking the screen The screen locks five seconds after it turns off automatically, or immediately if you turn the screen off manually. Use Secure Unlock if you want to require a PIN or a password to unlock the screen. -
Page 174: Sounds & Ringtones
Sounds & Ringtones Manage system sounds and notifications You can turn system sounds, such as transition sounds and notification alerts, on or off. You can also set the volume for system sounds. Sliding the ringer switch off not only turns off the ringer for incoming phone calls, it also turns off system sounds like the shutter click when you take a picture. -
Page 175: Ringtone Volume
Open Sounds & Ringtones Tap the displayed ringtone. Tap the song title to add it as your ringtone. Tap song title to preview it. To set the ringtone volume, drag the Ringtone Volume to the right of a slider. Chapter 10 : Preferences... - Page 176 Chapter 10 : Preferences...
-
Page 177: Troubleshooting
For additional information and answers to other common questions, visit palm.com/support. In this chapter For users of other Palm devices ® Battery Screen and performance Phone... -
Page 178: For Users Of Other Palm ® Devices
Use only batteries and chargers that are approved by Palm with your phone. Failure to use a battery or charger approved by Palm may increase the risk that your phone will overheat, catch fire, or explode, resulting in serious bodily injury, death, or property damage. - Page 179 Turn the phone completely off (see Turn everything (the screen and wireless services) on/off). Press and release the back cover release. Slide your thumbnail or a credit card between the back cover and the phone, starting at the bottom and moving halfway up one side until you hear the clasp (x) release.
- Page 180 Palm logo on the screen (approximately five seconds). Then wait until your phone completes startup. If your phone does not turn on after you insert the battery and press and hold...
-
Page 181: I Can't Get My Screen To Turn On After Removing And Replacing The Battery
Instead, press and hold until you see the Palm logo on the screen (approximately five seconds). Then wait until your phone completes startup. NOTE If your phone does not turn on after you press and hold power, you need... -
Page 182: Screen And Performance
Palm logo on the screen (approximately five seconds). Then wait until your phone completes startup. If your phone does not turn on after you insert the battery and press and hold Charge the battery). -
Page 183: Applications Are Running Slowly
® webOS™ platform. Applications written for Palm smartphones using the Palm OS operating system or Windows Mobile are not compatible with your Pre Plus phone. If you can try a free version of the software before purchasing it, you can test it first to make sure it works properly. In App Catalog, you can purchase the Classic application from MotionApps to run Palm OS applications on your Pre Plus phone. -
Page 184: Phone
Phone Signal strength is weak Become familiar with low coverage areas where you live, commute, work, and play. Then you know when to expect signal-strength issues. • If you’re standing, move about 10 feet (3 meters) in any direction. • In a building, move near a window. -
Page 185: Hands-Free Devices
® phone • Check the compatibility list at device is compatible with your Pre Plus phone. • Not all hands-free features work with every hands-free device. Check the on/off). documentation that came with your hands-free device or the manufacturer’s website for feature-compatibility information specific to your device. -
Page 186: Synchronization
(see computer?). You can assign this data to sync with an online account. You can also assign it to the Palm profile account. Data in this account is backed You cannot remove individual Exchange account applications. If the application. - Page 187 Palm profile daily, so you can retrieve it if you need to reset your phone. But it is not a true sync because you cannot change your Palm profile data anywhere except on your phone. If your desktop Outlook synchronizes with an Exchange server using Microsoft Exchange ActiveSync, you cannot do a one-way export of that Outlook data to your phone.
-
Page 188: Sending And Receiving Data In Email, Messaging, And Web
A notification tells me that ActiveSync encountered a problem with [item type] [item name] There was an error while synchronizing a single item. This error can usually be corrected only by deleting the item that caused the error. If you sync again to see if the error persists, be aware that items causing this type of error are skipped and do not show up again. -
Page 189: Messaging
I have problems sending and receiving email • Make sure your phone is on and that your data connection to your mail server or email service provider has not been interrupted (see phone on/off). • Short periods of time when email is unavailable are common, due to server problems or poor wireless coverage. -
Page 190: Wi-Fi
Some websites redirect simple web addresses given to the public to actual web addresses that are more complex (for example, if you enter the address www.palm.com/support, it may actually go to the web address can’t follow the redirect, enter the web address in a desktop browser and read the actual web address in the address bar. -
Page 191: Calendar And Contacts
My personal and work contact and calendar information is getting merged into a single view—I’d rather keep them separate The Palm Synergy™ feature on your phone displays information from ® several sources in a single view, so you can access your info quickly, without having to remember where you stored it. -
Page 192: Amazon Mp3
• For best results, verify that you have the brightest light source coming from behind you, lighting the subject’s face. Avoid taking indoor pictures with the subject in front of a window or light. If the light is behind the subject, try moving closer to the subject and enabling the flash. -
Page 193: Backing Up And Restoring Data
My bookmarks were restored, but the thumbnail icon is not displaying Web bookmarks are part of the data backed up to your Palm profile. After a full erase, a bookmark is restored with a generic thumbnail icon. After you revisit the page for which you created the bookmark, a thumbnail icon is restored. -
Page 194: Transferring Information From Another Palm ® Webos™ Platform Phone
(see Erase data and reset your phone). Enter your Palm profile email address and password to restore your backed-up information. If the problem is resolved, begin reinstalling your third-party applications one at a time. Open each application after you reinstall it to see if the problem recurs. -
Page 195: Making Room On Your Phone
Making room on your phone If you store a large number of files, or install many third-party applications, the internal memory on your phone may fill up. Here are some ways to clear space on your phone: • Photos, Videos, Music, Amazon MP3, Doc View, PDF View: files take up a lot of memory. - Page 196 Chapter 11 : Troubleshooting...
-
Page 197: Terms
Terms airplane mode A mode in which all the wireless services on your phone are turned off. Wireless services include the phone used for making and receiving calls, and Bluetooth wireless technology. See Turn wireless services off (airplane ® mode). application menu A menu that contains application commands such as cut, copy, and paste (where available);... - Page 198 DRM-free file A file that is not protected by Digital Rights Management. DRM-free files can be copied as many times as you like and can be played on your Pre Plus phone. flick A very fast skimming of the finger horizontally or vertically on the touchscreen.
- Page 199 Palm profile account An account that is automatically set up for you when you create your Palm profile. You can assign contacts and calendar events to it. Palm profile items are included in the daily backup of information to your Palm profile but do not synchronize with any of your online accounts.
- Page 200 Terms...
-
Page 201: Online Accounts Available For Palm® Webos™ Phones
Online accounts available for Palm® webOS™ phones Table 1. Online accounts available for Palm webOS ® Account Applications that display data from this account AT&T Address Contacts Book Exchange Contacts, Calendar, Tasks, Email Facebook Contacts, Calendar Google My Contacts, Calendar,... - Page 202 Table 1. Online accounts available for Palm Account Applications that display data from this account Photobucket Photos Yahoo! Contacts, Calendar, Messaging, Email *Sync: A two-way exchange and update of your data. What you add or change in one location is automatically added or changed in the other.
-
Page 203: Specifications
OMAP 3430 processor • ® Battery • Rechargeable lithium-ion • 1150mA/hr power capacity • Removable Operating system • Palm webOS™ platform ® Camera • 3 megapixel • LED flash with extended depth of field • Auto-exposure • Auto-white balance •... - Page 204 16GB (~15GB user available) • USB mass storage support Connector • microUSB connector with USB 2.0 Hi-Speed Back cover • Compatible with the Touchstone Included Palm webOS applications • Amazon MP3 (at time of purchase) • App Catalog • Calculator •...
- Page 205 Table 1. Specifications Category Description Included third-party applications • AT&T Navigator (at time of purchase) • Google Maps • YouTube • YPmobile Operating temperature range • 32°F to 113°F (0°C to 45°C) • 5% to 90% RH Specifications...
- Page 206 Specifications...
-
Page 207: Regulatory And Safety Information
This phone meets the FCC Radiofrequency Emission Guidelines and is certified with the FCC as: FCC ID: O8F-CASG The FCC ID on your Palm phone is located on a label inside the battery compartment. The battery must be removed as shown below to view the label. - Page 208 In order to comply with FCC, IC and EU RF exposure safety guidelines, users MUST use one of the following types of body-worn accessories: A Palm® brand body-worn accessory that has been tested for (specific absorption rate) SAR compliance and is intended for use with this product.
- Page 209 • Less than one month: -20° C to 60° C • More than one month: -20° C to 45° C Power Specifications Use only Palm-approved power accessories such as AC-power adapters and batteries. Unauthorized and non-approved batteries will NOT operate with the Palm phone. AC Power Adapter source: Palm Part Number: 157-10108-00 Input Rating: 100-240 Vac, 50/60Hz, 0.2A...
- Page 210 It is everyone’s responsibility to ensure that electrical and electronic products are properly reused, recycled or recovered. As part of Palm’s corporate commitment to be a good steward of the environment, we strive to use environmentally friendly materials, reduce waste, and collaborate with our channel partners to raise awareness and help keep Palm handheld devices, phones and mobile companions out of landfills through evaluation and disposition for reuse and recycling.
- Page 211 Blackouts and Seizures: Blinking lights, such as those experienced with television or playing video games may cause some people to experience blackout or seizure, even if never experienced before. In the event a phone user should experience any disorientation, loss of awareness, convulsion, eye or muscle twitching or other involuntary movements, stop use immediately and consult a doctor.
- Page 212 You must always switch off your phone wherever the use of a phone is prohibited. Use of your phone is subject to safety measures designed to protect users and their environment. • Always treat your phone and its accessories with care and keep it in a clean and dust-free place.
- Page 213 ESD. Devices that you carry with you, such as your Palm device, build up ESD in a unique way because the static electricity that may have built up on your body is automatically passed to the device.
- Page 214 The model number, regulatory number, and serial number are located on a nameplate inside the battery compartment. Record the serial number in the space provided below. This will be helpful if you need to contact us about your phone in the future. Product: Palm Pre™ Plus Phone ®...
-
Page 215: Index
See also Clock application linked contacts Album Art view music and album headers online albums. See specific types Palm profile alerts. See alarms; notifications pictures and All Calendars view Acrobat Reader files. See PDF files All inboxes all-day events See also calendars; events... - Page 216 – back cover back gesture Back view Background data collection option – Backup application See also Palm profile – basic gestures battery caring for charging icons – life purchasing – replacing specifications – troubleshooting billing accounts blank screens blink notifications...
- Page 217 See Palm XXX phone Device Info application device names Devices list diagnostic information dial pad – dialing dialing prefixes dialing shortcuts Digital Rights Management display.
- Page 218 DTA. See Data Transfer Assistant due dates (tasks) earpiece EarthLink accounts echoes EDGE data network editing contacts email accounts files instant messages accounts memos Palm profile tasks text videos Index web page bookmarks deleting electrostatic discharge (ESD) multiple – email preferences for...
- Page 219 opening zoom properties for Get email option saving GIF files searching for Global Address Lists sending Gmail storing Google accounts filtering tasks availability of Find command setting up on phone finding. See searching setting up on website flagging messages flick gesture synchronization with –...
- Page 220 Wi-Fi networks opening applications attachments files maps web pages operating system Option key organizer features outage information Outlook overdue tasks – pairing Palm Desktop software Palm Music Assistant Palm online support Palm profile – –...
- Page 221 Palm profile account restarting Palm XXX phone restricted dialing See also phone safety information partial erase setting up partnerships. See pairing silencing ringer for passkeys...
- Page 222 Wi-Fi networks phone security voicemail See also Certificate Manager share option erasing data from phone sharing locking the screen See also sending Palm profile addresses Select All feature files sending images addresses pictures conversation messages videos directions...
- Page 223 – – UMTS data network unflagging messages universal search See also searching unlinking contact information – unlocking the screen untimed events See also calendars; events up gesture updating applications billing accounts Palm profile settings – phone software – – Index...
- Page 224 Word files customer support worksheets. See Excel files disabling JavaScript for internal memory and music from XLS files XLSX files XXX phone. See Palm XXX phone; – phone Yahoo! accounts YouTube application – – zoom in gesture zoom out gesture –...
Need help?
Do you have a question about the Pre Plus and is the answer not in the manual?
Questions and answers