Table of Contents
Advertisement
Quick Links
Advertisement
Table of Contents

Related Manuals for Aputure MC Pro


Summary of Contents for Aputure MC Pro
- Page 1 MC Pro Product Manual English...
-
Page 2: Important Safety Instructions
LumenRadio CRMX or our innovative Sidus Link mobile app. With the MC Pro’s powerful feature set, you can achieve unlimited flexibility in the palm of your hand. Important Safety Instructions... -
Page 3: Fcc Compliance Statement
We recommend only using the original Aputure cable accessories. Please note that any malfunctions caused by using unauthorized accessories are not covered by the warran- ty. The user may pay for maintenance. When hanging the product overhead, always ensure an extra safety measure has been attached - such as a safety chain- that is certified for the weight of the product. -
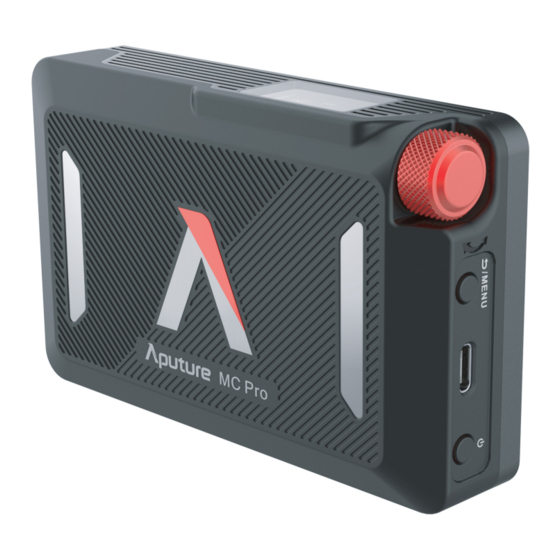
Page 4: Components List
Components List Please make sure all accessories listed below are completed before using. If not, please contact with your sellers immediately. MC Pro Standard Kit: 1/4" Coldshoe Ball Heads Carrying Case MC Pro ×1 ×1 ×1 1/4" Screw to Magnet Adapters... -
Page 5: Installations
* Please keep MC Pro away from diskette, credit cards, monitors, mechanical watches, mobile phones, medical devices (pacemakers), etc. * Do not install MC Pro on any surface where the temperature is above 80°C, as this may damage the magnet. -
Page 6: Power On/Off
Operations 1. Power ON/OFF Press and hold the power button for 1 seconds to turn the MC Pro on or off. 2. Charging 2.1 USB Type-C Charging USB Type-C Charging Cables MC Pro * Supports 5V/2A charging via charger or power banks. -
Page 7: Manual Control
2.2 Pogo Pin Charging MC Pro supports Pogo Pin charging. AC 100V-240V * MC Pro 8-Light Production Kit sold separately. WARNING Do not close the lid when the charging case on or in an active charging state, to prevent overheating. Failure to do so will result in the internal temperature of the case and the MC Pros being charged to become extremely hot. - Page 8 3.2 Menu Press MENU to access the system menu, rotate and press the knob to select the Light Mode / Bluetooth Settings / DMX Settings / System Settings. 3.3 Light Mode Rotate and press the knob to select Light Mode in system menu. Rotate and press the knob to select CCT / HSI / RGB / GEL / Source / XY / FX / Custom FX.
- Page 9 3.3.4 GEL Rotate and press the knob to select GEL in Light Mode. INT (Intensity): 0.0%- 100.0% CCT (Correlated Color Temp.): select 3200 or 5600K as the virtual light color temperature ROSCO: Select a lighting color filter from ROSCO filter library LEE: Select a lighting color filter from LEE filter library Col.Cor ROSCO...
- Page 10 1.Club Lights 2.Paparazzi 3.Lightning 4.TV 5.Candle 6.Fire 7.Strobe 8.Explosion 9.Faulty Bulb 10.Pulsing 11.Welding 12.Cop Car - 9 -...
- Page 11 BT Status/ BT Reset/ BT UID. BT Status: Turn on/off Bluetooth. BT Reset: Reset the MC Pro Bluetooth connection, and your mobile phone or tablet will be able to connect to and control the light with Sidus Link App.
-
Page 12: Dmx Settings
Rotate and press the knob to select DMX Settings in DMX Settings. DMX Address: Choose the DMX address of MC Pro, press and hold the control wheel for 2 seconds to lock/unlock the DMX address (Prevent accidental touch to exit DMX mode). -
Page 13: System Settings
3.6 System Settings Rotate and press the knob to select System Settings in system menu. Rotates and press the knob to select . Freq. Selection/Language/Product Info/Factory Reset. Freq. Selection: Rotate the knob to adjust the light frequency by 100Hz every turn. Language: Rotate and press the knob to select English or Simplified Chinese. - Page 14 4. Wired DMX Control 4.1 Connect a standard DMX controller Connecting DMX to a MC Pro hardwired OUTPUT DMX512 OUTPUT DMX512 Daisy chaining multiple lights over DMX * USB-C to 5-Pin XLR In & Out adapter sold separately 4.2 DMX Interface Info Data 2+(Optional Secondary Data Link)
-
Page 15: Channel Selection
* The range of DMX channels is 1 to 512. 4.4 Controlling Device Via DMX The MC Pro offers a variety of DMX modes. Please find a detailed overview of all DMX modes in the document, DMX Chart is available for free download on the Aputure official website https://www.aputure.com. -
Page 16: Specifications
Specifications Continue table: Power Input Power Output 2000K-10000K TICI SSI(D32) SSI(D56) TM-30 Rf(avg) TM-30 Rg(avg) Operating Voltage 3.0V-4.2V Operating Current 0.84A Operating About 1.5h -20℃~+45℃ Charging Time Temperature (USB Type-C 5V/2A) 100% Intensity Battery 3.7V/4200 mAh Battery Runtime (5600K):120 minutes Manual,Sidus Link®... - Page 17 Photometrics MC Pro Dome Flat Light Con- Distance Bare Bulb Bubble Diffusers Diffusers trol Grids Diffuser 2000K 0.5m 194 lux 1027 lux 253 lux 463 lux 838 lux 2500K 0.5m 1244 lux 226 lux 297 lux 543 lux 1014 lux 3200K 0.5m...
Need help?
Do you have a question about the MC Pro and is the answer not in the manual?
Questions and answers